March SUSIE-Q FUN TIP!

Please scroll down to meet our March Guest Designer!

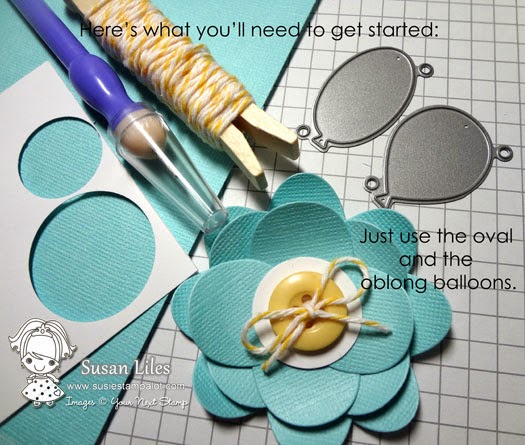
Well, it’s me, Susan (susiestampalot)!  Can ya’ll believe it’s March 1st already!?  I’ve got a super easy tip/tutorial today.  Raise your hand if you’re in love with WASHI TAPE as much as me, but don’t have a clue what to do with it.  Ope!  You, and you, and you!?!  Ok, well today I’m going to share a fun way to use it along with some of your favorite dies from Your Next Stamp!  This is seriously one of my favorite things!!

Let’s get taping….

 
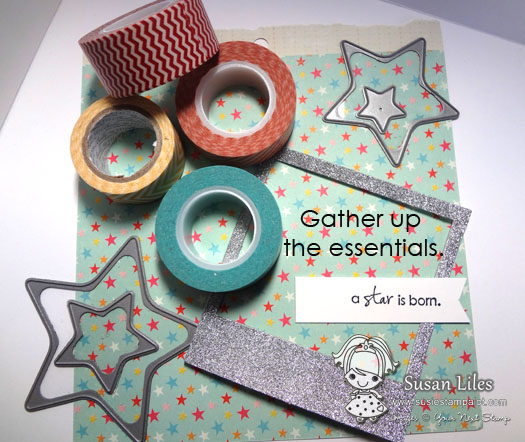
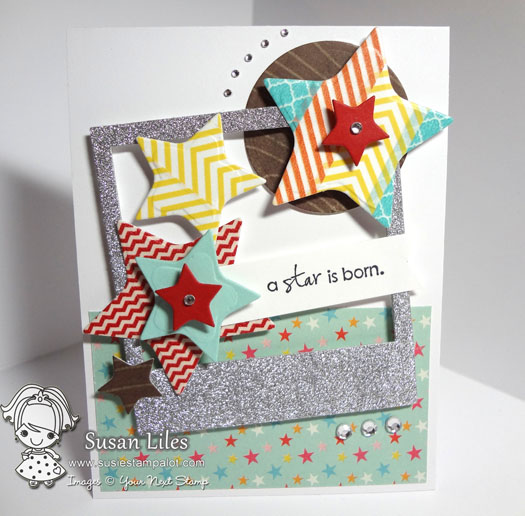
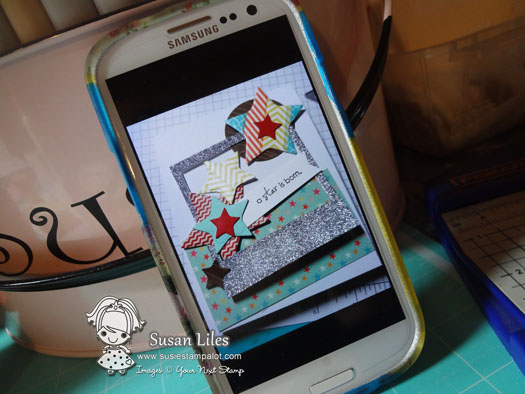
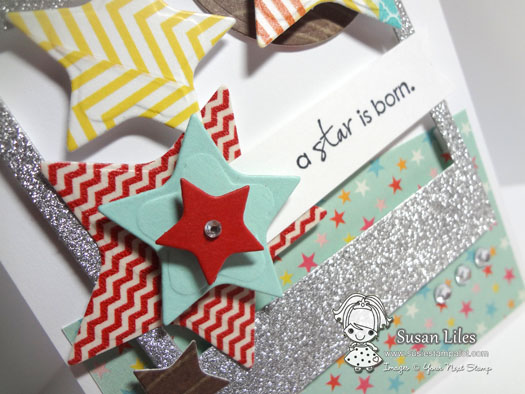
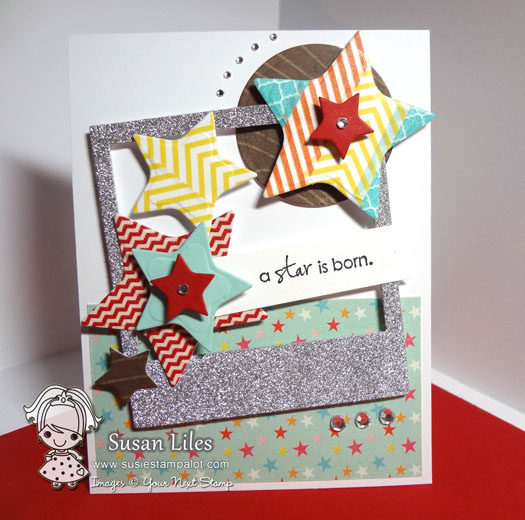
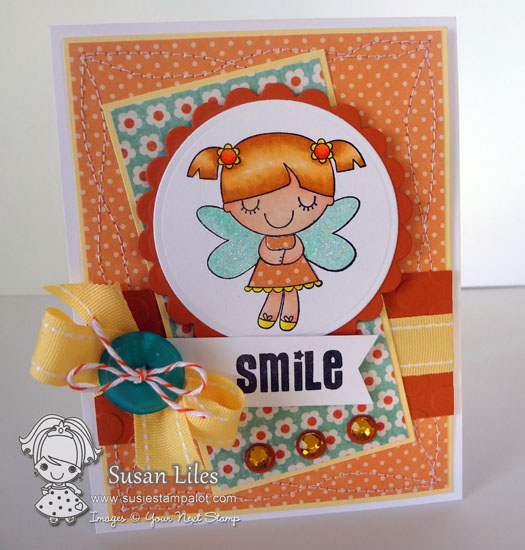
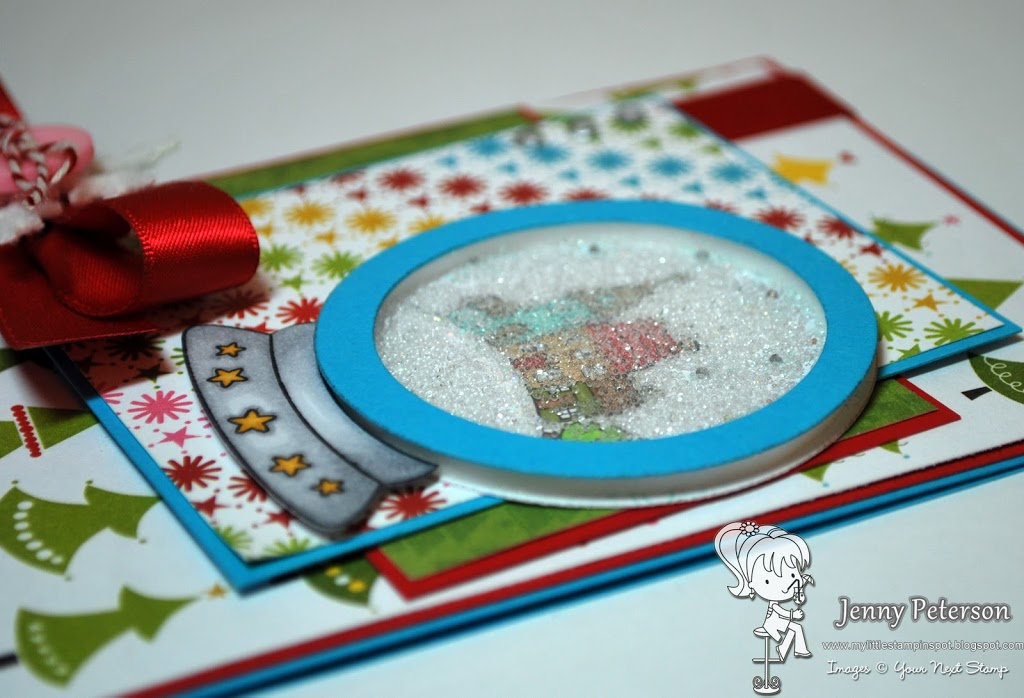
I had some sort of “star” card idea in my head, so I found this sweet little sentiment from the Welcome Baby Sentiment stamp set.  However, I wasn’t thinking babies, but of my Show Choir Diva daughter, Lindsie and their 2ND PLACE WIN from this past weekend’s choir competition and how proud I am of her.  I thought this would be fun to give her for that!  Therefore, I definitely needed a sparkly Polaroid frame from the Insta-Love Polaroid Die set, and a little patterned paper for a good foundation. 

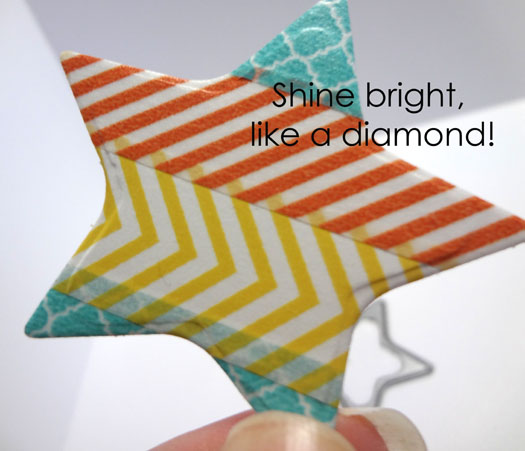
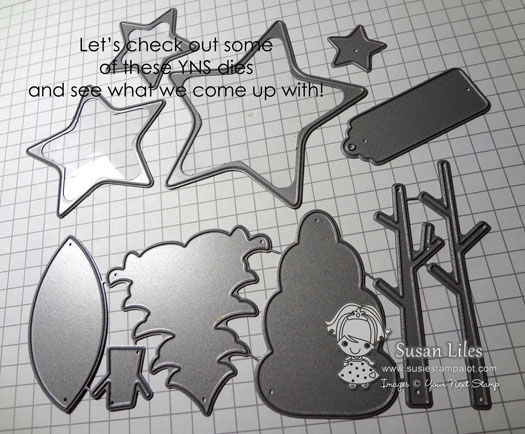
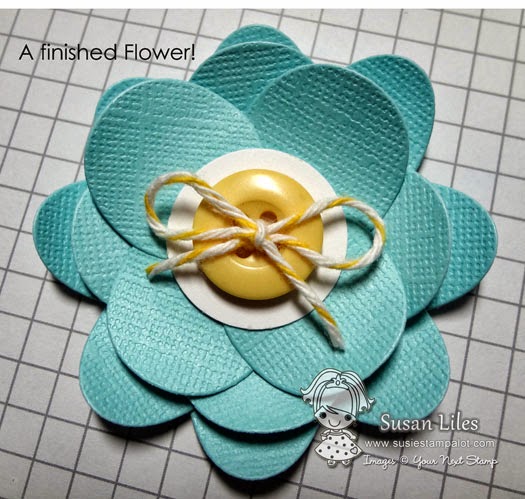
Then for the stars, some matching washi tape and my Whimsy Layered Star Die set (which is really all you need to just try out the technique by itself).

Let’s back up and start with a little “edjumacation”:
Raise your hand if you don’t know what WASHI TAPE even is?!  It’s ok, we don’t judge…
WASHI TAPE is a sticky backed tape that originated in Japan and is made with natural fibers, barks of different native trees of Japan and feels much like delicate paper but is quite strong.  I don’t know if some of it nowadays is actually a thin strictly paper tape (that would be my guess) or not, but it comes on little rolls and in a variety of tempting patterns and colors.  Surely you weren’t thinking it was a spicy Japanese condiment for your sushi and getting it confused with WASABI!  Welcome to your new addiction…

 
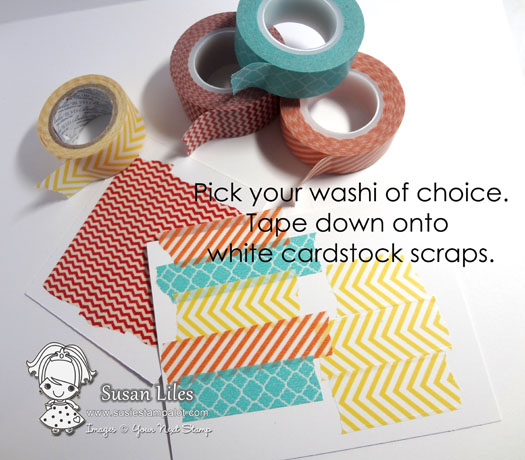
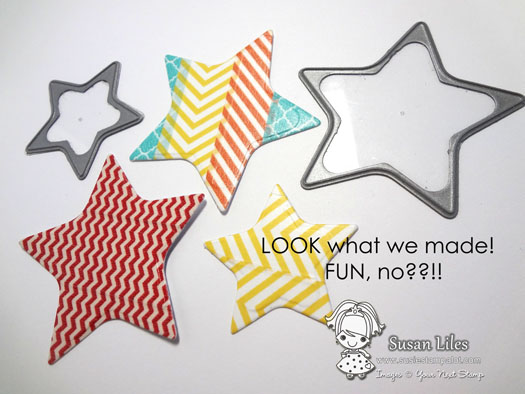
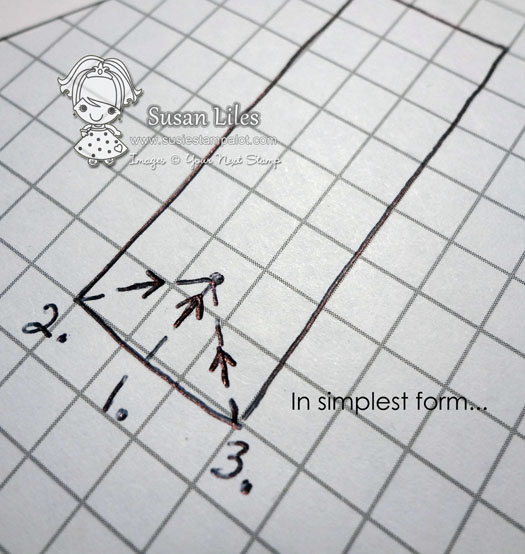
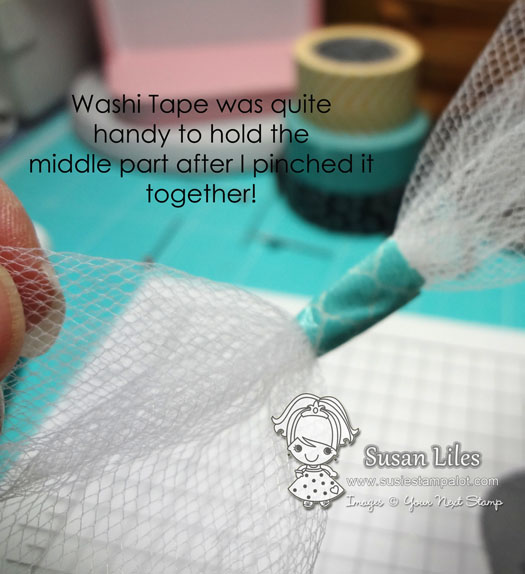
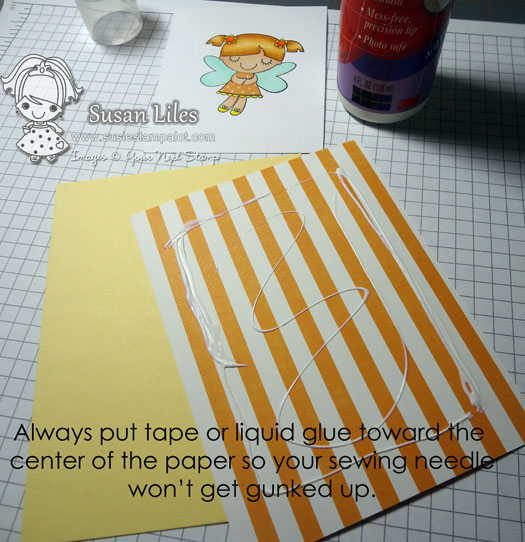
What we need to do first is make some “washi cardstock”.  Simply create whatever patterns you want by pressing strips of the tape onto some white cardstock.  I choose white since the tape is a little bit see-through and I want the colors to be vivid, but you can play with using different cardstock colors which will change the hues of your washi tapes.


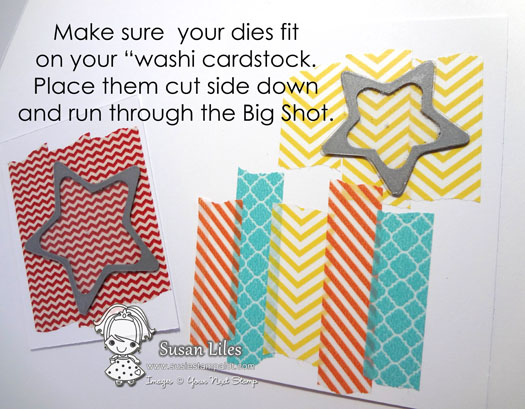
Time to cut your stars out!  I run mine through my Big Shot, but a Cuttlebug or other manual die cutting machine will work.

                             YOU LIKEY??????


 I even love the little layered washi tape look!!

 Look here…

So now that we have the elements of our card all made, it’s time to put it together.  Here’s another little trick I like to use, especially for these kind of random, clustery cards…To help me remember placement, angles, etc., I lay it all out the way I like my card, then take a pic with my phone before gluing anything down.  That way, I have something to refer back to when I have to start building the card from the bottom up.  
Cool, huh!  Your welcome.
Here’s a little detail shot of our stars in action!
 And now our little star card is all grown up and ready for the RED CARPET!!!
So what’d ya’ll think?  

Be sure and leave me some lovely comments as to your thoughts about this and let me know what else you’d like for me to cover next month!  
DONT’ FORGET— 

  There’s going to be a random drawing on MARCH 5th from all the comments to win some YNS goodies!    

Ready, set, GO!!!!!
FacebookPinterestTwitterEmail

December SUSIE-Q Fun Tip!


Well, it’s me, Susan (susiestampalot), and I’m back with another fascinating tip/tutorial.  Today I’m going to share something that may seem to some as mudane, but I tell ya’ll, when I heard this snazzy little tip from a friend, I had never thought of this method before!  It’s a unique way to make those swell fishtail banners that are all the rage.

Here’s a sample of what I’m talking about.  Let’s roll…

As always, we have an idea of what we are going to be using.  My favorite little “robin” from the Winter Fun Robin set will be joining us today.  Right now, he’s naked, but I am going to be coloring him red with a sickly green tummy here shortly.  (I wish I had made his belly ivory or something.  Not a happy with the green, but I was too far into it to start over, in my book!)

If you’re into yoga, you’ll know this phrase, “find your center”.  Do exactly that at the bottom of where you want your “flag-end” or fishtail.  You can measure and get all precise on me or just eyeball it with your “special eye”.  Make a cut vertically however deep you’d like the fishtail angle to be.

Here’s the result of the first cut.

I made dotted lines on the paper strip, just for ya’ll to see where I’m cutting.  At this point (no pun intended), all you do is cut from the corners to where you ended the first vertical cut.

Here’s a little look at what kind of difference this could possibly make.  If nine times out of ten your fishtails look like the one on the right and you have to end up fixing it a bunch to even it out, this method is for you.  Your welcome.

Here’s the Cliff Notes version.  

So what’d ya’ll think?  
Be sure and leave me some lovely comments as to your thoughts about this and let me know what else you’d like for me to cover next month!  
DONT’ FORGET— 
  There’s going to be a random drawing on DEC 5th from all the comments to win some YNS goodies!    
Ready, set, GO!!!!!
FacebookPinterestTwitterEmail

November Susie Q-Fun Tip!


Well it’s the moment ya’ll have all been waiting for–what’s next from Susan for the YNS Susie-Q Fun Tip, right?  Well today I’ve got a little something to share as far as making your own embellishments go!


So many of ya’ll were intrigued by my card I posted the other day for the Hop for Hope and how I added the tulle to my project’s focal point.  So I thought I’d show ya’ll one of my favorite things to do–stack die cuts, ribbon, tulle, etc. to create some fun and versatile embellishments.  Off we go….

First I pulled out some of my newer dies from Your Next Stamp to give my brain a little inspiration as to what to use!

Once I had that all figured out, the next step was deciding on what to pair my die cuts with (the heart was from a punch).

Plus I already knew my underlying layer would be tulle–you have to use something to tie it all to as your bottom layer for this tutorial such as tulle or ribbon, even a bow would work.  In this case I cut about a 4 inch by 6 inch piece of tulle and pinched it in the middle, securing with what I had handy–WASHI TAPE!

You’ll need to punch a hole in your die cuts for the twine to come up through.

Then I just ran my twine around the washi taped tulle and then threaded both ends of the twine up through each piece I wanted in my “embellishment sandwich”.

Here’s the magical moment!  NO, I didn’t say Magic MIKE, I said MOMENT!  Pull all your pieces together and tie it up in a bow or knot it tightly to secure it all.

Then you can fluff up the tulle and fix your bow/turn your die cuts to line up properly as they may have twisted when you pulled it all together.

I thought I’d show ya’ll another quick example.  I coined the phrase for this as my “Ribbon-Button-Loopy-Embellishment-Thingy” a long time ago when I first started making these handmade embellies!  There are endless possibilities for them–They aren’t just for cute Christmas packaging or tags, even though they are quick when you need something with a handmade touch!

I stole some fresh Halloween candy and put it in a glassine bag for this little treat!

By the way, these required very little stamping, and I *may* have used some sentiments from a set that’s coming in November…that’s all I’m gonna say ’bout that! 

I hope that all made sense!  If you have any questions, you can leave them here and I’ll try to answer!  
Also, be sure and leave me some lovely comments as to what ya’ll think about this and let me know what else you’d like for me to cover next month!  
DONT’ FORGET— 
  There’s going to be a random drawing on NOV. 5th from all the comments to win some YNS goodies!   Ready, set, GO!!!!!
FacebookPinterestTwitterEmail

September YNS SUSIE-Q FUN TIP

Well howdy there, YNS fans!  It’s me, Susan (susiestampalot) and it’s time for another monthly installment of my SUSIE-Q FUN TIP!  This month, I’m expanding on how I make “grounding” using my Copic markers for some of my stamped images.  Ya’ll can’t leave them floating around in space, now can you?  It just gives your focal point more of a “setting” and completes the image.


Now, just so ya’ll know, I’m no expert in Copic coloring.  I just do what I do’s.  I’m sure there are plenty of other ways to get the job done for creating “ground” out there, but this is just the way I do it, using C1, C3, C5, and my Blender.  However, if you wanted it to be dirt or grass or Mars, you’d use a series of browns, greens or whatever color Mars is to make this work for you.

Today, the cutie patootie stamp set, Joyful Apple Basket is helping me out and modeling for us.  I bet if ya’ll leave a comment at the end of this post, telling us how much you love it and what else ya’ll would like me to feature here, Karen will give one away!  Just sayin’.  Let’s get started…


1.  I actually usually color my image in first, but for the sake of this tutorial, just pretend the apple basket is colored.  First you’ll want to decide where the ground should be.  In this case, I wanted the leaves to be sitting on the ground along with the basket, so I brought it up a little high.  I usually always make my image be a tad lower than my ground lines.  Then start by drawing a line where the ground starts and coloring in a “base coat” both with C1.  The base coat should just kind of make a “cloud” underneath your image, how ever big you want and leaving the edges of your cloud light (as in don’t go over this part a bunch.)


2.  Using the C3, draw over the ground line and add some shadow under objects where a shadow would be.  Blend this with the C1, being careful not to take the C1 all the way to the edges of your cloud so that your base coat is “one layered”.


3.  Use C5 and draw over the ground line again and add some more shadows  where desired to intensify.  Blend with the C3 carefully and close to the C5 only.  In other words, don’t go really far out into your C1 area when blending this step.  I call it “tight blending”.  See how it looks roughly blended still?

4.  Now go back with the C1 and blend, still keeping away from the original layer near the bottom and side edges of your cloud.  Be sure at this time to slightly blend the C1 all the way up to the top edge of the ground and into the darkest shadows over your C5.  (Don’t be scared going into the dark shadows, it’s not Halloween yet.)

5.  See number 4 and blend it really well.


6.  Lastly, use your Blender (0) to feather out the bottom and side edges of your cloud to almost white, using a circular motion.  Don’t touch your C5 areas, or it will take the color away.  It’s ok to use the Blender on your lighter shaded areas until you get the desired look.  This will also make your dark areas seem darker.  I think I went over this with my Blender 3 times.  Let it dry a bit between each time you go over it.  The blender sometimes keeps working until it’s dry, and you’ll be sorry if it takes out too much color all at once after all that work.

So what’d ya’ll think?  Aren’t those some happy apples!?!  
Are you going to try it?  
Be sure and leave me some lovely comments as to what ya’ll think about this and let me know what else you’d like for me to cover next month!  
DONT’ FORGET— 
There’s going to be a random drawing on Sept 5th from all the comments to win the Joyful Apple Basket Stamp Set!   Ready, set, GO!!!!!
FacebookPinterestTwitterEmail

August YNS SUSIE Q-TIP


Well, it’s already time for another YNS Fun SUSIE Q-TIP post from me, Susan (susiestampalot).   I came up with the idea for this month’s post right after and on the same day I posted last month’s tip/tutorial and I just couldn’t wait to put this together and show ya’ll what I came up with for this month! (making sure it worked in real life as I had imagined it in my head first of course!)   I have always loved how Jen, in one of her blog posts, had used the wings from the Dress Up Fhiona die set to make a flower.  It inspired this creation.  Can you guess what dies I used from Your Next Stamp in a non-traditional way and what I made with them? 

If you guessed the Balloon Trio Dies to make that gorgeous flower, you are RIGHT!!  You win, so go have a cookie and come back so I can show ya’ll what I did…

Ok, so are you ready?  Wipe the crumbs off your face and let’s roll…


Here’s what you’ll need, plus some adhesive.  I used my ATG gun.  The circle punches I used on the white were the 1 3/8″ for the base of the flower, and a 1″ for the flower center.  The quilling tool won’t be used to quill, but to just bend the petals around the stick part, so it could be a pen or something similar if you wish and the button can be substituted for any type of flower center ya’ll want to use.  A big ol’ piece of bling would be fun!

NOTE that you only use the longer oval and oblong balloon dies.  The circular balloon gets to sit this one out.

First, using the balloon dies, cut out 8 of each of the two balloon shapes (for a total of 16) and cut the tails off.  If you would like more dimension to your new “petals”, slightly bend all of them around the stick part of your quilling tool on the opposite end from where the tail was.  I bent mine up a little, but down is ok too, for a different look.

Punch out a large circle with your circle punch (I used 1 3/8″).  Using it as a base, adhere 4 of the long oval “petals” to the center of the circle at the 12, 3, 6, and 9 o’clock positions. 

For the second layer, adhere the other 4 long oval petals on top of the first layer, in between each of the already adhered petals from the first layer.  (It kind of makes an “X”.)

Using the smaller, oblong balloons, start a third layer, again in the 12, 3, 6, and 9 o’clock positions.  The smaller petals should be adhered so that it is more of an “inside”, shorter layer and their ends shouldn’t be “even” with the ends of the previous 2 layers.  It’s ok if you need to overlap them in the center a bit to make this happen. 

Then adhere the last 4 petals in the same way as you did on the second layer, creating a sort of “X” with the 4th layer of petals.  Punch a circle (I used the 1″ punch) from whatever colored cardstock to highlight your flower center.  Attach the flower center of choice.  (Button with twine here.)

Now comes the REALLY FUN part–using your new handmade flower embellishment that no one will realize you made with BALLOON DIES on a project!


I chose to create a cute gift box using a Milk Carton file I downloaded and cut out with my Cricut.  I cut a couple of 1×12″ strips of yellow DP, wrapped them from the bottom to the top and adhered them with Scor-Tape to create a band and flag-ended the top.  I stamped the sentiment using the Happiness set.  The leaves were stamped with the brand new Sunflower set by Ann Ellis and then cut out. 

I LOVE getting MORE from my dies!!
So what’d ya’ll think?  Are you going to try it?  
Be sure and leave me some lovely comments as to what ya’ll think about this and let me know what else you’d like for me to cover next month!  
There’s going to be a random drawing from all the comments to win some YNS goodness!  Ready, set, GO!!!!!

Winner will be posted on Aug 5th!

FacebookPinterestTwitterEmail

Fun Friday SUSIE Q-TIP!

Well, it’s me, Susan here, with another Fun Friday SUSIE Q-TIP! I don’t know about ya’ll, but I was ready for my girls to be out of school for the summer yesterday when I picked them up at noon. We have lots of fun (and cheap) things planned to keep us busy (no vacation per se) on the days that mommy isn’t stamping. So I had summer on the brain when I made this card for today’s SUSIE Q-TIP. I thought the little Fairy Fhiona looked like she could be a summer fairy to get us smiling in anticipation of the fun we will be having! (Don’t forget I’ll be giving one away later in this post.)

Speaking of FUN, today we are going to DO THE WIGGLE! I have a quick picture tutorial on how I sew, WIGGLE style. Let’s roll…

First we have to get what we are about to sew all ready:


By the way: 
  LOL!!!


Don’t ya’ll feel like this sometimes?  Going around and around, but getting nowhere?  Word.
 
Ok, that’s all from me today!  I hope ya’ll enjoyed it.  Special thanks to Mini Fairy Fhiona for playing “Summer Fairy” for me and helping out today with a smile.  I hope my children act just as precious as she looks over the next 3 months.  
How would ya’ll like to win a Fairy Fhiona of your very own?  Just leave a comment on this post, letting me know how a Summer Fairy could help YOU out and Karen will pick a random winner (as long as ya’ll are behaving…see?  I’m in “bribe” mode already!) and post it here soon.
BUT WAIT, THERE’S MORE!!!…
Are ya’ll ready for a NEW RELEASE from Your Next Stamp?  GOOD!  Because we have one coming your way that includes lots of fun new stamps and dies.  YAY!!  
The SNEAK PEEKS will be starting this Sunday, June 3rd and will continue on through the 6th when we will have our Blog Hop!  Stay tuned for more details on the upcoming Release Party on our SCS forum HERE!
 
FacebookPinterestTwitterEmail

Scrapbook Page by Ann Jobes

I was thrilled and excited when Karen of Your Next Stamp asked if I could show how her stamps can be used on scrapbook pages. I was familiar with her stamps and knew I could work with them with ease!
Moresprinkles
The Cupcake Cutie Fhiona stamp was perfect for these photos from my daughter’s 10th birthday.
Moresprinklesdet1
To highlight and frame the stamped image, I painted a chipboard circle orange and once it was dry, stamped the star cluster from Cupcake Cutie Accessories all around the circle, using VersaMark ink. Glittery embossing powder was sprinkled on top and heat set, to add a touch of sparkle to the festive page.
Moresprinklesdet4
The greeting from the Cupcake Cutie Accessories was a fun way to add just a little journaling sentiment to the page.

One of my favourite things about this page is the vertical row of pennants layered up the right side of the page. I struggle with achieving uniformity, so here, in my first video tutorial, I explain how I made this nice, neat row of pennants:

I have another page to show you and another tutorial, so come on back soon!


LovesTeanPaperSig

Pin It
Initial inspiration for this layout comes from a sketch by Lucy Chesna.

FacebookPinterestTwitterEmail

Double Surprise Matchbox Kit Release Day!!!

HAPPY NEW YEAR!!!!

I thought it would be fun to ring in 2012 with a super fun YNS Kit release!!! Maureen designed this awesome Double Surprise Matchbox kit for CHA 2011 and I’ve decided to finally release it on the YNS Website!!! YAY!!!

This fun double surprise matchbox has a pop up to hold a gift card PLUS a little compartment to hold another little gift…Maureen put cookies in this sample she made using the stamps that come with this kit. 


Do you want the stamps and instructions to make this awesome little box? Wait no longer! It’s available now in the YNS Store!!! 

PLUS you still have 1 more day to take advantage of our 25% off!!! YIPPEE!!!


I’ll be back later in the week with more details on some awesome events we have planned for 2012!!!

Have a wonderful day!!!


FacebookPinterestTwitterEmail

Gatefold Card Tutorial

Here is an amazing tutorial by Maureen!!! She has created a beautiful Christmas gatefold card which could easily be altered for any occasion!!! Thank you Maureen!!!

There were some requests for a tutorial for my combo
gatefold card with gift card pull-out
so here it is!

Materials needed:

Materials
  • 4 1/4″ x 11″ piece of cardstock, scored and folded at 2 3/4″ from each short end
  • 2 pieces of patterned paper – 4″ x 2 5/8″ (I just took a piece that was 4″ x 5 1/4″
    and cut it in half so that the patterns would line up in the middle)(I used My Mind’s Eye Lost & Found Christmas 6×6 paper pad)
  • 1/8″ hole punch
  • String/Twine of some sort (I used 2 18″ strands of Timeless
    Twine
  • Strong adhesive of choice
  • And whatever you want to use to decorate. I used the Happy
    Holidays Stamp and Die Set
    from Your Next Stamp

Instructions:
1) Take the piece of cardstock and put adhesive as shown using the gift card as a guide. Make sure to leave the right side open!

Step1
2) Decorate as desired. For the trees, I stamped the tree image in dark chocolate ink 6 times: twice on cardstock and 4 times on different patterned papers. Next I cut the cardstock trees with the matching die.
Finally, I cut the tree tops out as shown below:

Step2a
I adhered all the pieces together (the first small tree is mounted with
foam tape) and here’s what the decorated card looks like:

Step2b
3) Punch 1/8″ hole near the middle of the bottom right edge of the card
and pull the twine through.

Step3
4) Insert the gift card into the pocket. As you push the card in, the
twine should be going inside the pocket as well. It may be a little
tight, so push carefully to not damage the card.

Step4
5) When the gift card is hidden completely in the pocket, tie a bow with
your twine.

Step5

6) Here’s what the finished card looks like with the gift card pulled out:

Step6
You can also see that the top lifts up for you to write a message to the
recipient.

I hope you like this card and if you do make one, please link it up in
the comments so we can see it – thanks! ~Maureen

FacebookPinterestTwitterEmail

Shaker Card Tutorial

Hi there! Jenny P, here. Today I have a fun tutorial to share with you! Our last release featured the cutest little set, Holiday Snow Globe, and it is absolutely perfect for making Shaker Cards! Shaker Cards basically have a ‘window’ and contain something behind the window that moves and shakes around!
There are a few different ways to make these kinds of cards, depending on what look you are trying to achieve. I am going to show you how to make a interactive snow globe to adhere to the front of a card.

Step 1: Gather your supplies.
You will need:
~Acetate (or overhead transparencies, clear plastic packaging material, window sheets, etc.)
~Cardstock to frame your window
~foam tape
~dies (as used in my example, but you can also free cut or use punches)
~filler (micro beads, glitter, buttons, sequins…whatever you want! Think outside the box! Basically   anything that is small enough to move around in your window)
~premade cardbase

Step 2:
Choose dies to fit the size of your image and the window size that you would like. Here, I stamped the village from the snowglobe set and the base of the snowglobe. I am only using the base in this card, rather than the whole snow globe image. The larger die will be the overall size of the framed shaker and the smaller circle will be the inside window.

Step 3: Line up both sizes of dies, nesting them together, onto your cardstock window frame. Cut out.(Notice my lovely cutting plate?! lol! Dear Santa, Jenny desperately needs a new cutting plate in her stocking;)

Step 4: Cut out your stamped image using the largest of the circle dies. Remember that the outer edges of the image will be covered by the CS frame.

Step 5: Cut out a peice of acetate using the larger of the two circle dies. Colour image and decorate with glitter, rhinestones, etc. Apply glue (or double sided tape) to the backside of the CS frame. Adhere acetate circle to the back of the frame. *Remember that if you are using transparencies, one side is slightly ‘tacky’ and will show fingerprints, etc, so put that side facing the inside of the shaker and the shiny side towards the outside*. Colour and cut out globe base.

Step 6: Apply foam tape to the acetate, following along the path of the frame so that you won’t see the tape behind the CS frame. I used Stampin’ Ups shaker frame circles, but you can use any foam tape roll. Check out the YNS store foam tape (currently on sale!)

Step 7: Add your filler. I used clear micro beads. You need to be fairly conservative with this, as you don’t want the image to be completely covered when the shaker is upright.

Step 8: Peel off the tape backing and adhere to the stamped image circle, keeping both the acetate circle and the stamped circle alined as perfectly as you can. Turn over and you have your shaker!

Step 9: Adhere shaker and globe base to decorated card front!

Here is another example of a shaker card that I made using Ellie Loves to Ski. I wanted this card to have an acetate front and back so that you could see nothing but air behind her;) This was also achieved better using an easel card design.


And another shaker card, using the same Holiday Snow Globe set, only fussy cutting the inside of the stamped globe out, rather than using circle dies.

I hope that you’ve enjoyed my photo tutorial and are inspired to have a go at making these fun little cards!

FacebookPinterestTwitterEmail

© 2024 Your Next Stamp. All Rights Reserved.