ABC Time! Anything But a Card

Hi Friends! Jen Roach here and it’s time for another ABC (Anything But a Card) project!

I was super excited to see our Design Team theme this month.  It’s been a while since I made anything but a card so this was my chance to get scrappy again!

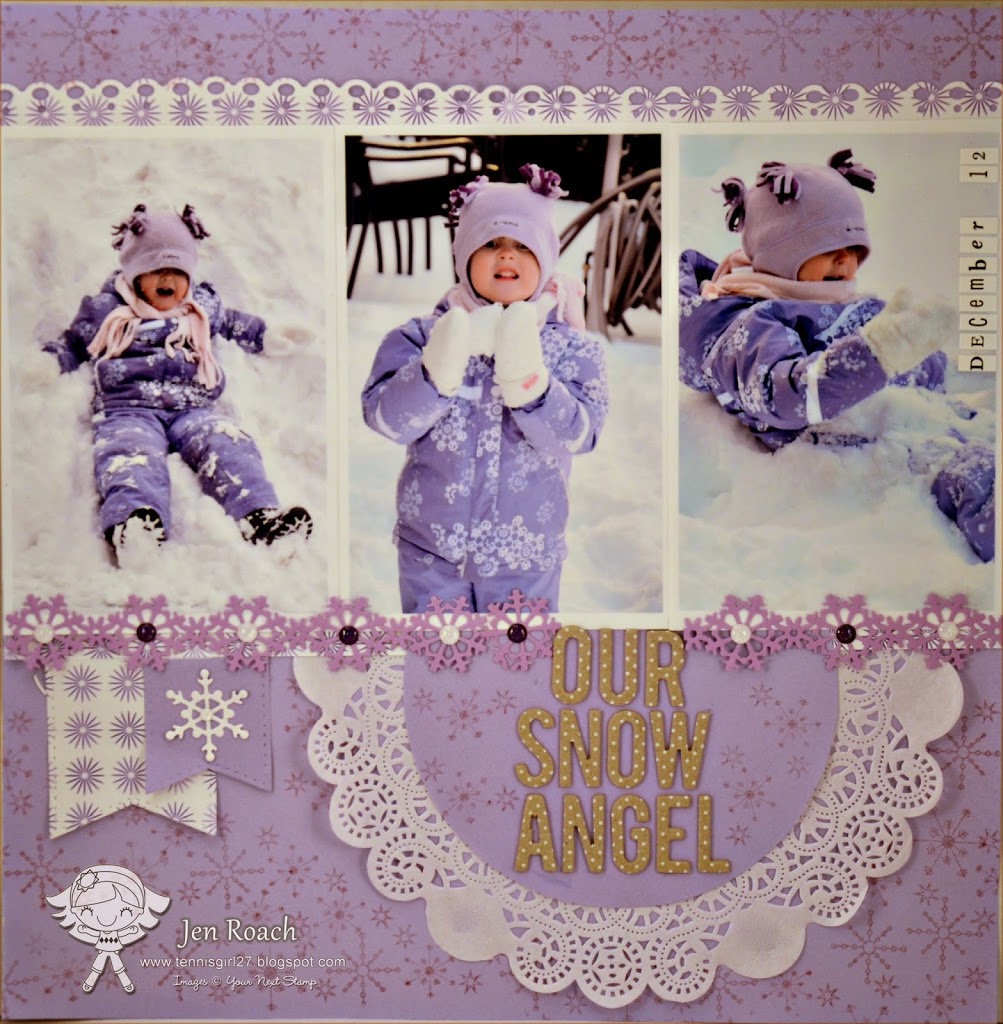
I created this winter themed layout using some YNS Dies (see full list below) and the Snowflake Border cling stamp. I also added some YNS Gumdrops to the center of the snowflake border dies.

This design is a super quick and easy way to fit three 4″ x 6″ photos across a 12″ x 12″ page.  I added a bit of a border at the top and then use a doily for placement of my title.  I added some snowflake stamping on the background papers (which in hindsight would have been much easier to do BEFORE starting the layout as I had to just work them in around the items I added to the page already) and a row of die cut snowflakes across the bottom.

I hope I have inspired you to dig out your YNS dies and stamps to create a scrapbook layout!

Supplies:
YNS Stamps: Snowflake border from Your Next Stamp
YNS Dies: Snowflake Border die,  Stitched Fishtail One Tag set, Whatnots Season set 1
YNS Embellishments: YNS Gumdrops (Sparkly purple and sparkly white)
Ink: Ranger Distress Ink (light purple)
Papers: DCWV, The Paper Company
Accessories: Doily, Polka Dot letters (Target Dollar Spot), Fiskars edge punch

FacebookPinterestTwitterEmail

Scrapbook Page #2 by Ann Jobes

I was thrilled and excited when Karen of Your Next Stamp asked if I could show how her stamps can be used on scrapbook pages. I was familiar with her stamps and knew I could work with them with ease!

Here is the second layout I created:

IMG_3465
This time, I worked with Fhiona and Her Pony to accent my double layout. The stamped image is coloured with watercolour pencils and layered on patterned paper and a diecut cardstock.

IMG_3466
I love the coordinating dies and stamps available at YNS, and this CrissCross Border die and stamp were a perfect way to trim my page and create continuity across both pages. Stitching the pieces together I think adds to the western feel I was trying to achieve on this page.

IMG_3467
I did not want to add a journaling block because I like the placement of the elements already, so I lightly brushed gesso over the patterned paper to fade it out enough to journal right on top. A few western charms further accent the page.

Do you see those 3-D star embellishments? Here’s how to make them:

Thank you, Karen, for allowing me to work (who’s kidding who, it’s play!) with your fabulously fun and whimsical stamps. I thoroughly enjoyed it, and hope you feel inspired to use Your Next Stamps on your next layout!

LovesTeanPaperSig

Pin It

FacebookPinterestTwitterEmail

Scrapbook Page by Ann Jobes

I was thrilled and excited when Karen of Your Next Stamp asked if I could show how her stamps can be used on scrapbook pages. I was familiar with her stamps and knew I could work with them with ease!
Moresprinkles
The Cupcake Cutie Fhiona stamp was perfect for these photos from my daughter’s 10th birthday.
Moresprinklesdet1
To highlight and frame the stamped image, I painted a chipboard circle orange and once it was dry, stamped the star cluster from Cupcake Cutie Accessories all around the circle, using VersaMark ink. Glittery embossing powder was sprinkled on top and heat set, to add a touch of sparkle to the festive page.
Moresprinklesdet4
The greeting from the Cupcake Cutie Accessories was a fun way to add just a little journaling sentiment to the page.

One of my favourite things about this page is the vertical row of pennants layered up the right side of the page. I struggle with achieving uniformity, so here, in my first video tutorial, I explain how I made this nice, neat row of pennants:

I have another page to show you and another tutorial, so come on back soon!


LovesTeanPaperSig

Pin It
Initial inspiration for this layout comes from a sketch by Lucy Chesna.

FacebookPinterestTwitterEmail

© 2024 Your Next Stamp. All Rights Reserved.