Posted by: Julie Elak on Tuesday, March 17, 2020 at 10:00 am
Ashley Abelson is welcoming flowers and eggs with this week’s edition of Stamp Create Repeat!
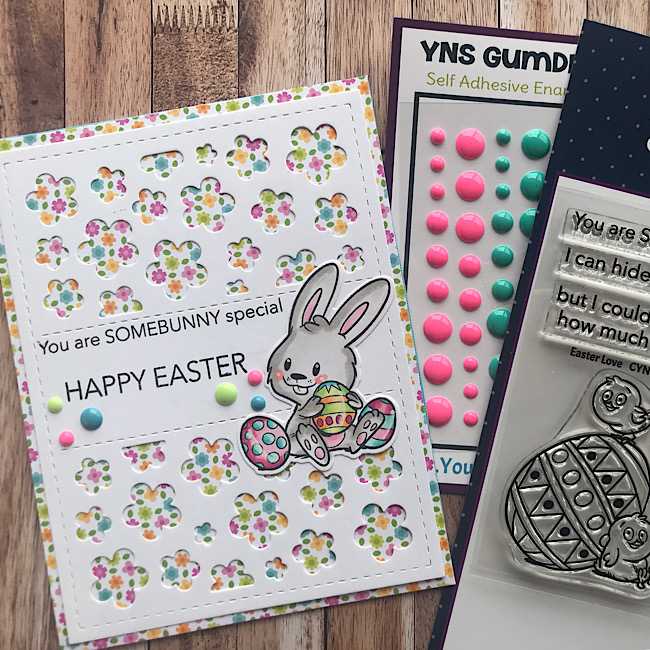
The Easter Love stamp set and Flower Panel die are the perfect combination for an Easter card. The Flower Panel die makes it easy to use patterned paper and create a colorful background for the adorable bunny!
Click here to view the video on You Tube or click directly on the video below.
Posted by: Julie Elak on Tuesday, February 4, 2020 at 10:00 am
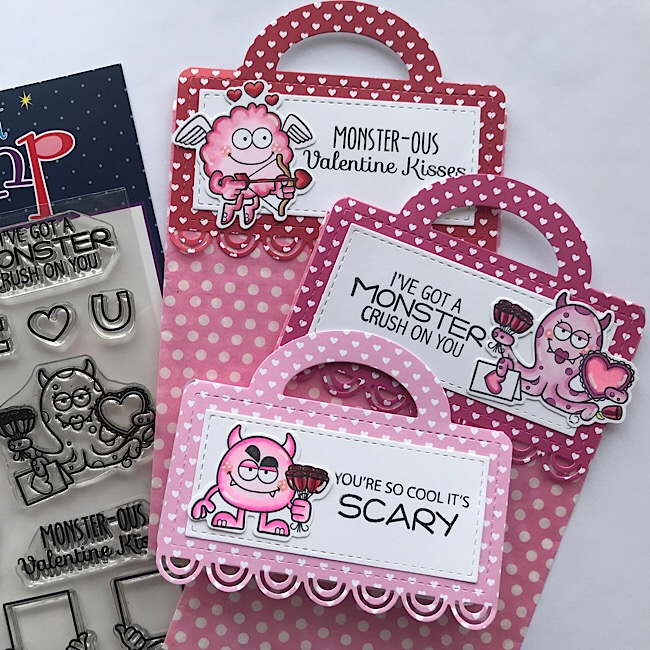
Treat bags filled with candy, cookies or small gifts are a fun way to celebrate. It is even better when those bags are adorned with a handcrafted topper specific for the occasion! Ashley Abelson is spreading the love with Valentine’s Day treat toppers featuring one of our favorites here at YNS…those Silly Love Monsters!
Are you ready to make a sweet topper? Grab your Treat Topper Die Set and let’s go!
Click here to view the video on You Tube or click directly on the video below.
Posted by: Julie Elak on Tuesday, January 7, 2020 at 10:00 am
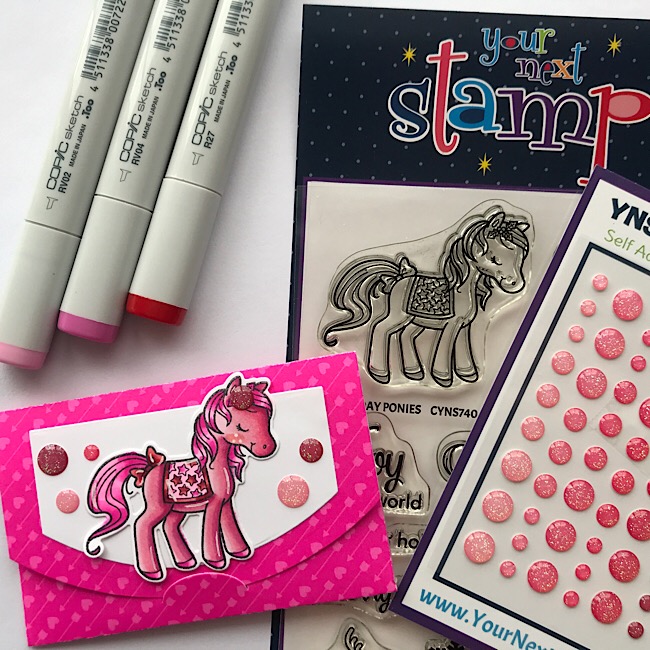
Stop! Don’t put away those Christmas stamp sets! Some of those sets are perfect for Valentines! Ashley Abelson’svideo this week is showing how versatile those Christmas stamps can be, especially the Holiday Ponies stamp set.
Are you ready to Stamp, Create, and Repeat? Pull out the pinks and reds, then watch Ashley’s video to make a Valentine gift card holder.
Click here to view the video on You Tube or click directly on the video below.
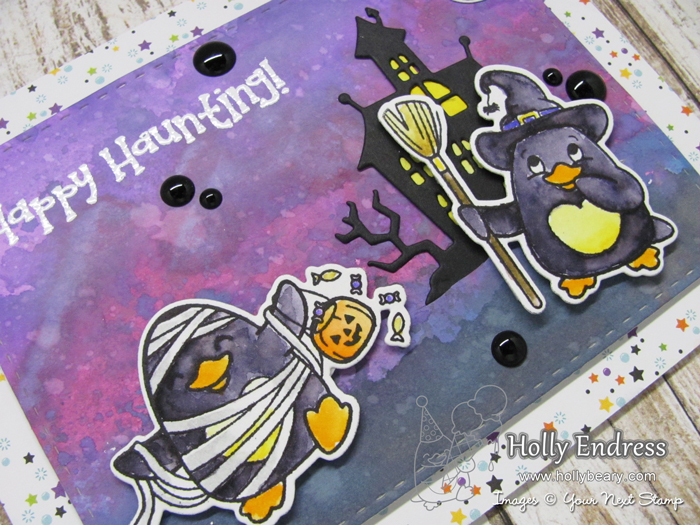
Posted by: Julie Elak on Thursday, September 28, 2017 at 12:00 am
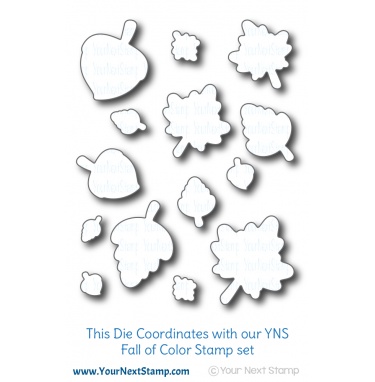
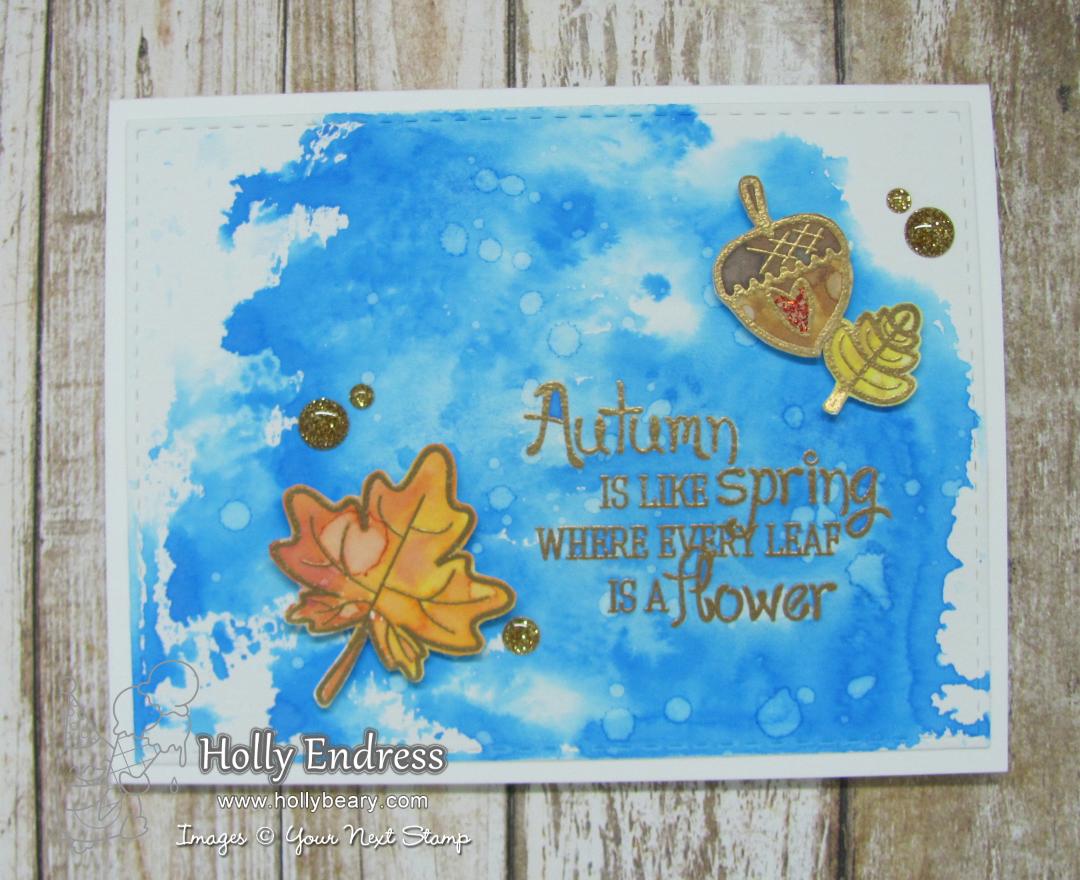
It is the perfect time to put the Fall of Color stamp set in the spotlight. Yes, it is the right season, but the good news is that Karen recently added a coordinating die set to the YNS store.
Normally we share a flash from the past with creations from the design team and guests from over the years, but Holly Endress was inspired to use Fall of Color in a new way!
Holly is sharing a video too, click here to view it on You Tube or click directly below:
Posted by: Julie Elak on Monday, September 25, 2017 at 10:33 am
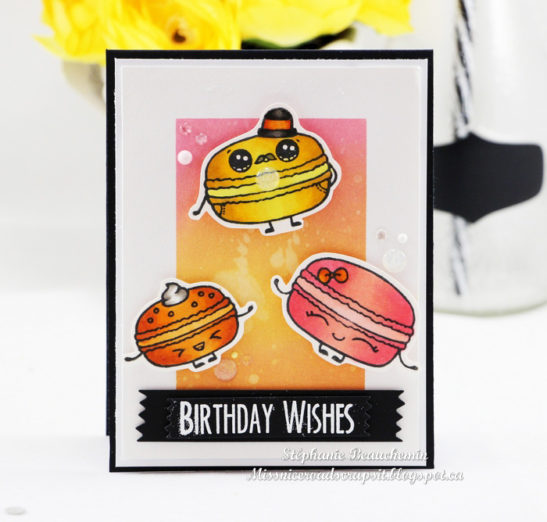
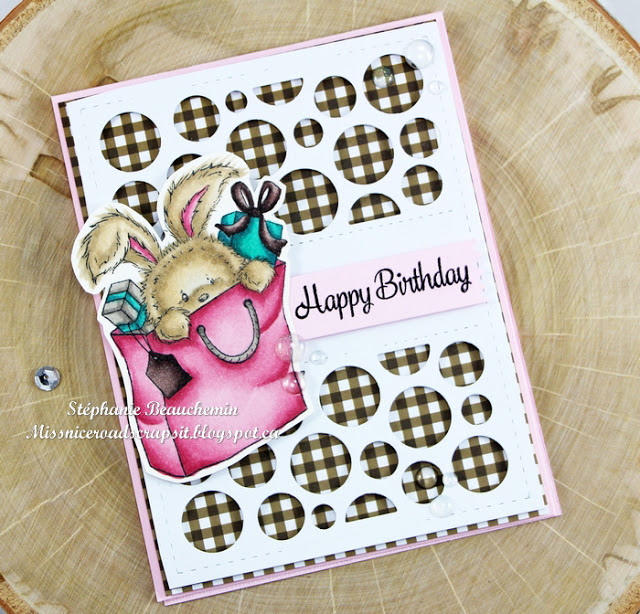
Today Stéphanie Beauchemin, our September guest, is sharing the process behind two of her cards with videos. Scroll on down and click on each of the videos to learn more!
Posted by: Julie Elak on Tuesday, April 18, 2017 at 12:00 am
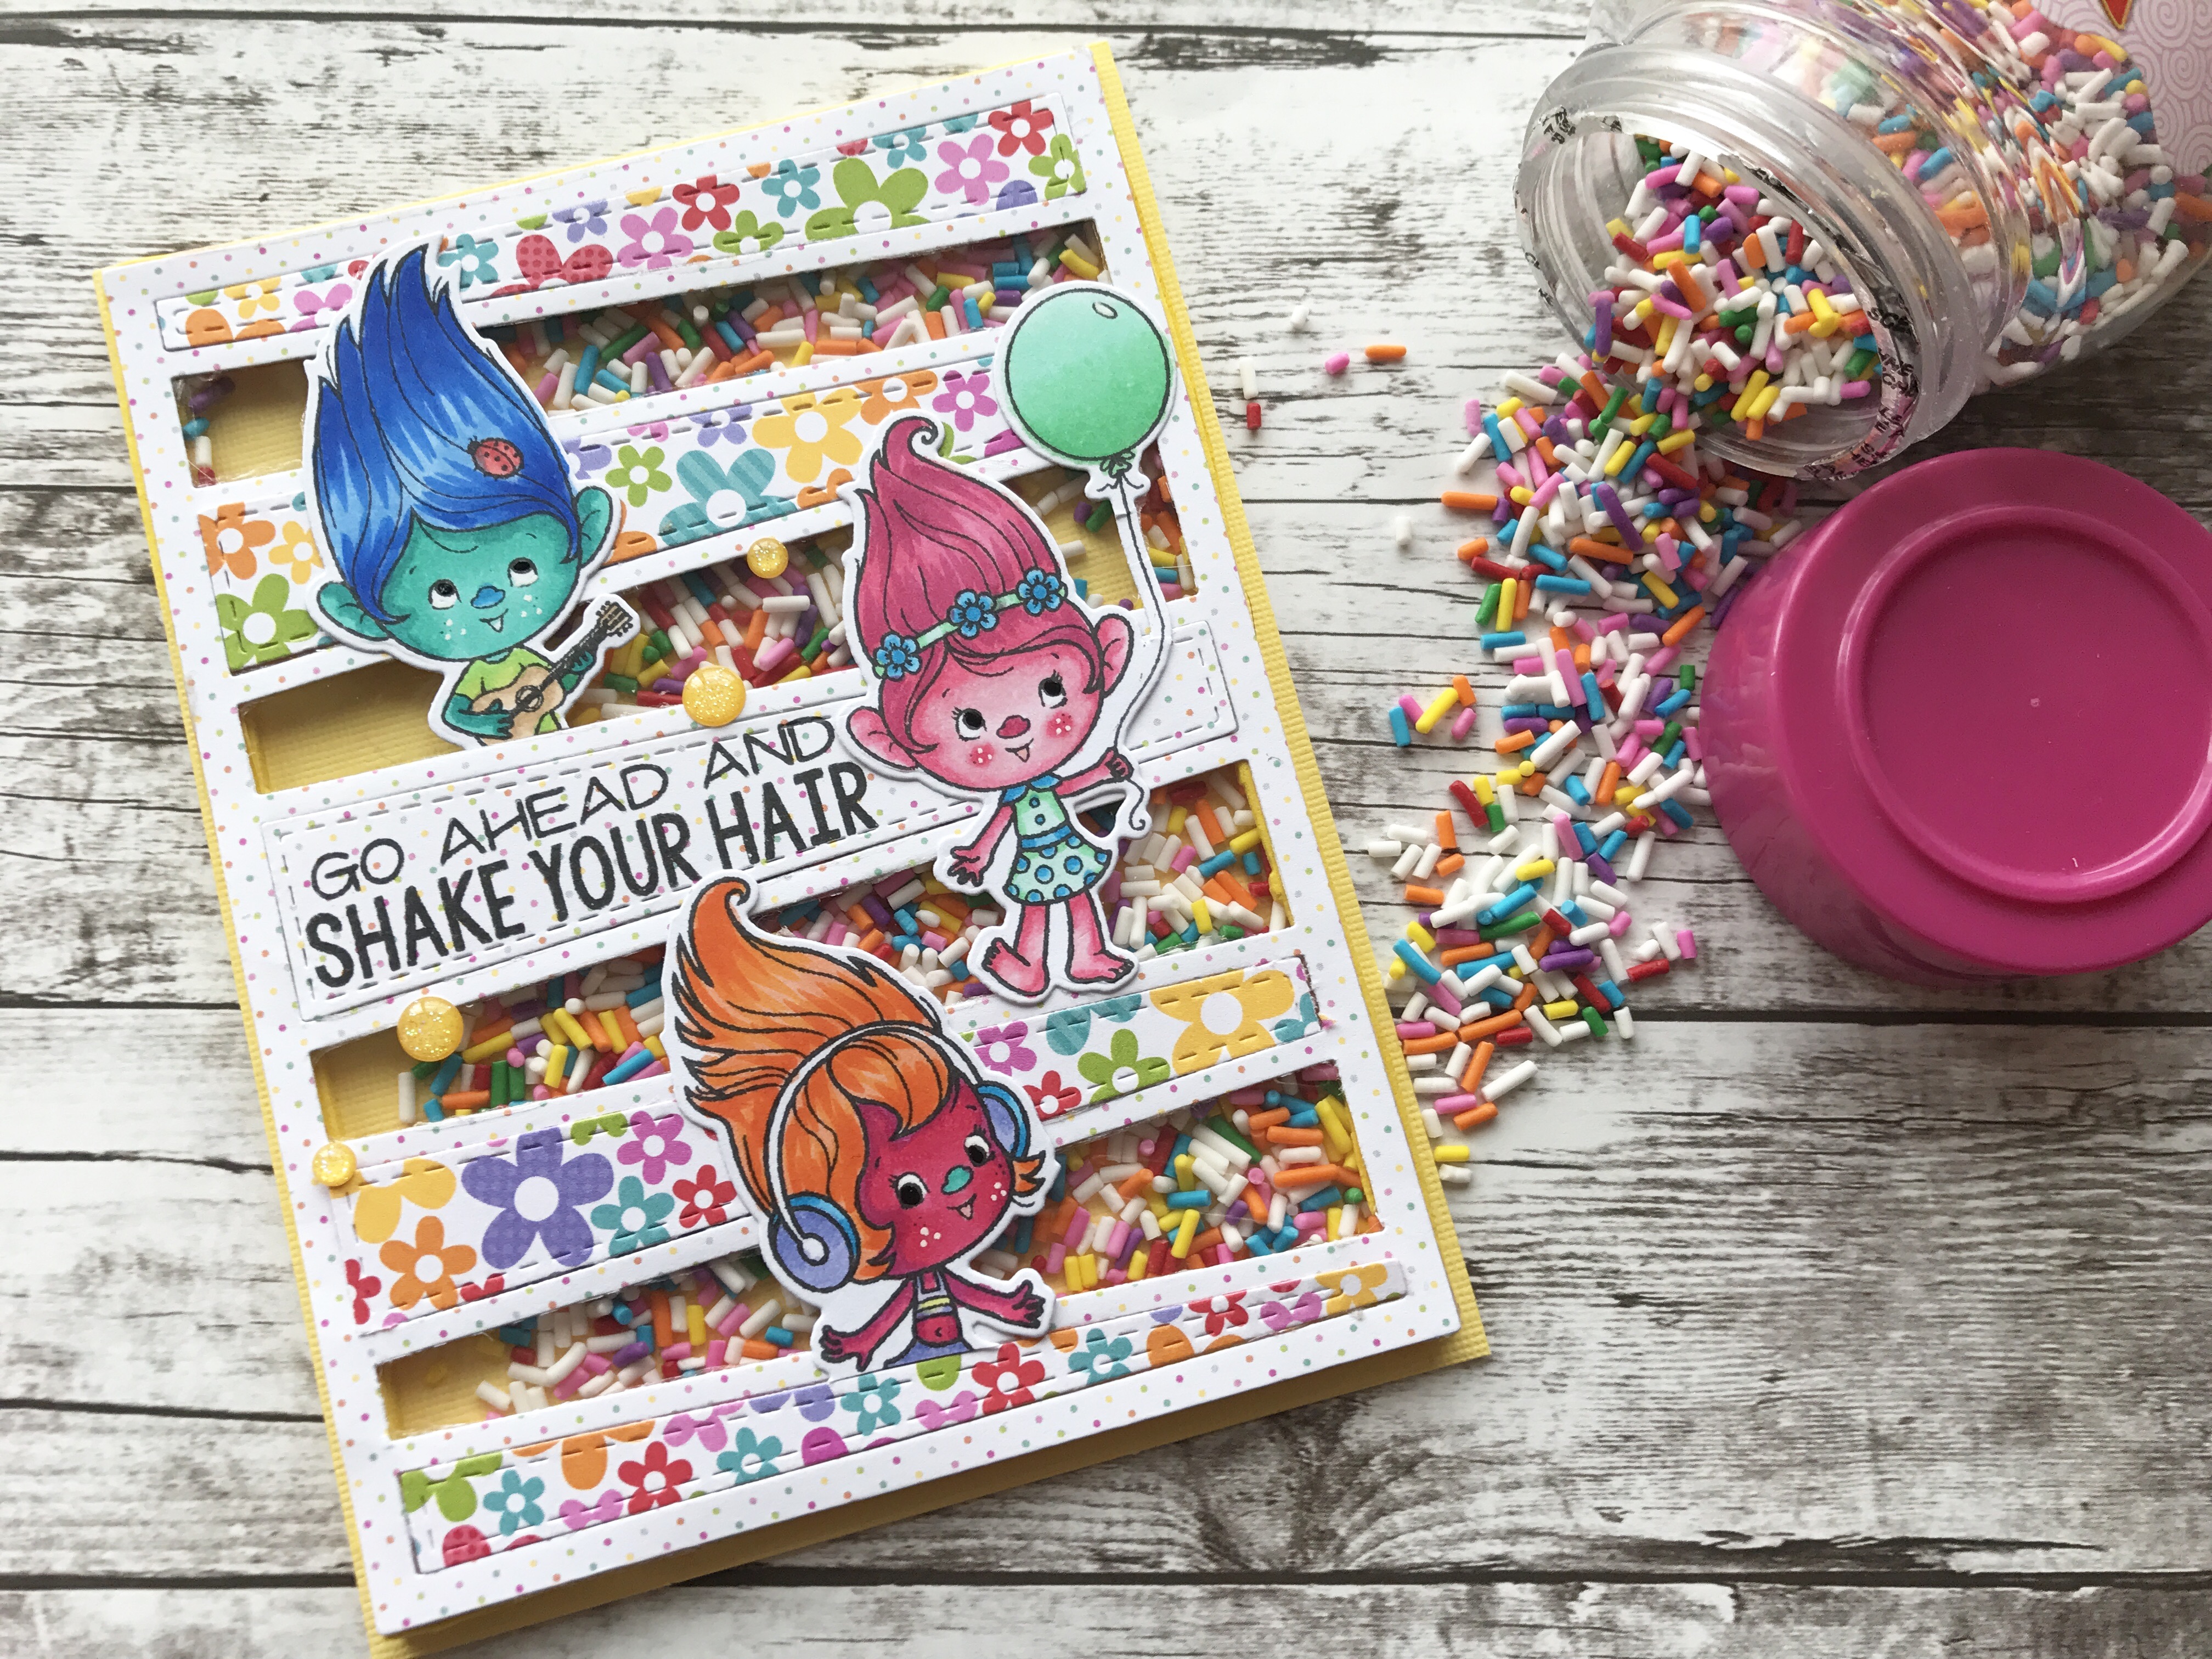
This week’s edition of Ashley Abelson’s Stamp Create Repeatwill make you insanely happy. If you love sprinkles on your cookies or ice cream, then you are going to love adding them to your cards.
Get ready to head in to the kitchen and pull out your baking supplies for this week’s tutorial.
Click here to check out the video on the YNS You Tube channel or click below on the video directly.
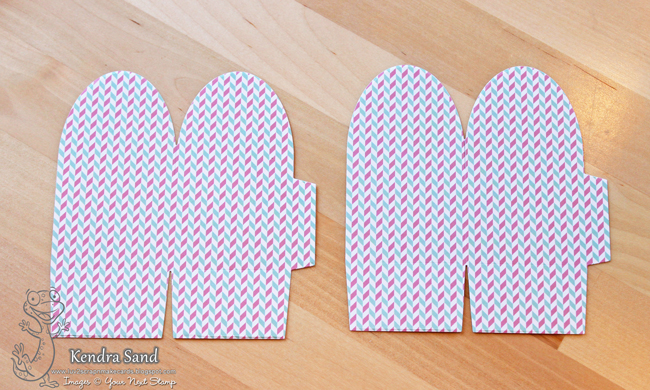
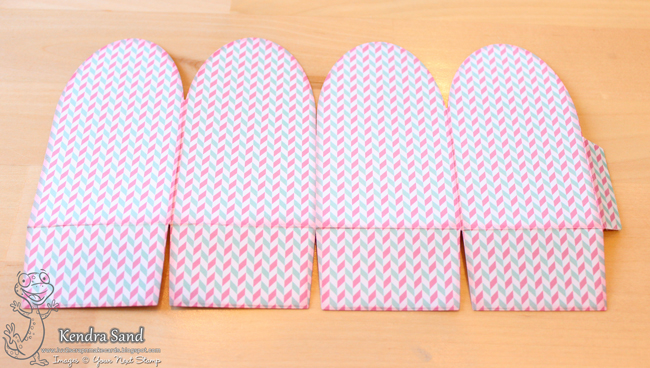
I decided to use a piece of pattern paper to create my box, which is from the Hugs and Kisses paper pad. Grab two pieces of paper and run them each through a die cut machine using the box die.
Fold on appropriate scored lines.
It should look something like this:
Now begin assembling the box! But before I started, I decided to ink the edges with Cherry Blossomink first!
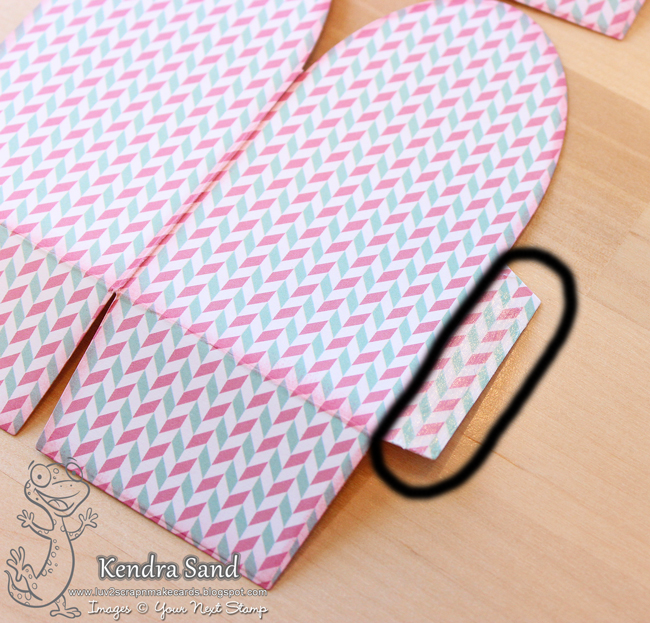
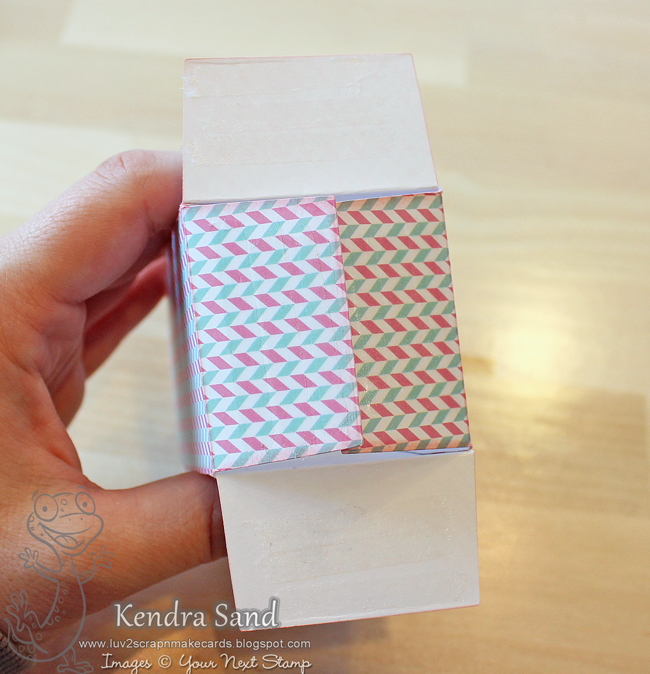
Attach the two die-cut box pieces together, by adding adhesive to the pattern side of the end tabs.
I circled the flap in the photo above to show where the tape goes, as it may be hard to tell in the photo. Each end tab needs adhesive added to it to put the box together.
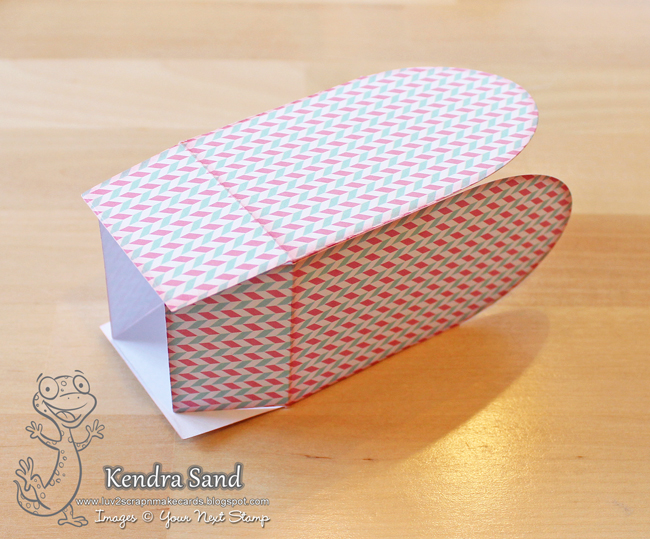
Then connect one adhesive tab to the other die cut piece, to look like this…
Then fold around the box and add the other flap to the inside, to complete the box…
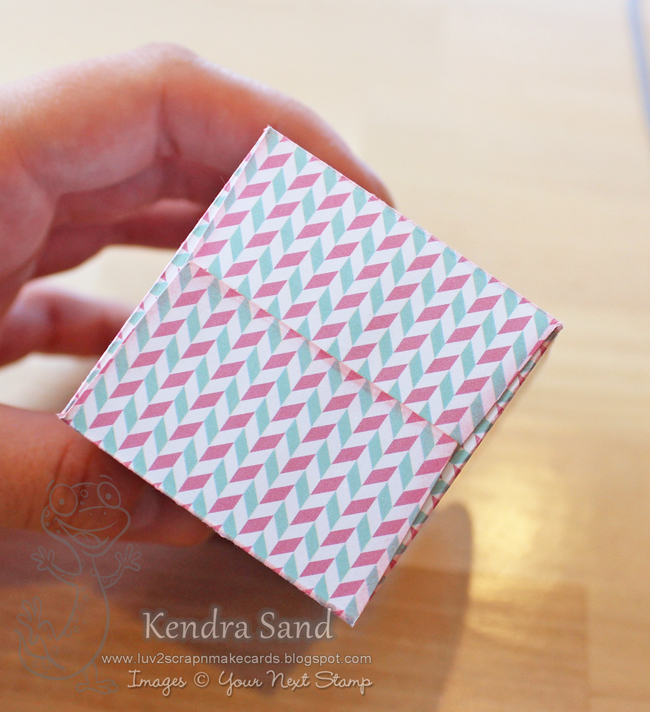
Now to enclose the bottom!!
For the bottom, add adhesive to the pattern side of two of the flaps across from each other and then to the non-pattern side of the opposite two!
As the photo shows, the adhesive pattern side is down already and the box is in a square shape. Adhere them to each other where they overlap and then fold the other two down.
Set the box on your table and reach inside to push the flaps together more, if you like.
Oh so fun!!
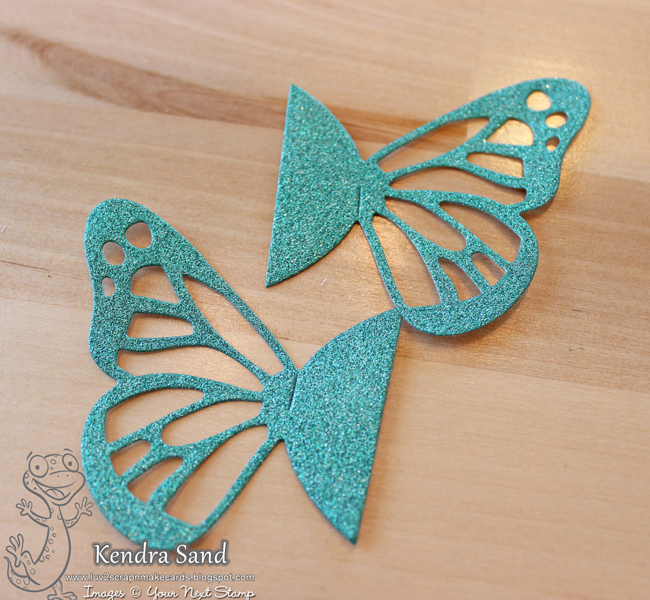
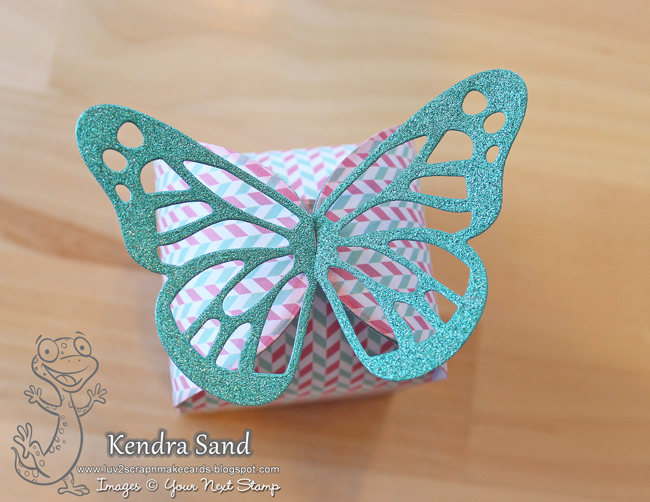
Now to die cut the butterfly!!! Like the other box I created previously, I decided to grab some glittery paper!! As I love glitter!!
Die cut each butterfly piece once!
Use your scissors to slightly cut the slit open on each butterfly.
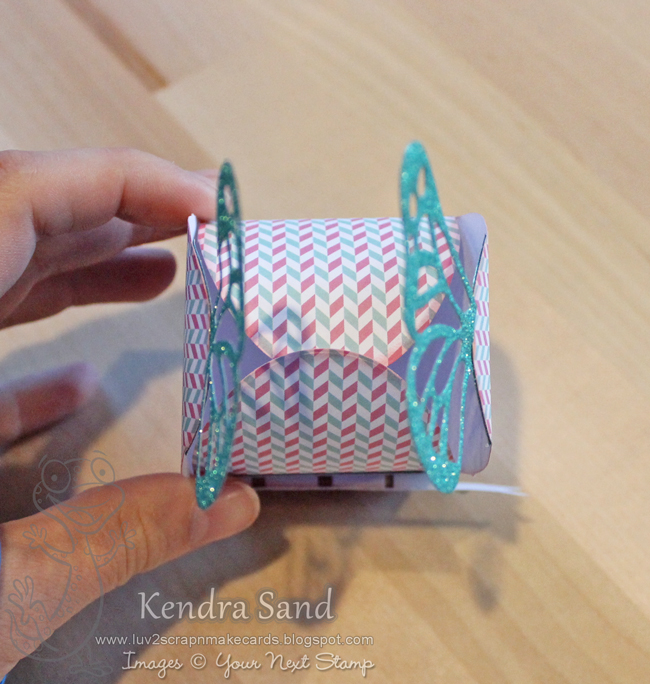
Add glue to the glittery side (the pretty side) of the rounded part of the die-cut butterfly. Adhere it to the inside of the box flap, lining it up so the slit is just above the top of the flap.
Do the same to the second wing, attaching it to the flap across from the flap the first butterfly is adhered to.
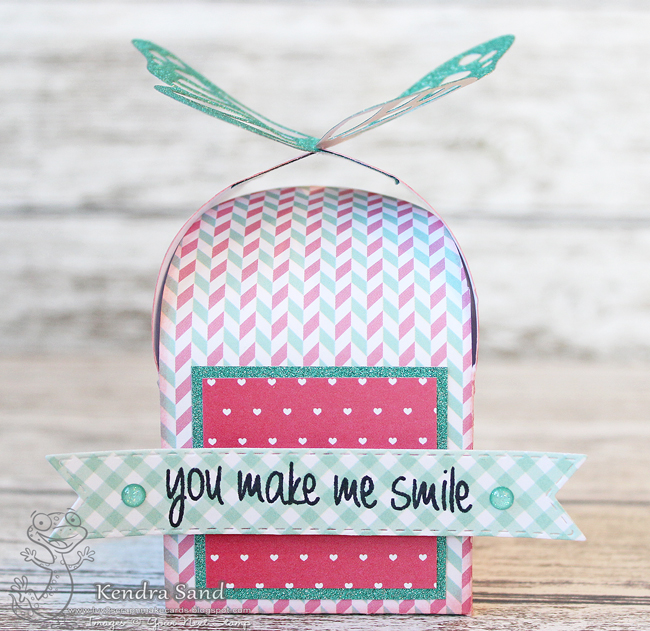
Hold the box so the front is facing you. Then carefully run the back and front flaps (the ones without butterflies) in your fingers to give them a slight rounded bend, being careful not to crease the paper.
Then fold in the rounded back flap first, then the front.
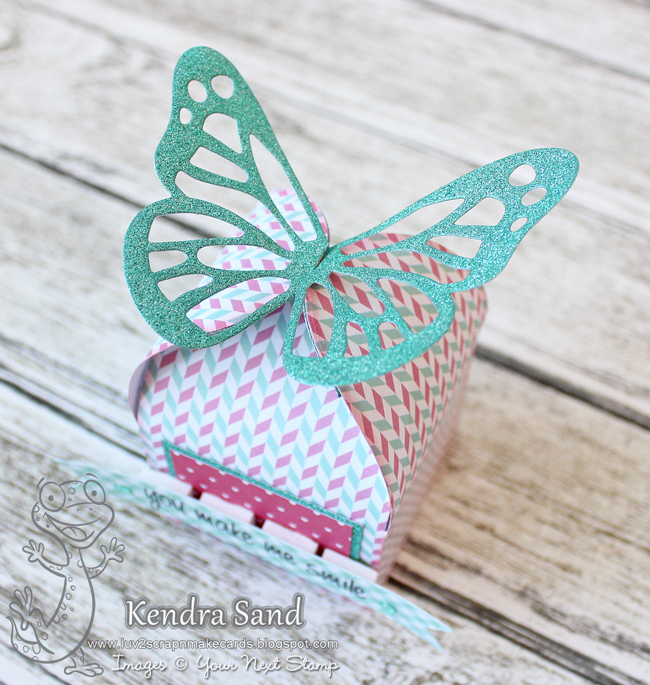
Piece together the butterfly flaps, by bringing the left wing/flap above the right wing/flap and sliding the two slits into each other.
The finished top:
So fun! So glittery!! I love it!!
The box is perfect just the way it is, but if you’d like, you can add embellishments, images and/or sentiments to it!
Which is what I did! I ended up die-cutting the banner from theCool Tag Two Patterns Die Set.I then stamped the ‘you make me smile’ sentiment from the Garden Phoebestamp set in the center.
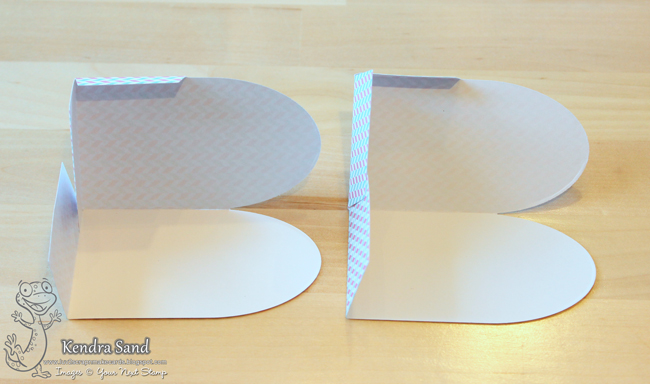
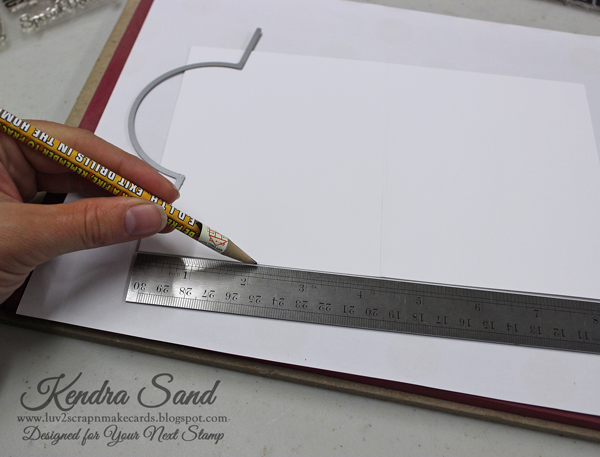
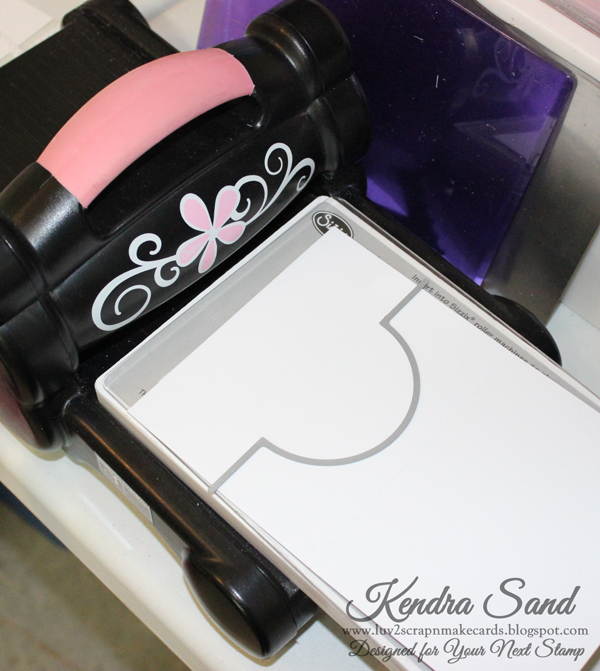
This is where the tutorial slightly changes from the Flip-It, when you place your cardstock in your die cutting machine, place the die just over the marks you created, with the circle facing to the right!
Run the die through your machine.
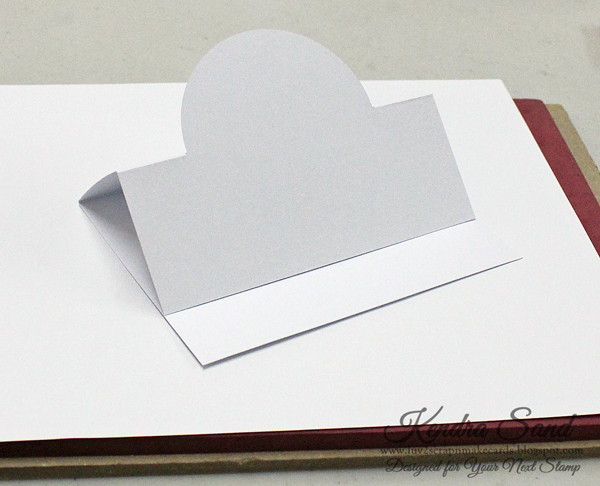
Once you take it out, fold the left side over to the right on the score line, like a normal card.
The you will fold along the score lines the die created, folding the piece so that is folds inside. So that the circle will “stand up”! Like this….
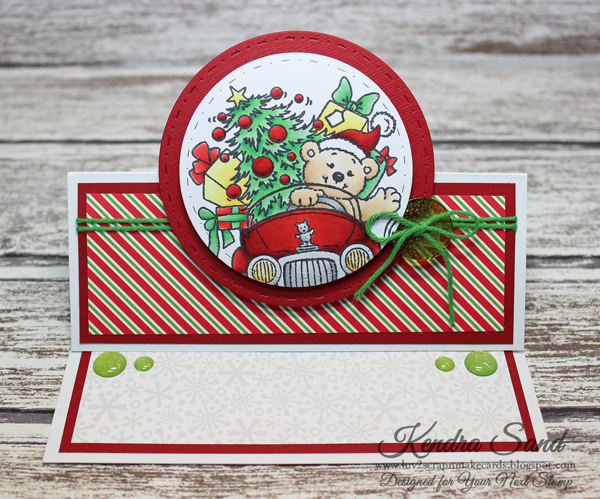
Now you are ready to decorate your fun card!!
Here is my finished card:
I used the super adorable new Christmas Delivery stamp for my main image!! I just love this sweet image!
I added some Gumdrops to the “inside” of the card, so that it would help keep the “stand-up” portion up.
I stamped the “Have yourself a Merry Little Christmas” to the inside of my card, which is part of the Santa’s Magical Sleigh stamp set!
So super fun and easy to create! Something a little different then the traditional card!
You can view all the amazing products from YNS here!