Pizza Box Tutorial by Maureen Wong

Hi everybody! It’s Maureen here and I have a tutorial for you today! It’s a little Make & Take that I designed for a past ScrapFest show, but since not many people got to make it, I thought some people might be interested in a tutorial for it. Since it was meant to be a M&T, it’s pretty simple, but you could easily fancy it up by adding more layers to the belly band or embellishments of your choice.

Pizza Box Surprise Gift Card Holder

Materials needed:
Sturdy patterned paper or cardstock for box: 4 ½” x 9 ½”
PP or CS for belly band and insert: 1 ½” x 9, 3 7/16″ x 3 15/16″
White CS: 3 7/16″ x 2 5/16″ (for writing a note), 3 pieces 1 ½” x 3 7/16″ and to stamp bag images 2″ piece of ribbon

A Good Friend YNS stamp set

Score board
¾” circle punch
Adhesive (regular and foam)
Coloring medium of choice
Scissors
Pencil

Instructions:
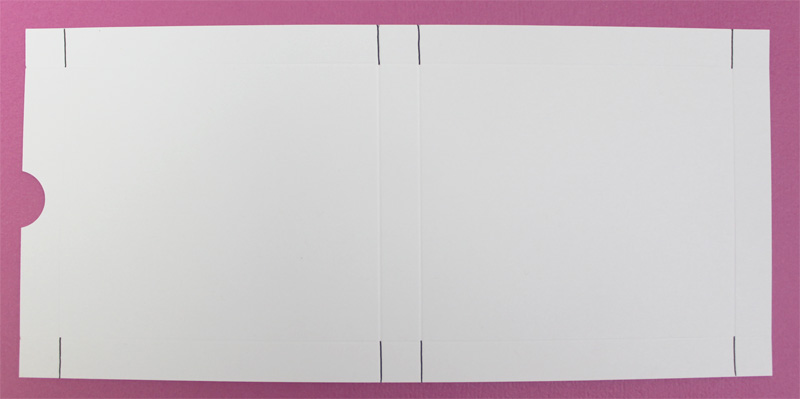
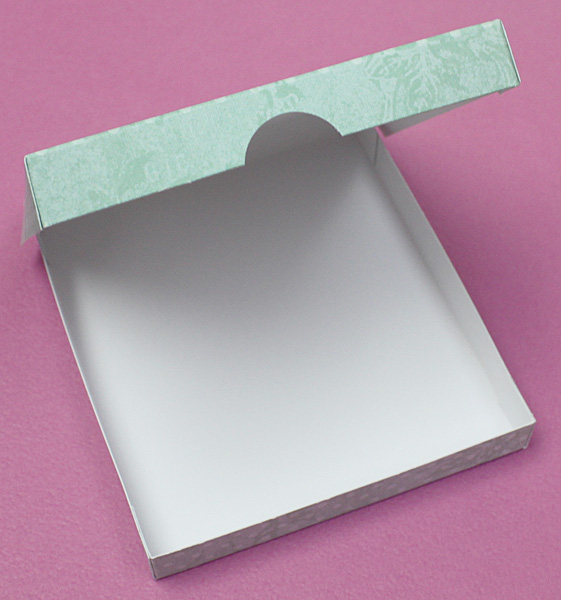
1) Take piece for box and place short edge along top of scoring board.
Score at ½” and 4″. Turn piece and score at ½”, 4 ½”, 5″, 9 ½”. Cut on
all score marks on each long edge as shown in pen (8 in all):


2) Lightly mark center of one short edge of the piece. Using the ¾”
circle punch, punch a notch where you marked (shown above).

3) Adhere short flaps inside box and you should have this:


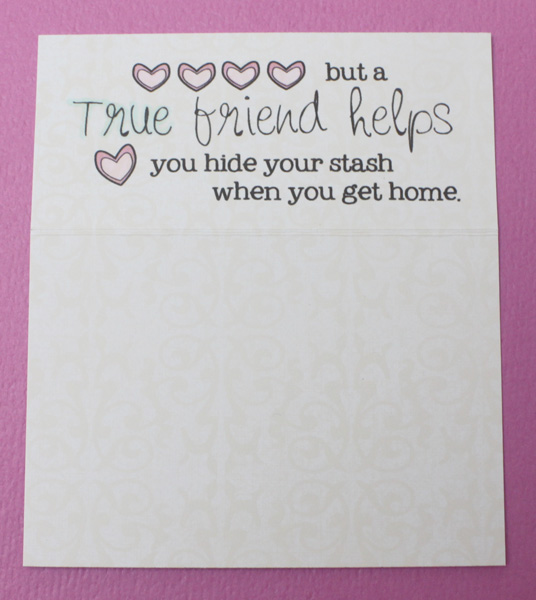
4) Take the insert piece and place 4″ side along top of scoring board.
Score at 1 ½”. Before folding, stamp “true friend” image inside the
smaller top area and color as desired. Now fold back and forth along
score line a couple times to make sure it bends easily.


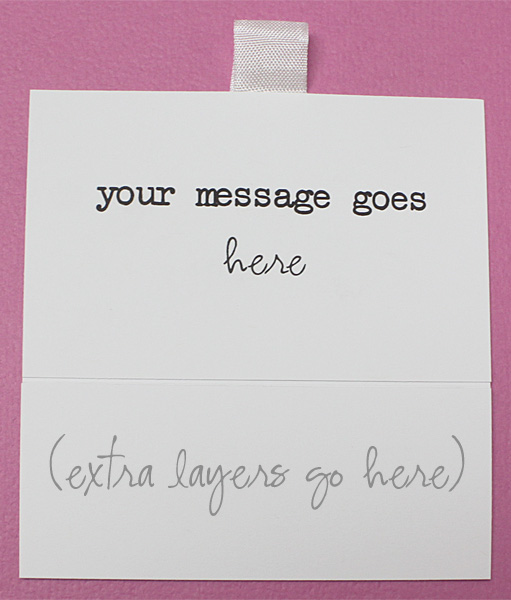
5) Take piece of ribbon and lightly fold in half. Tape to back of bottom
edge of insert (in this picture and the one below, the insert is upside
down):


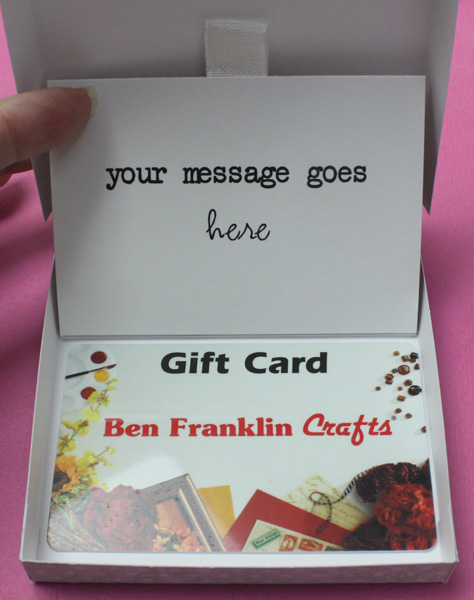
6) Write a note to the recipient and stick piece onto back of bottom of
insert. Take the 3 small white pieces and stick to the back of the top
of the insert. (These will help the insert lie flat even when the gift
card is underneath the bottom portion.)


7) Place adhesive on back of top portion ONLY and adhere inside box bottom.

8) Decorate bottom of insert as desired. (I stuck the 2 smaller bags
directly to the insert and then popped the big bag up on foam tape.)


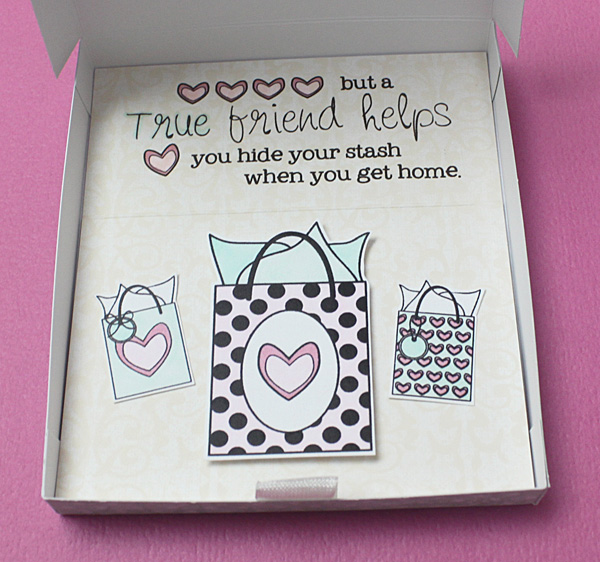
9) Lift up insert flap and place gift card underneath. Surprise! 🙂


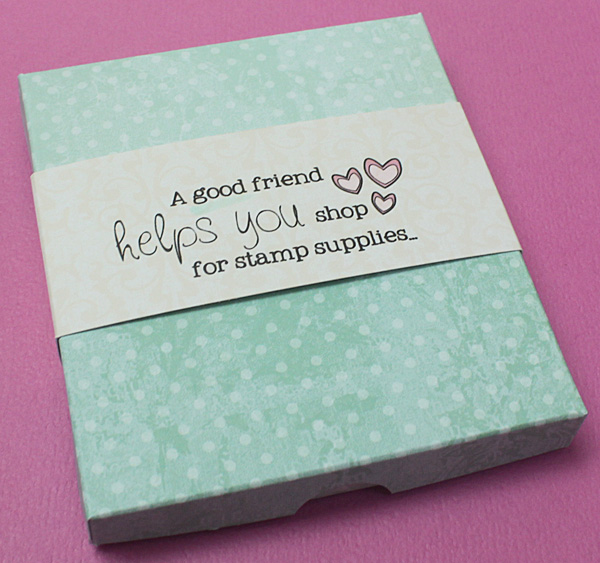
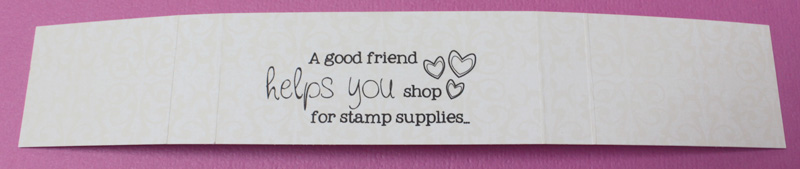
10) Take piece for the belly band and make light marks on the back and
score at the following: 2 ⅜”, 2 15/16″, 6 ½”, 7 1/16″. Before folding,
stamp the “good friend” sentiment in the middle section of the band and
color as desired.


11) Fold band around box and adhere it to itself (NOT to the box!),
making sure that the band isn’t too tight so it can slip on and off
easily.And your box is done! Yay!

FINAL NOTE: I know a lot of the insert measurements are in 16ths of an
inch – if it’s easier to think about it, they’re all based on the pieces
being slightly smaller than 3 ½” x 4″. So, you could always cut the
pieces the full size, and then just slice off a 16th of an inch wherever
necessary to make the pieces fit!

I hope you like my project and that you’ll give it a try! If you do,
please leave a comment so we can check it out!

FacebookPinterestTwitterEmail

Pocket Tag Tutorial and A New Stamp Set!!!

Don’t you LOVE this new stamp set!!!  I just adore this sentiment and it’s so true LOL!  This new set is called A Good Friend, and it is available TODAY at the Your Next Stamp Store!!! 
This weekend Karen will be at ScrapFest with all of the wonderful stamps from Your Next Stamp!  This is one of the Make and Takes that she will have at her booth~so FUN!  I have a simple tutorial to show you how to make one of these these yourself, just in case you can’t make it to ScrapFest:)  I saw this tutorial first HERE, but I changed the measurements around a little bit. 
To make the base, you need two pieces of cardstock.  One cut at 5″x5″ and the other at 3″x6″:
Score the 5″x5″ piece at 1/2″ and 1″ on 3 of the 4 sides:
Cut out the sections shown below:
Fold it up to make your box:
Add adhesive (I’m a glue girl:)
Attach to the 3″x6″ piece:
Decorate!
I used some Echo Park Paper For the Record dp and the little bag and sentiment both come from the A Good Friend Set!  There are also 2 other bags this size, and 3 smaller bags that would be so cute on a tag or to stamp a little bag border~oh, I need to try that!:)
Thank you so much for stopping by, and make sure you come back tomorrow for the Your Next Stamp ScrapFest Blog Hop!!!  We have two VERY SPECIAL LIMITED EDITION STAMPS that you will not want to miss out on!  You only have three days to snatch them up!  Have a wonderful day:)
Kerri
Recipe:
Stamps:  Your Next Stamp A Good Friend
Paper:  PTI Pure Poppy, Echo Park Paper Co. For the Record
Ink:  Memento Tuxedo Black, Copics
Accessories:  Oval Nestabilities, Ribbon, Martha Stewart Daisy Border Punch, Stardust Stickles, Dimensionals
FacebookPinterestTwitterEmail

Happy Spring!

Hi all … Jenny here!
Sharing with you my CAS (Clean and Simple) project.
I love CAS – which to me means uncluttered.
I like to showcase the image.
I want it to be the star of my card.
With CAS cards I can achieve that!
And heres how you can too:
First I stamp my image onto white cardstock, I use Gina K pure luxury white when I am making a one layer CAS card because the markers don’t bleed through the back. Makes for a perfectly clean card.
Next, I stamped my sentiment in the bottom corner then used a ruler to make a border around the card.
Then I stamped my image and colored in.
And here is my finished card! So clean and really makes the star of the show “TULIP GARDEN” stand out and be the focal point of the card. And I made this card in less than 10 minutes, so they are really perfect when you need a quick card!
Your Next Stamp rubber stamps are perfect for doing CAS. They are nice, crisp and you can get them in a variety of sizes to make small notecard size cards or large standard size cards. 
PS: Dont forget to enter for the SURPRISE GIVEAWAY! You dont wanna miss it!!
Thanks for peeking in and letting me share my project with you today!
Have a great week!! 
Blessings,
🙂 🙂 🙂 Jenny
FacebookPinterestTwitterEmail

Quick CAS cards

Hi all … Jenny here 🙂 Hope your week is off to a great start!!!

Most of you have probably seen my style, Clean and Simple.
Today I would like to share with you some CAS cards.

These cards you can make in 5 simple steps!


On this card I used the adorable Mini Yippee Fhiona and sentiment from Yippie Fhiona.

Just incase you want to make a card similar to this, I will write these simple instructions so you can see how fast you can make this card in 5 steps! These mini YNS stamps are perfect for quick cards!

1. Make card from cardstock. 3″ x 3″
2. Cut 2″ x 2.25″ piece of cardstock for your background; adhere to cardstock.
3. Stamp YNS Mini image of your choice and sun; color, trim and adhere.
4. Die-cut grass and adhere with foam dimensional tape.
5. Stamp sentiment.

Easy peasy! And in a snap; great for a quick card!

Heres another you can do in less than 5 steps too!!


On this card I used the super cute Mini Flying High Fhiona and Flying High Accessories.

Don’t you just LOVE cards you can make quick when you need one fast and dont have time to spend an hour or more on one? I know for me it comes in handy. Thats why I love CAS design. And thats why I LOVE Your Next Stamp Mini’s. Be sure to check the full line HERE.

I hope you enjoyed my creations today.
Thanks for peekin’ by! Have a fabulous week! 🙂 🙂 🙂


Other Supplies:
Cardstock: Papertrey Ink
Cloud and grass dies: My Favorite Things and Papertrey Ink
Ink: Copic Markers and Memento Tuxedo Black
FacebookPinterestTwitterEmail

© 2024 Your Next Stamp. All Rights Reserved.