Posts By: Kendra Sand

12 Days of Christmas – Day Eleven with Kendra – Comment to Win!

Welcome to Day Eleven of the 12 Days of Christmas Designer Series!   

The designers have put together 12 days of holiday ideas.   Our goal is to help you get ready!

We also want to give you  the chance to win a YNS Store gift certificate!   All you need to do is leave a comment on the 12 Days of Christmas posts right here on the YNS Blog to be entered in the draw.   The grand prize is a $25.00 YNS Store gift certificate and two runner ups will each win $10.00 YNS Store gift certificates, the winners will be chosen randomly among all the comments left on the 12 Days of Christmas posts.   The more 12 days posts you comment on, the greater the odds of winning.   All comments must be left by December 8, 2017 and the winners will be announced on December 10, 2017.


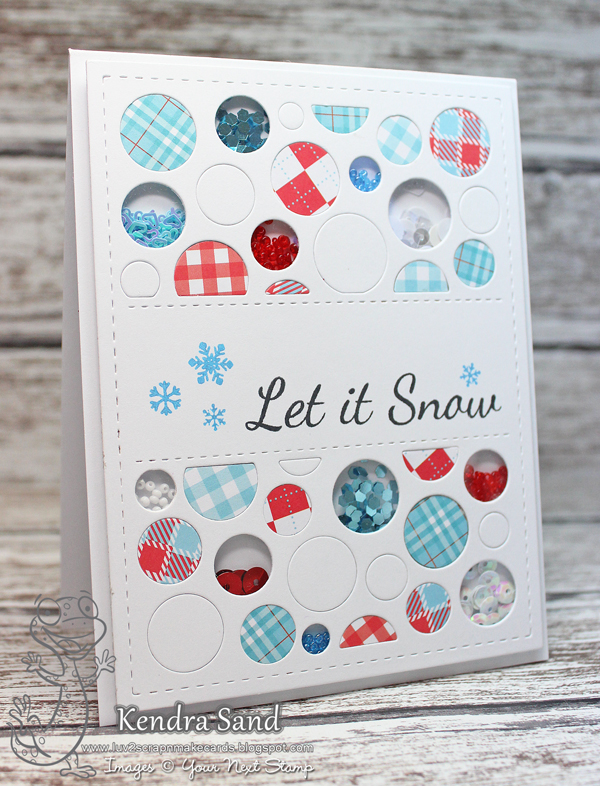
Hello YNS Fans!! Kendra here today to share some fun tags with you!!

I am absolutely in LOVE with all the lovely Panel Dies YNS has released!!

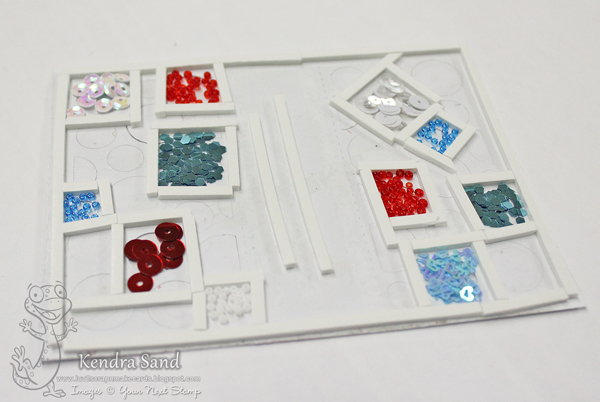
They make some super fun shaker cards!!!

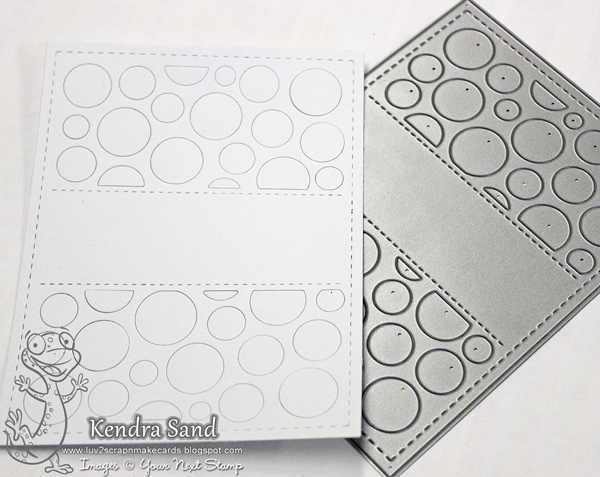
Recently when working with one, I thought it would be fun to alter it a little instead of using the entire panel!  A great way to get a different look and get more uses from the panels!  I decided to use the Snowflake Panel Die for my tags today!

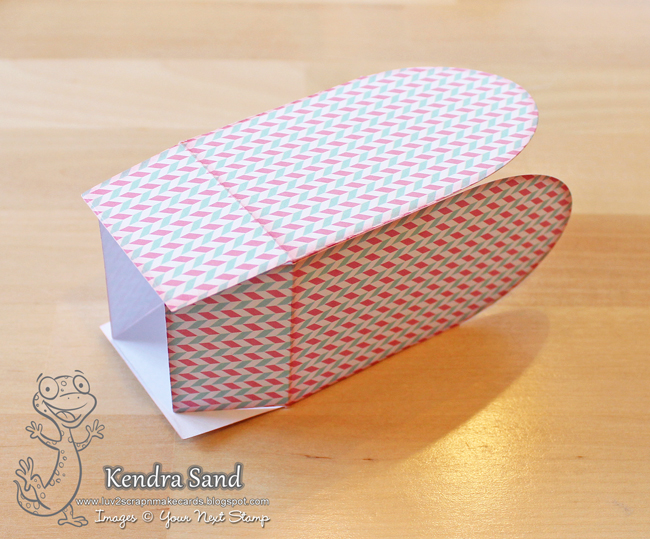
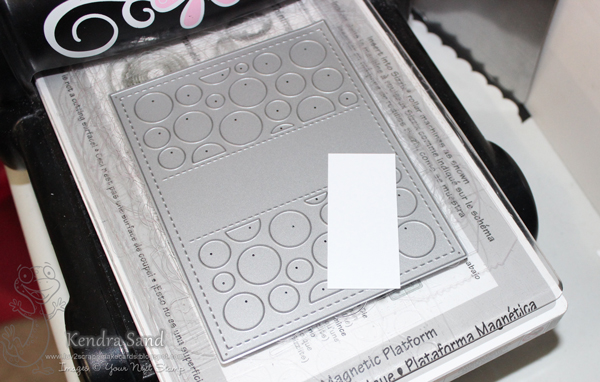
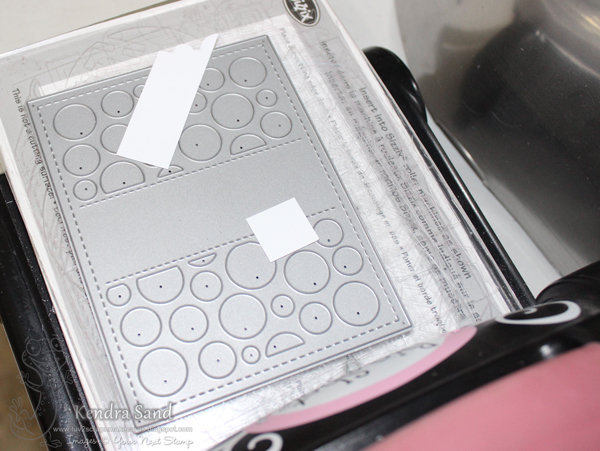
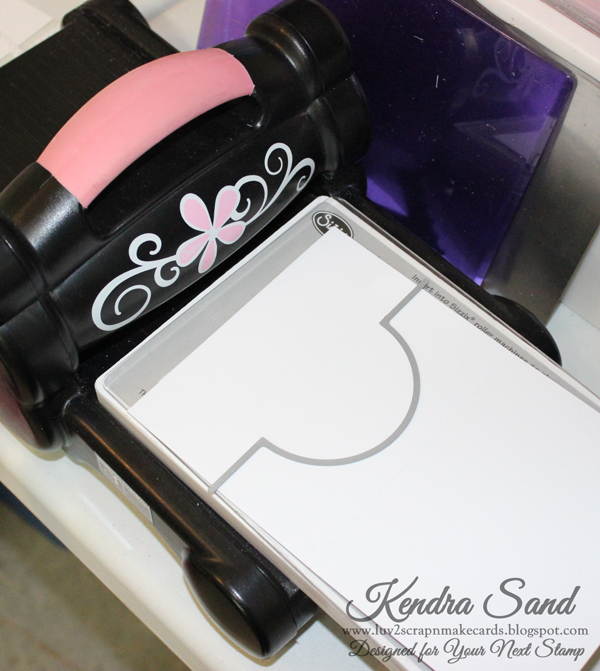
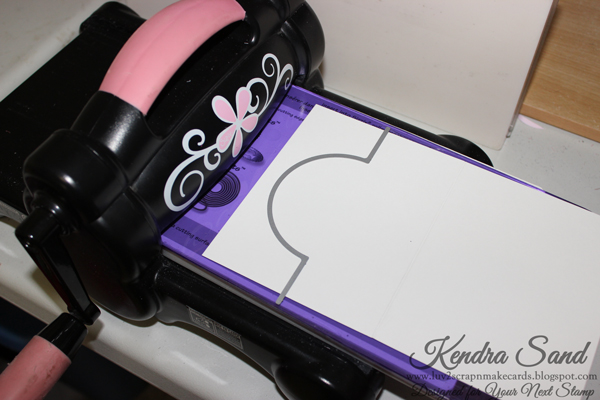
Depending on what you plan to do, run the entire panel die through your die cutter or just run a portion of it through:

I ran it both ways to show you! I’ll create 3 tags with the snowflake panel portions!!

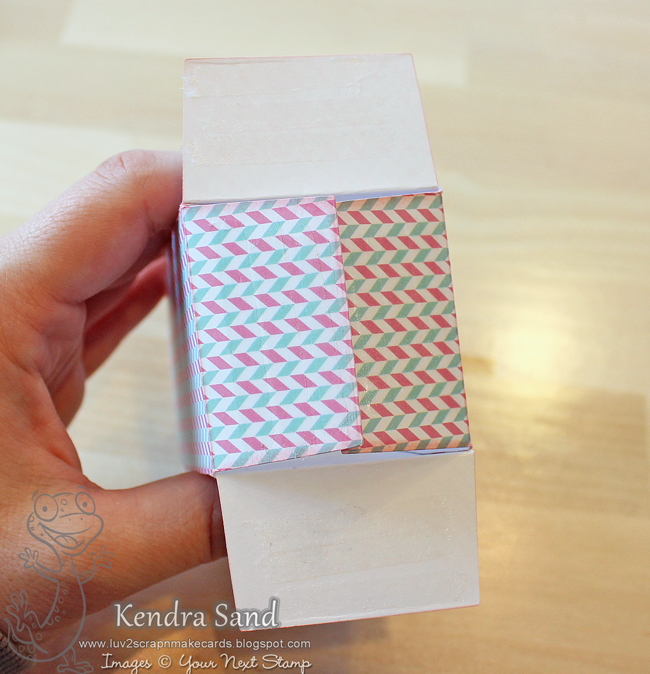
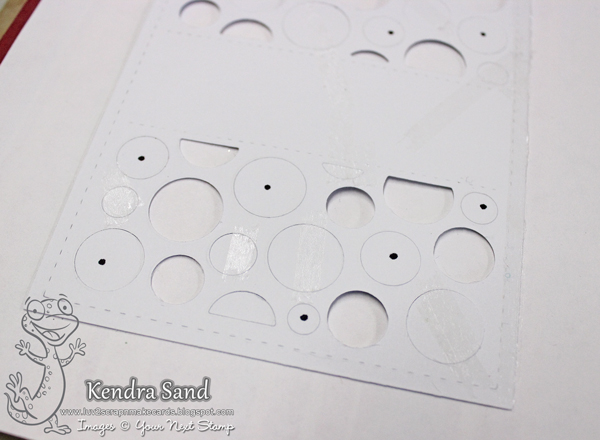
Position the die cut panel in the paper cutter just below the stitched line the runs in the middle.

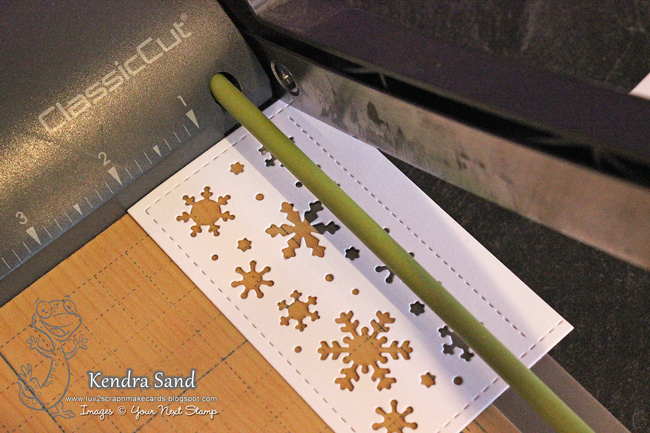
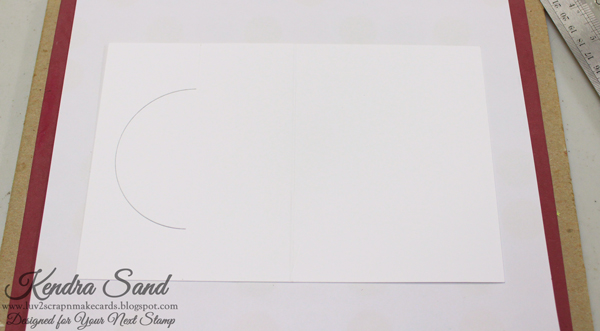
The stitching marks won’t be perfect as the stitching won’t run around the corner where you just cut like it does the other actual corner.  But you and I will be the only ones to notice!  Most people probably won’t even be able to tell!!

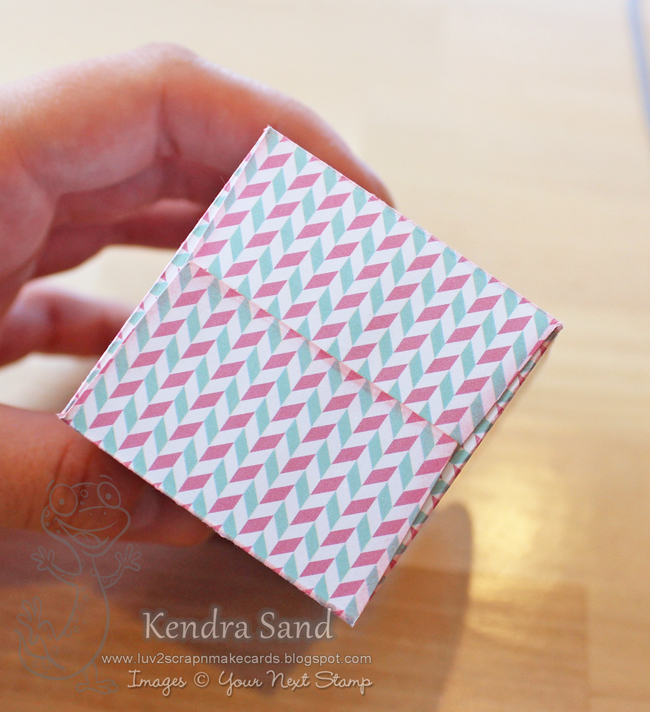
Trim along the stitching on the other three original sides, so there is the same amount of space by the stitching.

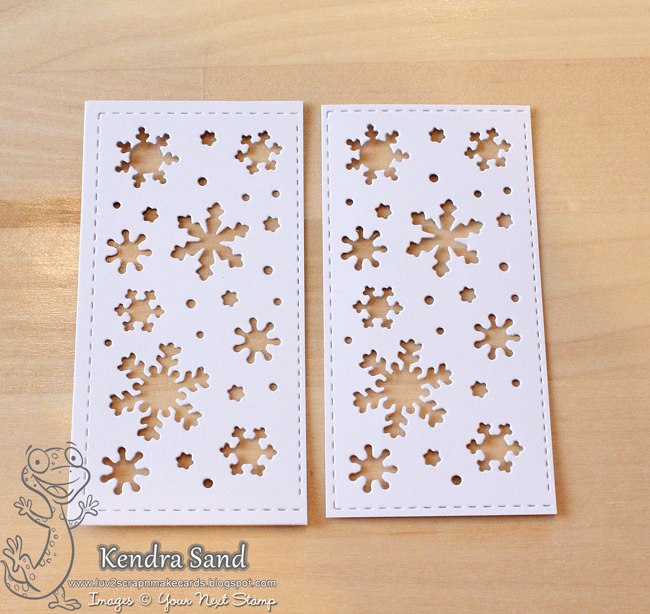
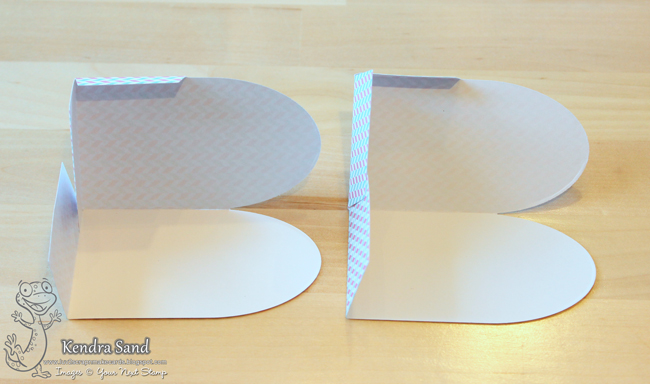
The right die cut is with the original sides yet and the left is after I trimmed!  To me it looks perfect!  Can’t even tell we altered a die!!

Now the new panel portion is ready to be used to create something fun!

As I mentioned before I thought it would be fun to use them to create some tags for Christmas gifts!!

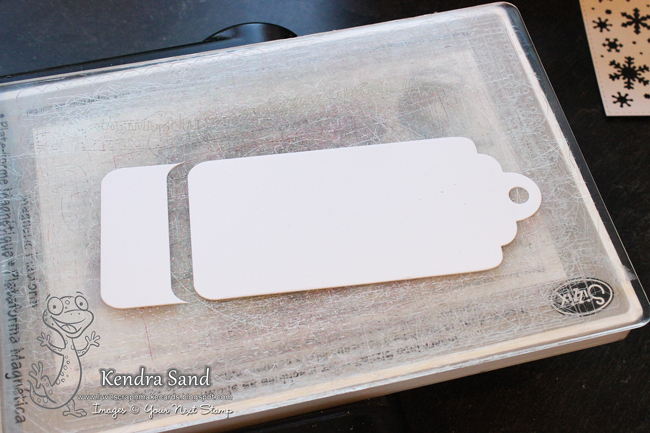
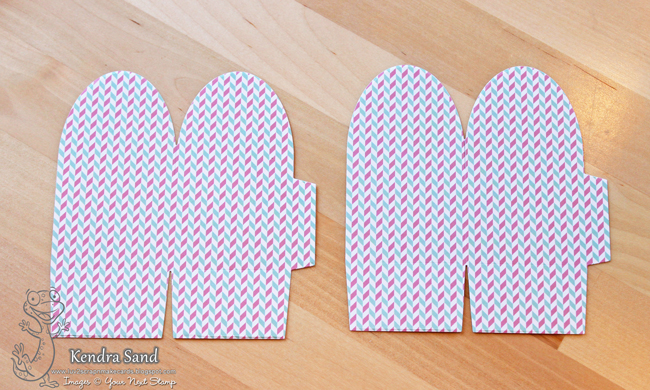
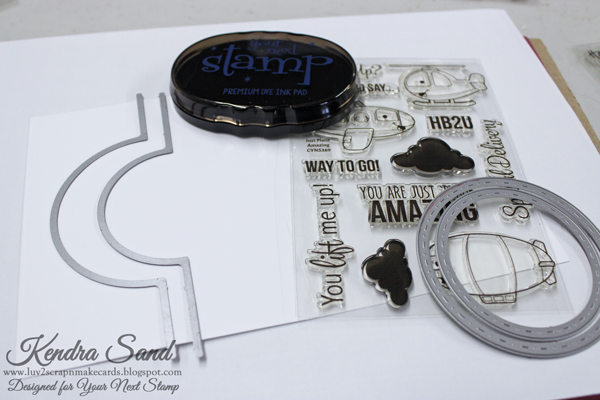
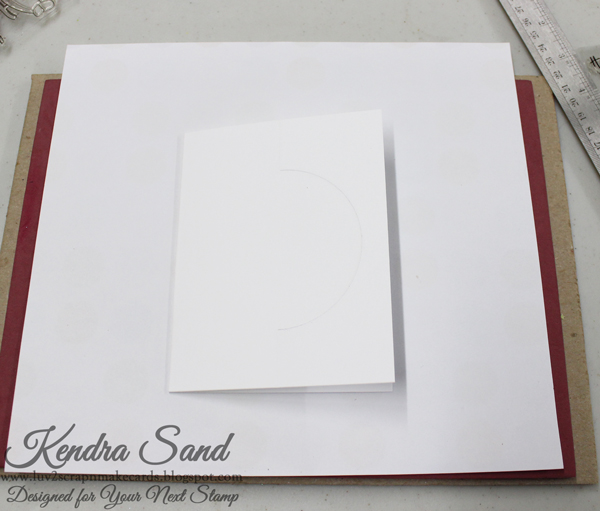
So I grabbed the fun Bookmark/Tag Die Set!!

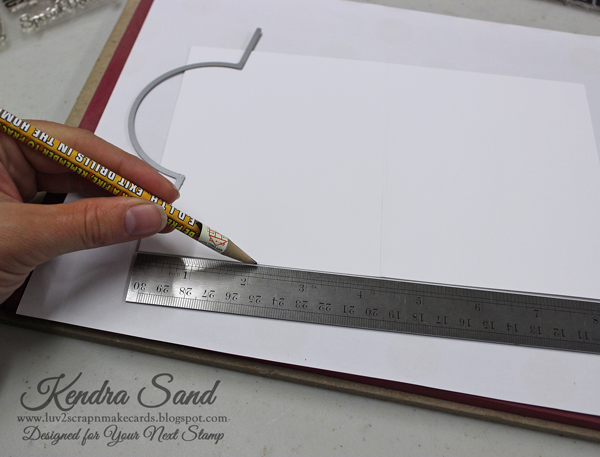
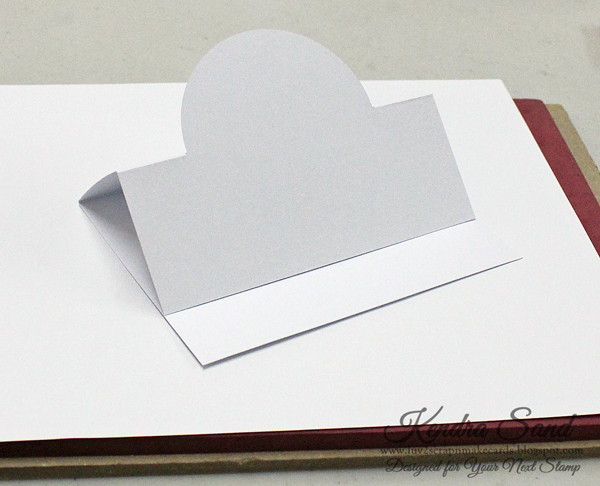
I found that the largest die in the set would work perfect for the tags, but the length is a little longer then I need.  So I ended up altering it a little bit.

First run it through the machine like normal.  Then take the snowflake panel, lay it on the bookmark where you intend to place it.  Be sure to keep the bookmark die snug to the two sides of the already die cut bookmark, then slide it to the desired length and run it through the machine again!

I just love being able to alter dies and getting more uses out of them!

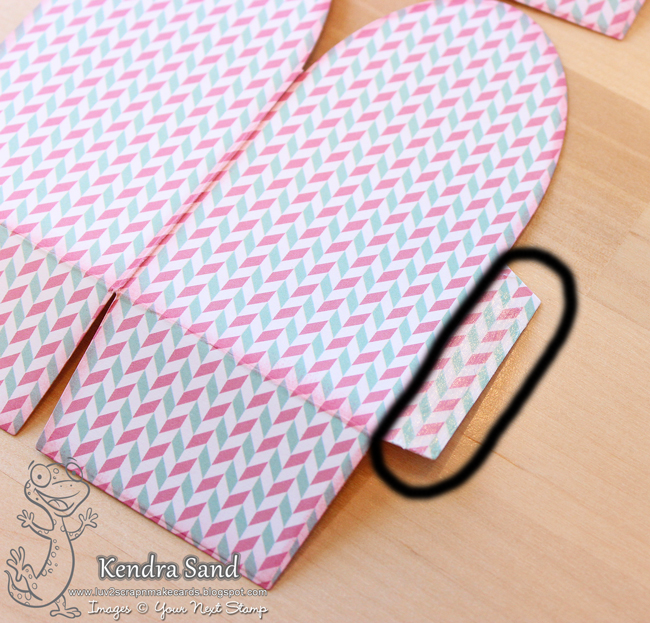
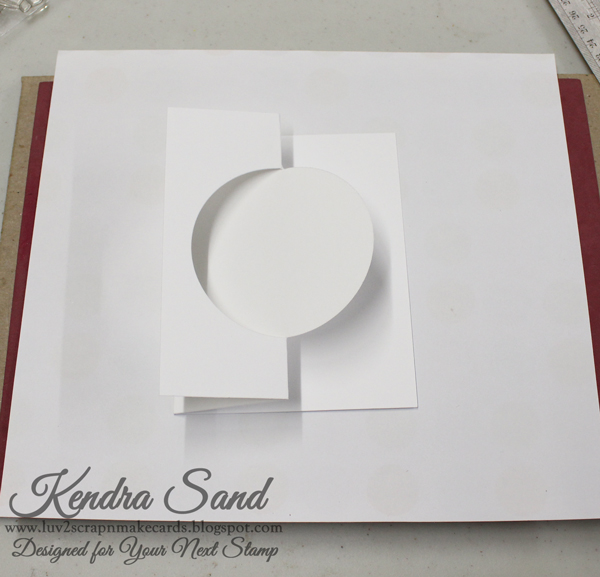
Here is a look after it was run through again:

How cool!!

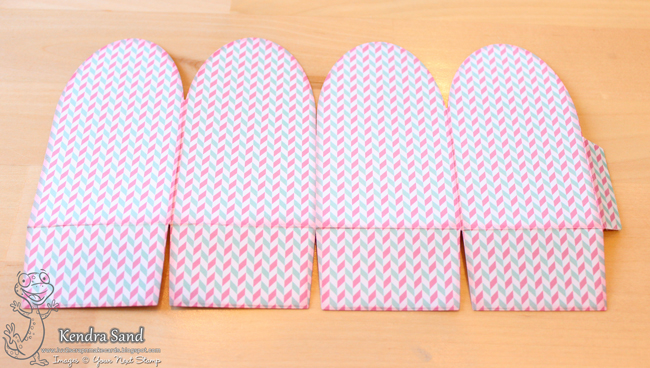
Now you can assemble your tags as you’d like!!

Here is a look at my three finished tags:

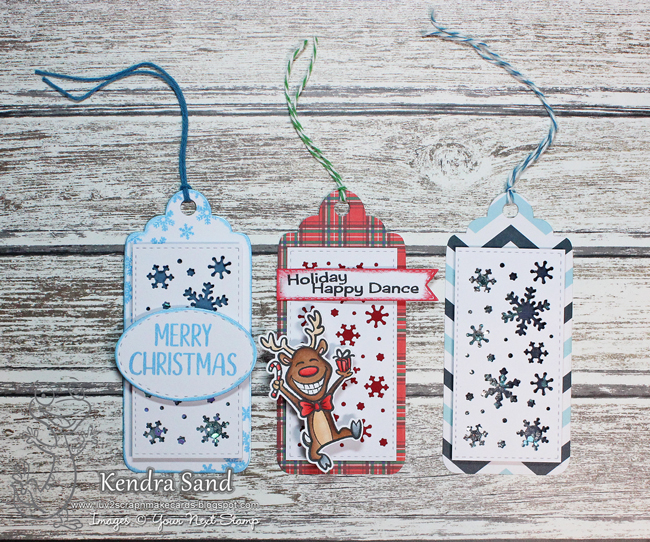
So fun!!  I can’t wait to add them to presents!!

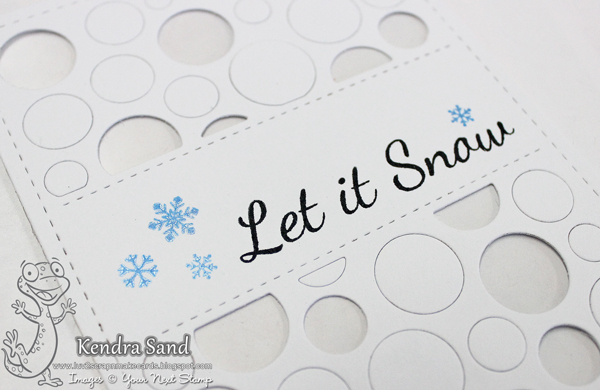
 I used the  Stitched Ovals Die Set to die cut an oval to stamp the ‘Merry Christmas’ sentiment from the Be Jolly stamp set:

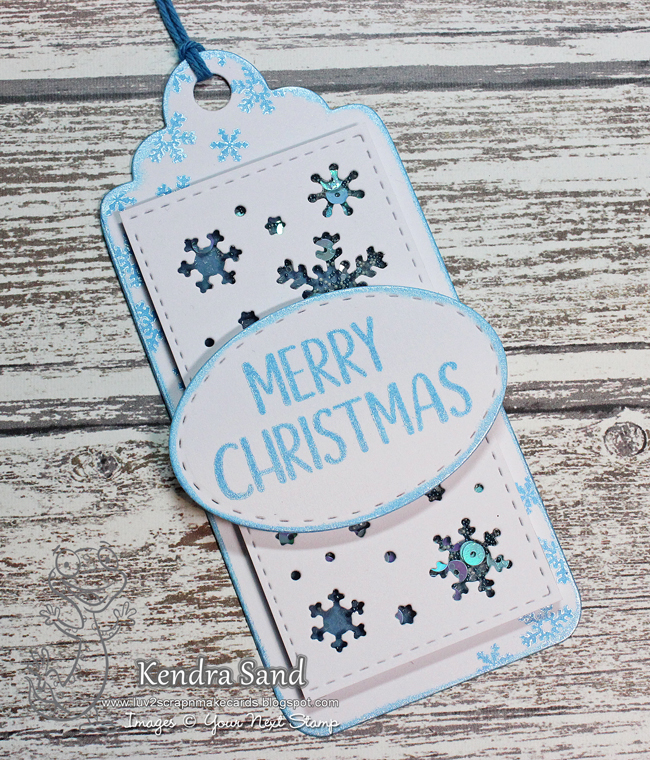
I also used the Merry and Bright stamp set to stamp snowflakes on my tag!

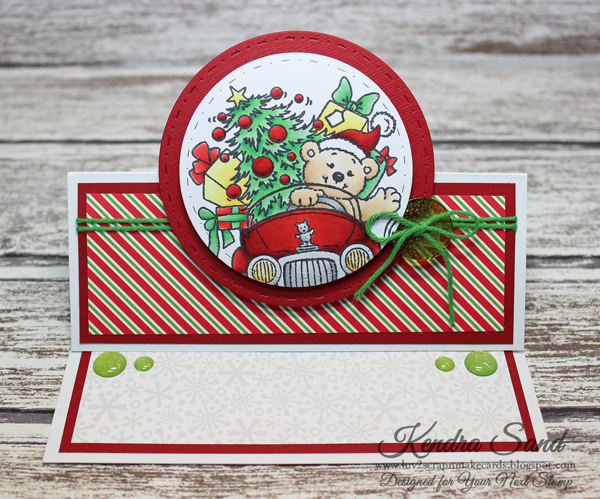
I used the adorable reindeer from the Be Jolly stamp set and coordinating Be Jolly Die Set for this fun tag:

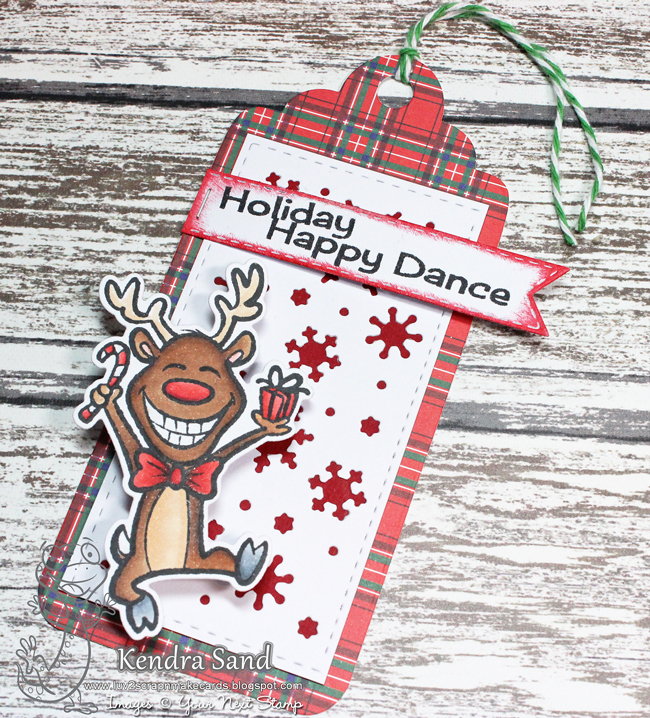
I just love the joy of this reindeer!  Sure to put a smile on someone’s face!!  The fun ‘Holiday Happy Dance’ sentiment is also from the Be Jolly stamp set!

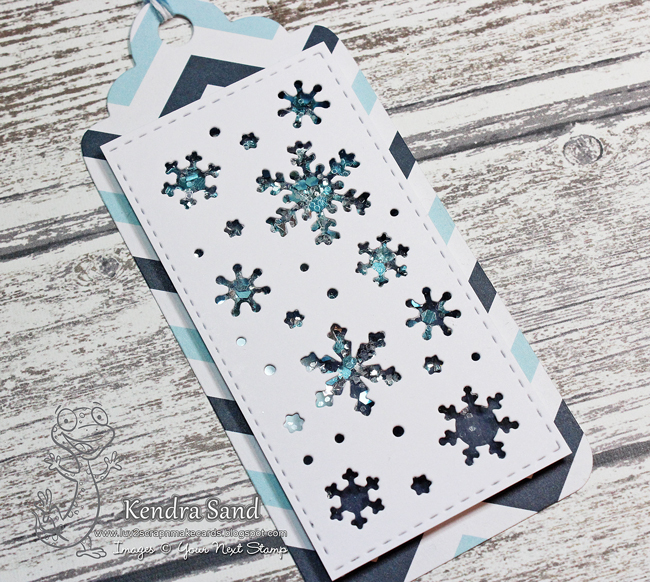
For this tag I wanted to just leave it clean and simple to really show off the fun shaker I created:

I hope I’ve inspired you to create some tags and look at your dies in a different way!  Plus, get as many uses out of them as you can!!

Have a lovely day!!   Don’t forget to leave a comment before you go.   Tomorrow is the last day of the series and Martha will be sharing another holiday idea with you.

Kendra

FacebookPinterestTwitterEmail

Butterfly Box Tutorial

Hello Your Next Stamp Fans!!

Kendra here, from Luv 2 Scrap N’ Make Cards to share a tutorial with you!

I am featuring the awesome Butterfly Gift Box Die!!

I absolutely LOVE creating 3D projects, they make such special gifts!  And are so fun to fill with special little treasures!!

I am going to share with you today, how to create these cute little boxes!

Grab a few supplies:

Butterfly Gift Box Die

Die Cutting Machine

Paper (Hugs and Kisses)

Stamps (Garden Phoebe for sentiment)

Ink (Cherry Blossom and Black Olive)

I decided to use a piece of pattern paper to create my box, which is from the Hugs and Kisses paper pad.  Grab two pieces of paper and run them each through a die cut machine using the box die.

Fold on appropriate scored lines.

It should look something like this:

Now begin assembling the box!  But before I started, I decided to ink the edges with Cherry Blossom ink first!

Attach the two die-cut box pieces together, by adding adhesive to the pattern side of the end tabs.

I circled the flap in the photo above to show where the tape goes, as it may be hard to tell in the photo.  Each end tab needs adhesive added to it to put the box together.

Then connect one adhesive tab to the other die cut piece, to look like this…

Then fold around the box and add the other flap to the inside, to complete the box…

Now to enclose the bottom!!

For the bottom, add adhesive to the pattern side of two of the flaps across from each other and then to the non-pattern side of the opposite two!

As the photo shows, the adhesive pattern side is down already and the box is in a square shape.  Adhere them  to each other where they overlap and then fold the other two down.

Set the box on your table and reach inside to push the flaps together more, if you like.

Oh so fun!!

Now to die cut the butterfly!!!  Like the other box I created previously, I decided to grab some glittery paper!!  As I love glitter!!

Die cut each butterfly piece once!

Use your scissors to slightly cut the slit open on each butterfly.

Add glue to the glittery side (the pretty side) of the rounded part of the die-cut butterfly. Adhere it to the inside of the box flap, lining it up so the slit is just above the top of the flap.

Do the same to the second wing, attaching it to the flap across from the flap the first butterfly is adhered to.

Hold the box so the front is facing you.   Then carefully run the back and front flaps (the ones without butterflies) in your fingers to give them a slight rounded bend, being careful not to crease the paper.

Then fold in the rounded back flap first, then the front.
Piece together the butterfly flaps, by bringing the left wing/flap above the right wing/flap and sliding the two slits into each other.
The finished top:
So fun!  So glittery!!  I love it!!
The box is perfect just the way it is, but if you’d like, you can add embellishments, images and/or sentiments to it!
Which is what I did!  I ended up die-cutting the banner from the Cool Tag Two Patterns Die Set.  I then stamped the ‘you make me smile’ sentiment from the Garden Phoebe stamp set in the center.
I added a Gumdrop on each side of the sentiment!!
A cute package, sure to put a smile on someone’s face!!
I hope I have inspired you to create some of your own Butterfly Boxes!!  They are so easy to create with this die!!!
Have a lovely day!!
~ Kendra
FacebookPinterestTwitterEmail

Winter Wonderland Showcase – Day 11 with Kendra – Comment to Win

Welcome to day 11 of Your Next Stamp’s Winter Wonderland Designer Showcase.  

winterwonderlandgraphic

Over 12 days the design team and guests are sharing winter filled creations.  Plus, we are giving away a prize each day!  One random comment left on each day’s  post will be selected to win a $10.00 gift certificate to the YNS Store.  Leave a comment by 12/25 at midnight EST for a chance to win; all winners will be announced on 12/27. 

It is Kendra’s turn today and she is sharing how to create a shaker card using the Circle Panel Die.


I absolutely LOVE the Circle Panel Die!!

It is so much fun to work with!!  I got a bunch of awesome comments on the first cared I created using it and several crafty friends asking how I made it!  So I thought I would share how I create the a shaker card using this fun die!  If you want to take a look at my first card you can find it here.

I started by running the die and a piece of white card stock through my Big Shot.

I carefully removed the die and die cut piece, as I didn’t want all the negative pieces to fall out; I wanted some to stay in place.

I laid the die cut piece on my work station with the front side down and began to figure out which ones I was keeping white (I ran tape across to keep adhered to the die cut), which ones would be replaced with pattern paper (removed the circle completely) and which ones would become shaker parts (left in place for now and marked those with a black dot).

Once I had it all figured out, I ran tape in all areas possible, being sure not to add tape to any of the circles with black dots.  I then added a piece of acetate across the entire back of this layer.

Next, I flipped the layer over to view the front.

 I wanted to add a sentiment, along with some snowflakes, before I started adding the foam for the shaker windows.

I decided to stamp the “Let it Snow” sentiment from the adorable Little Darling Winter stamp set in Black Olive Ink.  With the 12″ of snow we are currently getting, I found it very fitting!  I also decided to add a few of the tiny snowflakes from the set as well!

Before turning back around, I decided to add my pattern pieces of paper!  I used the super cute new Winter Plaids paper pad!!

You can cut your pattern paper into little strips, then place them exactly where you need the die cut circles!  This helps to not waste the entire piece of pattern paper.

Once you have all your pieces cut you can either add tape or glue to the back of each piece and put them back in place on the acetate!

I then flipped from front to back to figure which circles I needed to remove for my shaker portion (pieces with the black dot)!  Once they are all removed, you are then ready to add some fun to your card!

I used foam 3D tape to create each of the individual shaker windows. I also added some extra around the card, so that the entire card would have even dimension once I added the layer to my card base.

So much fun!!!

Here is my finished card:

I love all the little shaker windows, combined with the pattern paper!  So fun!!

Hope you have a lovely holiday season!!

~ Kendra


FacebookPinterestTwitterEmail

Stand-Up Card

Hello Your Next Stamp Fans!!

Kendra here, from Luv 2 Scrap N’ Make Cards to share another tutorial with you using the Half Circle Flip Die Set!

If you missed me sharing how to create a fun Flip-It card using the set, you can find it here.

Today I am sharing an alternate use for it!  You can also use this die set to create a fun stand-up cards as well!!

Once again I started by creating my A2 card base. (8 1/2″ x  5 1/2″) Scored at 4 1/4″.

Lay down card base and find the center of the left half of the card base, which is 2 1/8″.

2

Similar to the Flip-It card, I decided to use the larger of the two dies from the Half Circle Flip Die Set.  As I really like that you can use the Circles with Stitching and Piercing Marks Die Set with it.

This is where the tutorial slightly changes from the Flip-It, when you place your cardstock in your die cutting machine, place the die just over the marks you created, with the circle facing to the right!

1

Run the die through your machine.

Once you take it out, fold the left side over to the right on the score line, like a normal card.

The you will fold along the score lines the die created, folding the piece so that is folds inside.  So that the circle will “stand up”!  Like this….

2

Now you are ready to decorate your fun card!!

Here is my finished card:

yns_ksand_dec6

I used the super adorable new Christmas Delivery stamp for my main image!!  I just love this sweet image!

I added some Gumdrops to the “inside” of the card, so that it would help keep the “stand-up” portion up.

I stamped the “Have yourself a Merry Little Christmas” to the inside of my card, which is part of the Santa’s Magical Sleigh stamp set!

yns_ksand_dec6-2

So super fun and easy to create!  Something a little different then the traditional card!

You can view all the amazing products from YNS here!

Have a lovely day!

Save

FacebookPinterestTwitterEmail

Flip-It Fun Tutorial

Hello Your Next Stamp Fans!!

Kendra here, from Luv 2 Scrap N’ Make Cards to share with you how to create the fun “Flip-It” Card with our Half Circle Flip Die Set!

In my opinion this is a must have die!  It really creates a fun card!

It may look a little intimidating at first! Which is why I have created a tutorial for you to make it easy!

Just to let you know, I am also working on a second part to this series!!  First I wanted to share how to create a Flip-It card!  My next tutorial I am going to share another fun card design to change it up a little!  Another use out of this awesome die!!

Here is a look at a few supplies I quickly grabbed to get me started:

1

Start by creating a A2 Card base (8 1/2″ x  5 1/2″), scored at 4 1/4″.

I decided I was going to use the larger of the two dies from the Half Circle Flip Die Set to create this Flip-it card!!  As my sentiment and image I want to work with will work best with this size!  I’ve also used the awesome Circles with Stitching and Piercing Marks Die Set!  As these circles work so well together with the Half Circle Flip Die Set!

Lay down card base and find the center of the left half of the card base, which is 2 1/8″.

2

Place the card base and die in your die cutting machine.  Place the die just over the marks you created, with the circle facing to the left.  Position the die evenly from top to bottom as well, unless you want the circle position more to the top or bottom.  I am trying to make it as centered as possible.   Feel free to use a little painter’s tape or post-it note to keep the die in place. I have magnetic platforms, so I normally don’t use them unless I think I need to.

3

You are then ready to run in through your machine.  So exciting!!

It will look like this:

4

Now fold along the center score line, just like it was a normal card.

5

Lastly carefully fold the right  most section over to the left along the score lines the die created!  Should look like this:

6

YAY!!  You just created a Flip-It Card base!  How exciting and so much fun!

The Half Circle Flip Die Set really is great for making creating this card design so fun and easy!!

You are now able to embellish the card to your liking!!

Here is my finished card:

flip-itplane

How fun!!  I used the adorable Just Plane Amazing stamp set for the sentiment and plane!!  As well as the coordinating Just Plane Amazing Die Set to die cut the plane, in which I then used pop-dots to adhere to the circle.

To get the striped piece of paper, I simple ran the die through my die cutting machine on the pattern paper, I then trimmed three of the edges slightly (but did not trim anything on the right side)!

Here’s a glance at my in process work of creating the clouds on my die cut!

7

I used the Puffy Cloud Border Die Set and die cut one of the clouds to use as a mask.   I then used the Blueberry Breeze to add ink to the circle in circular motions.  I moved the mask a few times.  I really like how it turned out!!

Opened up:

flip-itplane2

On the inside I stamped two clouds also from the Just Plane Amazing stamp set and also added the large “Happy” in Holly Berry Red Ink and “birthday” in Black Olive Ink from the awesome Happy Everything stamp set!!

What a fun design!!

I finished off this card by adding some lovely Gumdrops!!  I just love those embellishments!!

I created this card when the die was first released:

This card used the smaller of the two dies from the Half Circle Flip Die Set!

I hope I have helped you see how fun and easy it is to use this die!!  You’ll love it!!

Happy Crafting!!!

FacebookPinterestTwitterEmail

© 2024 Your Next Stamp. All Rights Reserved.