Getting Organized Part 8 with Peggy

Hey everyone!  Peggy here for the final installment of our Getting Crafty and Organized series here at YNS!  I have loved taking a peek into everyone’s rooms over the last 2 months and getting new storage ideas and inspiration!

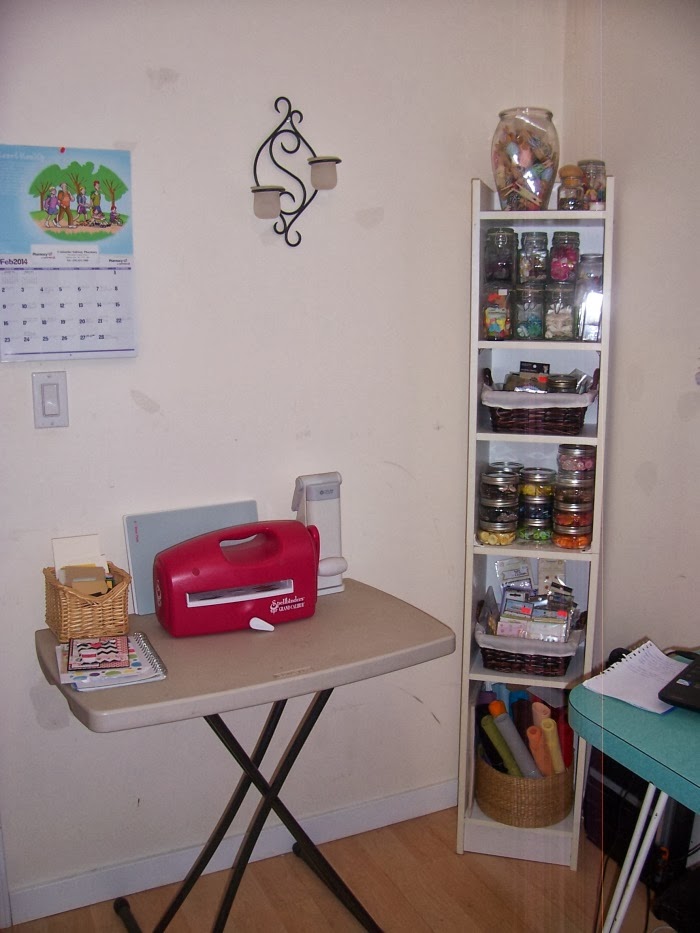
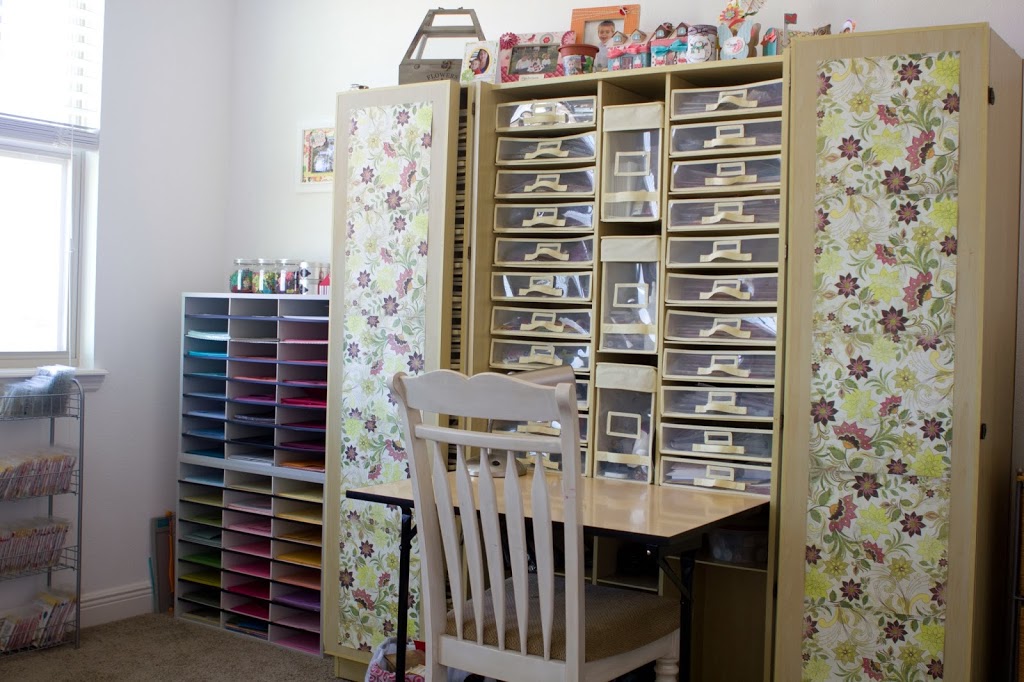
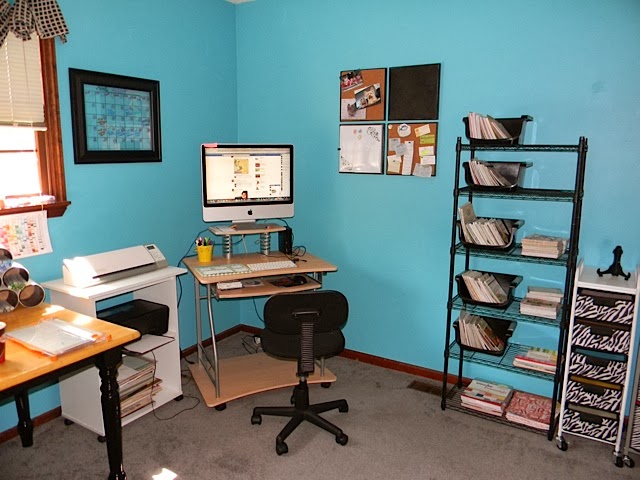
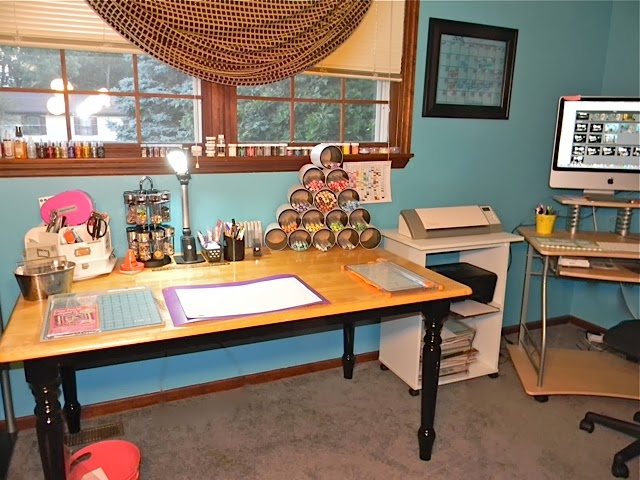
Okay, lets get started! This is the view of my room from the door, you can see my work space as well as sewing machine, Cuttlebug and box of patterned paper that I want to use for upcoming projects.

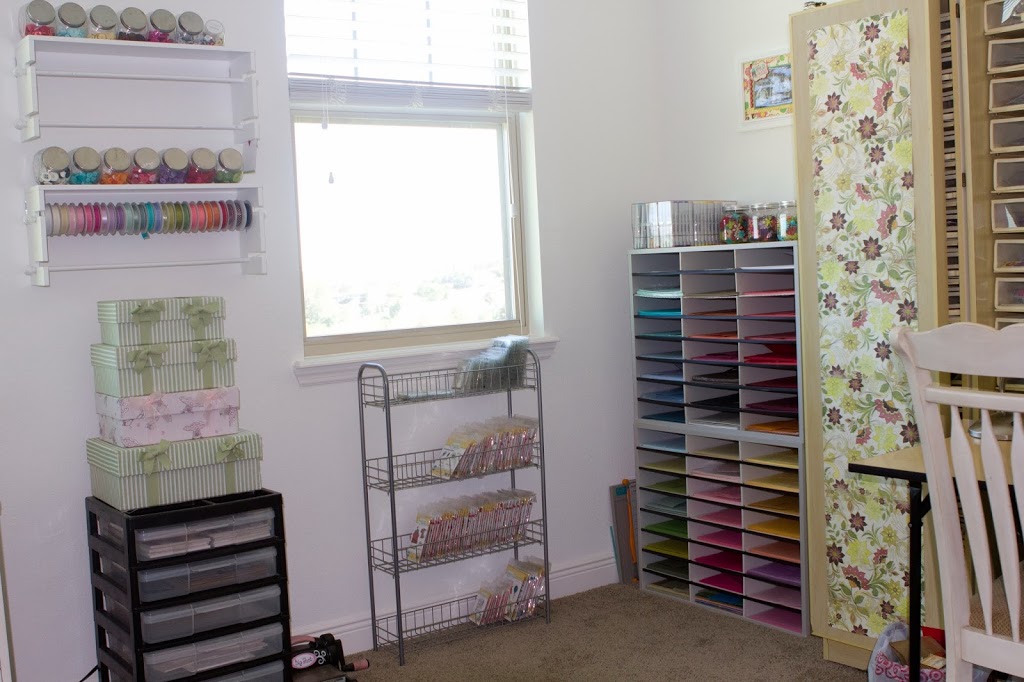
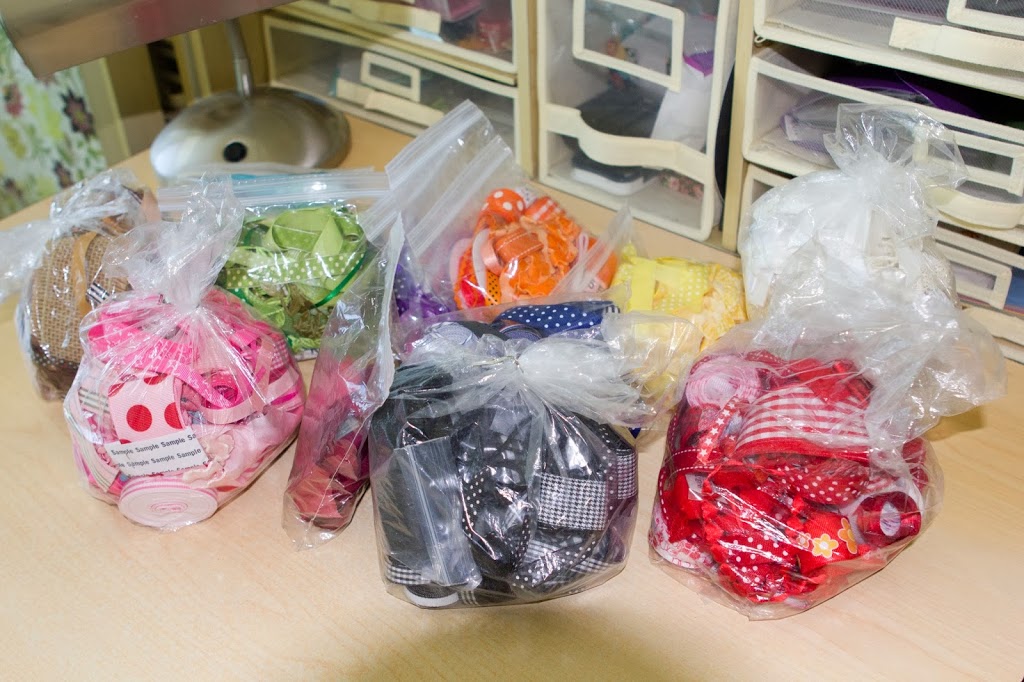
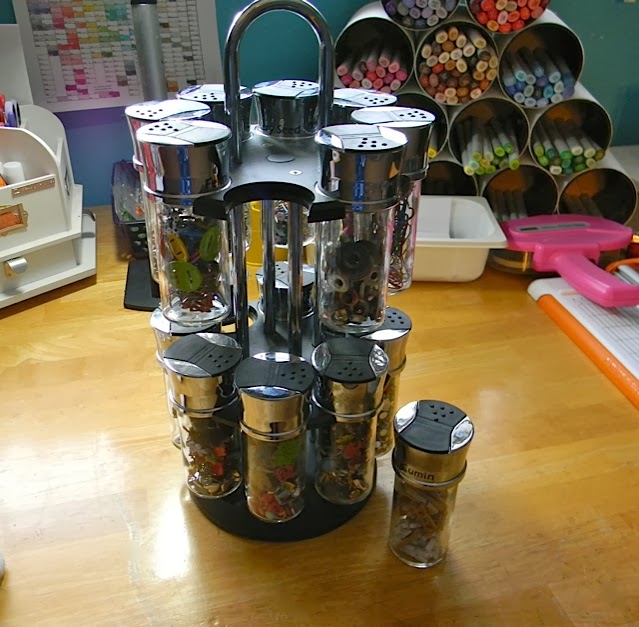
To the left of my desk is were I store all of my embellishments, twine and felt. I love this shelf!  There is also my die cutting area, where I keep my Grand Calibur.

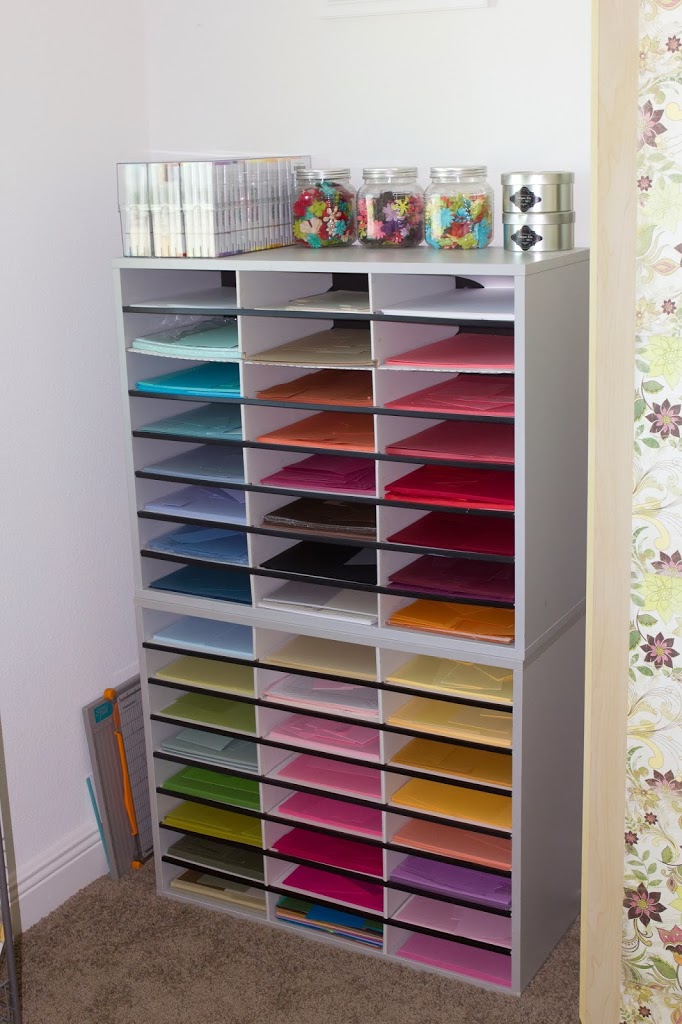
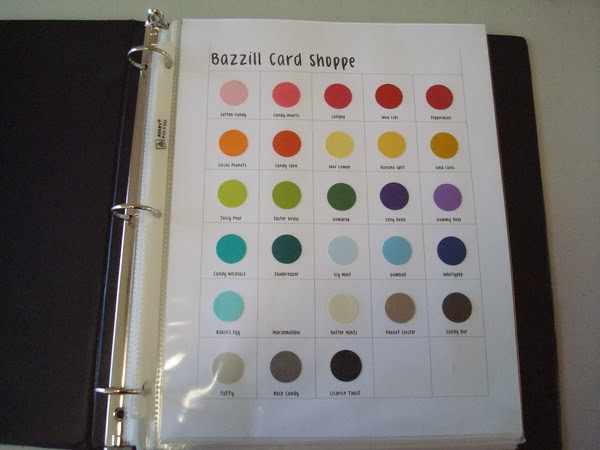
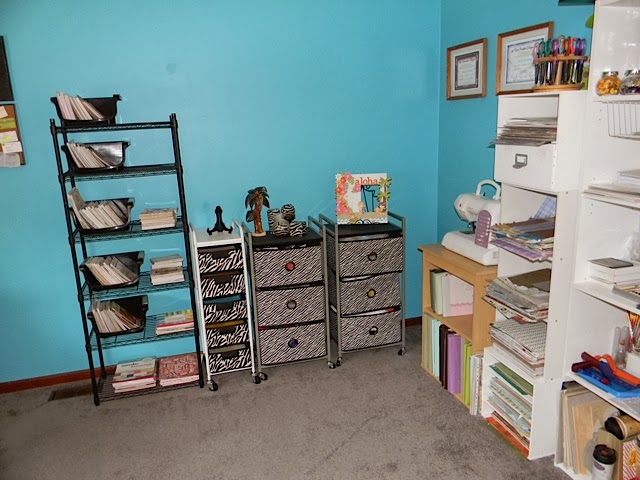
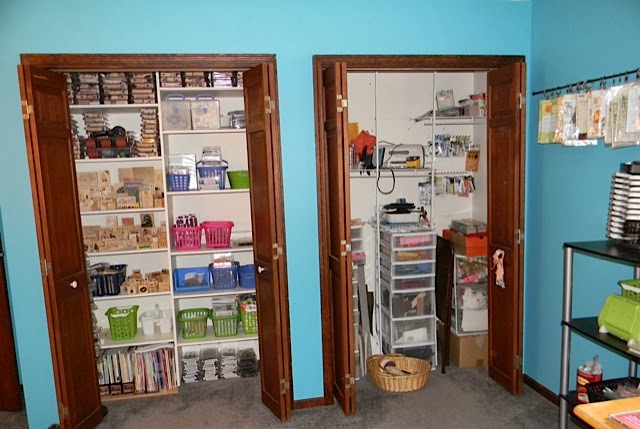
To the right of my desk is where I keep all of my patterned papers and cardstock as well as stickles on the top shelf.

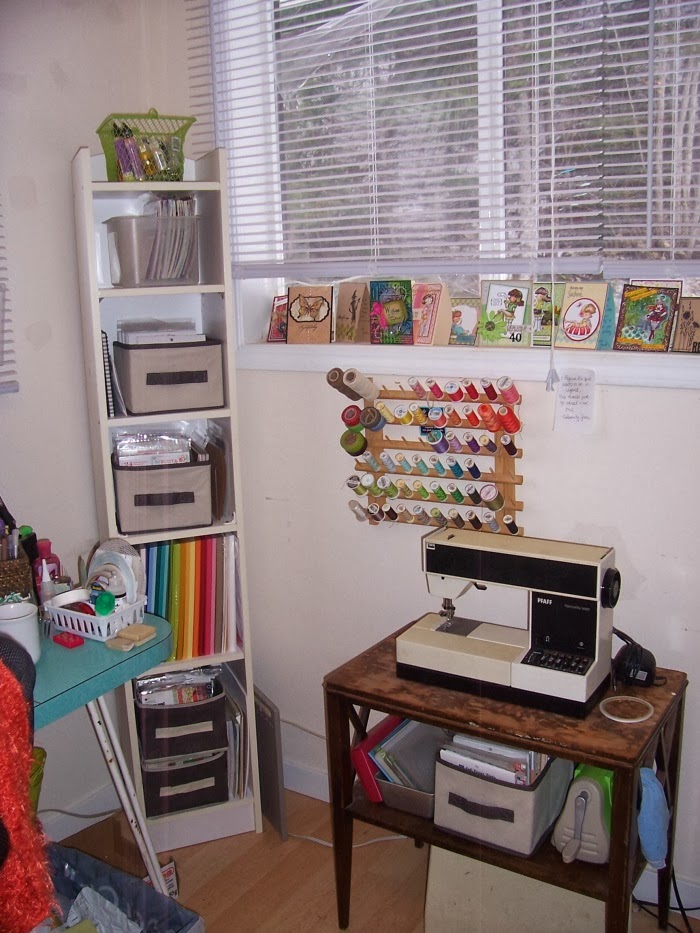
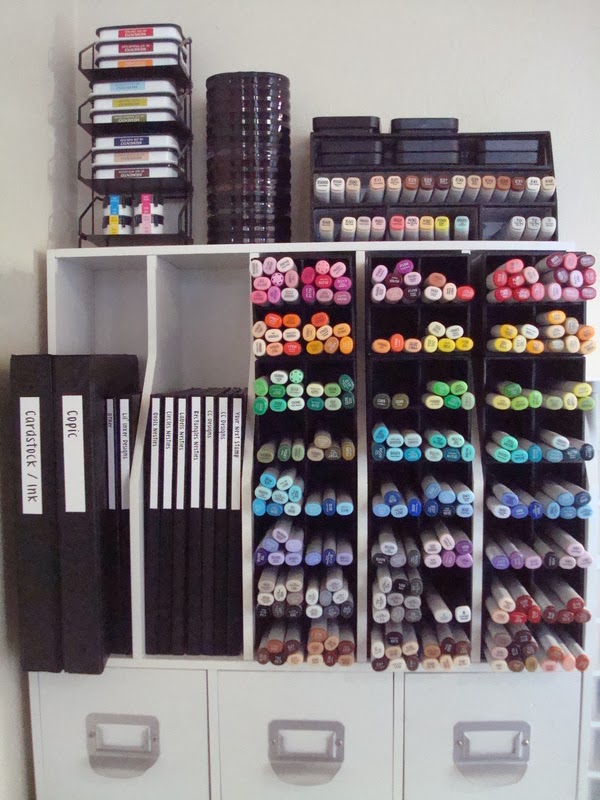
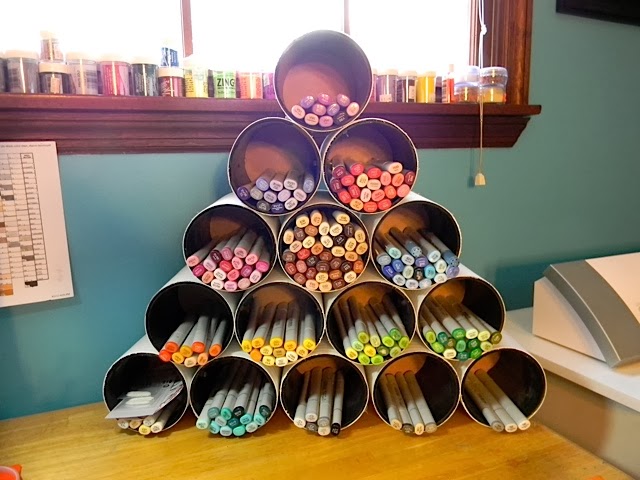
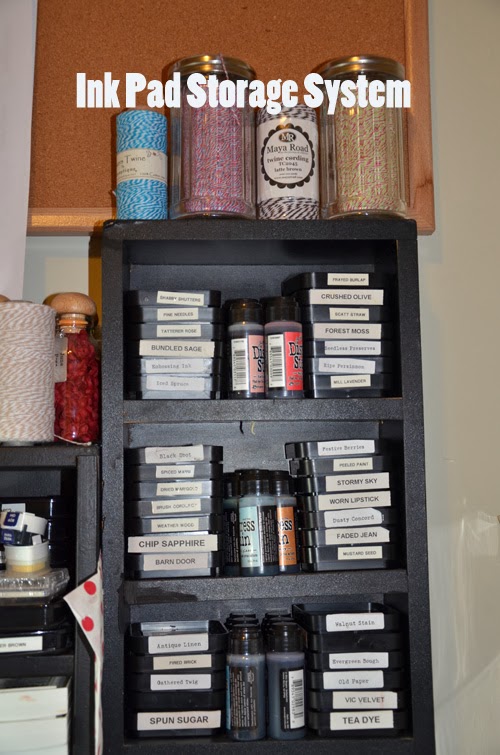
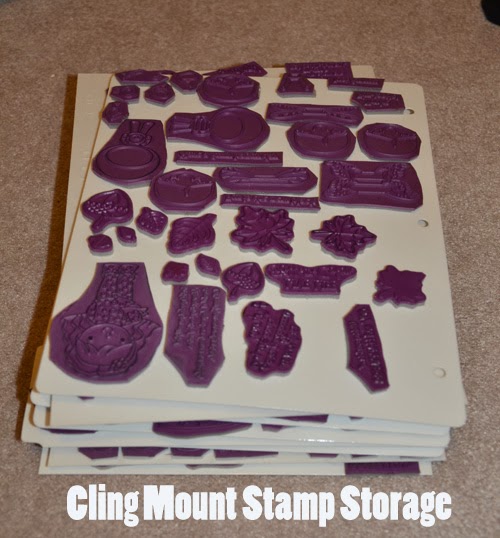
Behind my desk I have a wall of shelves that hold all of my stamps, dies and coloring mediums. The cupboard right beside it holds extra adhesives, glitter, re-inkers,envelopes and that sort of stuff.

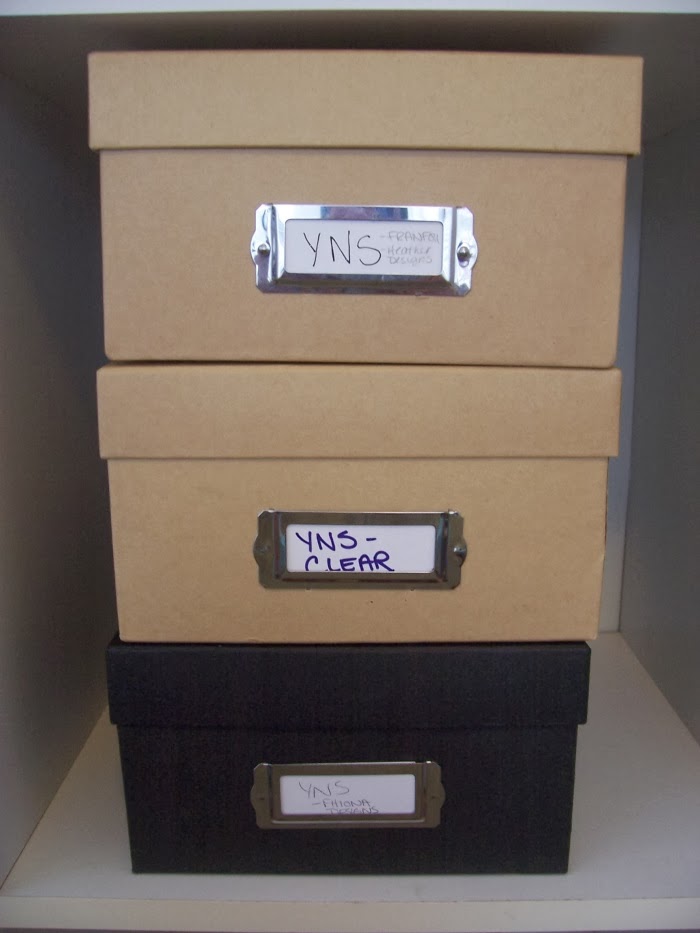
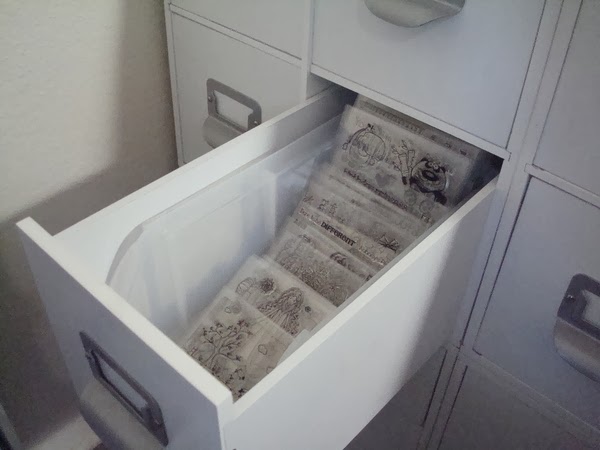
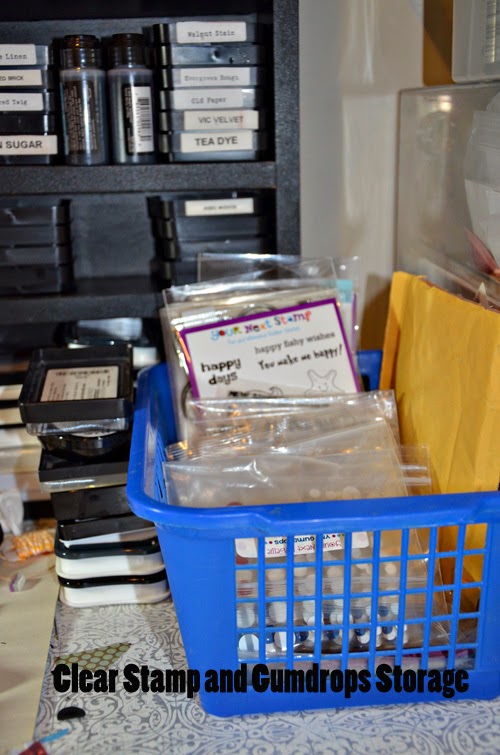
Now, onto my stamps!  I like to keep all of my YNS stamps in photo boxes sorted by designer.

And inside one of the boxes…

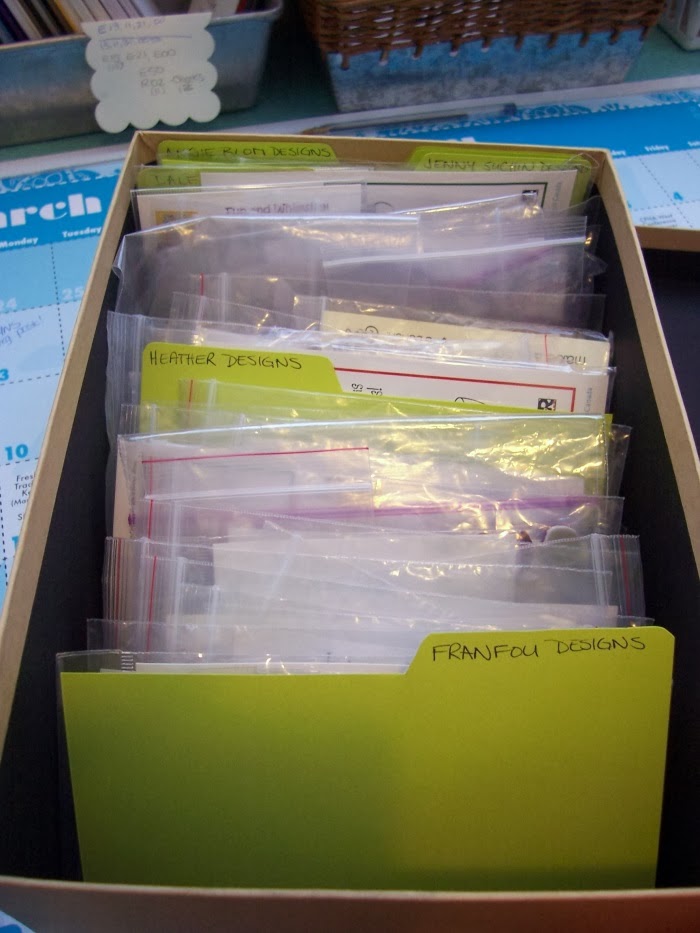
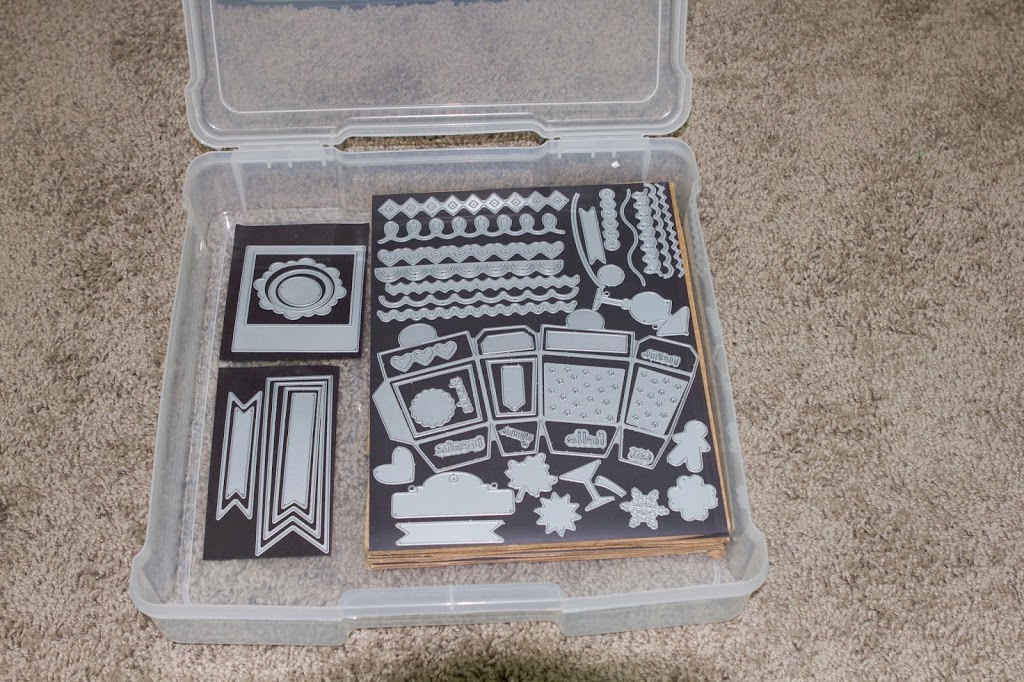
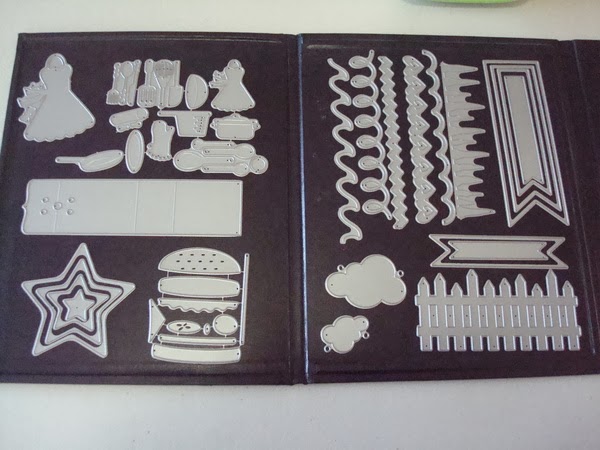
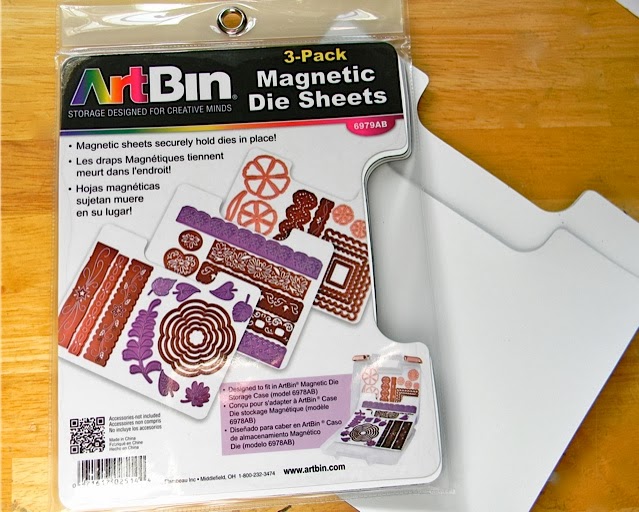
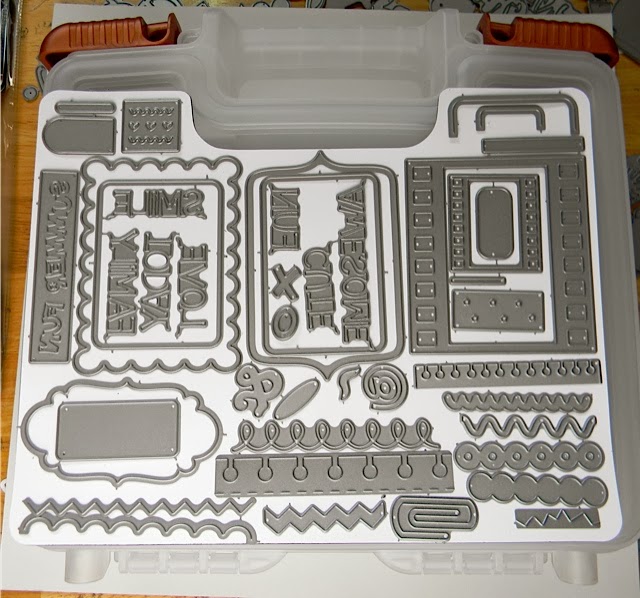
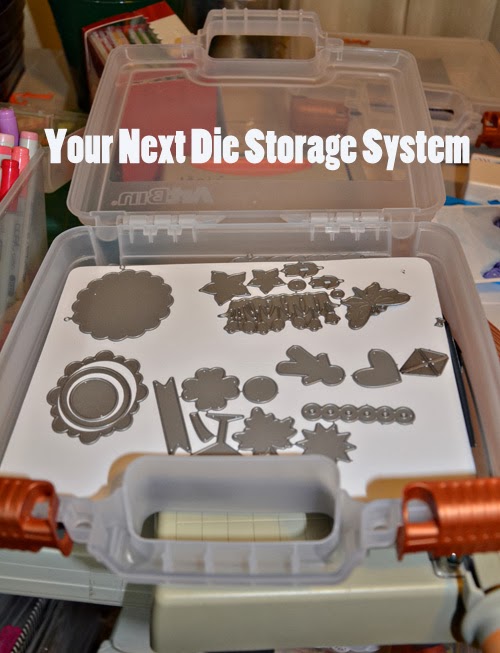
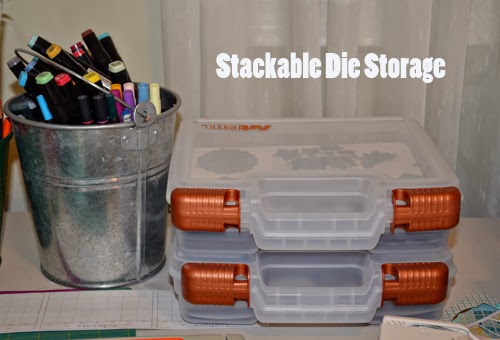
Next up are all of my YNS dies!  I keep them separate from all of my other dies mostly because I like to keep like things together and also because I grab them the most so it is handy to have them all in the same place!

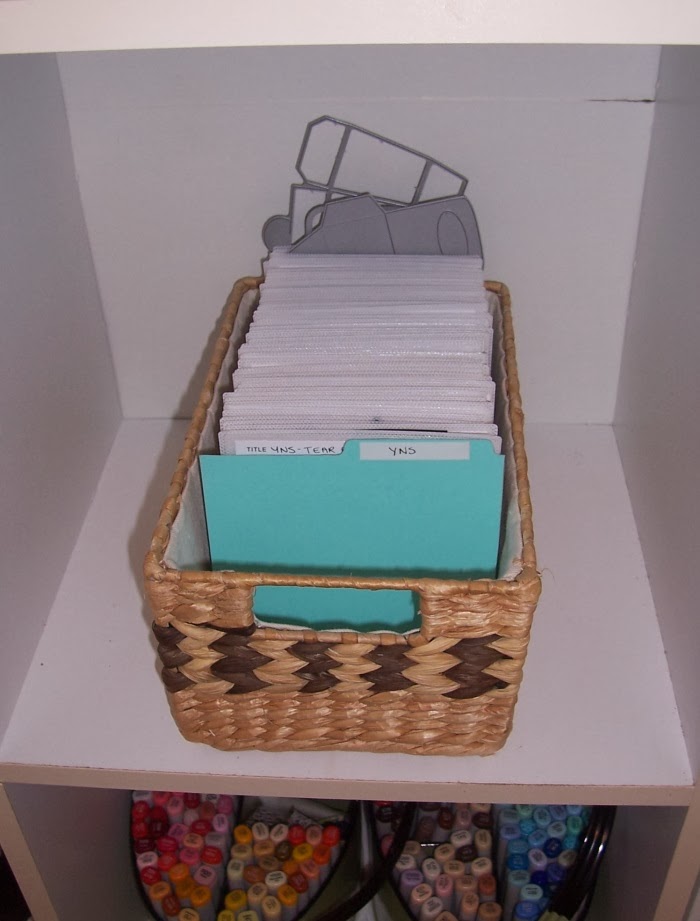
I picked up a bunch of CD sleeves at Staples and sheets of magnet to store and organize them.

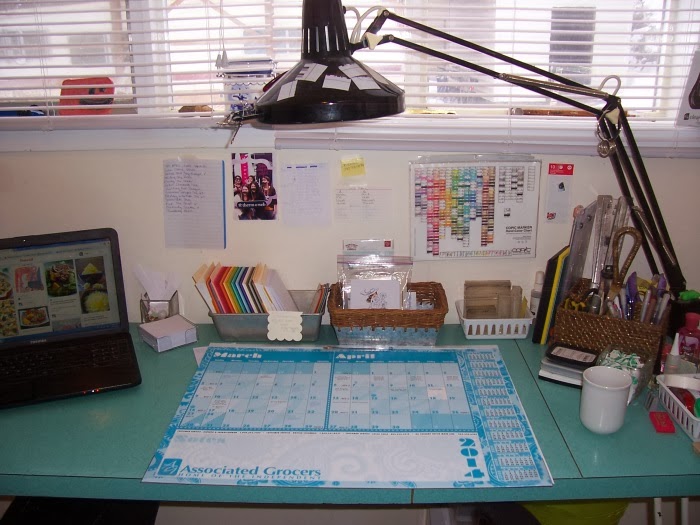
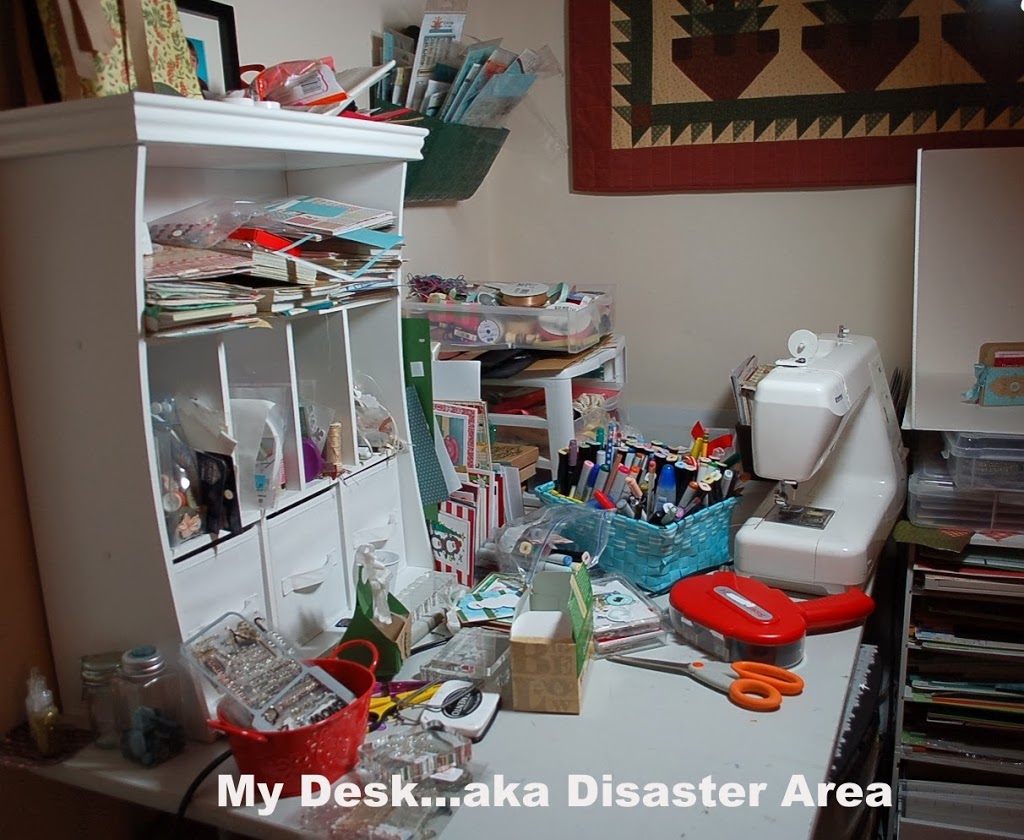
Finally we have my desk, normally it is NOT this tidy and clean.  If you were to just show up you would find a mountain of stamps and papers and embellishments with a 6×6 area for me to work!  On my desk I keep my most reached for tools, adhesives, clear stamp blocks, pre-cut cardstock and current DT work.

Well, that is all for my crafty space and how I like to store all of my YNS stamps and dies!  I hope everyone has enjoyed this series from the design team as much as I have!

FacebookPinterestTwitterEmail

Getting Organized Part 6 with Kerri


Hello!  Kerri here with a peek at my crafty space:)  We just moved into our house about 6 months ago, and haven’t really had a chance to “decorate” this room so it’s still a little boring and kind of blah.  It is clean and somewhat organized though, which is what I need in order to  be creative.  I’m like Laura, and have to put everything back in it’s place between projects LOL!

This space also acts as an extra sleeping area.  We usually have guests sleep in my daughter’s room since she has a queen bed and her own bathroom.  She sleeps in here in her old bed when that happens.

My biggest organizational tool is my Scrap Box!  I have had this for several years and absolutely love it!!!  It holds so many of my stamp supplies and everything is well within reach!

Beside my Scrap Box is some shelving at got at Staples or Office Depot-one of those.  I use it to hold my cardstock.  I just recently bought that little cart at Home Goods for $16.00.  It’s perfect for holding my YNS clear stamp sets and my Taylored Expressions sets!
You can see on top of the shelves I have my Copics.  I just grab them and put them on my desk when I’m coloring an image.
I also just recently tried this method for storing my dies.  I bought some printable magnet sheets and backed them with cardboard so they are not flimsy.  I think it’s working out pretty well:)
I also store my ribbon that is not on spools in plastic bags by color.  This is quick and easy, so whenever I have scraps I just throw it in the coordinating bag:)

My favorite part of my crafty space is my view!

It’s the best view in the house and I just love it!

Thanks for taking time to check out my space!  Have a fabulous day!

Kerri

FacebookPinterestTwitterEmail

Getting Organized – Part 5 with Maureen

It’s time for another installment of our mini-series… Getting Organized!

Hi all!  This is Maureen and welcome to Part 5 of the YNS Getting Organized mini series.  I’m afraid I can’t show you my whole craft room because it’s a disaster area, so I’m just showing pics of a few things that I have organized in my room.  I took a lot of organizing tips from Jennifer McGuire so some of these storage solutions might look familiar if you read her blog.

First up are my YNS dies and clear stamps.    I store them in a clear bin that I got from Amazon: 

 Stamps & Dies

I keep them in clear pockets: the larger size are from Avery Elle and the smaller sizes are from Office Depot  and a cheap version I got from Amazon.  These cheapo ones have a sticky strip on the back to stick the flap on to close them, but I don’t use it – I just tuck the flap inside the pocket.

I just recently got a Label Maker to label my stuff and you can see one of those labels up close here:

Stamps & Dies 2

You can also see from the picture above that I keep the inner packaging that comes with the stamps and dies and put those in the pockets too.  Even though I put the company name on the label, it’s really easy to see as a glance which stamps are which by the packaging.

Before I got my label maker, I made my own labels out of self-adhesive mailing sheets run through my printer.  You can see one of those here:

Stamps & Dies 3

The number tells me how many dies are in the set so I can tell if any are missing. 

Next up I want to share how I store my Tim Holtz Distress Inks:

Distress1

I originally got this tool box from Target, but you can find it at Amazon.  It perfectly fits all 48 colors of Distress Inks, refills and the blending sponges.  Each pad was labeled and then they are stored 2 to each drawer. 

Distress2

Here’s a shot inside the last drawer where you can see how nicely everything fits.  Each pad has a tiny piece of velcro on the bottom to hold its dedicated blending sponge. 

Distress3

And because I love making color charts, I thought I’d share my Distress Ink chart:

Distress48 Chart

Finally, I want to share how I store my Copics.  I shared this on my blog a looooong time ago and now here’s an updated picture:

Copics1

BTW – that funny thing sticking out of the top left is my mini tripod.  It’s where I put my camera to film videos for YNS.  To the left of the racks are all my colors charts – Copics, colored inkpads, Inktense pencils and Prismacolor colored pencils.  The blue package to the right of the racks is baby wipes – I use them to clean my stamps and work surface.

Since that other post, I added 2 more wine racks to keep up with my Copic buying habits and I also store some other things in the cups like my white gel pens, an extra sprayer for my airbrush and anti-static bag for heat embossing.  In between some of the cups I slipped in little tubes (left over from Prima Daisies) to hold Spica glitter pens, my craft knives, extra Copics and my Stamp-A-Majig.  Here’s a closer shot of the tube with my Spicas:

Copics2

The tube just fits right in there and isn’t held onto the racks with anything!

I hope these little organizing tips help and thanks for stopping by!  ~Maureen

FacebookPinterestTwitterEmail

Getting Organized – Part 4 with Laura

It’s time for another installment of our mini-series… Getting Organized!
Laura here today to give you a little tour of my crafty space! I’m not sure I have any great organizational tips for you, but I’ll show you what I do, and maybe you’ll get some new ideas!
Here is a view of my area… I share the space with my husband, half of the room is his home office, and this is my half. My desk is made with the Jetmaxx cubes that Michael’s sells… I’ve had them for years, and they work great for my small space!
(pssst… Wendy… I use the same exact spice rack for storing my embellies!)
I like a neat, tidy work space. Everything has a place, and it goes back to it’s place immediately after each use! I’m a little OCD about it!
I also like for most of my items to be within arms reach, especially the things I use every day.
On the left side of my desk, I have this nifty storage unit. It is made to hold books and magazines, but I found some square pencil cups that fit perfectly in between the dividers… so it became my Copic storage! I have them spread apart so it is easier to grab the colors I need, and since I only have about 275 markers, I have lots of room to grow my collection!
My ink collection is rather small, so it just sits on top of the unit. One of these days I’ll label the sides with the colors…
Also in this unit, I keep my dies. I store them in  QuicKutz Magnetic Storage Binders… these can be a little spendy, but I found a great deal on a used lot!
I don’t have a huge collection of dies, so for the time being I keep them separated by brand. 
Another item in this unit are my swatch books (just 3-ring binders with page protectors). I have one for my Copics, where I keep a Copic swatch sheet, and samples of my favorite color combos, and the other is for my ink and cardstock swatches. I use a lot of Bazzill, so I created a printout in Word, and punched a 1/2″ circle sampler of each color.
I created the same thing for the few brands of inks I collect.
And then we move to the right hand side of my desk…
This tower houses my 6″ paper trimmer, score boards, cutting mats, and all my most used cardstocks… white for Copics, white for card bases, and black, kraft, and ivory. I have a tray for each stack of full sheets, and there is room next to each tray to contain scraps.
And now, onto stamps… my system might not be the best, but it works for me! 
 
All of my cling mount rubber stamps are kept in CD cases in the drawers in my desk. I also separate these by brand.
And last, I have a special drawer just for my YNS Clear Stamps… there is a removable plastic tray in this one, so I can pull it out and flip through the sets to find what I need. 
That’s all! I hope you enjoyed my little tour, and maybe found some helpful info on storing your crafty goods!
 
FacebookPinterestTwitterEmail

Organization

Wendy here with some of my organizational tips…everyone has their own way of keeping organized …here at YNS we decided to share some of ours with you all…

Here is a peek into my craft room with some photos of how I stay organized and how I have re-purposed some everyday non craft related items…I am all about saving my money for the FUN stuff like paper, stamps and embellies….

 My closets are full of dollar store bins and shelving to keep all my stamps on..to the right on this picture you will see  a curtain rod re-purposed to hang stamp sets from

 I have my dies organized using the ArtBin system , the same as Jen showed you last week..it works for me too..everything neat and tidy in 1 tote

A while back I had decided that I no longer wanted my spices taking up counter space so I  packed away my spice rack but when I had seen it re-used  for embellishments I hunted it down in the garage and filled it up …I love having this on my desk handy and full of fun

Next up is my Copic marker cubby…. my husband made this for me out of PVC pipe for next to nothing and I love it…I have close to 200 markers and still have oodles of room for more…plus another row can easily be added anytime …how is that for cost savings
And lastly I thought I would share one of my MOST  treasured  organizational tools…my dry erase calendar that hangs above my computer station…I have a  symbol  and color coded system that works for me and helps me remember what I need to post and when …I certainly wouldn’t be able to keep up my blogging without it…well hopefully I have helped some of you with ideas on how to re-purpose or ways to stay organized

Happy Crafting
Wendy

FacebookPinterestTwitterEmail

Getting Organized – Part 2 with Jen Roach!

It’s time for another Your Next Stamp mini series for …”Getting Organized”!  


Hi!  Jen Roach here and today I’m sharing more organizational tips with you today. Those of you that have seen my craft space know that it’s far from organized but I do have a few things you might find inspirational for your craft space.

First up I’d like to show you two garage sale finds and how I put them to good use in my craft space.  Keep an eye open at your local thrift shops or garage sales for economical ways to organize your craft space!

The first garage sale item is a CD/DVD rack that I bought for $5.  It’s PERFECT for storing 6″ x 6″ paper pads.  Down the right hand side where the CDs racks were I just stacked up some Sizzix dies and miscellaneous stuff and some more pads on top (and yes, I have an addiction to paper LOL!)


Next up is another media rack that I scored for $1.  This one sits on the back of my desk and stores my Distress Ink pads and Distress Stains.  I also have a few miscellaneous ink pads at the bottom.  As you can see I labeled the sides of most of my ink pads so it’s easy to find the colour I need.  I took advantage of the top to store some baker’s twine.  


And now here’s how I organize and store some of my Your Next Stamp items.  I have a dollar store basket on my desk that I keep my clear stamps in.  I also keep any of the new release items I need to work with and any of my YNS embellishments.:

For my YNS Dies, I use the Art Bin system.  It comes with magnetic sheets and they are stackable.  I try to group my dies by theme but truthfully they just end up randomly on the sheets”

Here’s a peek at how they look closed.  I keep them at the back of one of my tables.  You’ll also see I use some buckets to store my pens/markers to the left of the die storage:

And finally today here’s how I store my YNS cling mount stamps.  I use EZ Mount storage panels and then keep them in binders or in stacks in my craft cabinet.  Here’s my daughter modeling a sheet for you:

FacebookPinterestTwitterEmail

Getting Organized – Part One

The Your Next Stamp design team is starting a new mini series for 2014…”Getting Organized”! 


Today I am kicking off the series, with the top ten craft organizing mistakes I make.  Yep, this list is all about what not to do!   I am a “craft after the kids go to sleep” kind of gal.  That means when I am done crafting I am ready for bed and don’t want to take the time to clean up.  That also means my crafting area is typically anything but organized!


1 – Garbage Can – Placing a garbage can right next to the work area is a huge mistake if the desk is covered in piles.  Piles tend to topple and it always seems that the tower falls right into the garbage can.

2 – Ribbon Storage – If the goal is to have a ribbon jumble, then I highly recommend storing spools without securing the loose ends.

3 – Dirty Stamps (part I) – If you like ruining your finished cards, then not cleaning stamps is the way to go.  Ink tends to create a mess and it spreads easily.  It ends up on the work area and inevitably on fingers and then fingers always pick up the just completed card and leave an ink smear – not good!

4 – Dirty Stamps (part II) – Not cleaning stamps can lead to friendship issues.  If dirty stamps are stuck back in their package do not loan these out to friends.  The friend may not know that the stamps still have BLACK ink on them and then when said friend attempts to use their new PINK ink pad the BLACK ink transfers to the PINK ink pad and RUINS IT!!!  If this happens, buy said friend a new PINK ink pad.

5 – Loose Stamps – Leaving stamps out loose on the work area leads to lost stamps.  Acrylic stamps will stick to almost anything, even hair. 

6 – Dies – Loose dies are easily lost too.  I believe mine are hiding with the stamps I have lost.  Fortunately I have not had dies get stuck in my hair, yet.

7 – Glue – When glue does not get put back where it belongs it tends to multiply.  When one goes missing, more is opened and before you know it there are 5 open bottles that take up much needed space. 

8 – Scrap paper – Keeping scraps is a great idea, but there must be a good way to organize them to avoid ending up with a BEAUTIFUL card front that is inadvertently glued on to a card base that has stamping on the back.
 
9 – Cords – For those items that require cords I do not recommend storing the cords away from the items.  It leads to FORGETTING the cords when traveling with the items.  Sooooo sad to pack up the Cricut, paper, stamps, and ink, then arrive and realize that nothing is going to get done because the power cords back at home.

10 – Markers – Not tracking what you already own is costly.  Markers are extremely tempting to buy and without a tracking system in place it is easy to end up with duplicates; duplicate markers and duplicate refills.
 

So what type of organizing mistakes do you make?  I am not an expert when it comes to organization, but hopefully after my teammates share their tips over the coming weeks we will all be closer to conquering our craft areas.

The card I am sharing today is for everyone attempting to organize their craft areas.  

Card Details:   Smiley Happy Critter Crew Set TwoTalk Bubbles Dies, and the sentiments from Celebration Circles and Insta Love.


Good Luck!!!

Smiles,
Julie

FacebookPinterestTwitterEmail

© 2024 Your Next Stamp. All Rights Reserved.