Well, it’s already time for another YNS Fun SUSIE Q-TIP post from me, Susan (susiestampalot). I came up with the idea for this month’s post right after and on the same day I posted last month’s tip/tutorial and I just couldn’t wait to put this together and show ya’ll what I came up with for this month! (making sure it worked in real life as I had imagined it in my head first of course!) I have always loved how Jen, in one of her blog posts, had used the wings from the Dress Up Fhiona die set to make a flower. It inspired this creation. Can you guess what dies I used from Your Next Stamp in a non-traditional way and what I made with them?
If you guessed the Balloon Trio Dies to make that gorgeous flower, you are RIGHT!! You win, so go have a cookie and come back so I can show ya’ll what I did…
Ok, so are you ready? Wipe the crumbs off your face and let’s roll…
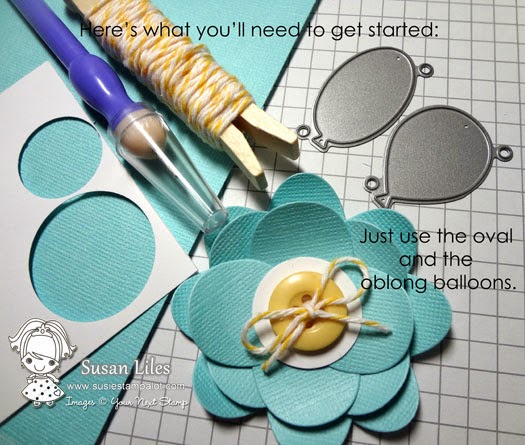
Here’s what you’ll need, plus some adhesive. I used my ATG gun. The circle punches I used on the white were the 1 3/8″ for the base of the flower, and a 1″ for the flower center. The quilling tool won’t be used to quill, but to just bend the petals around the stick part, so it could be a pen or something similar if you wish and the button can be substituted for any type of flower center ya’ll want to use. A big ol’ piece of bling would be fun!
NOTE that you only use the longer oval and oblong balloon dies. The circular balloon gets to sit this one out.

First, using the balloon dies, cut out 8 of each of the two balloon shapes (for a total of 16) and cut the tails off. If you would like more dimension to your new “petals”, slightly bend all of them around the stick part of your quilling tool on the opposite end from where the tail was. I bent mine up a little, but down is ok too, for a different look.
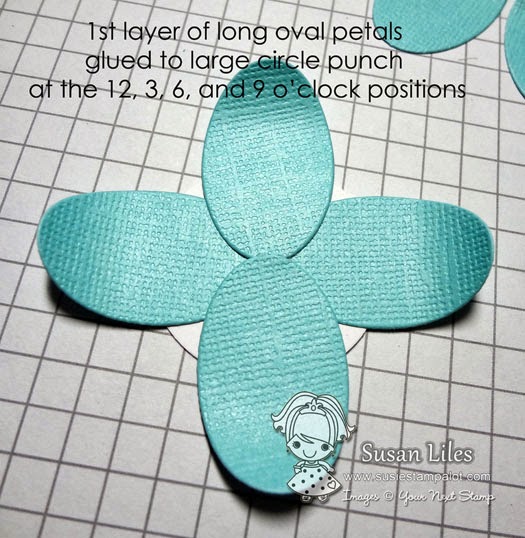
Punch out a large circle with your circle punch (I used 1 3/8″). Using it as a base, adhere 4 of the long oval “petals” to the center of the circle at the 12, 3, 6, and 9 o’clock positions.
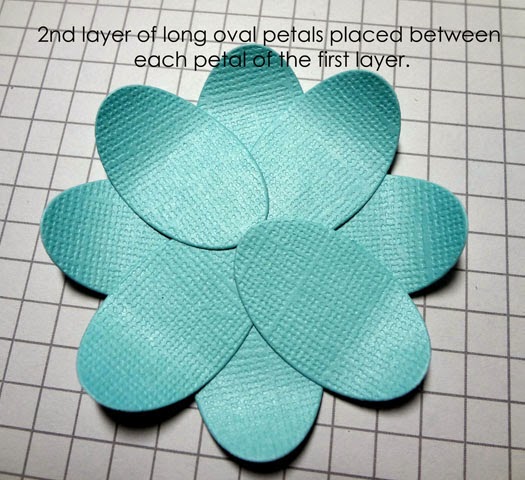
For the second layer, adhere the other 4 long oval petals on top of the first layer, in between each of the already adhered petals from the first layer. (It kind of makes an “X”.)
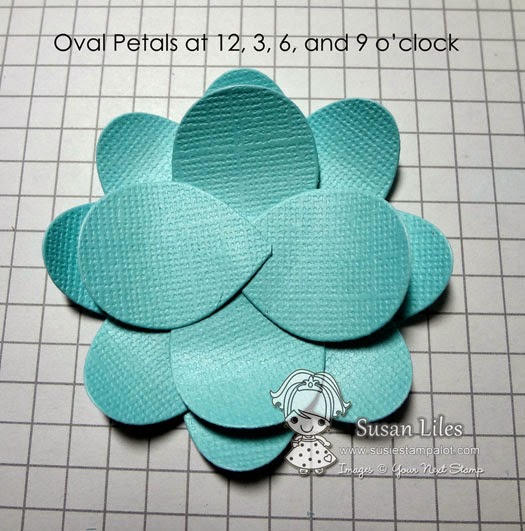
Using the smaller, oblong balloons, start a third layer, again in the 12, 3, 6, and 9 o’clock positions. The smaller petals should be adhered so that it is more of an “inside”, shorter layer and their ends shouldn’t be “even” with the ends of the previous 2 layers. It’s ok if you need to overlap them in the center a bit to make this happen.
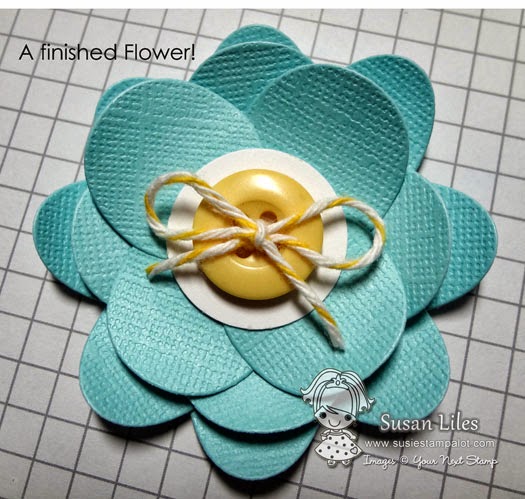
Then adhere the last 4 petals in the same way as you did on the second layer, creating a sort of “X” with the 4th layer of petals. Punch a circle (I used the 1″ punch) from whatever colored cardstock to highlight your flower center. Attach the flower center of choice. (Button with twine here.)
Now comes the REALLY FUN part–using your new handmade flower embellishment that no one will realize you made with BALLOON DIES on a project!
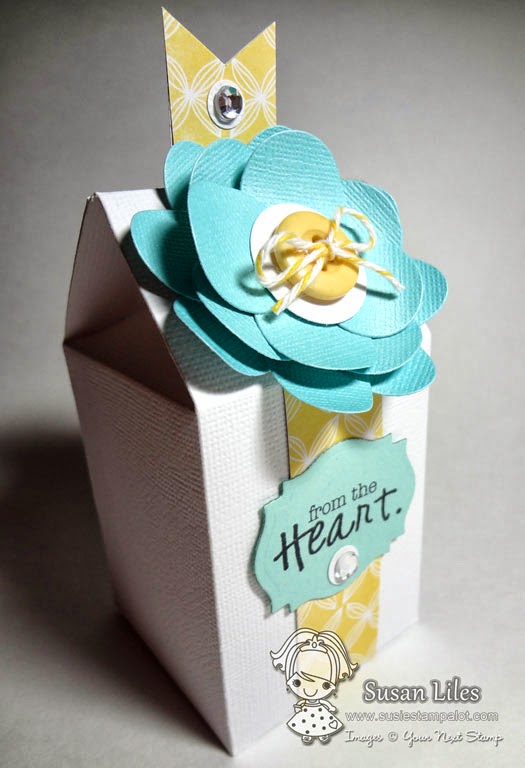
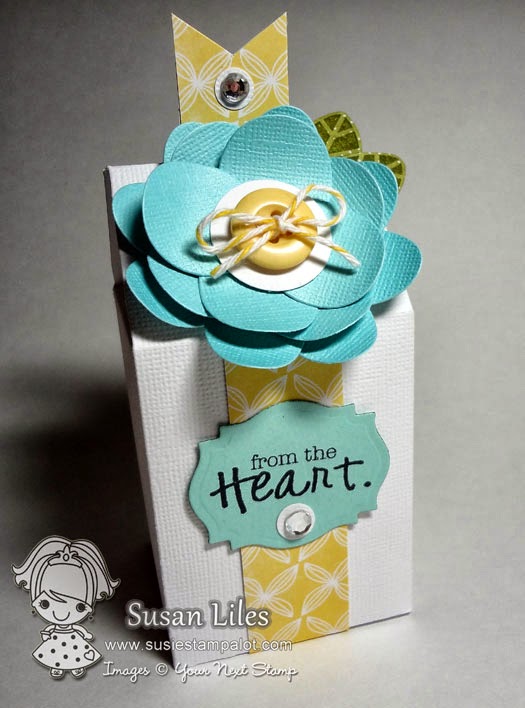
I chose to create a cute gift box using a Milk Carton file I downloaded and cut out with my Cricut. I cut a couple of 1×12″ strips of yellow DP, wrapped them from the bottom to the top and adhered them with Scor-Tape to create a band and flag-ended the top. I stamped the sentiment using the Happiness set. The leaves were stamped with the brand new Sunflower set by Ann Ellis and then cut out.
Winner will be posted on Aug 5th!


Such an awesome idea and very beautiful outcome. Love your flower. I think I’m going to need those balloon dies now 🙂
Great idea for making flowers. Thanks for the tip.
It’s so great when a product has more than one use. Super idea and beautiful flower!
Super cute! I’ve been eye-balling those balloon die-cuts at the store I work at, I think I might need to get them now, hopefully there are some still left!
how cute is that! I love to put flowers on my cards! Thanks for the chance to win!
Great idea! The flower looks great. Love finding new ways to stretch the products that I have!
Thanks for your tutorial and I will try making flowers.
oh Susan another great Susie Q-Tip …thanks for sharing…such helpful hints to get creative with our crafting products, great thinkin outside the box!
what a great way to utilize a die that I know I wouldn’t think to use as a flower…..great job Susie!!
Very pretty and great way to get more use out of the balloon dies!
I never would have thought of that!
Oh this tip is just awesome! I love the versatility of these dies… who would of ever thought balloons would turn into a gorgeous flower???? Amazing! You did an awesome job!
Hugs,
Jo
That’s a geat idea! Another way to get extra uses out of the dies. The flower looks awesome… so does the carton! I love it 🙂
Luvs,
Annie Rose
I LOVE this! I’m always looking for ways to embellish that can be sent through the mail. This would lay quite nicely if I change out the button. Thanks!
Great flower created out of a totally different die… thanks for showing us how to think outside the box. I would love to see how you use border punches in a new way.
Such a cute flower. Who’d have believed it came from a balloon die? Very clever!
Carrie C
Just lovely and so easy to do. Thanks for the tutorial.
Hi Susan! Wow, thank you for sharing this wonderful tip and tutorial! I LOVE when a die has more than one use!! The balloon makes such a pretty flower. I can’t wait to take a look at the other dies and see what possibilities are waiting. This is so inspirational, thank you!
As my dad would say, “I love getting a two-fer.” 🙂 Thanks for the inspiration!
Hi Susan —- what an awesome tip! Some of us who are not as creative to think up these great ideas really do appreciate you! Who would have thought you could use balloon dies to make flowers — that is just so cool!!! I love that we can use these dies for more than just the obvious – thank you for sharing this with us. Do you have any ideas for star dies? I have a few of those and really only use them as stars. Thank you.
Aack!! Sus, you amaze me and entertain like no other! Awesome tutorial and project!!
What a creative use for those ballon dies – extra cute!
Very pretty. I love using products for other creative projects. This is awesome. TFS
Awesome idea who would of thunk.. I love the idea using dies for different applications than what they were made for. You always have great ideas and I always look forward to your inspiration and tips. Hugs
Love your beautiful flower, such a great idea!