September SUSIE-Q FUN TIP–Spooky Mini Book


Well, it’s September already and time for another SUSIE-Q FUN TIP tutorial from me, Susan (susiestampalot).  Something ya’ll may or may not know about me is that I LOVE to make stuff for Halloween AND I LOVE to make little mini books from unlikely items. 

One thing I know about YA’LL is that ya’ll LOVE to get more use out of your dies and use them in different ways other than the obvious.  With that in mind, how about a little tutorial on how ya’ll can use the POCKET DIE SET and CLIP IT DIE SET for the basic “bones” of a little mini book?  If you’re not so much into the Halloween theme, I hope you glean the info about making the book anyway, and you could decorate it to fit any theme!

Ok, off we go….


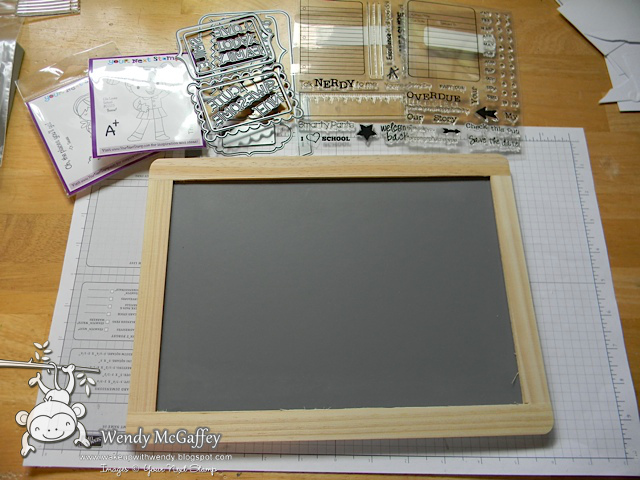
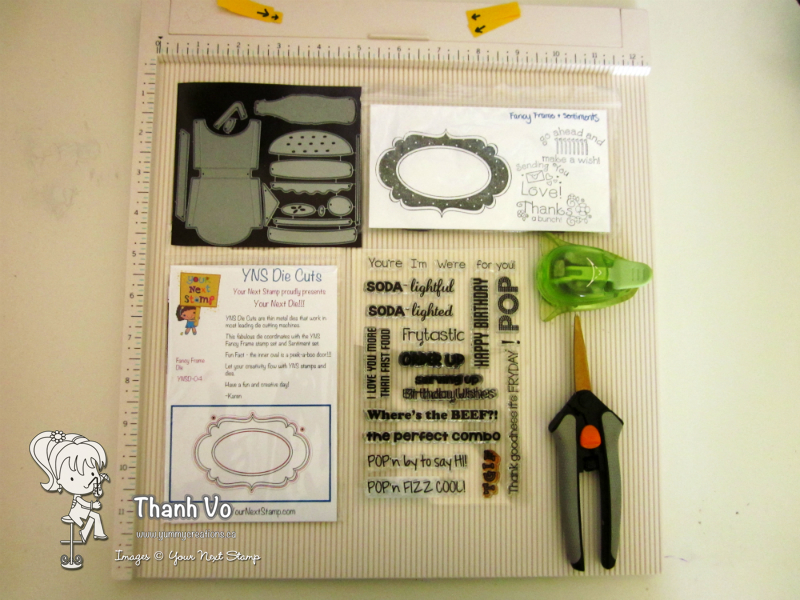
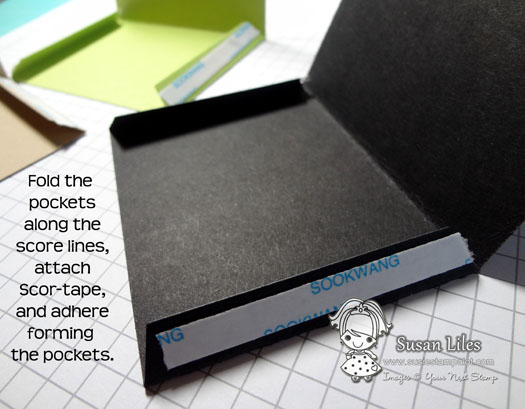
All we need to get the actual book made are the two die sets mentioned above, some cardstock, Scor-tape (or other tacky tape), and 2 binder rings.

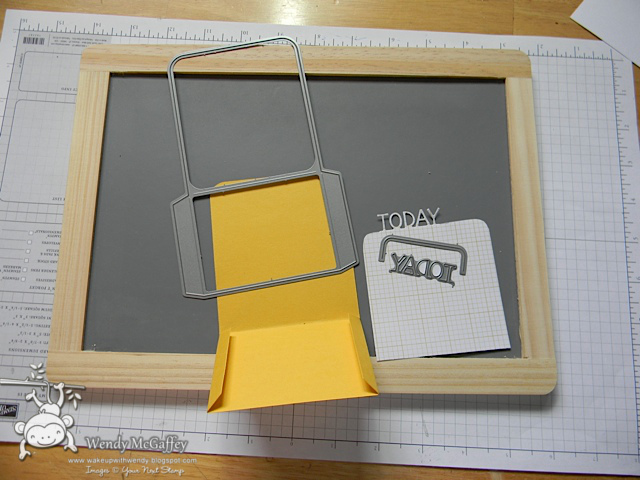
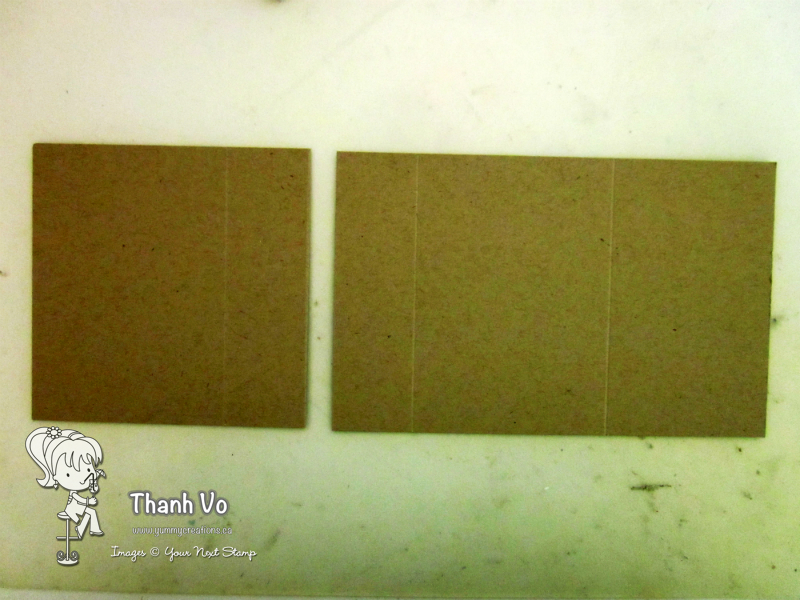
First, die cut the Pocket Die for as many “pages” as you want.  I did 3.  That may not sound like a lot, but once you fill it and decorate it, it’s plenty.  I like big books and I cannot lie.  But it’s up to you, just be sure your binder rings are big enough!  (These look like t-shirts to me at this point…hmmm…another mini book, perhaps?)


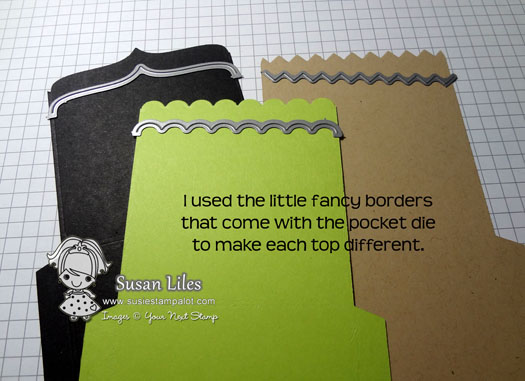
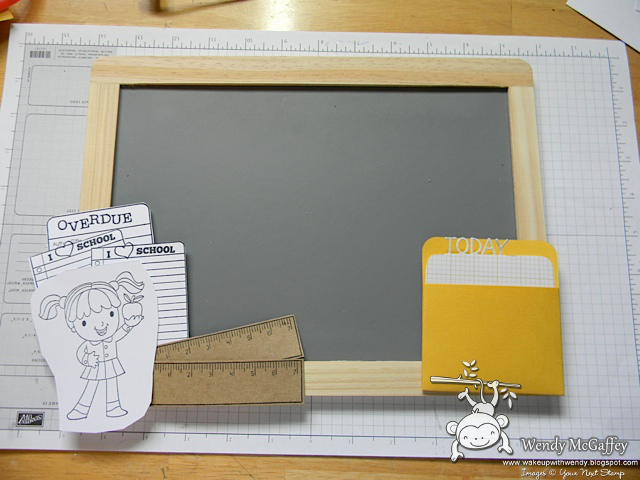
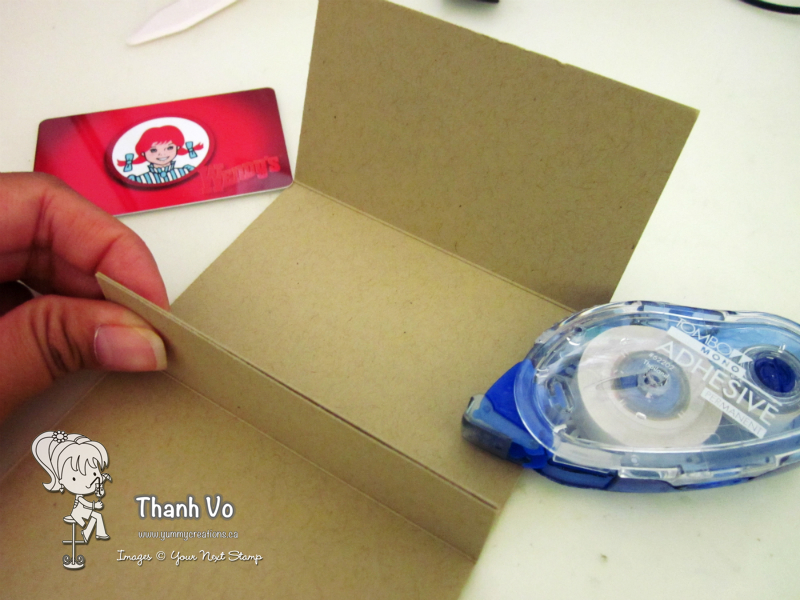
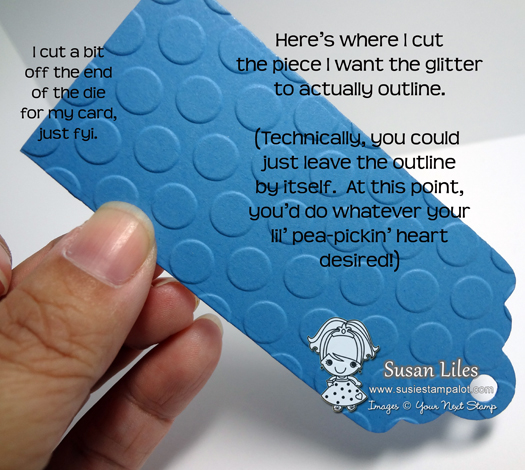
Here’s where it starts getting cute (and FUN)!  Use the border dies that come with the POCKET DIE SET to make interesting edges.  This will be the sides to your pages.  Make them all the same, or change it up!  I like the variation!


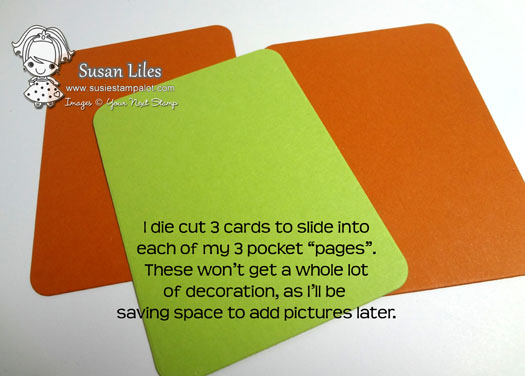
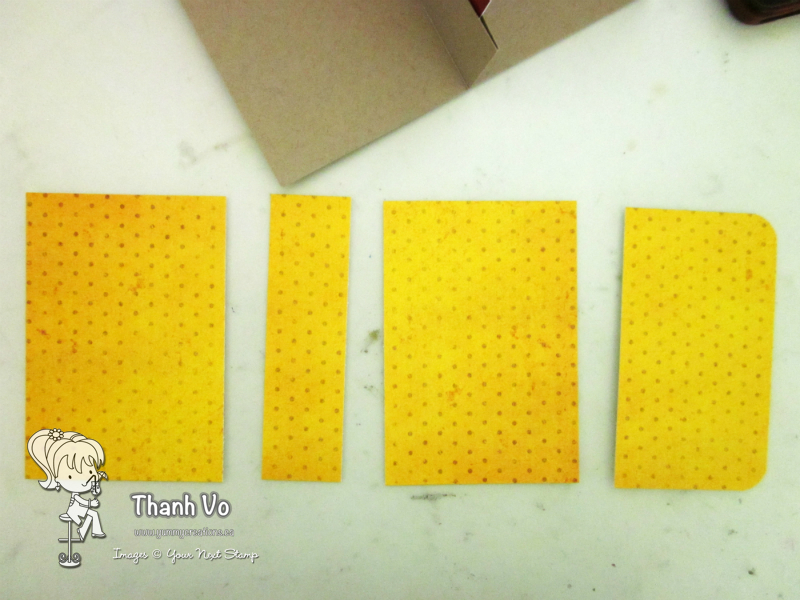
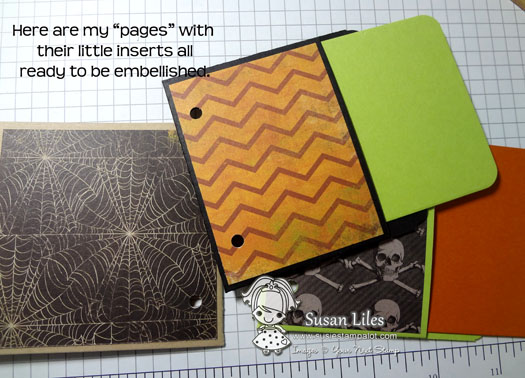
Don’t forget the little card inserts for your pockets.  Cut these to match the number of pages you made using the rectangle from the CLIP IT DIE SET.  Don’t ya’ll love my spoooooky colors? 


I’ve got a plethora of pockets now.


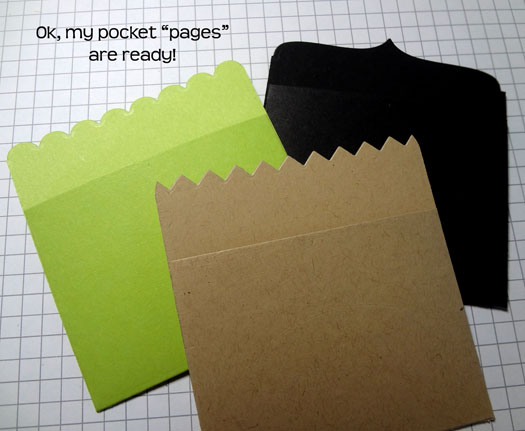
See how cute these are?  I love the little zig-zag on the kraft pocket the best.  He will now be my first page.  He wins.


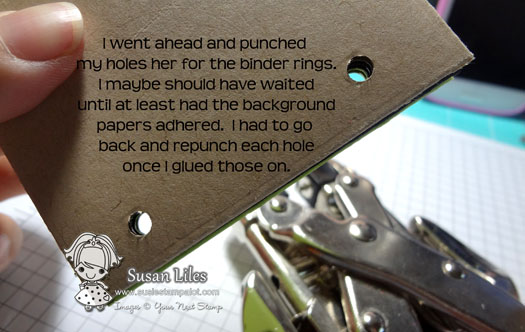
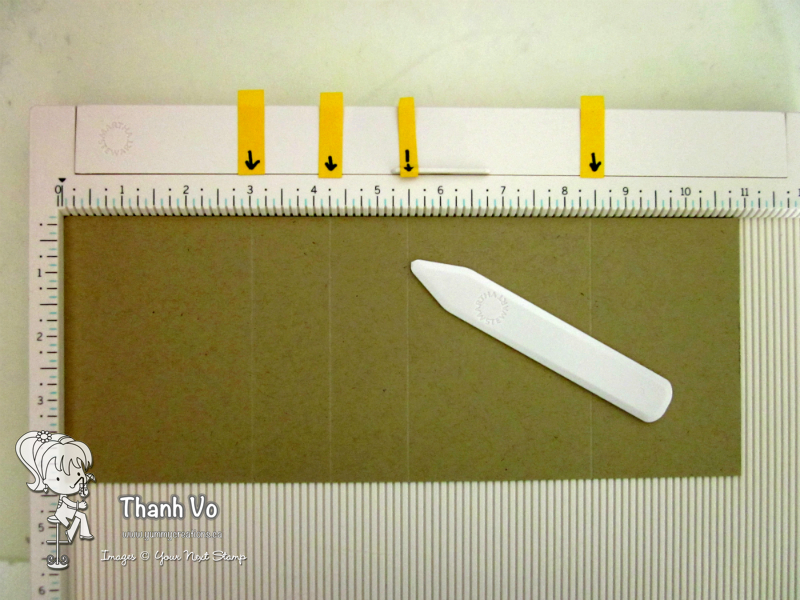
LEAVING THE INSERTS OUT OUT and OUT, stack and line up all three pockets along the straight edges and punch two holes for your binder rings using a Cropodile. I just eyeballed it.  I’m fun like that.  Or depending how strong you are, wait and punch these holes after you have all your background papers adhered. 


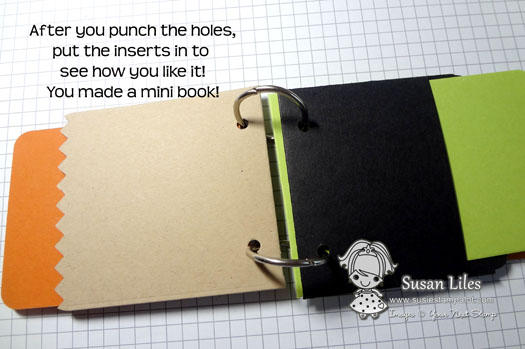
I’m always too impatient and want to put the basic book together just to see how it will look.  This is when I decided what pages would go in what order and what color inserts I wanted in each to make it most cohesive.  Then I took it all back apart to finish the decorating.  It’s just easier.

So that’s basically how the book comes together!  
Now on to the finishing touches…


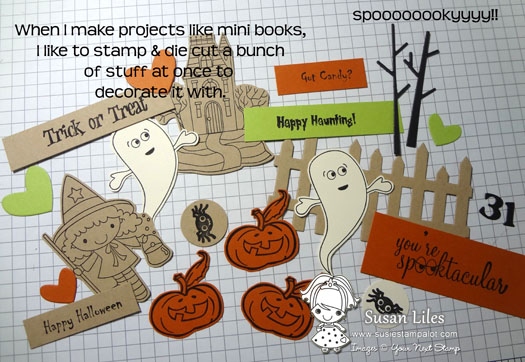
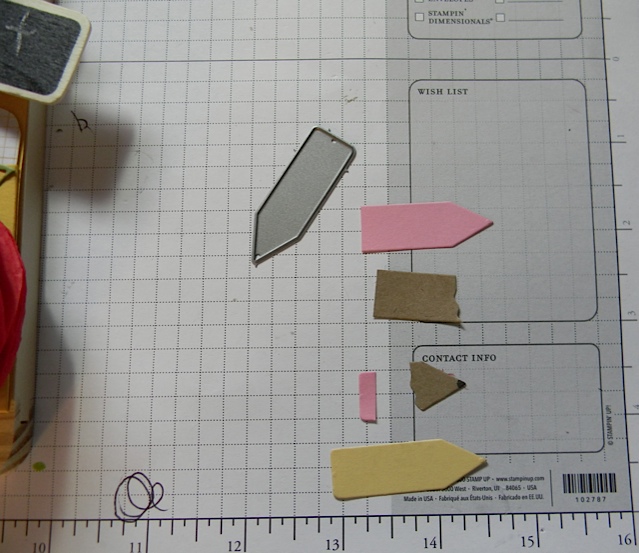
Now is when the magic starts to happen.  I wanted to be able to pick and choose what to use on each page, so I just premade a bunch of stamped images and sentiments, and die cut a bunch of doodads from various YOUR NEXT STAMP Halloween stamp sets and dies.  Here’s a few links to some of what I used:

Spooktacular (ghost and sentiment)
Trick or Treat (pumpkin and sentiment)
Happy Haunting (haunted house and sentiment) 
Then I went on and adhered the papers to each of the pockets on the fronts and backs.  
Front measurement:  2 3/8 X 3 1/8
Back measurement:  3 1/8 X 3 1/8
Don’t forget to re-punch your holes as you do each side of your pockets if you already punched them.
Then I went to town and fixed up my book using just about ALL of the stamped stuff I made and a few other embellishments from my stash!  This is the front cover.
Here are the card inserts, ready for pictures!


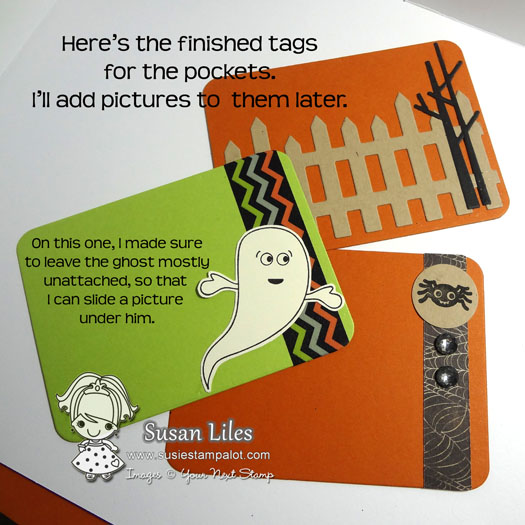
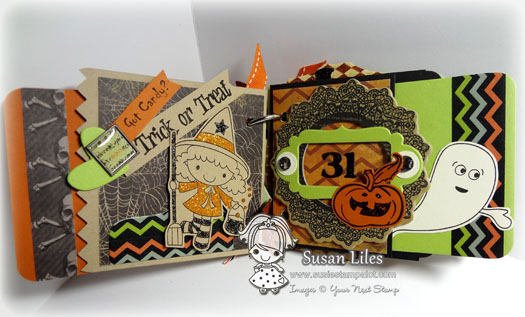
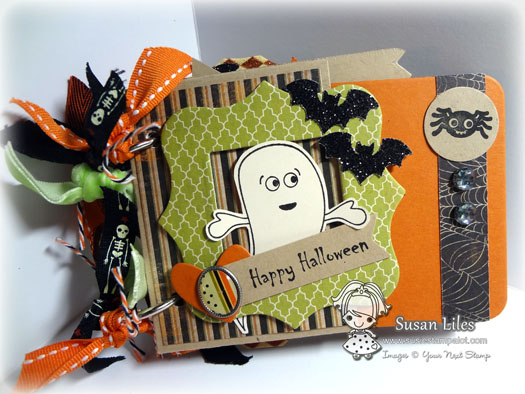
The finished pages, 2 and 3 (if you count the front as page one!).  I “colored” the witch, pumpkins and the haunted house on the next pages with orange and black Stickles in order to keep up my color scheme.  Neat trick. Or is it a treat?


The finished pages, 4 and 5.  The chipboard frames on the cover and each right side page are some I picked up from Michael’s.  This one was a little large, but I still used it, overlapped my binder ring holes and repunched them with my Cropodile.  No problem!


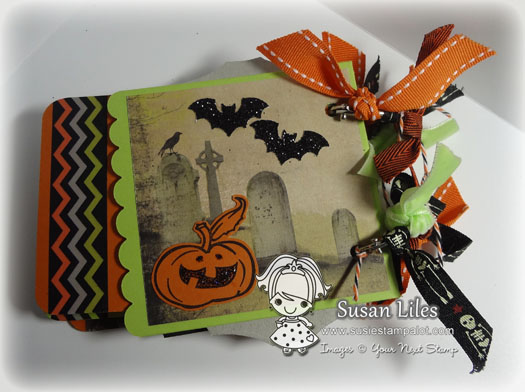
And the back.  I added a ton of ribbons and twine (maybe too many, the pages don’t lay flat when I open the book) to the binder rings for texture.  It looked great with them off as well, but I really wanted to use that skeleton ribbon!  ACK!  It’s so fun and I’ve hoarded it for a long time but thought it was perfect for this!  And before ya’ll ask (because I know ya’ll will), it’s pretty old, from Cosmo Cricket.

Ok, that concluded today’s episode of my SUSIE-Q FUN TIP tutorial.  Did ya’ll like it?  I can’t wait to hear what you think…


Before ya’ll go, I have a little bit of news.  Unfortunately this will be my last SUSIE-Q FUN TIP unless I just can’t stand it anymore and want to come back to visit ya’ll on occasion!  I’m scaling back on my stamping commitments and having to do some re-arranging of my time, as my kiddos are highly involved in sports and school.  I’ve loved having the opportunity to share what little I know about the craft and give ya’ll a laugh here and there along the way!  This has been a fun ride and Karen has blessed me beyond measure to let me get to do what I do for Your Next Stamp.  She’s a class act.
Until next time, find me on my blog, 

Thanks to ya’ll, my stamping family for listening to me ramble!
HUGS AND LOADS OF LOVE!! 
FacebookPinterestTwitterEmail

Piercing Circles!

Hey everyone!  Peggy here with you today sharing how I paper pierce circles.  I have been asked how I do this quite a few times so I decided to do a little tutorial. Once you have the plastic canvas, it is quick and easy, Let’s get started!

First I stamped and colored the adorable cow from the Funny Farm Crew set, cut it out with a circle nestie and got everything I needed together. When I am piercing circles I always us some plastic canvas that I picked up in the craft section of my local dollar store.

Next I position my canvas over my cut image and start to pierce.  I try to center the holes the best as I can, sometimes I do better than others with it!

Here is my image after I am finished piercing.

Next I decided to pierce the background of my card instead of using patterned paper, I placed my image on my card (no glue yet) and figured out where I wanted my circles to go, I also stamped my sentiment  from the Funny Farm Sentiments Set that is on sale this week! so I would know where not to pierce.

Once I was happy with all the piercing I attached the image and added a couple of enamel dots to finish it off!

Thanks for stopping by today, I hope you all have a great day and happy stamping!
Hugs,
Peg
FacebookPinterestTwitterEmail

Shading with Pastel Chalk Pencils

Hello – it’s Kerry and I’m super excited to be sharing with you on the blog today!  I wanted to show you a new tool I’ve added to my colouring techniques to achieve some of the shading that I was loving when I looked at the colouring of some of my stamping idols!  

I recently got a set of these Pastel Chalk Pencils and have been using them in conjunction with my copics.  Now you need to use these at the very end of your colouring – once you’ve finished, otherwise you’ll muck up the nibs of your markers.  You’ll also need a blending stump. 

So here’s my image.  I’ve used Amber and coloured her up with my copics. Now before my pastel chalk pencils, I’d be perfectly happy with this image. But let me show you my process and you can judge the results for yourself.

I use mainly the black chalk pencil from the set, even on skin.  Some people might find that it looks a bit “dirty”, but in real life shadows are dark.  If you find that you’re not a fan of the black pencil on skin, there’s a couple of skin colours in this set that you can play with as well.  Hopefully you can see that I’ve used the black chalk pencil to go over the stamped lines under her hands and in the crease of her arms as well as under the front covers of the books.

Now it’s time to go in with our paper blending stump and pull the chalk out into the image so it gives the appearance of depth and shadow.  Can you see where I’ve blended the chalk pencil into the image?

At this point I’m going to go back in and shade the rest of the image.  I’ll do under her hairline, under the apple, and in her hair.  I’ll also do where her arms and books would be resting on the table.

The other things I’m going to do is take the Burnt Sienna colour and add a bit of definition to her nose.  I could do this with my copics, but I like that I can sharpen my pencil to a very sharp tip in order to get a fine line.  The other great thing about the pastel chalk pencils is that they can be erased.  So if I draw in my lines and am not happy with them, I can erase them and start over (same with the shading – if I’ve added too much, I can take away by using the eraser).

So – what do you think?  Can you see the difference?

And here’s my image made into a card!  I used some new Echo Park papers (Paper & Glue) and used the August challenge sketch.

Hope you’ve found this helpful!  

Kerry

FacebookPinterestTwitterEmail

Altered Chalkboard Tutorial

Good Morning and Happy Hump Day 

Wendy here with a tutorial on altering a chalkboard with Your Next Stamp goodies! With some kiddos already back to school this board can be used to help track their reading, homework or chores…the possibilities are endless! 

Even though I don’t have an elementary school aged child I really enjoyed making this and seriously when I was done my daughter who is in her second year of college “called it” for her room :o)

Ok enough chatter onto the project…

Naturally I started out with a chalkboard that I purchased at the local craft store and then decided on what YNS stamps and dies I wanted to use. You’ll find a complete list at the end of this tutorial.

FYI…in these photos you are getting a super sneak peek at some of the stamps and dies being released TOMORROW…lucky you!

As I went along I always placed my elements until I find where I like them to go before sticking them down permanently.

In this photo I show how I made the pencil from the Back to School Die set.

I also decided to try my hand at making my own honeycomb paper to make an Apple for the teacher…

Here is what I did…to start cut 40 to 50 rectangles (any size you want) from tissue paper, also cut out a circle from chipboard whatever size the finished product should be and cut it in half

Next up draw out your pattern measuring exactly the same width apart in 2 different colors….you will be alternating your glue rows on each sheet

starting on your first sheet of tissue paper run your glue stick down each row of pink ..they lay down your next sheet of tissue paper on top and press it down to stick…then lay your next sheet down and run your glue stick down all the green tick marks…alternating each piece till done…

Here I made one in white, it shows you the honeycomb you end up with…

after your stack is dry then cut out your half circle…glue each half circle to your tissue…open your  creation…I found that securing the ends with thread helped to keep it together

Here is the finished Altered Chalkboard

Here are the YNS stamps and dies I used for this project…

Thanks for stopping in today! Be sure to join us tomorrow for our new release hop!

Wendy

FacebookPinterestTwitterEmail

Adding Dimension by KelliJo

Hello peeps!  It’s my turn to write some words of wisdom!!! 😉  SO, I decided to share some tips n tricks I have picked up along with way on adding dimension to your images and then a tip that I have always used for dimension to your card.

My card uses Ellie Loves Lattes 

Stamp your image several times, 3 for my card here.  This will depend on the depth of the image.

Color your images.  I always outline the area to be covered in case I have oopsies in cutting.  Make sure you color the EDGES of your cut image too!  That pesky white side is ICKY!

Add your first colored image piece

Now add your 3rd image piece, I gave Ellie’s hair some curl by running my fingernail down the ends.

Here is my personal tip/pet peeve getter… It may look like over kill, but, I do NOT want to have my image sag in the middle, so I load up the back of my panels making sure that the center has attention too!  You could probably get away with 1 in each corner and then 1 smack dab in the middle…. but I prefer this method!

Complete your card by adding the image, some twine and give those fish tails some curl too! 🙂

Well that’s it for me!  I hope you enjoyed this tutorial and found some great tips to use! 🙂

kj

FacebookPinterestTwitterEmail

Hair Coloring with Copic Markers

Hi everyone!

I just found this tutorial in our archives and I wanted to share it with all of you!

This fabulous hair coloring tutorial Cabio made for all of you! Enjoy!

Here is a hair tutorial to share with you. Today’s sample is Cupcake Cutie Fhiona from YNS. I will be using the same three tones again. Since Fhiona’s hair area is much bigger than some other stamps, so I tend to use more brushing for this images.

*****Black Hair tutorial*****

Black Hair – 100, C8, C5, C00
First, let’s see the finished black hair sample

Step #1 – The first marker is #100. You use the 100 to make a gap (space line) as her hair part to separate between the left and right section of the hair. (the part by her hair-band). When coloring her pony tail, use a little curve stroke to brush the marker from the top and brush it toward to the left side where her pony tail hanging. But remember to leave some space in between to fill shadowing later with some lighter markers.

Step #2 – Use #C8 to brush over the black but make the brush line longer than the 100 yet to leave some space for shadowing later.

Step #3 – Use #C5 to start brushing little lines from the edges of each last stroke of #C8, but still to leave a little space for the last light marker to shadow. For the middle part line, draw a very narrow straight lines lightly (See left pic below)

Step #4 – Use #C00 to brush over the part line and then also to fill up shadowing by brushing the rest of empty space.

*****Brown Hair tutorial*****

Brown Hair – E49, E37, E41 (These are my favorite brown hair combo)

Step #1 – you basically use the same stroke, but just using E49 to start. (See left pic below)

Step #2 – to use E37 brushing/blending in a curve motion, so that your pony tail and hair looks like it’s moving from the wind….well…at least I am hoping that the result will look a bit like that :o)

Step #3 – Instead of using the circle motion to fill up the empty space, I like to do mine by brushing little lines, I find that it looks more natural that way, but you can just use whatever way that works for you and as you wish :o)

*****Yellow Hair tutorial*****

Yellow Hair – Y38, Y17, Y15, Y00

OK, I think you already have an idea, so I am just going to post the pictures to show you the marker #s.

Step #1 – see left pic below, Step #2 – see right pic below

Step #3 – see left pic below, Step #4 – see right pic below

Thanks for stopping by and have fun coloring Fhiona :o)

Cabio

FacebookPinterestTwitterEmail

Creating embossed resist background

Hello!  Jen Roach here and today I’m going to show you how to make an embossed resist background using some clear embossing powder, glossy cardstock, Ranger Distress Inks and the YNS Fun with Borders set.
Let’s get started.  First stamp the border stamp with Versamark ink onto some glossy cardstock (note that glossy cardstock works best for blending ink colours).  Heat emboss with clear embossing powder.

Now it’s time to apply the Distress Inks.  I picked three colours from one of the seasonal sets as they are designed to work together.  Start with the lightest ink colour and using a sponge applicator apply randomly over the card base. 

Then apply the other colours of ink and blend well.

This is  such a fun technique to play around with.  You can switch up the ink colours and stamps to create lots of different looks.
Here is the card I created with the background.  I wanted to keep it simple to show off the background so I added some kraft cardstock, ribbon and a burlap flower.
I hope you enjoyed today’s tutorial!

Supplies: 
Stamps: Fun Borders set from Your Next Stamp
Ink:  Ranger Distress Ink (Peacock Feathers, Squeezed Lemonade, Shaded Lilac), Versamark (for embossing)
Papers:  Glossy Cardstock, kraft cardstock
Accessories:  MLYB burlap flower embellishment, The Twinery twine, Pebbles Inc. rubon on sentiment, white ruffle ribbon

Thanks for stopping by!

Jen R.

FacebookPinterestTwitterEmail

Gift Card Tag Tutorial

Hi Everyone!

Today I am sharing a fun (and easy) way to make tags for gift bags.  I typically buy solid gift bags (you know, the 12 packs at the big box craft stores) and then dress them up with a tag. 

This type of tag is a mini gift card that does not need an envelope because it hangs from the bag.

What do you need? 
Your Next Stamp stamps!  The tags I made feature the dog from Smiley Happy Critter Crew Two and the Cow from Funny Farm Crew, plus sentiments; “Holy Cow!” from Funny Farm Animal Sentiments and “Smile” from Insta Love
Corner Punch 
What else?
1 – 7″ x 3.5″ piece of cardstock
1 – 3″ x 3″ piece of cardstock
Patterned Paper (pull out your scraps)
Hole Punch
Dimensionals
Ribbon
Score 7″ x 3.5″ at 3.5″ along length
Fold in half and hole punch along scored side so that it is a 1/2 circle
Decorate and layer with scraps and stamps and then put everything together with dimensionals


Pull ribbon through holes and then tie it to the gift bag…tada you are done!


Thanks for stopping by and have fun making tags!  Be sure to share if you make one :>)

Smiles,
Julie

FacebookPinterestTwitterEmail

Gift Card Holder Birthday Fun

Hi there! It’s Thanh bringing you a quick and fun tutorial on the YNS blog today. August is a BIG month for YNS and I figured I would get in early on the fun and feature a birthday gift card holder.

You may have seen a reoccurring pattern in my YNS projects; I keep using the Fast Food Sentiments and Dies! I can’t seem to get enough use out of them as they are so much fun, especially when I add faces to the food and make them really come to life. This gift card is really quick to make, I hope you’ll end up making one yourself.

Here are most of the supplies I used:

YNS Supply List:

Step 1: Cut a 4.25 x 11 inch piece of cardstock

Step 2: Using a scoring board, start from the left side and score at 3, 4.25, 5.5 and 8.5 inches as seen below:

Step 3: Cut your cardstock into two pieces at the 4.25 inch score line. The smaller piece will measure 4.25 x 4.25 and the bigger piere will measure 4.25 x 6.75 inches as seen below:

Step 4: Fold all your score lines and adhere the 1.25 inch flaps together by sticking the adhesive on the short edges as well as along the scored line only (you’ll be putting your gift card here)

Step 5: If you want to give your card a finished look on the inside, cut four pieces of patterned paper:
 2.75 x 4 (two), 1 x 4 and 2.25 x 4 as seen below:

Step 6:  You have the choice to round your corners on the closing envelope side and decorate the inside as you wish! I chose to use my Fast Food set:

Step 7: Decorate the front of the gift card holder any way you like. To make the band, I cut a .75 x 7.5 inch strip and folded it around my score lines. Then I adhered the overlapping ends together and adhered the die cut frame to it:

Here’s a close up of the fast food dies:

I hope that you’ve enjoyed this quick tutorial today! If you end up running to craft room to make one, please let me know. Thanks for dropping in.

Thanh 

FacebookPinterestTwitterEmail

August SUSIE-Q Fun Tip–Summer Sparkle Series #3–Glitter Borders


Well, it’s the first of the month, and ya’ll know what that means!  Time to pay bills.  Well, that may be true, but it’s me Susan (susiestampalot) and I have something way  more fun than that–it’s my monthly SUSIE-Q Fun Tip Tutorial!

It’s the last one of my very glitterfied 3-part  
“Summer Sparkle Series”
Today we are going to play around with using YNS dies to create a GLITTER BORDER or outline on our cards and projects.  This one is SUPER FAST and easy and has limitless possibilities.
 OFF WE GO!….
This month, all we need is a few things…GLITTER (A#1, since this IS a glitter tutorial), A YNS Die of choice (I’ve chosen the largest one from the BOOKMARK/TAG DIE SET.) and a glue pen.  I love this one from Martha Stewart.  Oh, and three cheers for SOPHIE, my little Dallas Cowboy Cheerleader, for helping this card come together.  Go Cowboys!
Like I said, this is super EASY…almost TOO easy!  By the way, I didn’t just invent this, I’m sure it’s been done before, but I have wanted to try it with my YNS dies for quite a while now, so WHY NOT share it with ya’ll??  Your welcome.  
What we are going for is an outline of the die in glitter.  It can be any die, just depending on what you’ve got envisioned.  So decide what die and where you’d like your outline for your particular project.
Ok, once all that’s decided, just hold it in place and TRACE the outline of the die using your glue pen.  Told ya’ll it was easy.
Glue outline!  This is what that particular pen line looks like.  It says “fine-tip”, but it’s going to leave about a 1/8″ line.  The sooner you get the glitter on here after tracing the better, just fyi.
Silver glitter makes me happy.  Again, I glittered over a creased piece of copy paper to make a trough that my excess glitter could easily slide down and back into the container.  “Put that thing back where it came from, or so help me!”–Mike, Monsters Inc.  (I’m easily entertained and sidetracked.)
OOHH, pretty and so so sparkly!!  Tap off the excess and stare at your beautiful almost-finished creation.  Take a break and have a cookie for a self-congratulatory party.
For my card, I die-cut another shade of blue using the same BOOKMARK/TAG DIE.  Then I ran it back through my Big Shot to emboss it with the dots.  It needed to be a bit shorter for my design, so I cut the bottom end off.  (Wish I could just cut my bottom end off.)
Glued it down to finish off that panel.  
Here’s a closer look at my finished card.  
Did I say, GO COWBOYS? 
 
Well, I hope ya’ll have enjoyed my
“Summer Sparkle Series”!
What should I do next?  Let me know!  
Don’t forget to leave me a comment–
There’s going to be a RANDOM DRAWING on August 5th 
to win some YNS goodies! 
  
FacebookPinterestTwitterEmail

© 2024 Your Next Stamp. All Rights Reserved.