Good Morning and Happy Hump Day
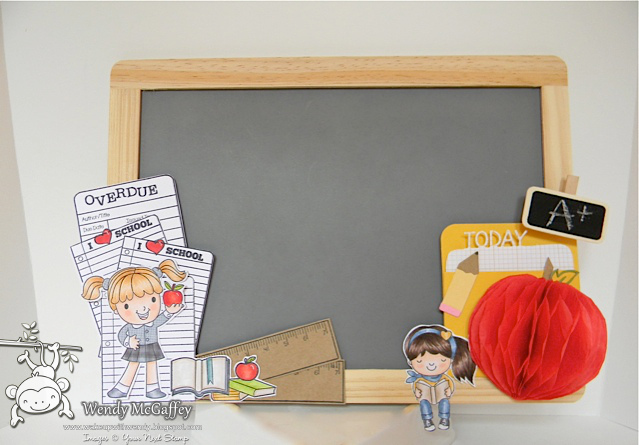
Wendy here with a tutorial on altering a chalkboard with Your Next Stamp goodies! With some kiddos already back to school this board can be used to help track their reading, homework or chores…the possibilities are endless!
Even though I don’t have an elementary school aged child I really enjoyed making this and seriously when I was done my daughter who is in her second year of college “called it” for her room :o)
Ok enough chatter onto the project…
Naturally I started out with a chalkboard that I purchased at the local craft store and then decided on what YNS stamps and dies I wanted to use. You’ll find a complete list at the end of this tutorial.
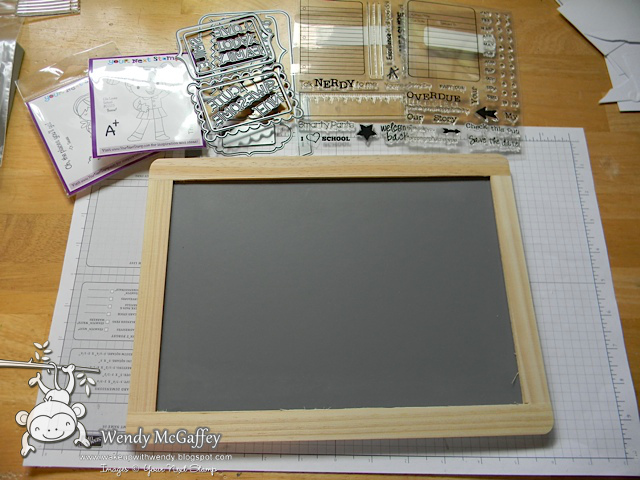
FYI…in these photos you are getting a super sneak peek at some of the stamps and dies being released TOMORROW…lucky you!
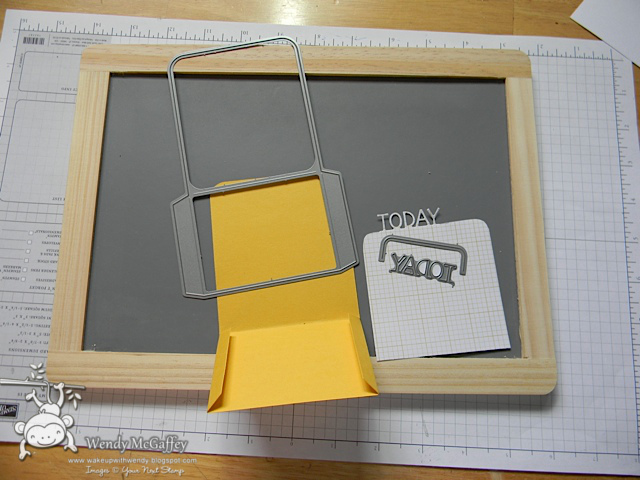
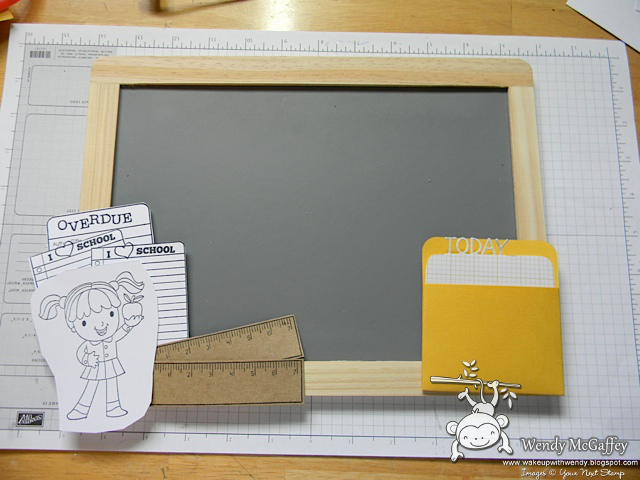
As I went along I always placed my elements until I find where I like them to go before sticking them down permanently.
In this photo I show how I made the pencil from the Back to School Die set.
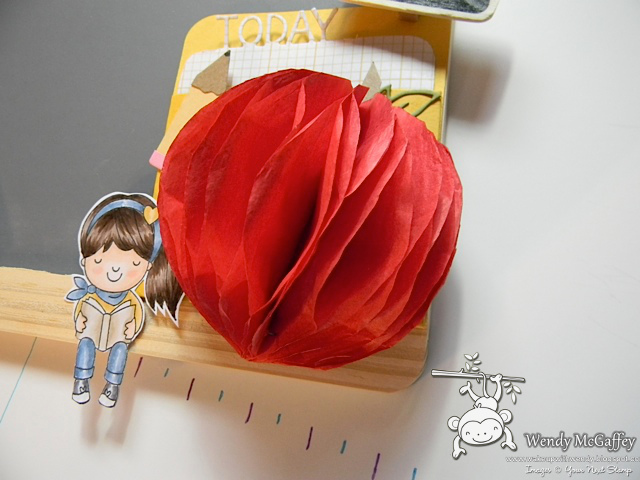
I also decided to try my hand at making my own honeycomb paper to make an Apple for the teacher…
Here is what I did…to start cut 40 to 50 rectangles (any size you want) from tissue paper, also cut out a circle from chipboard whatever size the finished product should be and cut it in half

Next up draw out your pattern measuring exactly the same width apart in 2 different colors….you will be alternating your glue rows on each sheet
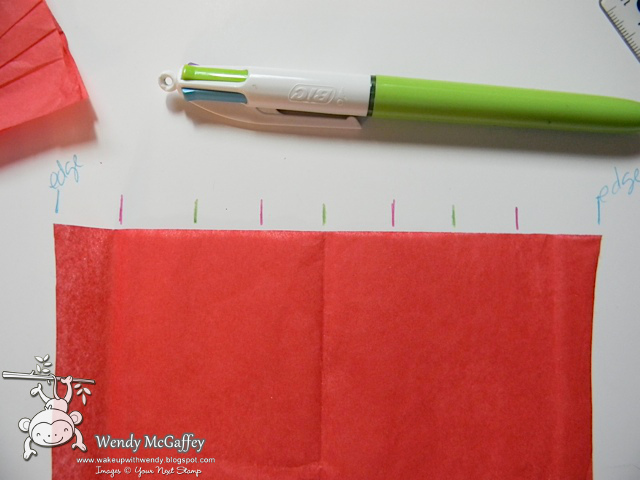
starting on your first sheet of tissue paper run your glue stick down each row of pink ..they lay down your next sheet of tissue paper on top and press it down to stick…then lay your next sheet down and run your glue stick down all the green tick marks…alternating each piece till done…
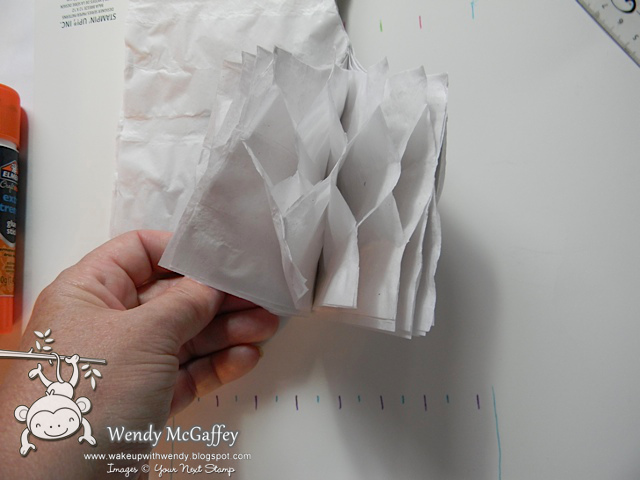
Here I made one in white, it shows you the honeycomb you end up with…
after your stack is dry then cut out your half circle…glue each half circle to your tissue…open your creation…I found that securing the ends with thread helped to keep it together
Here is the finished Altered Chalkboard
Here are the YNS stamps and dies I used for this project…
- Ellie Loves School
- Ellie Loves to Read
- A+ Teacher stamp set
- Back to School Die Set
- Smarty Pants stamp set (new set being released Aug 22)
- Overdue Library Card Stamp Set (new set being released Aug 22)
- YNS Pocket Die (new set being released Aug 22)
- YNS Journaled Weekly Die Inserts (new set being released Aug 22)
Thanks for stopping in today! Be sure to join us tomorrow for our new release hop!
Wendy


Awesome tutorial Wendy! Love your altered chalkboard!
What a fun chalkboard, Wendy! Great photos to go with the tutorial.
Awesome chalkboard!
I LOVE this!! Adorable!!
Have a wonderful day,
Migdalia
♥ Crafting With Creative M ♥
♥ 2 Creative Chicks Challenges ♥