Posted by: YNS on Tuesday, October 29, 2013 at 4:00 am
Die Cutting “Out of the Die” Tutorial
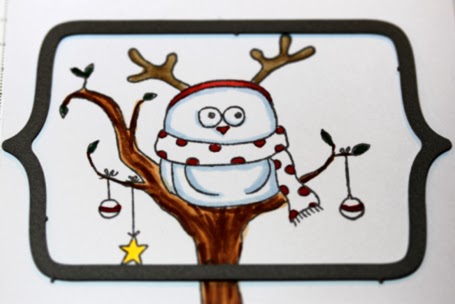
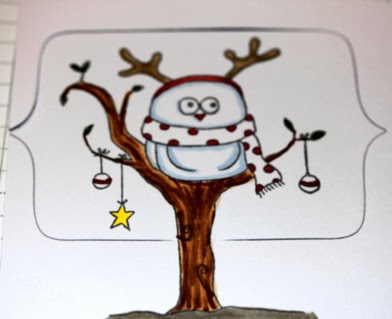
1.Stamp and color your image. Place a die over the focal point of your image and have some part of the image stick out of the image ( in this case it is the tree trunk).
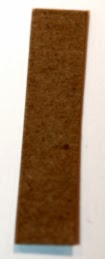
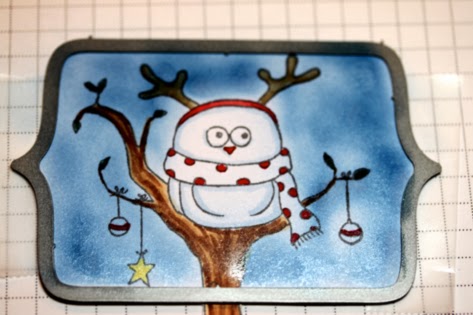
2. Cut a piece of chipboard about the size of the tree trunk. Fold in half.
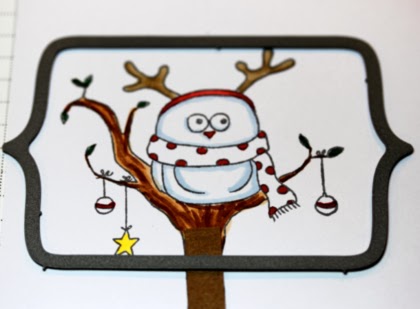
3. Place the chipboard under the die, but over the tree trunk.
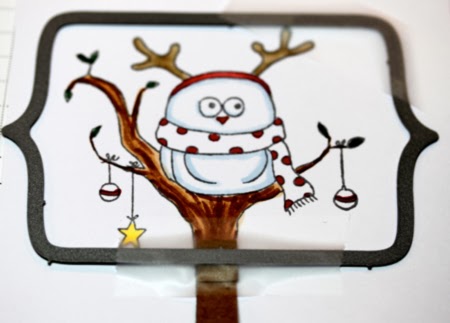
4. Tape the die in place before running through your die cut machine.
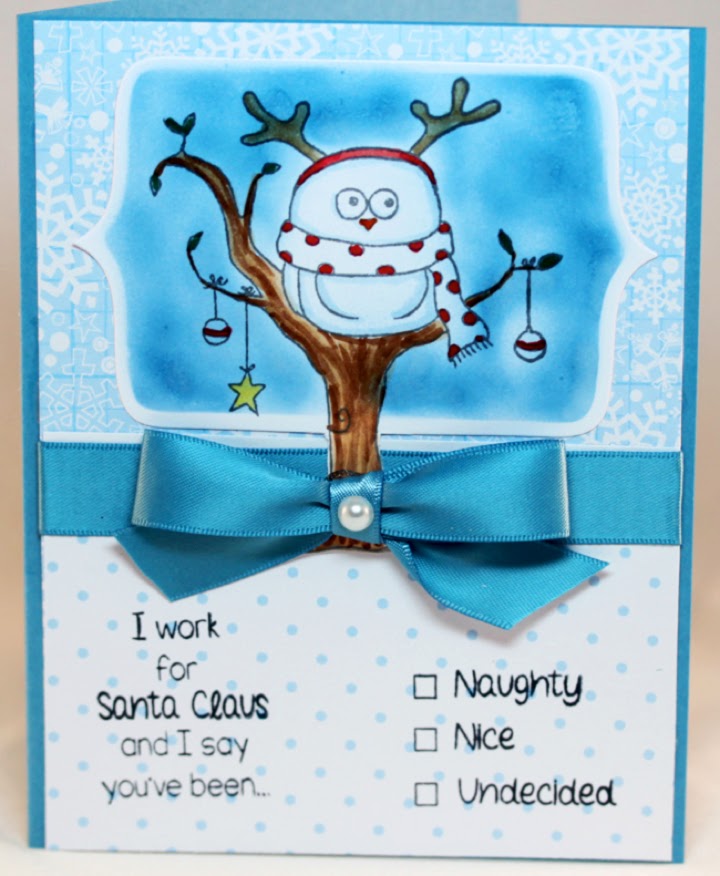
5. Run through your die cut machine. This is what the die cut should look like.
Posted by: YNS on Monday, October 28, 2013 at 4:00 am
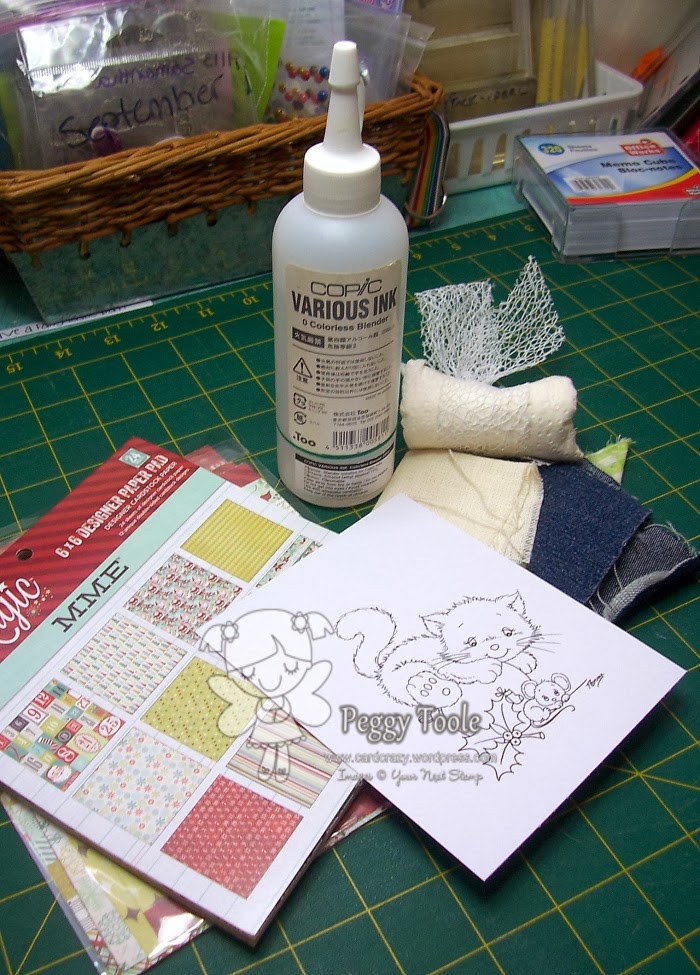
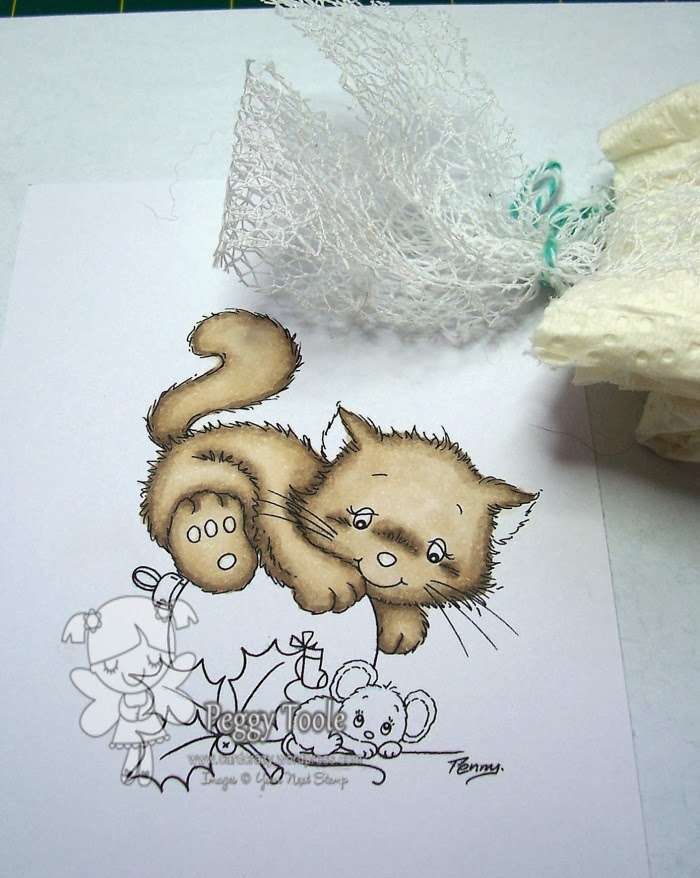
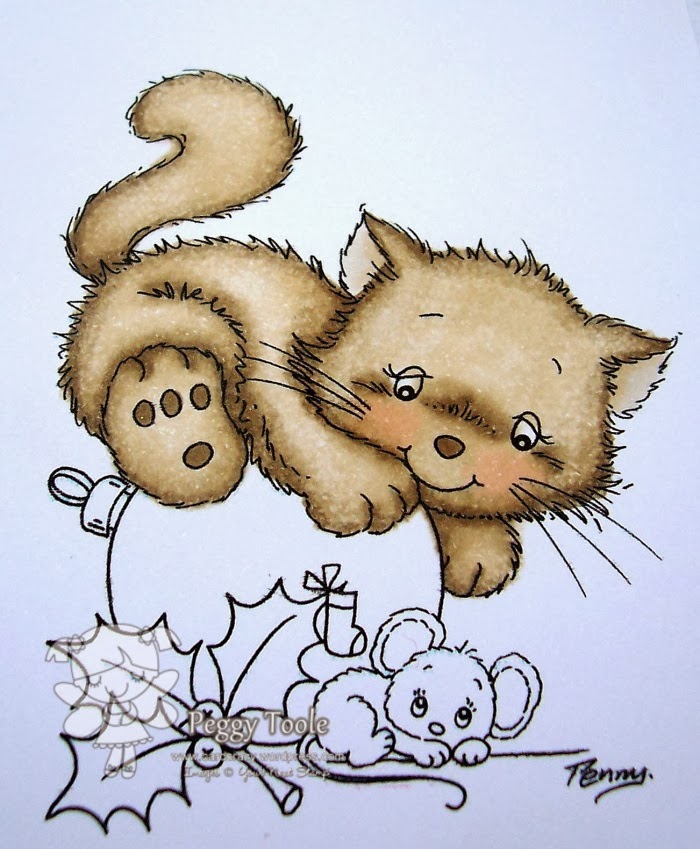
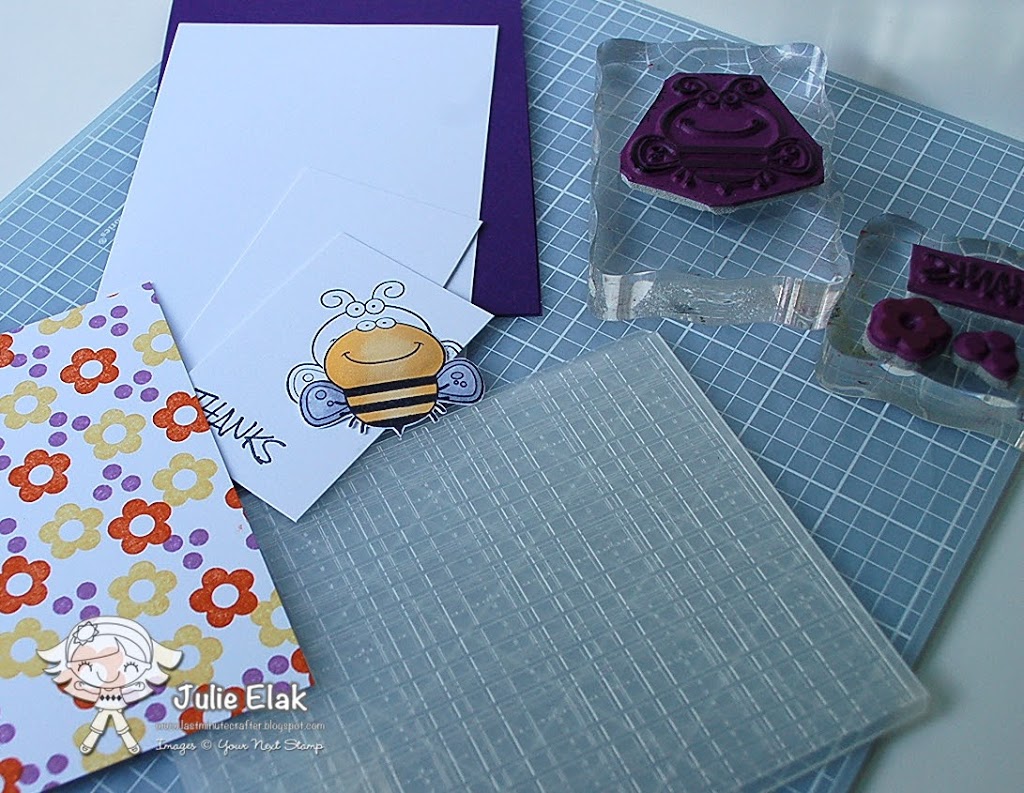
Hey everyone! Peggy here today and I am going to show you how I create texture with my Copic markers when I color animals. I find coloring fur a little tricky, so I like to use this technique when I do use animal images.
First I collect everything I will need. Today I have used the new digi stamp Waiting for Christmas, I thought this adorable little kitty would be perfect! As you can see I have a collection of different materials and ribbon that I use to create texture depending on what I am doing.
Next I color the part of the image I want to have texture, make sure you color this first or you will get texture on other parts of your image.
Once you have finished coloring add a little colorless blender to the fabric or ribbon you want to use and press down on the image a few times, you can clean up any ink that bleeds out with your colorless blender pen.
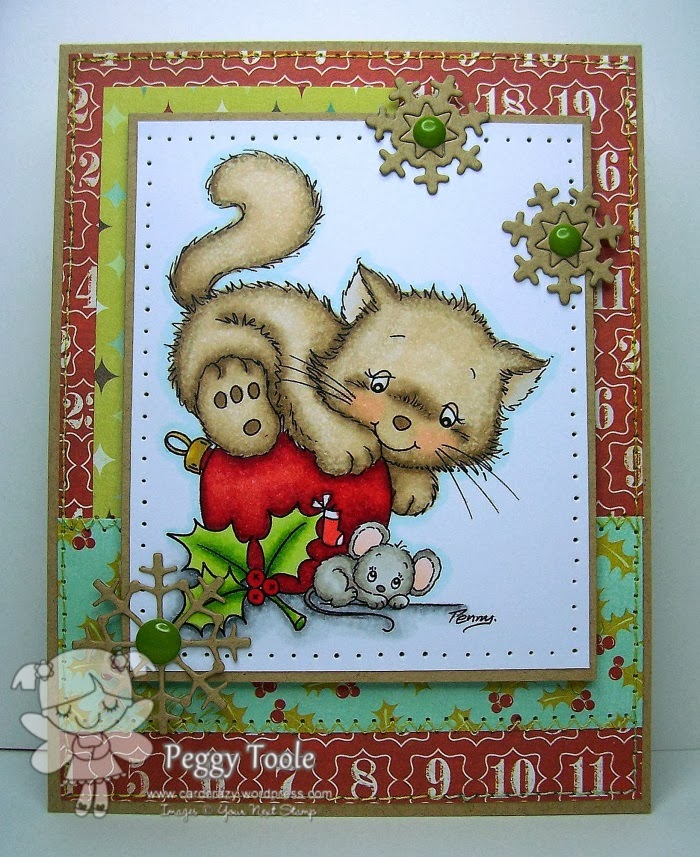
I then color the rest of my image how I want it and make my finished card.
I love the look and how easy it is to do and how you can use any fabric scraps you might have laying around!
Posted by: YNS on Wednesday, October 16, 2013 at 4:00 am
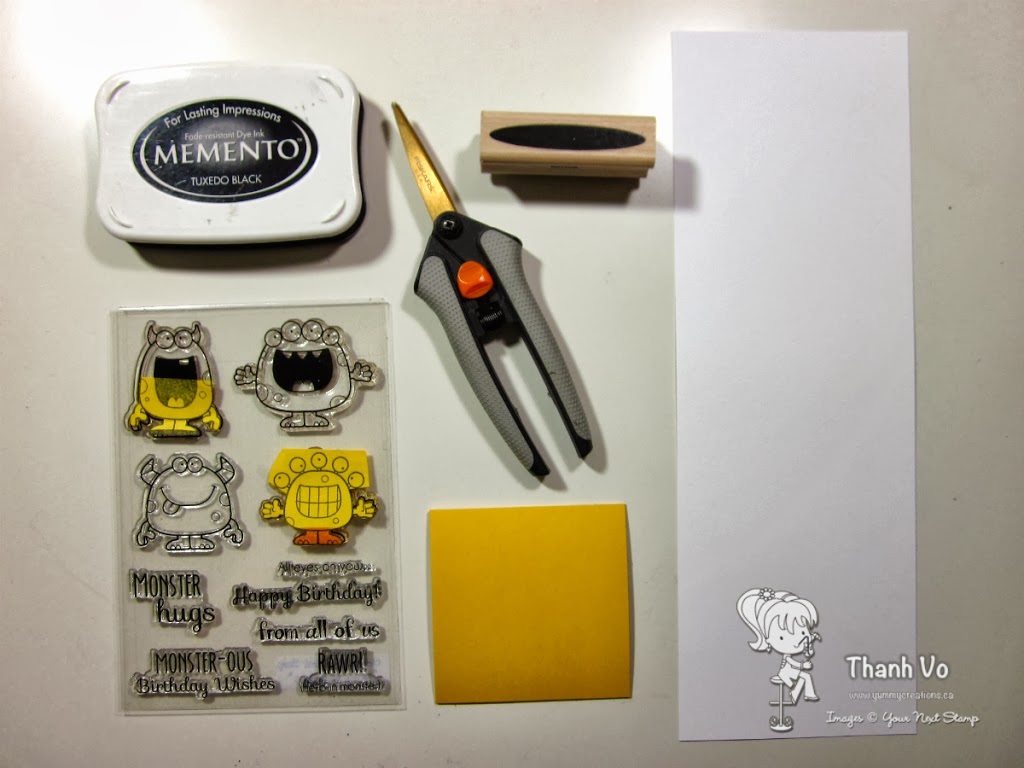
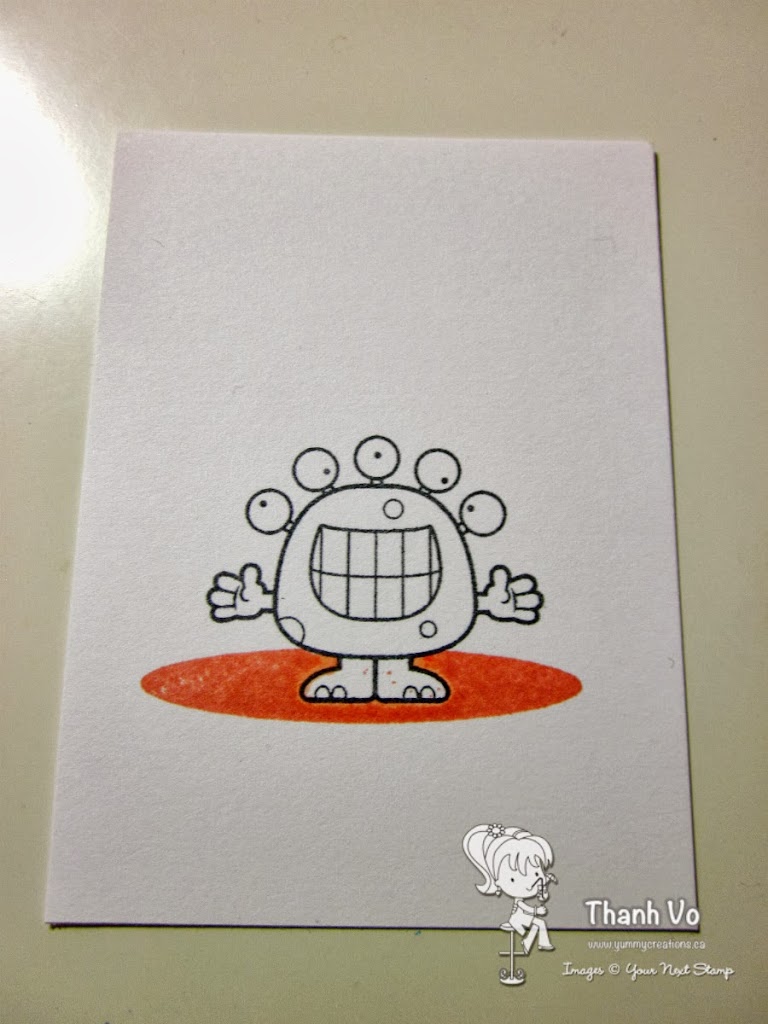
Hey there, YNS fans! It’s Thanh here today with a tutorial on masking. I know, seems like a basic beginners tutorial, but it’s such a great foundation for simple cards! You may also want to refer to Suzanne’s tutorial on masking as well. Here are all the supplies I used for masking:
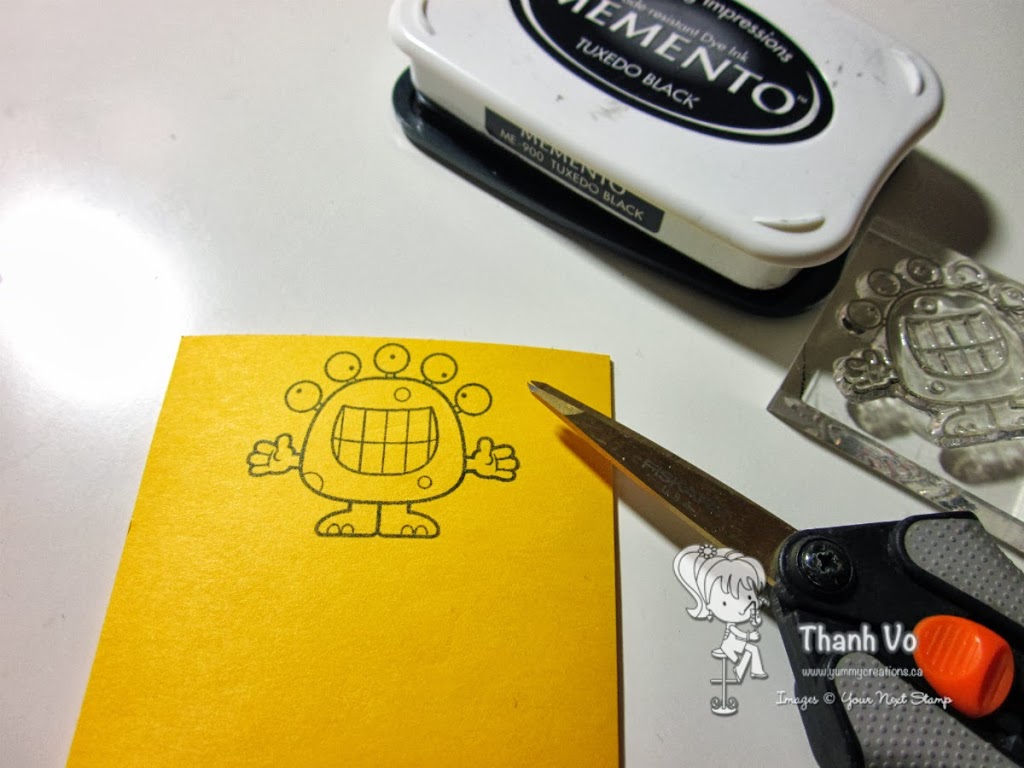
Step 1: Stamp the main image on a post it note. Make sure that the image is on the sticky part of the paper.
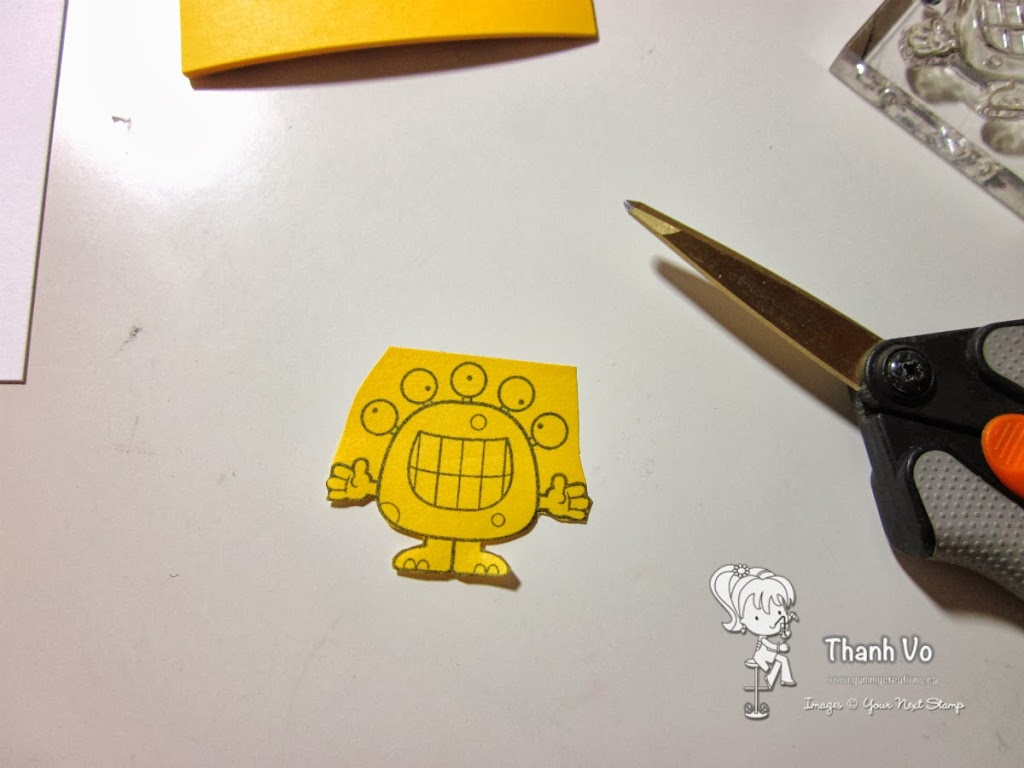
Step 2: Carefully cut the image out.
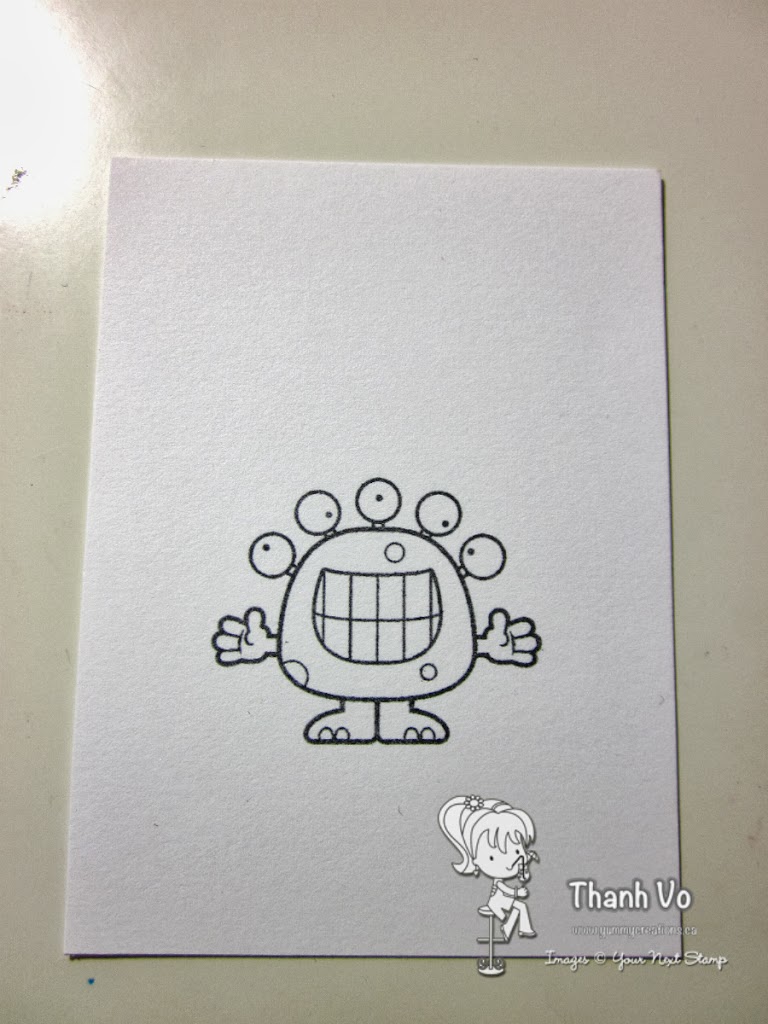
Step 3: Stamp the image on to your cardstock
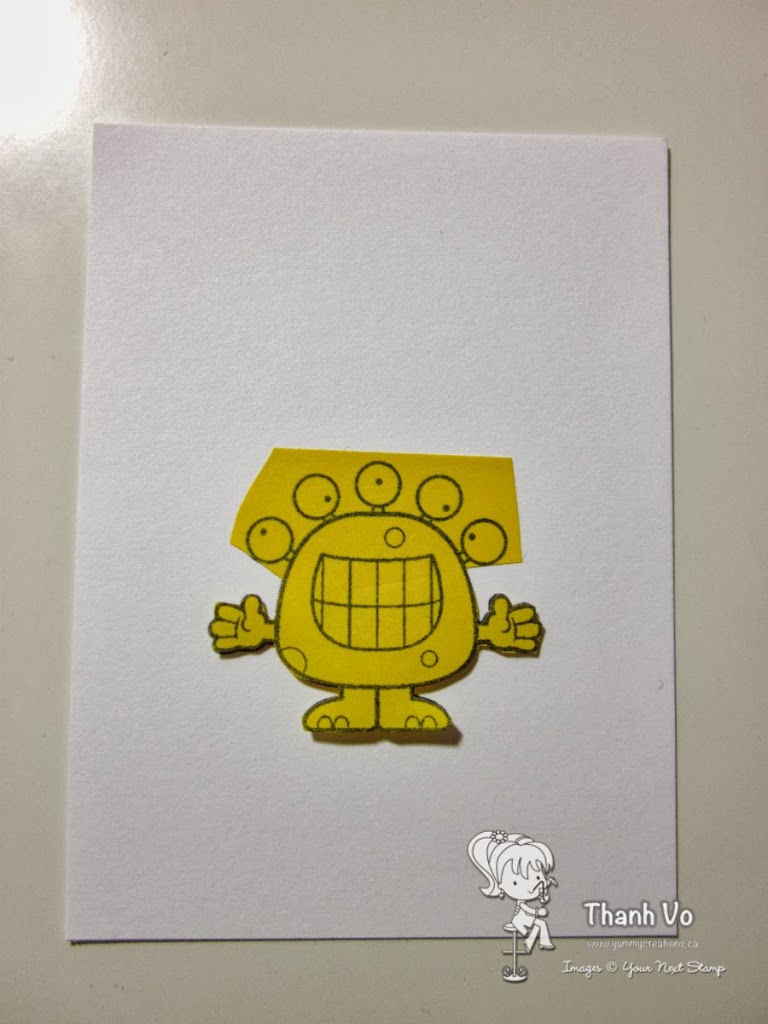
Step 4: Layer the Post It note image on top of your stamped image.
Step 5: Stamp the second image over the first, this will then appear to be the background of your scene.
Step 6: Color your image… my favorite part!
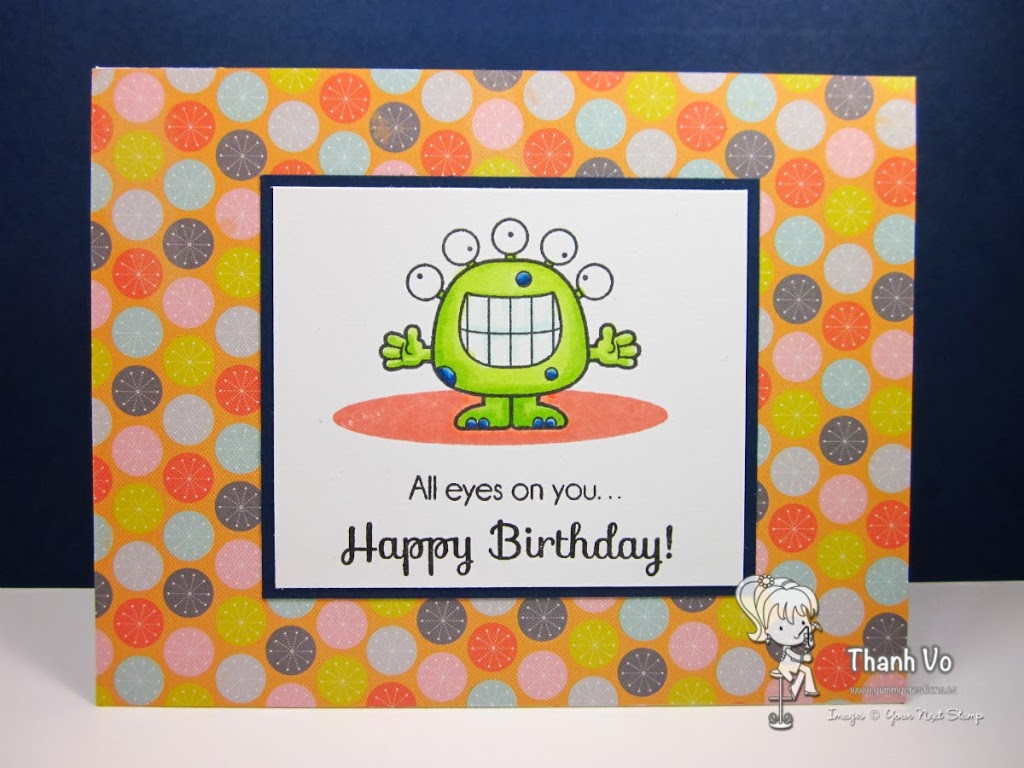
Ta da! Here’s my finished card:
Just remember, some of the most basic techniques make the biggest statement. If you have any questions, please ask them below. Have a fantastic Wednesday! Thanh
Posted by: YNS on Monday, October 14, 2013 at 4:00 am
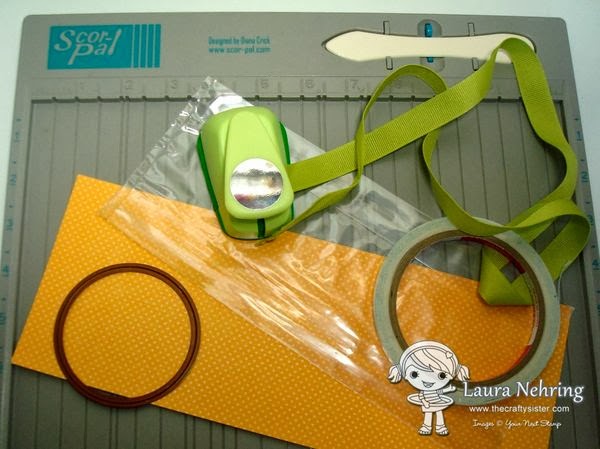
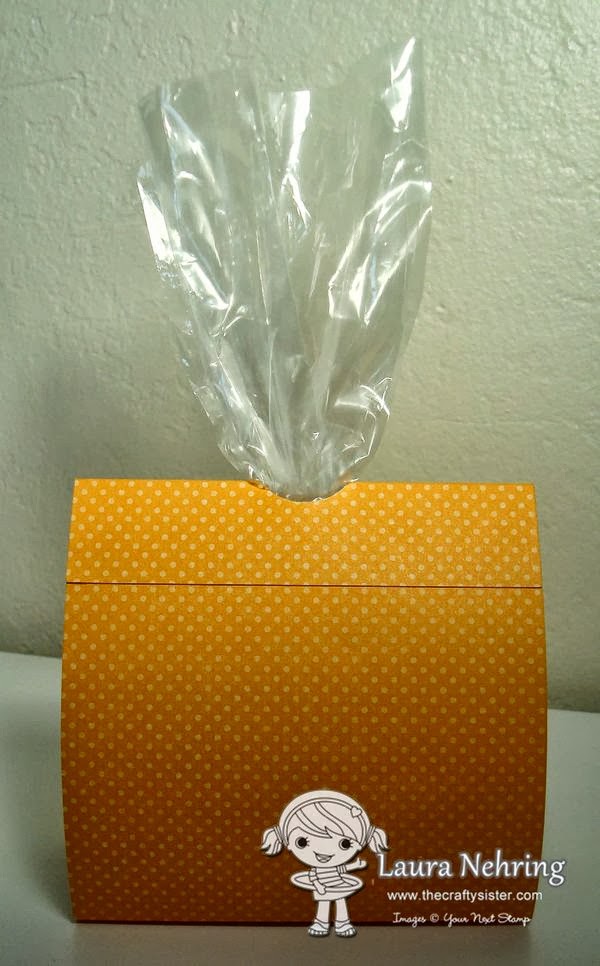
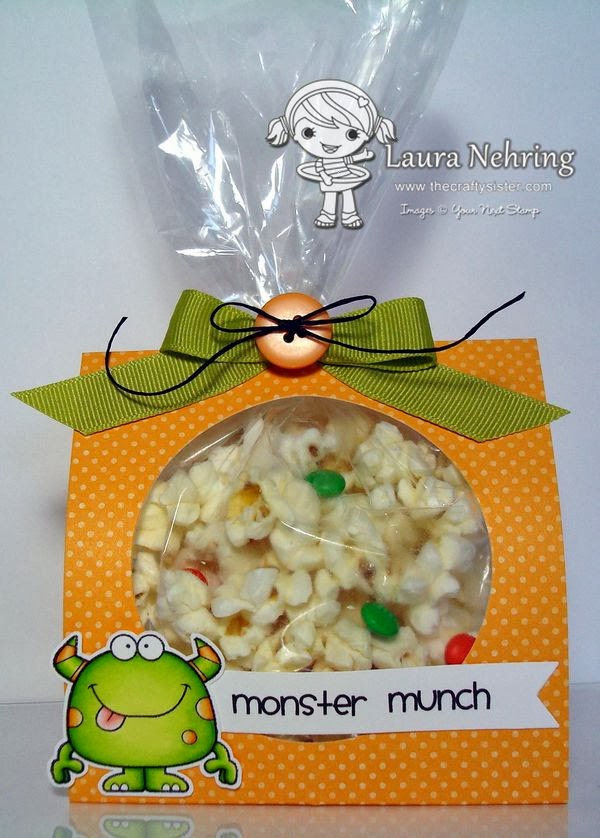
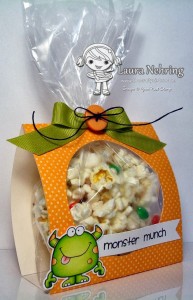
Hi everyone! Laura here today with a little tutorial on how to make an easy Treat Bag Cover! I’ve been making these for years, so if you follow my blog, you may have seen a variation of these before…
Supply List:
4.25″ x 11″ heavy-weight cardstock
Scoreboard
Scor-Tape
Circle Die (approx. 3″)
1″ Circle Punch
Plastic Treat Bag (I use Wilton brand 4″ x 9″ bags)
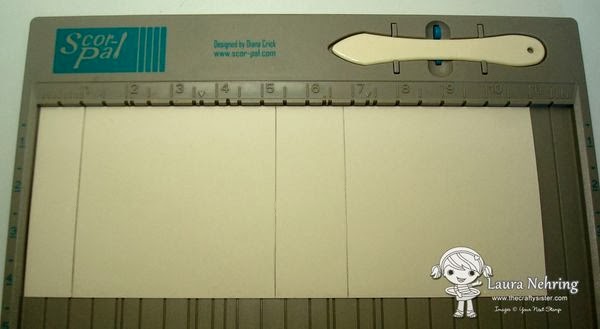
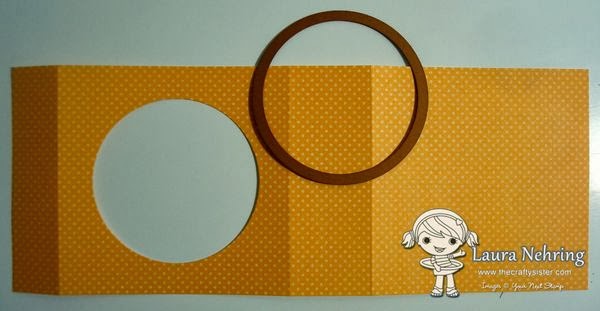
First up, take the 4.25″ x 11″ piece of cardstock (this is exactly half of a standard sheet of cardstock, so you can make 2 bags per sheet!), and score at 1″, 5.25″, and 6.75″.
The second panel from the left in the photo will be the front of the treat bag. On this section, use a 3″ die to cut a circle out of the center of the panel.
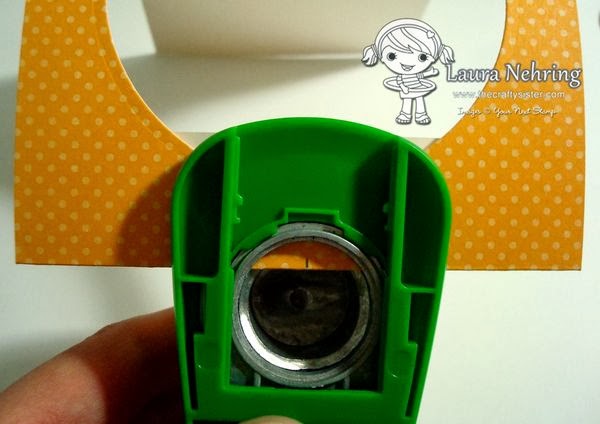
Next, you’ll need to cut a notch in the top of the treat bag cover. Fold the score line between the 1″ panel and the front panel, and mark the center. Using a 1″ circle punch or die, Cut a half-circle notch.
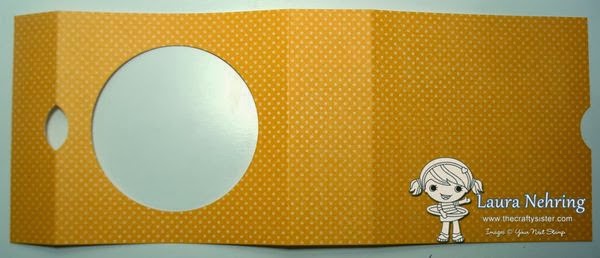
Another half-circle notch needs to be cut at the opposite end of the cardstock, so that the unassembled cover looks like this:
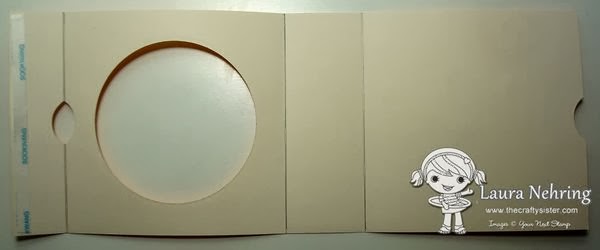
Turn the cardstock over, and add a strip of Scor-Tape to the 1″ panel as shown:
(Optional Step/Not Shown: adhere a piece of clear acetate on the back side of the cardstock to re-enforce the circle window.)
Now it’s time to fill your treat bag! I use the Wilton brand Clear Party Bags for these. They measure about 4″ x 9″ and fit perfectly inside the cover. Fill the bag about halfway with goodies (I used a mixture of popcorn and mini M&M’s for mine), then twist the top of the bag and insert it through the circular notch. Fold the cardstock so that the half-circle notch meets up with the circular notch at the top. Fold the 1″ flap down over the back, remove lining from Scor-Tape, and adhere.
Tie up the top of the bag with a ribbon, and decorate the front of the cover as desired. I used one of the cuties from the Silly Monsters set, along with a computer generated label, cut out with the Fishtail/Banner Dies.
Front View
Side View
These little treat bag covers are perfect for party favors or holiday treats! I’ve made them for lots of occasions, and they are so quick and easy to put together!
Hope you enjoyed my tutorial! Thanks so much for stopping by!
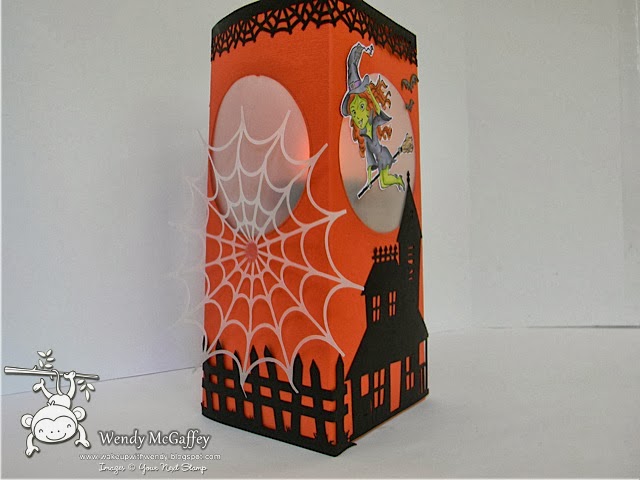
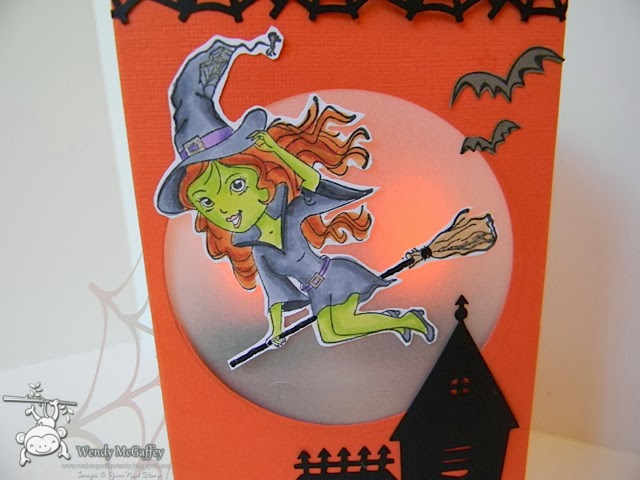
Posted by: YNS on Wednesday, September 25, 2013 at 4:00 am
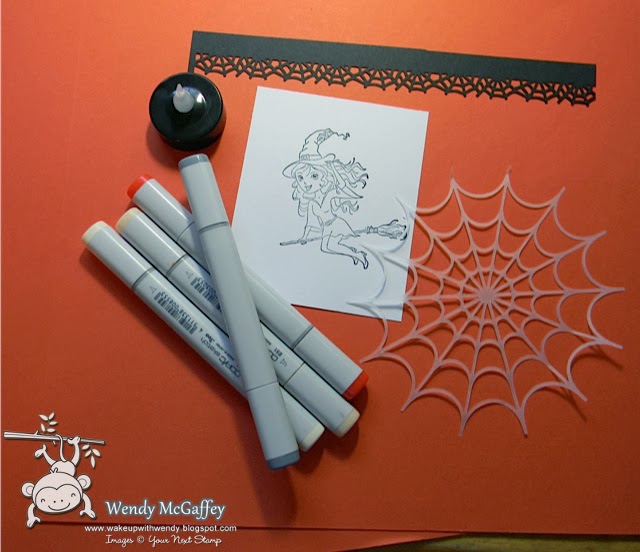
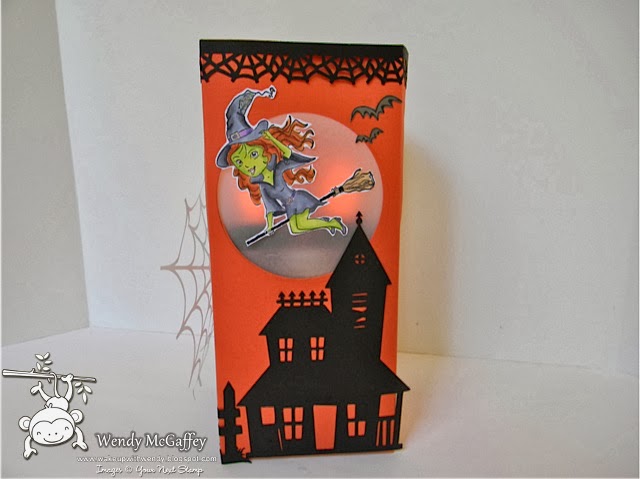
Wendy here with a tutorial today on how to create a lantern using some Your Next stamp products and a LCD tealight.
Before I dive into my YNS tutorial…have you see the fabulous new release stamps and dies?! Be sure to HOP along our fun and inspirational blog hop for your change to WIN some new stamps!
Now, let’s make a Luminara Lantern!
I began by gathering all the required supplies…
cardstock, stamped image, tealight, dies
Next up cut and score your cardstock, I used a 12 x 12 sheet because I wanted it larger to fit all my diecuts…normally you would use a 5 1/2 x 10 3/8 piece of cardstock scored at 2 1/2″, 5″, 7 1/2″ and 10″
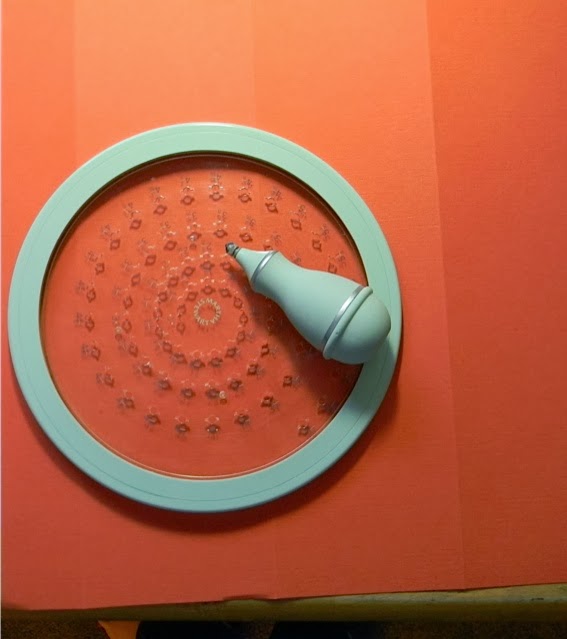
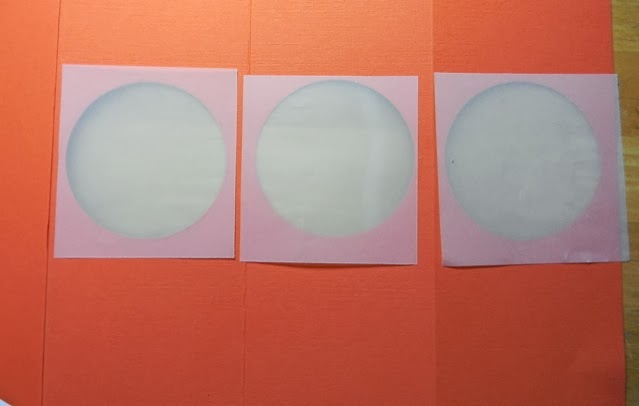
Now cut out your circles to make the windows…I used a portable cutter instead of my diecut machine again because of the size of my lantern but you can definitely use a die to cut out your circles or ovals for the windows….
adhere your vellum over the windows before taping your container closed
After you have assembled everything you may chose to decorate anyway you would like..I chose the newest Darling Diva Samantha the Witch for on my lantern, added a creepy haunted house and turned on the non-burning tealight and there you have it a spooky Halloween lantern…
Thanks for stopping in today for my tutorial…we currently have a new release special so now is the perfect time to grab yourself some YNS images and make your own Luminary Lantern just in time for Halloween!
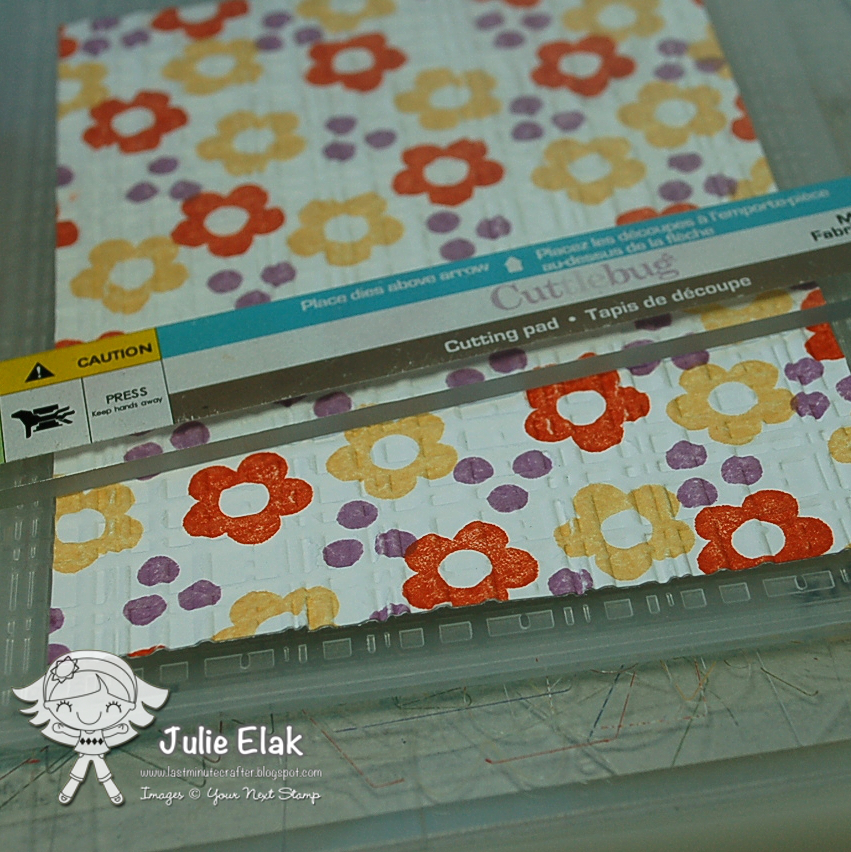
1 – Create patterned paper. Start off with a full sheet of white and randomly stamp images several times, then cut it down to the desired size.
2 – Run trimmed down patterned paper thru embossing machine in desired embossing folder.
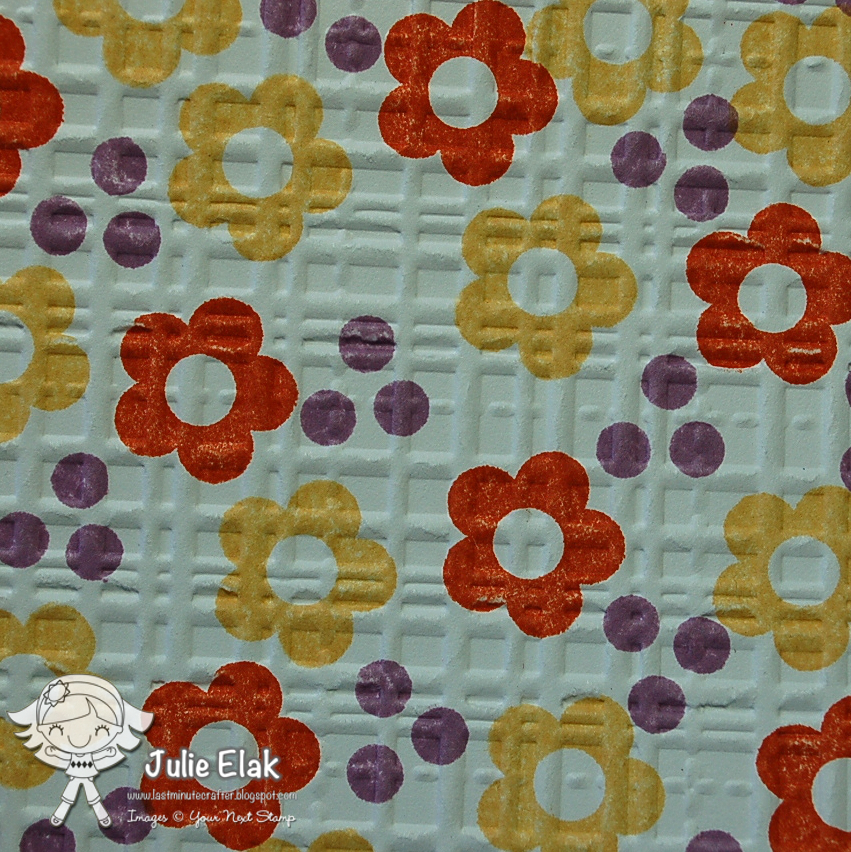
3 – Now this is where the “subtle” comes in. Place the patterned paper on top of the embossing folder and run it thru the embossing machine again.
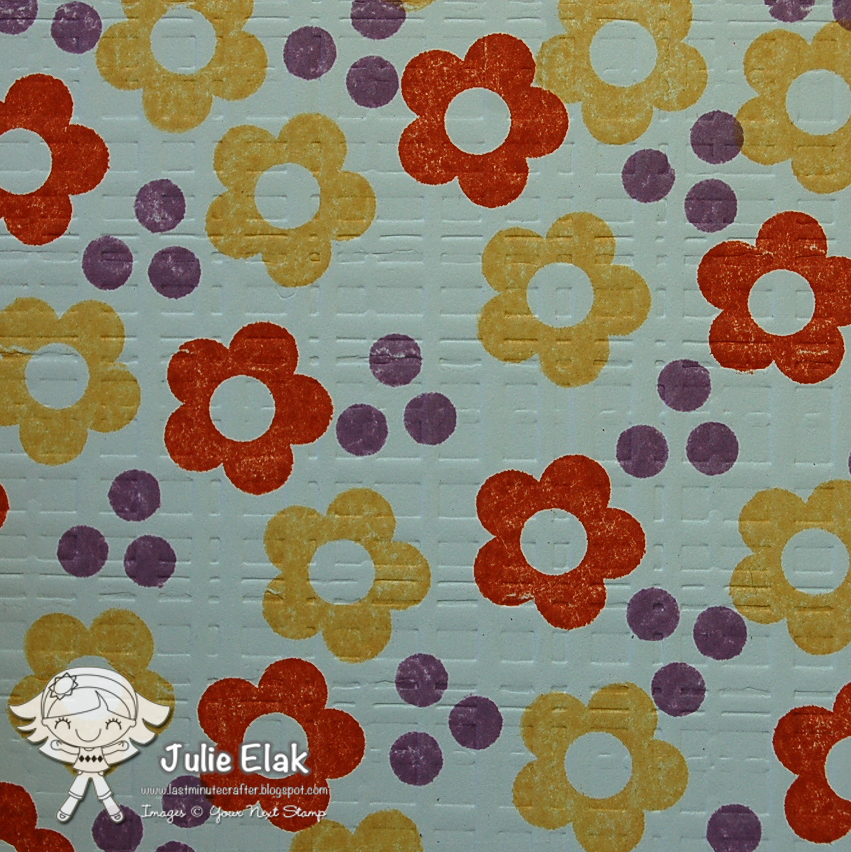
Running it thru the second time outside of the folder reduces the depth of the embossing but it is still visible. Check out the difference:
Results after one pass in the embossing folder:
Results after being run thru outside the folder:
That’s it! Now you are ready to assemble your card. So easy and the perfect way to add a bit of texture! I decided to make my own patterned paper for today’s tutorial, but this technique can be used on card stock or purchased patterned paper.
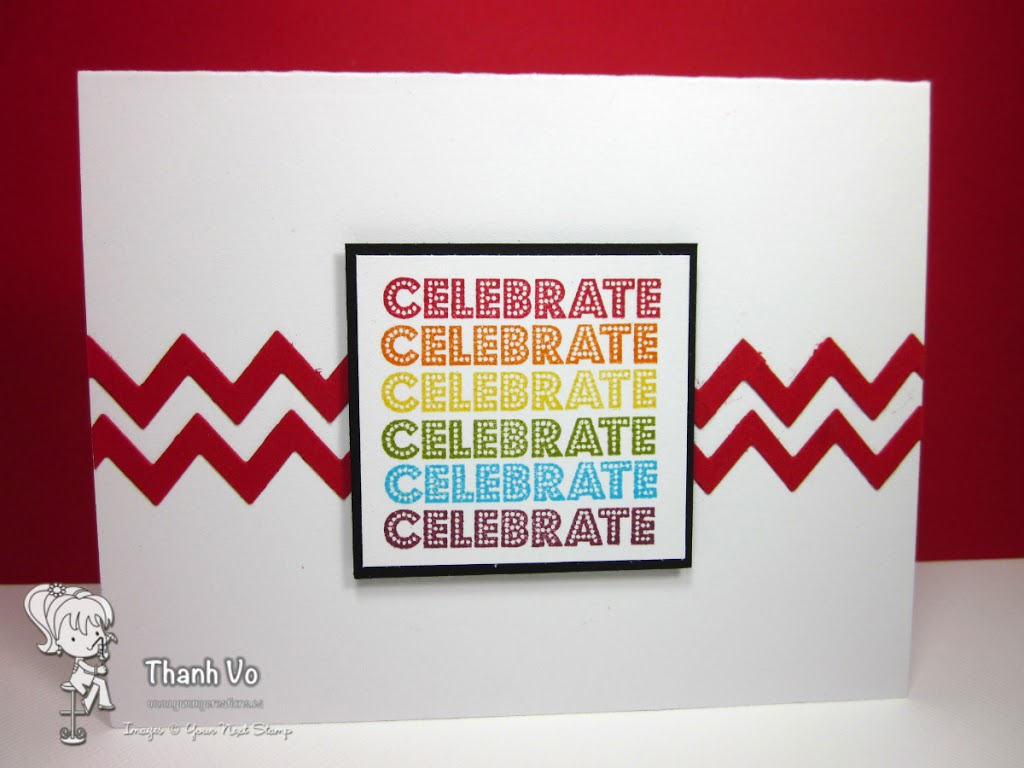
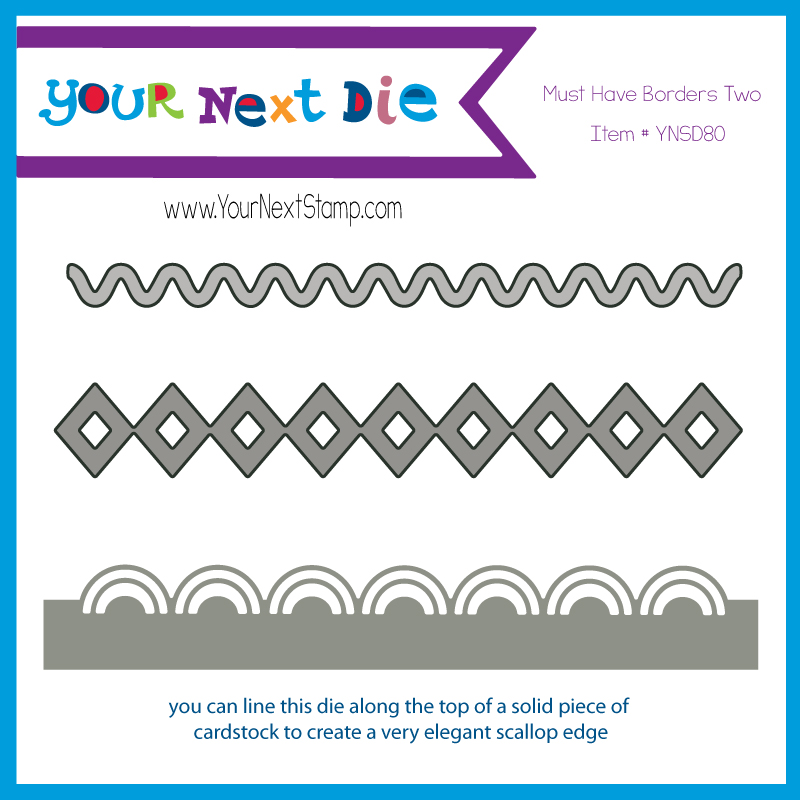
Clean and simple, right? Here are all the dies that come in that set:
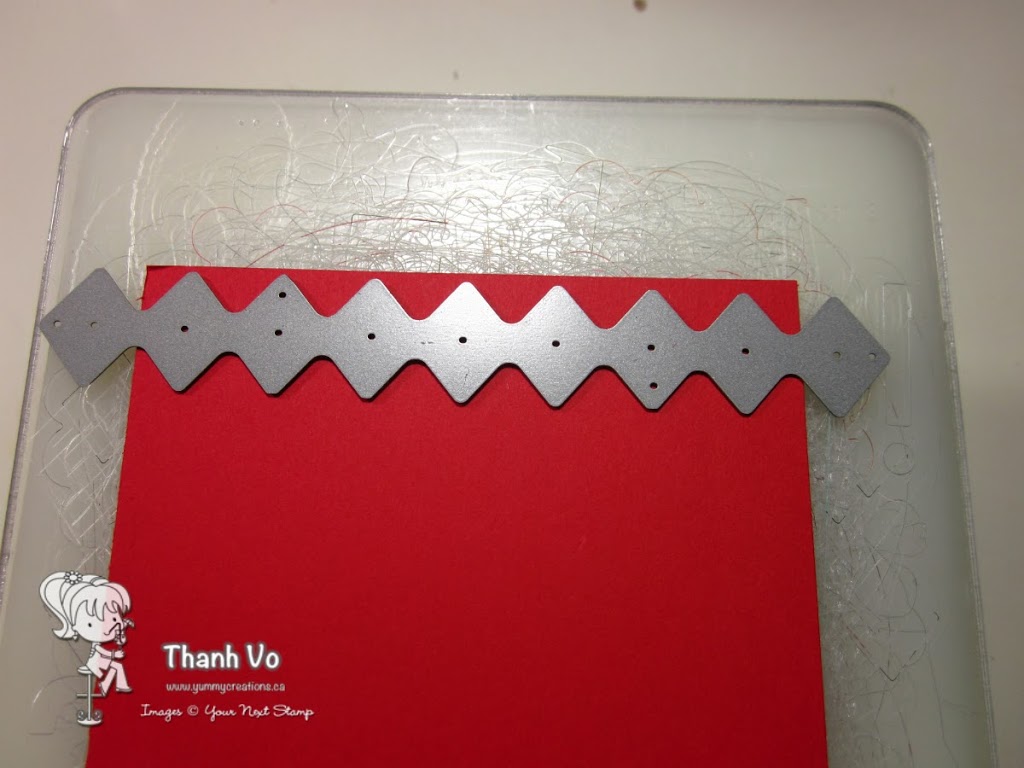
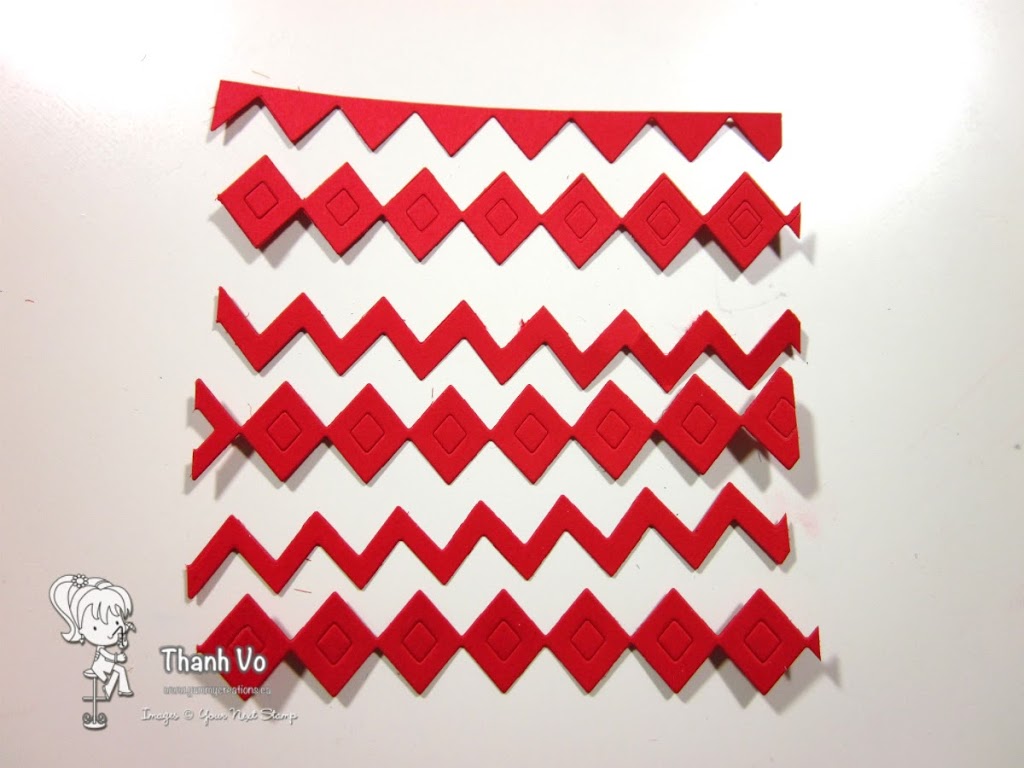
No chevron die you say? I used the negative to create the chevron!
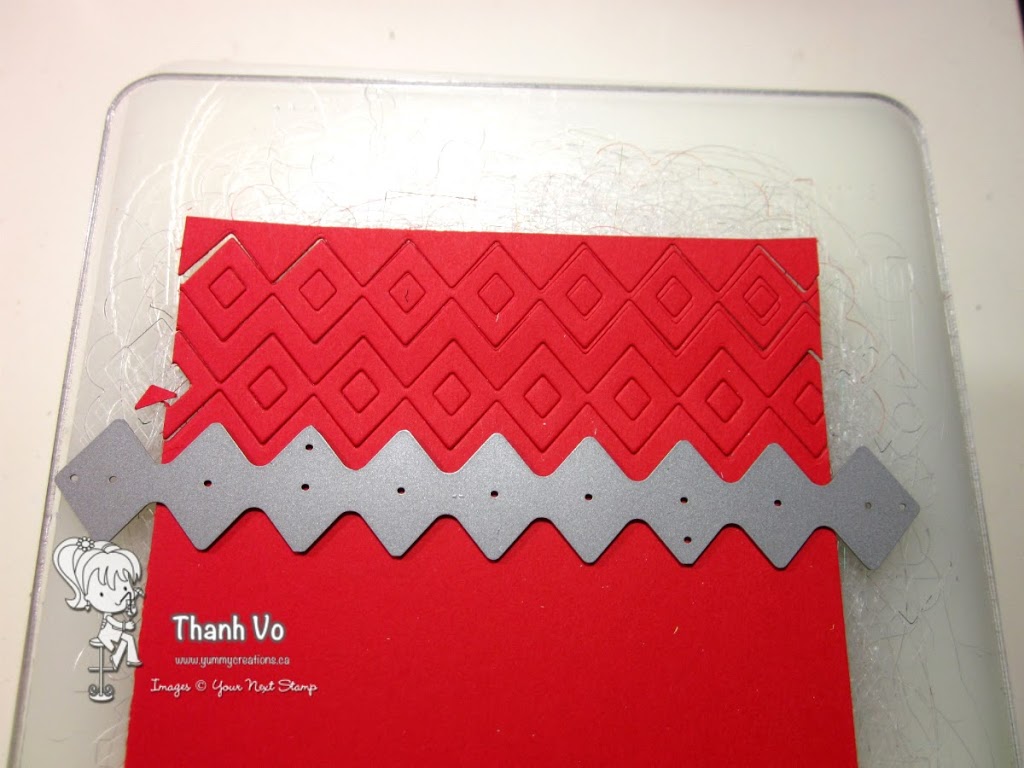
Run the first of several cuts through your die cutting machine of choice (I use a Cuttlebug).
Keep going!
… Keep going!
After several run throughs with with same diamond shape die, you get the above cuts.
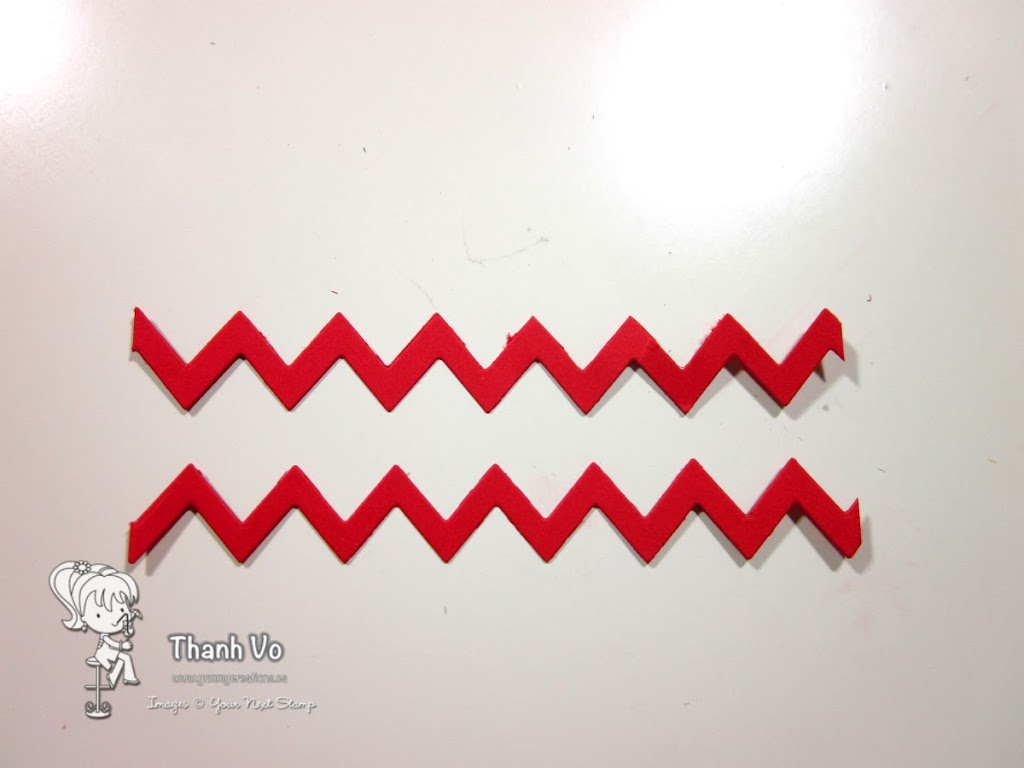
If you remove the positive and choose to use the negative cuts, you have your chevron border!
The above photo just shows that sometimes, you can really stretch your cardstock as well! If you have an image covering the die, you can always make it shorter, thus saving your cardstock and cutting it in half.
Voila! You never know what other different shapes you can create using YNS dies. Do you create your own die cuts using other shapes? Please share.
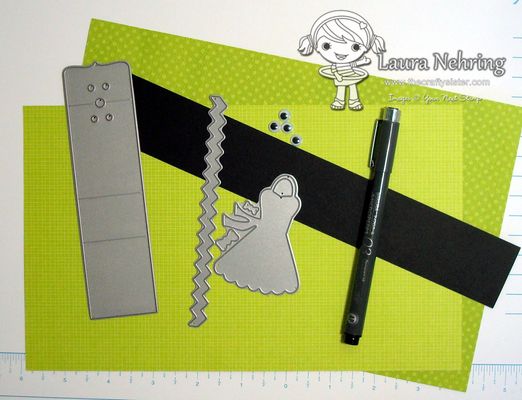
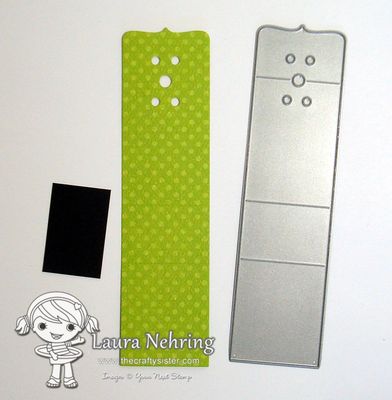
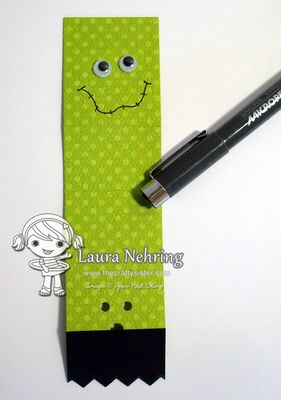
The first step, is to cut the Lollipop Cover from your green cardstock. You also need to cut a piece of black cardstock measuring 1 1/2″ x 1″.
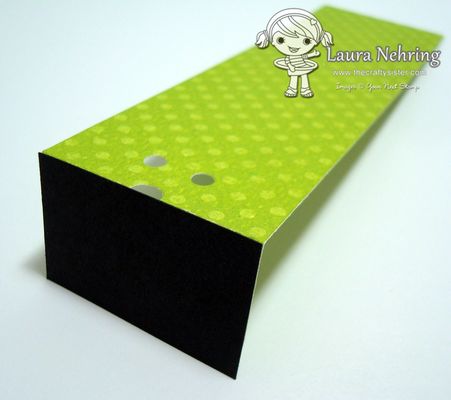
Fold over the top flap of the Lollipop Cover, match the black piece to the fold line, and adhere.
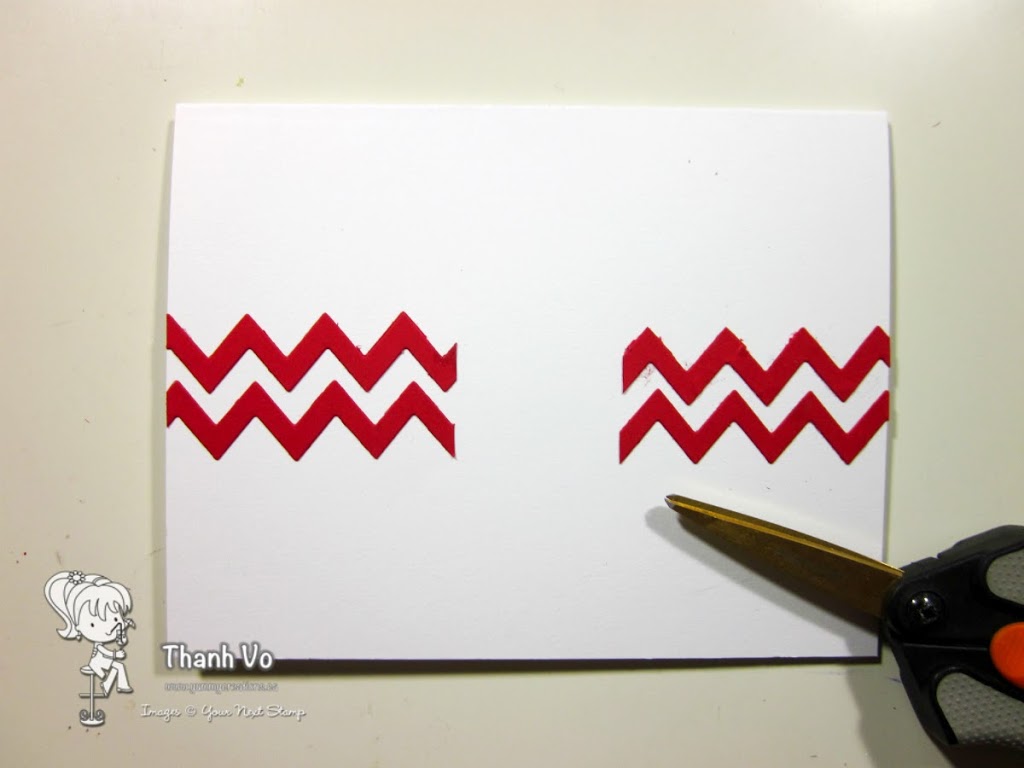
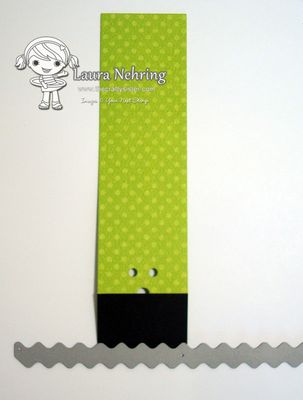
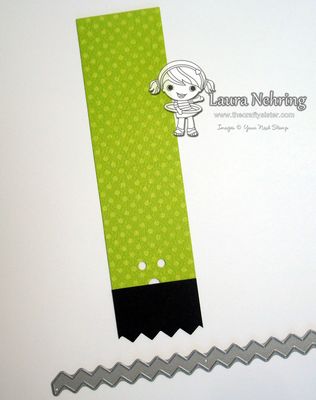
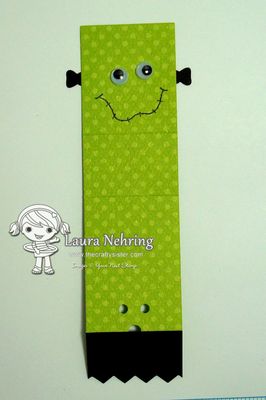
Now, you need to line up the zig-zag edge of the chevron die to the bottom edge of the black cardstock, and run through your die cut machine. This will be Frankie’s hair line!
Fold the remaining creases on the Lollipop Cover. Draw a mouth and glue eyes to what will be the front of the cover.
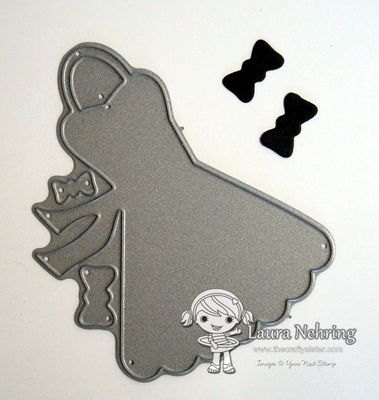
Next, cut two of the larger bows from the apron die from black cardstock.
Adhere the bows to the sides of Frankenstein’s head, so only half of each is showing.
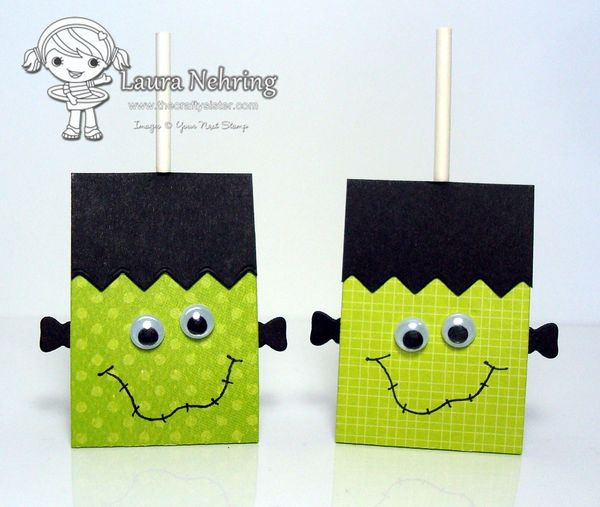
Now you are ready to assemble your Lollipop Cover! Since I didn’t use the ribbon holes to tie ribbon around the stick, I just used a glue dot to hold the lollipop in place.
What do you think??
Super cute, and easy enough to get the kiddos involved! I plan on making up a bunch of these with my kids to pass out to their classmates!
Posted by: YNS on Wednesday, September 4, 2013 at 4:00 am
Hi everybody! It’s Maureen here and I have a little tutorial for you today. Although Your Next Stamp already carries a Pocket Die Set, it’s larger than what I wanted for my project today and it doesn’t exactly fit the library card from the Overdue stamp set so I made my own smaller library pocket using the 3×4 die from the Journaled Weekly Die Set. First, you take a piece of double-sided patterned paper that’s 6” by anywhere 3” and over. My sample uses a piece that’s 6×3.25”. Score and fold at 4” and you’ll have this: Next, take the 3×4 die and tape it into place on your paper: Make sure that the fold of the paper doesn’t touch the cutting line of the bottom of the die – this makes sure you cut a pocket and not 2 separate pieces of paper. Here’s a pic showing the cutting edge in red and the fold not touching it: Run through your die cut machine and you’ll get this: Now tape the sides shut with washi tape: And then cut off the excess washi tape from the corners: An alternative method of making the pocket is to sew up the sides either by hand or with your machine. Make sure you stitch very close to the edges because there’s not a lot of excess room. Here’s a pic showing how nicely the library card fits into the sewn pocket: BTW – did you know that the big die from the Clip It die set cuts the library card perfectly?! That’s what I used for this sample. And here’s a pic of the pocket all decorated: I added a sentiment, a piece cut from the patterned paper to the bottom and a washi tape tab at the top to easily pull out the card. The whole pocket will fit into your Project Life or other pocket scrapbook pages or it can go directly on a card or scrapbook page. I hope you liked my tutorial and if you make anything using it, please comment so we can go admire it!! Thanks for visiting! ~Maureen


