Hi everyone! Laura here today with a little tutorial on how to make an easy Treat Bag Cover! I’ve been making these for years, so if you follow my blog, you may have seen a variation of these before…
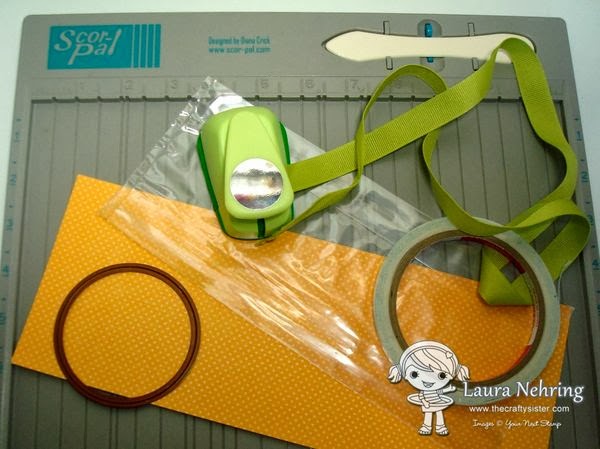
Supply List:
4.25″ x 11″ heavy-weight cardstock
Scoreboard
Scor-Tape
Circle Die (approx. 3″)
1″ Circle Punch
Plastic Treat Bag (I use Wilton brand 4″ x 9″ bags)
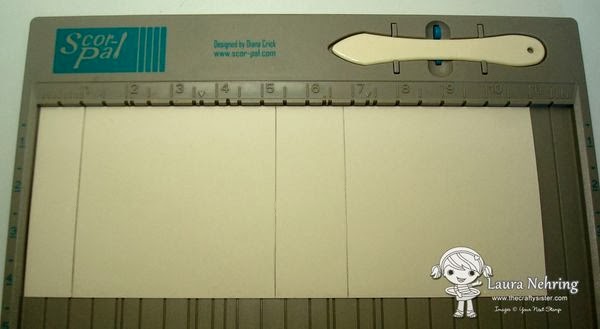
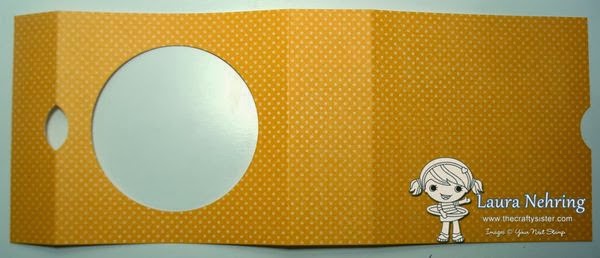
First up, take the 4.25″ x 11″ piece of cardstock (this is exactly half of a standard sheet of cardstock, so you can make 2 bags per sheet!), and score at 1″, 5.25″, and 6.75″.
The second panel from the left in the photo will be the front of the treat bag. On this section, use a 3″ die to cut a circle out of the center of the panel.
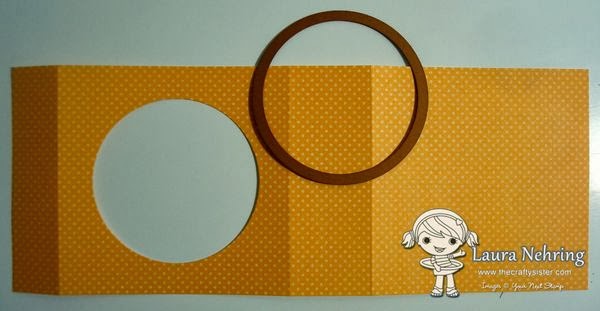
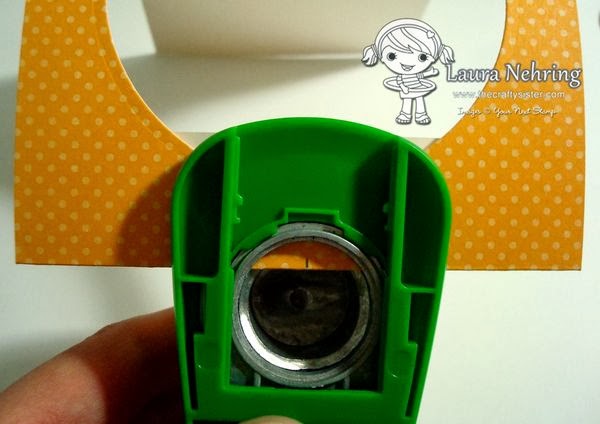
Next, you’ll need to cut a notch in the top of the treat bag cover. Fold the score line between the 1″ panel and the front panel, and mark the center. Using a 1″ circle punch or die, Cut a half-circle notch.
Another half-circle notch needs to be cut at the opposite end of the cardstock, so that the unassembled cover looks like this:
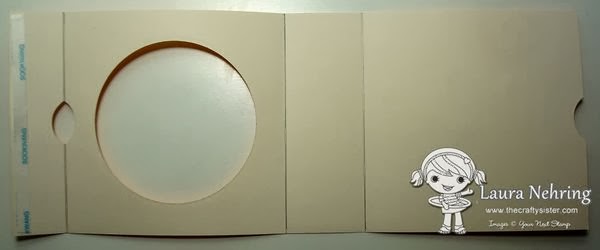
Turn the cardstock over, and add a strip of Scor-Tape to the 1″ panel as shown:
(Optional Step/Not Shown: adhere a piece of clear acetate on the back side of the cardstock to re-enforce the circle window.)
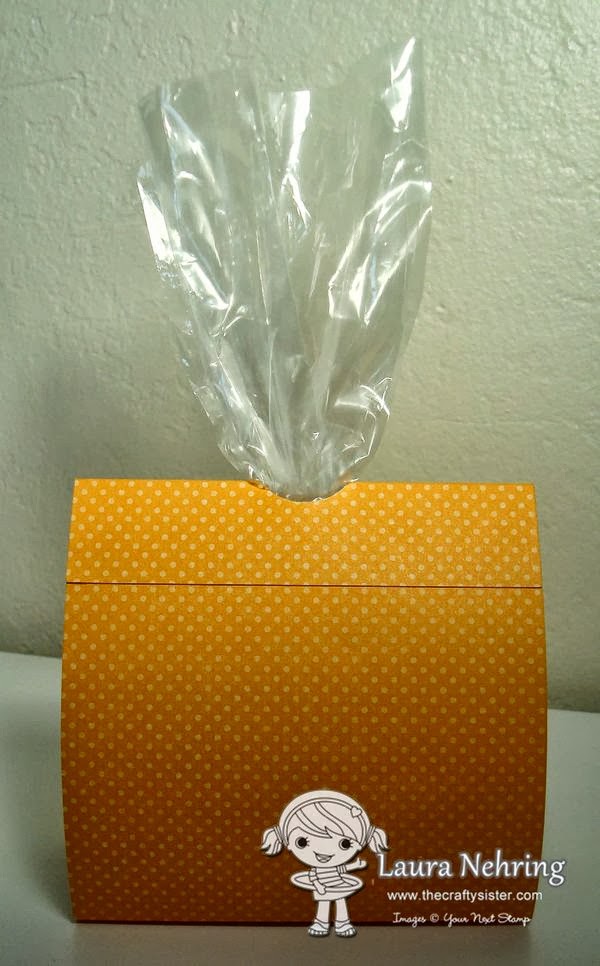
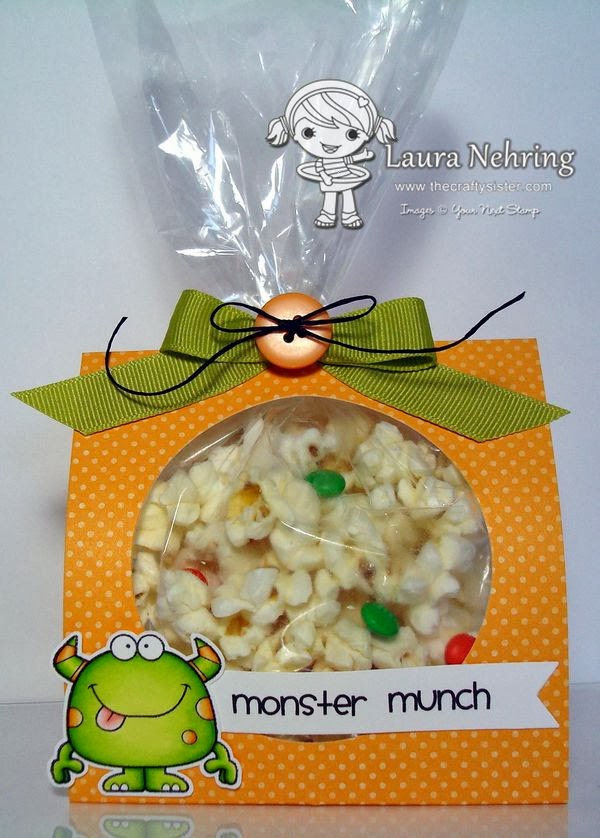
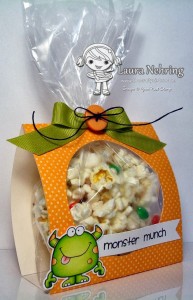
Now it’s time to fill your treat bag! I use the Wilton brand Clear Party Bags for these. They measure about 4″ x 9″ and fit perfectly inside the cover. Fill the bag about halfway with goodies (I used a mixture of popcorn and mini M&M’s for mine), then twist the top of the bag and insert it through the circular notch. Fold the cardstock so that the half-circle notch meets up with the circular notch at the top. Fold the 1″ flap down over the back, remove lining from Scor-Tape, and adhere.
Tie up the top of the bag with a ribbon, and decorate the front of the cover as desired. I used one of the cuties from the Silly Monsters set, along with a computer generated label, cut out with the Fishtail/Banner Dies.
 |
| Front View |
 |
| Side View |
These little treat bag covers are perfect for party favors or holiday treats! I’ve made them for lots of occasions, and they are so quick and easy to put together!
Hope you enjoyed my tutorial! Thanks so much for stopping by!


What a great idea and your coloring is perfect! TFS!
This is such a cute treat bag! TFS!!
Hugs,
Jo
xox
Too CUTE! Love this little treat bag! TFS!
I LOVE this Super cute & YUMMY treat!! Adorable image.
Have a wonderful day,
Migdalia
♥ Crafting With Creative M ♥
♥ 2 Creative Chicks Challenges ♥
ADORABLE !
Oh so cute!!!