Posted by: YNS on Wednesday, July 31, 2013 at 4:00 am
Hello! Kerri, here and I wanted to share with you how I usually color faces with my Copic markers:)
These are the colors I almost always use. E11, E00, E0000, and R20. I am using the adorable Ellie Loves Lattes for my demo today.
I know that many teach to start with the lighter color first, but I always start with the darkest first. I outline the hairline and the sides of the face with E11.
Next I add some blush to the cheeks with R20.
I blend those together with E00, making sure to leave a space for my lightest color around the nose and mouth.
I finish blending with E0000.
Sometimes I go back and add a little shading around the hairline with my E11 once again.
The finished product! I used the YNS Fishtail/Banner Dies for my sentiment and the dp is Pebbles Seen and Noted.
I hope you enjoyed my tutorial! Thank you so much for stopping by and have a fabulous day!
Kerri
Recipe:
Stamps: Ellie Loves Lattes
Paper: White and Red cs, Pebbles Seen and Noted dp
Posted by: YNS on Wednesday, July 17, 2013 at 4:00 am
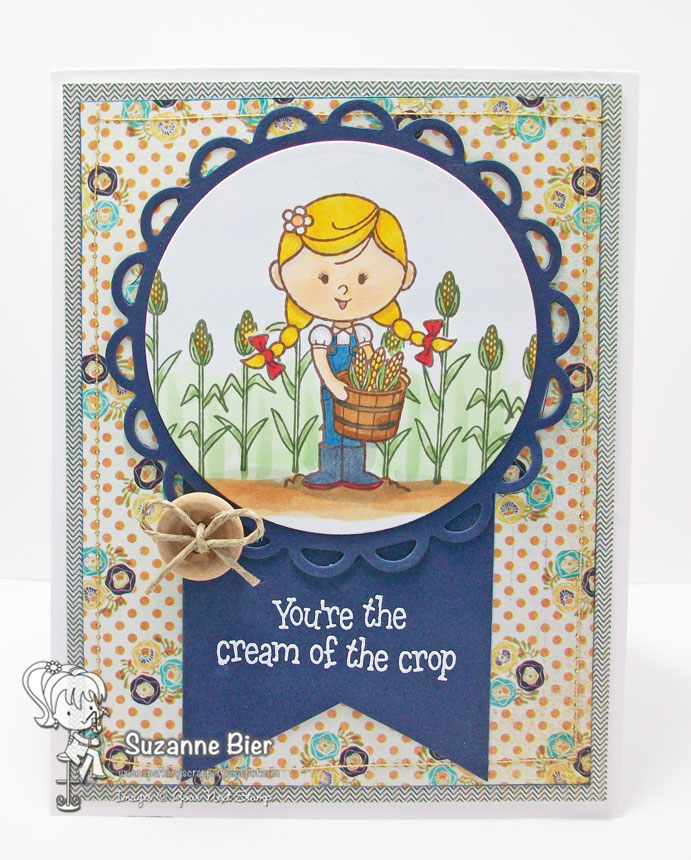
Hi, everybody! Suzanne here with a tutorial on masking with your YNS stamps to create a scene! The newly released “Howdy Farmer” and “Barnyard Love” sets are perfect for this technique! You can carry it over to other sets where you want more than one item to come together and look like it’s all one image.
Here’s a card that I made for YNS’s July Fun Friday challenge with the “Howdy Farmer” set. I’ll show you the steps I took to put the main image together. (There’s still time to play along!)
Depending on how much temporary adhesive is on the back of the paper, you may have to add more. If the image is small enough, I run it through a sticker machine (like a Xyron) with a repositionable adhesive. That way, I can be sure that my mask will not move when I stamp over it later.
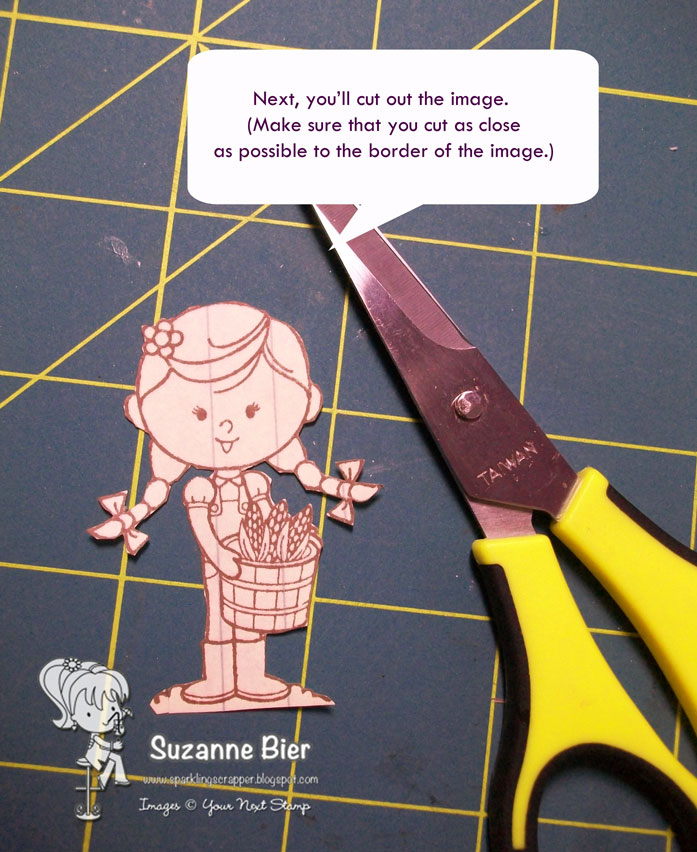
As you can see, I got close to the edge and went over in a few places. Some parts I didn’t get as close as I would have liked to. You’ll see later why you’ll want to trim as close as you can to the edges.
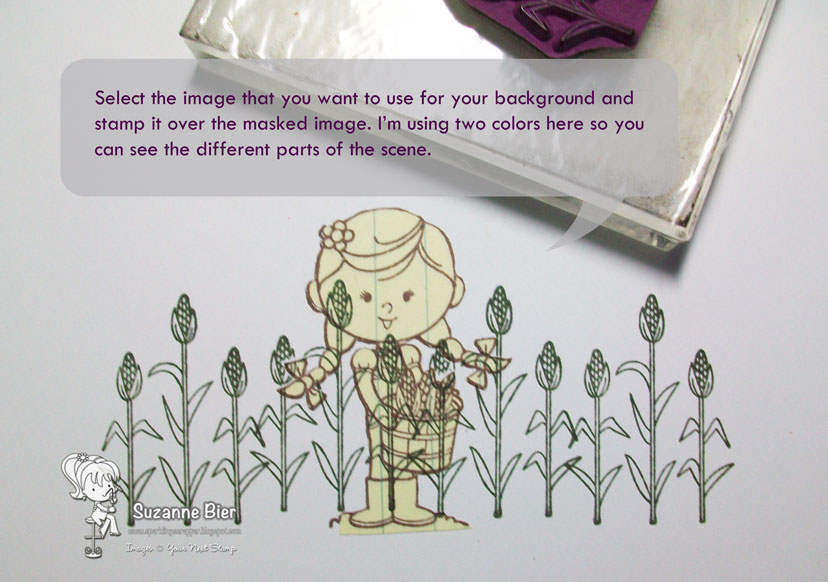
Depending on the type of ink and paper that you’re using, you may need to wait for the image to fully dry before applying the mask. Try to line up the mask as much as you can with the image underneath.
Don’t worry about stamping on top of the mask. This will help you line up the background image.
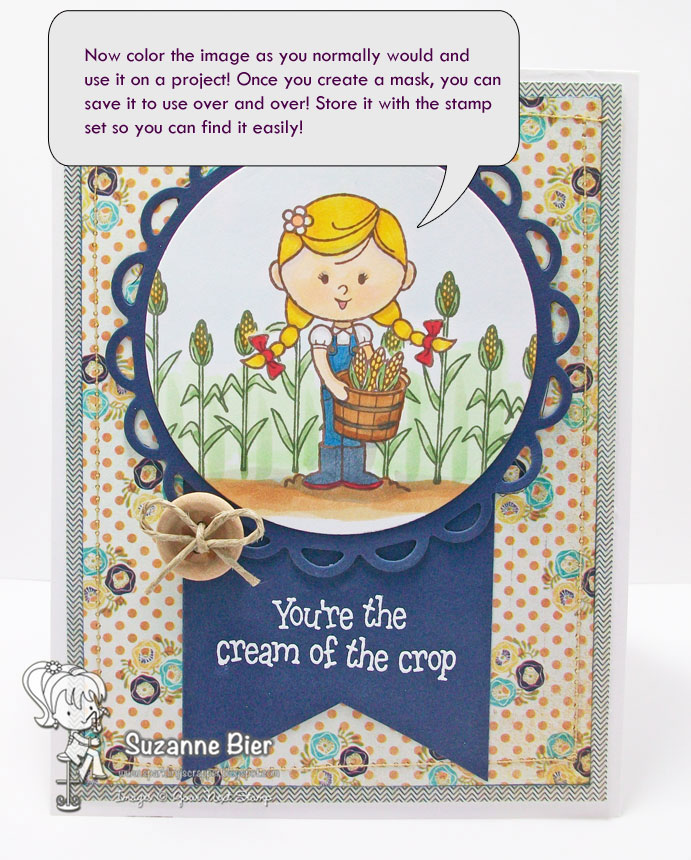
You can see the little gaps near her pigtails and the bucket of corn where the mask placement is off a bit. You can add shading in those parts to make it less noticeable, or draw a line to connect the missing parts, but when the difference is that small, you can leave it just as it is!
Thanks so much for stopping by today! I hope you enjoyed this tutorial and will be trying the masking technique on a project very soon!
Posted by: YNS on Monday, July 15, 2013 at 4:00 am
Hi all! Maureen here and I’m going to share a little video with you today! A little while ago, I shared this card on my blog: For today’s video, I’m going to show you how I colored the image with Prismacolor colored pencils and odorless mineral spirits (I actually used a version called odorless paint thinner). Please be kind with your comments as this is my very first video!! Thanks for watching!
Posted by: YNS on Wednesday, July 10, 2013 at 4:00 am
Hi everyone! Laura here today, with a quick and easy how-to on making your own flower embellishments.
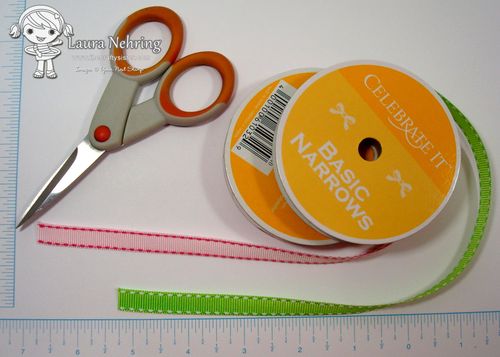
A few supplies you will need:
scissors, saddle-stitch ribbon in green and another color of your choice (I used 3/8″ ribbons), ruler, glue dots (not pictured – I used 1 large, 2 mini)
The first step is to cut your ribbon… no need to be exact. I cut my pink ribbon to about 8 inches (this will be the flower), and the green ribbon to about 1 1/2 inches (this will be the leaf).
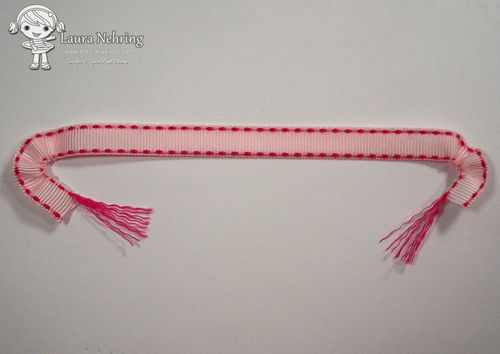
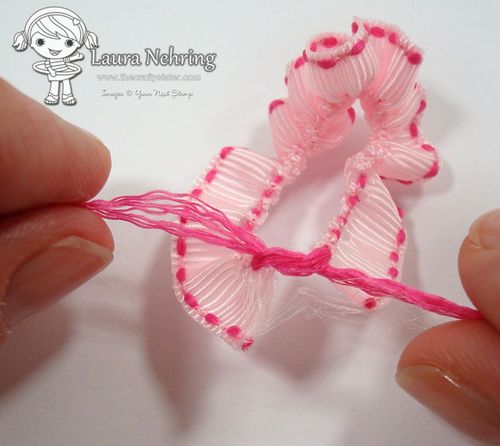
Take the 8 inch ribbon, and pull out the stitching a little from each end (make sure you are pulling at the stitching running along the same side of the ribbon).
With one hand, put the two ends together, and pinch the loosened stitches where they meet the ribbon.
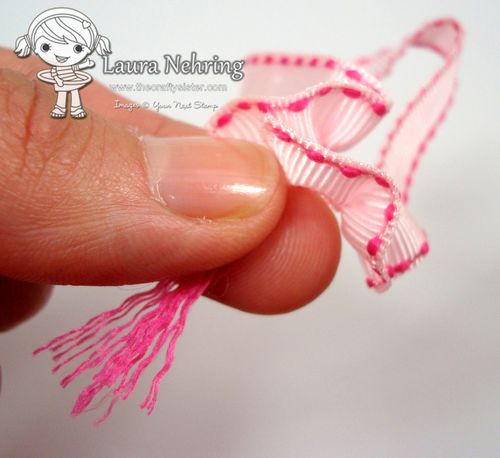
With your other hand, grab the stitches hanging below, and pull slowly to gather the ribbon.
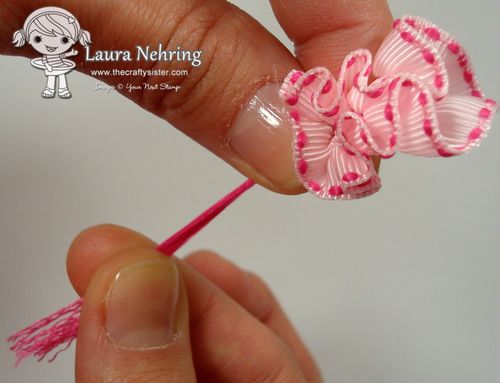
Once the ribbon is gathered, tie the loose ends of the thread together. The tighter you can get it, the better.
After you’ve tied a knot, just cut the excess string.
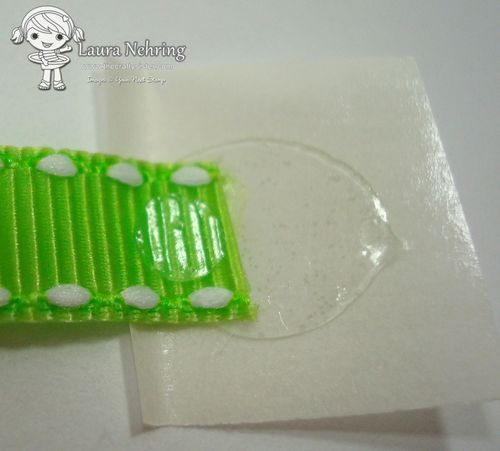
Now we are ready to make the leaf. Take the green ribbon (cut to about 1 1/2 inches) and stick one end of it onto a large glue dot. I buy the glue dots on a roll, so I just cut one off, keeping the backing in place. Once the ribbon is in place, stick a mini glue dot on top.
Fold the other side of the ribbon over, sticking it to the mini glue dot. Add the other mini glue dot on top.
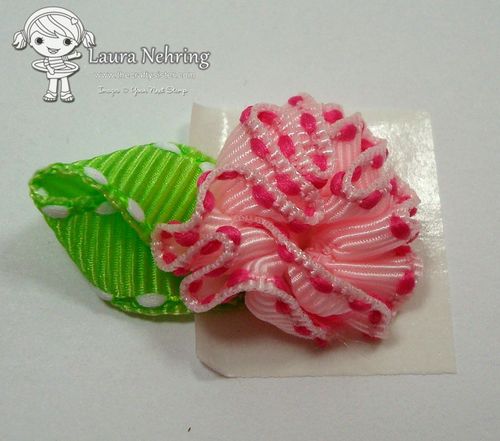
Now you can stick your gathered ribbon on top of the leaf. Make sure to tuck the raw edges of the ribbon underneath, then smoosh it around a bit till you like the look of it!
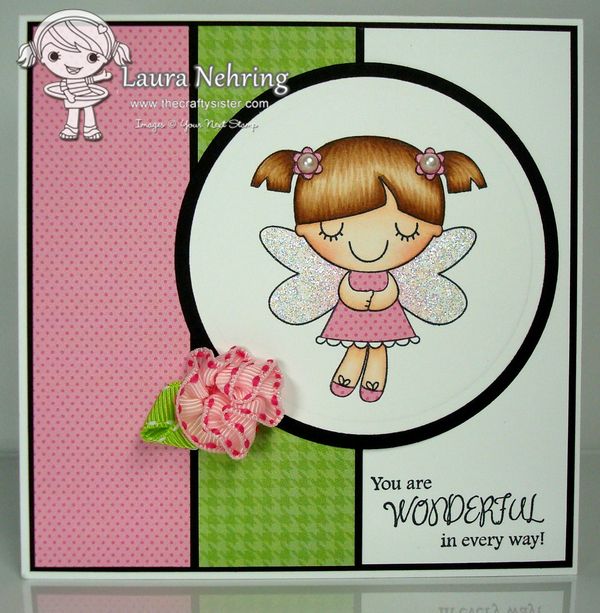
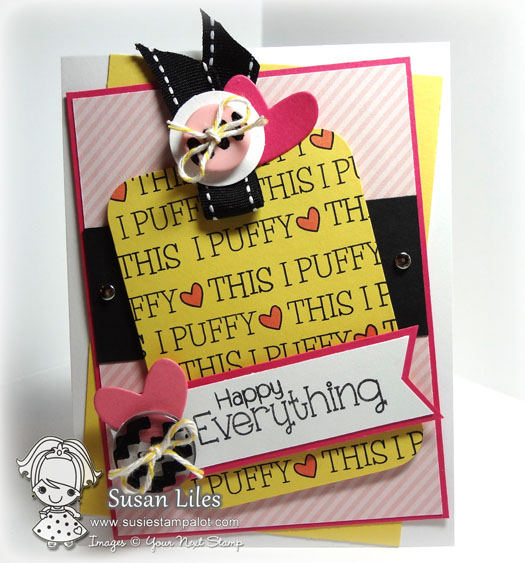
And now you have a simple little embellishment ready to add to your project.
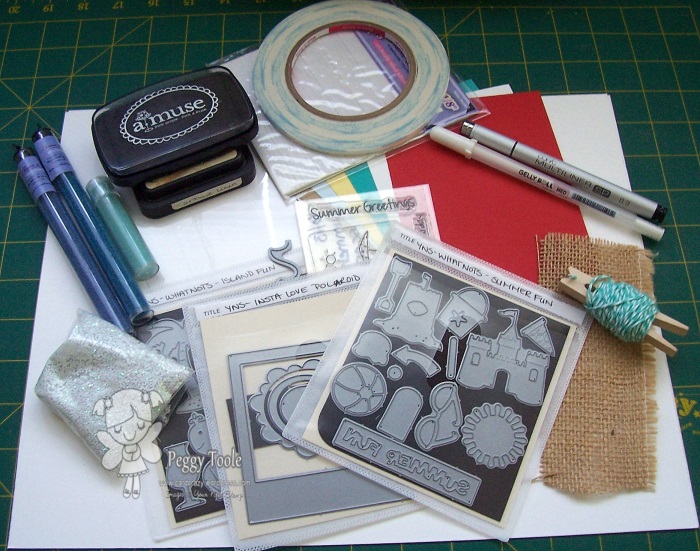
Hey everyone! Peggy here with you today and I am going to show you how I make a shaker card. I haven’t made one in ages, but I love how fun, interactive and easy they are! I used LOTS of fun YNS dies to make my card and have them all listed at the bottom of the post.
First you need to gather all of your supplies that you will need. I found the little glass beads at the dollar store, they have lots of colors and they are cheap too!
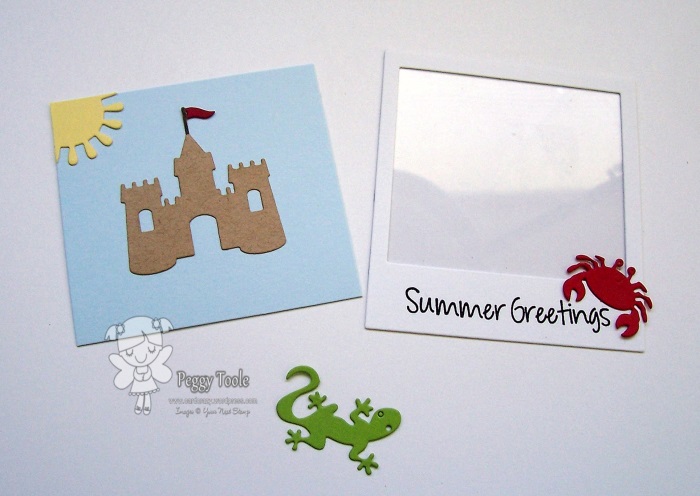
The next thing I did was die cut all the shapes that I wanted to use and stamp the sentiment. This is a great way to use up those scraps that we never know what to do with!
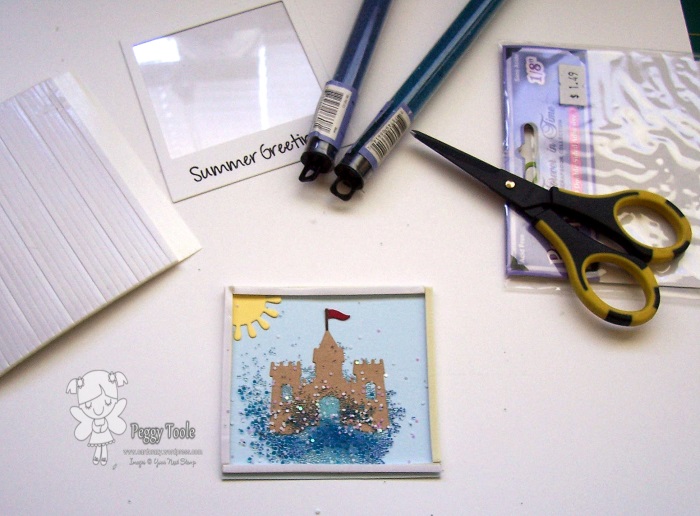
Once I had my little scene the way I wanted it I used some thin strips of foam tape to create a box to hold all my beads and glitter. You don’t want to over fill, but you also don’t want to under fill it. I under filled mine at first, it was a mess to try and open it back up to add more beads! I will be cleaning beads up for a loooooong time!
The last thing I did was attach the window for the shaker and finish off my card! I think that the hardest part of this card was trying to decide what kind of scene I wanted, once I figured that out it it came together quickly.
Well, can ya’ll believe it’s the first of July already? Me neither. Lucky for ya’ll though, that it means it’s time for another SUSIE-Q Fun Tip from me, Susan. Today I’m sharing my second glitterfied tutorial in my 3-part
“Summer sparkleSeries!”
I’m going to show ya’ll how to use the YNS Letter Board Die and add sparkle to the letters from the “negative” tile part. I know–you’re thinking, “WHAAATTT?” Just follow along and don’t worry. I took lots of pictures!
OFF WE GO!…
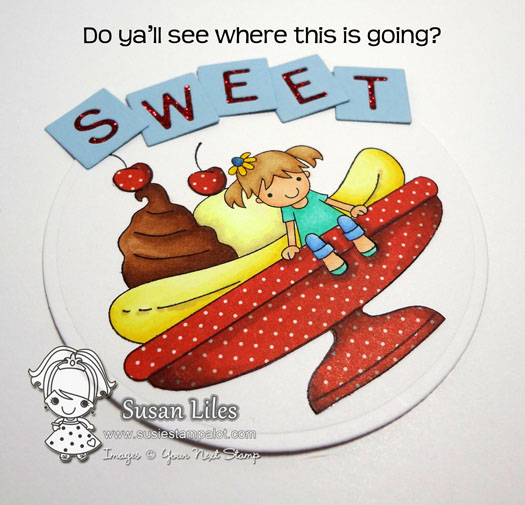
All we need to get started is the YNS Letter Board Die, some packing tape, and of course, GLITTER!! Helping me out today also is the delightful ice cream sundae loving girlie from the Total Sweetness cling set. If you really think about it, you could use almost any die’s negative cut for this technique.
Since all twenty-six letters are included in the die, you are free to make thousands of words with it. That’s a lot of bang for your buck if you ask me. Today, I’m just spelling the word “sweet” to go with my ice cream girl. Die-cut the letters of your choice. We are only using the tile part (negative cut), so the actual letters are yours to rearrange and make as many words on the table as you can with them in thirty seconds after this tutorial is over.
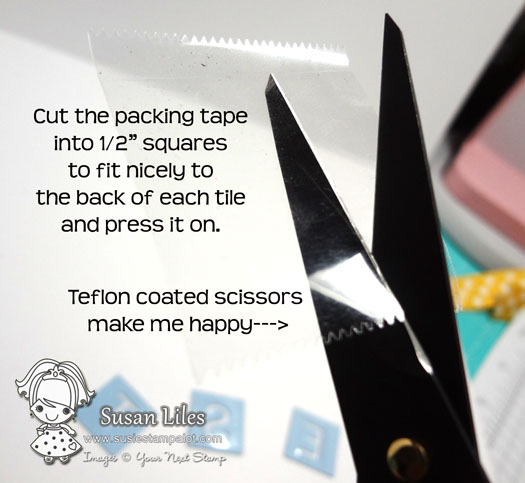
Next we need to make the recessed letter opening be sticky from the front side. The letter tiles happen to be just a little larger than a 1/2″ square, so that’s a good size to cut the tape into. Do this and stick it on the BACK SIDE of each letter tile.
Here’s what the back of the tile should look like with the tape pressed onto the back.
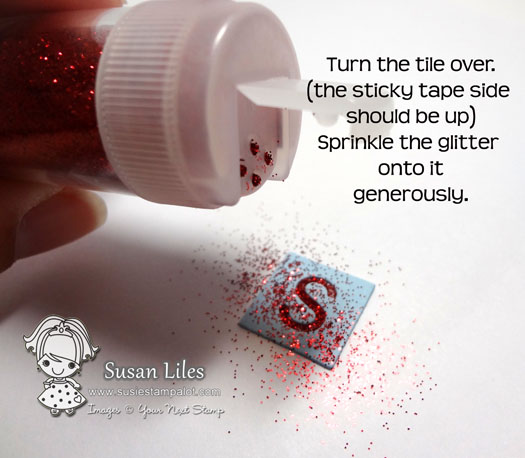
Now we glitter! Sprinkle a lot onto the FRONT side of the tile, so that it sticks to the sticky side of the tape showing through. Remember to glitter over a fresh piece of copy paper that’s been creased to create a trough for the excess glitter to slide back into the container. Goggles optional.
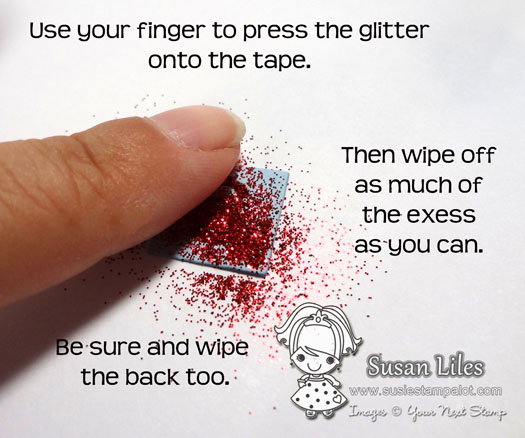
You’re going to want to use your finger to press the glitter onto the tape, then wipe off the excess as best as you can. This is your chance to add more glitter if necessary and repeat the pressing/wiping part.
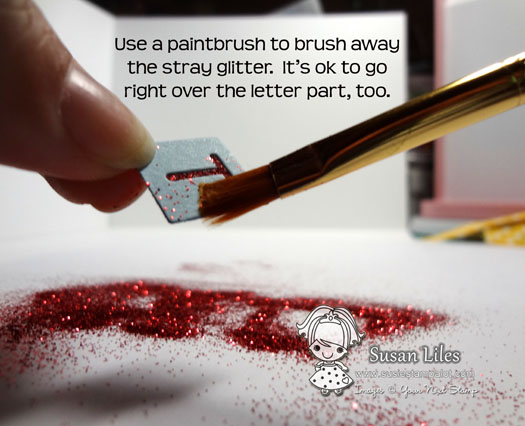
I’ve found using an old paintbrush works wonders in getting off the little extra tidbits of this fine glitter. I keep one especially for this purpose so that if I paint, I don’t end up with unwanted glitter in my paint.
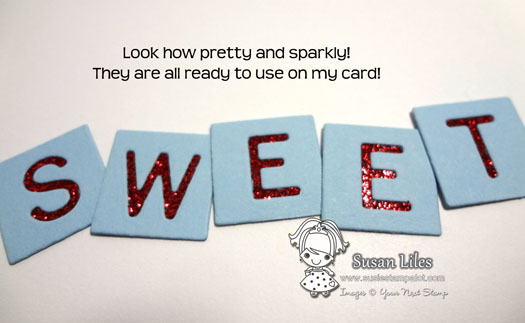
Ok, my letters are all done and super SPARK-A-LAY!!!!
And, here’s my image all ready to go and I’m envisioning the letter placement here.
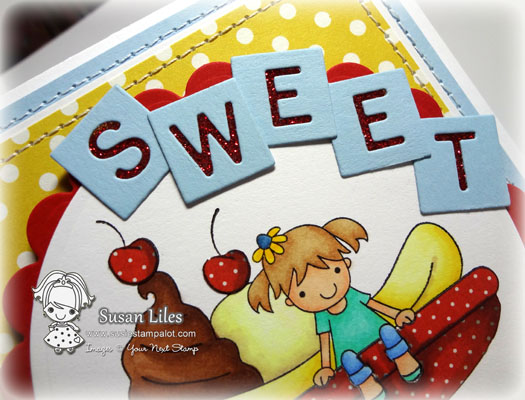
A closer view of my finished card!
I cannot say “I did” and I cannot say “I didn’t” have to go buy and actually eat some ice cream during the making of this tutorial. You’ll have to check my facebook status from last night to find out.
Well, I sure am having fun finding and sharing
NEW ways to play in the GLITTER with ya’ll!
I know you’re going to want to try this tutorial because
it’s so EASY!
DONT’ FORGET to leave me a comment—
There’s going to be arandom drawing on JULY 5th from all the comments to win some YNS goodies!
Posted by: YNS on Wednesday, June 26, 2013 at 4:00 am
Hey there
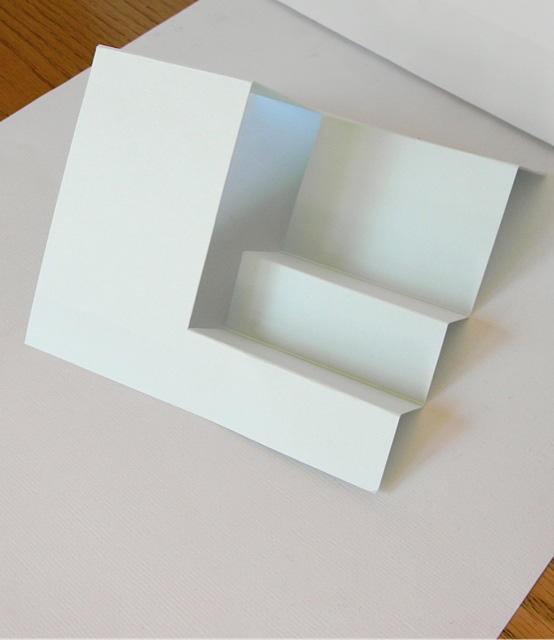
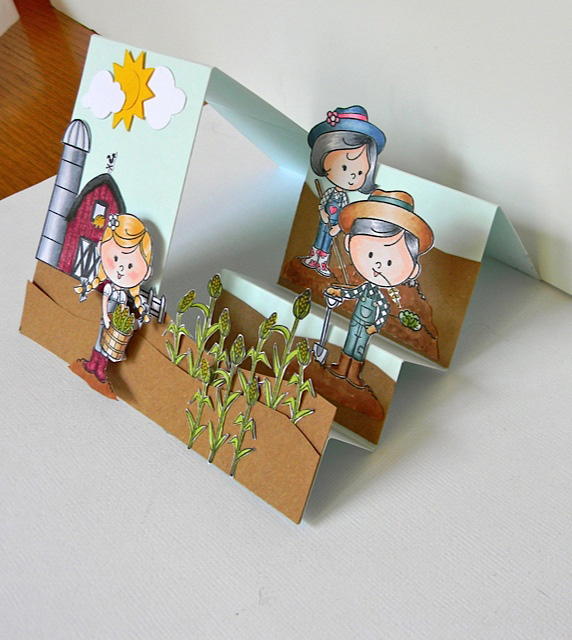
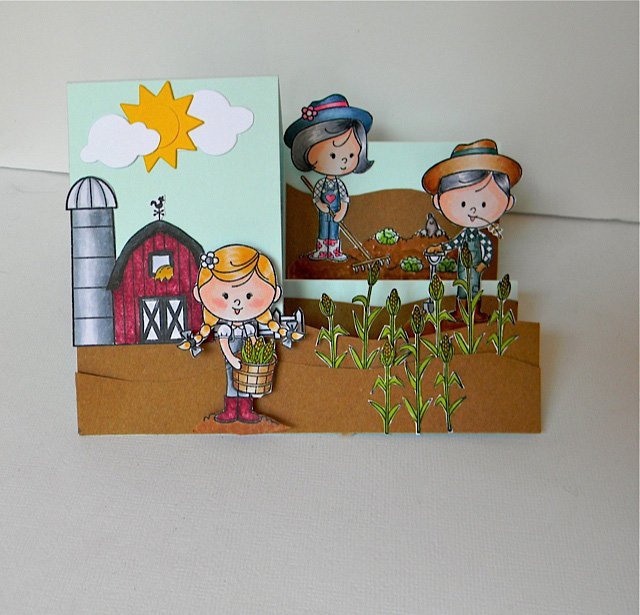
Welcome to our YNS weekly design team post…each Wednesday we will help inspire, teach, organize and share crafty tips..today I am sharing a tutorial on how to make and decorate a side step card First start with a piece of cardstock 5 1/2 x 81/2, put paper in your cutter along the short side and cut it from the 1 inch mark to the 61/2 inch mark
Next score on the 2 1/2 inch side of your paper at 4 1/4 then flip your cardstock and score the 3 inch side at 1, 2, 3 1/4, 41/2 and 6 1/2..( I didn’t realize how LOVED my score pal was till it was time to edit these photo’s…please excuse all the scribble marks)
Fold on the score lines
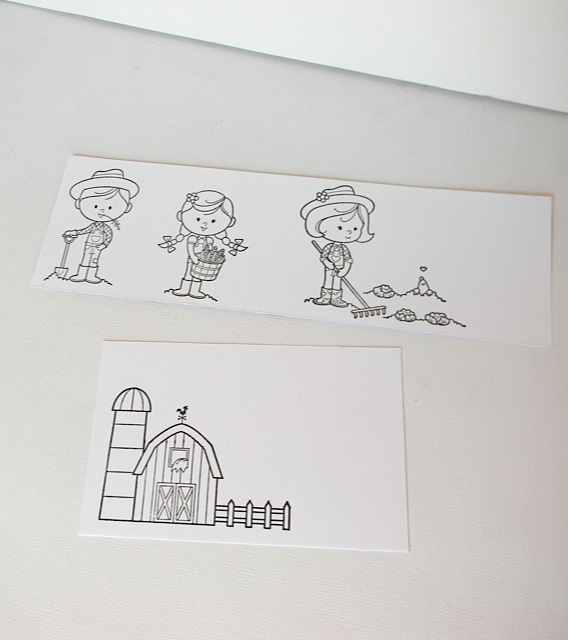
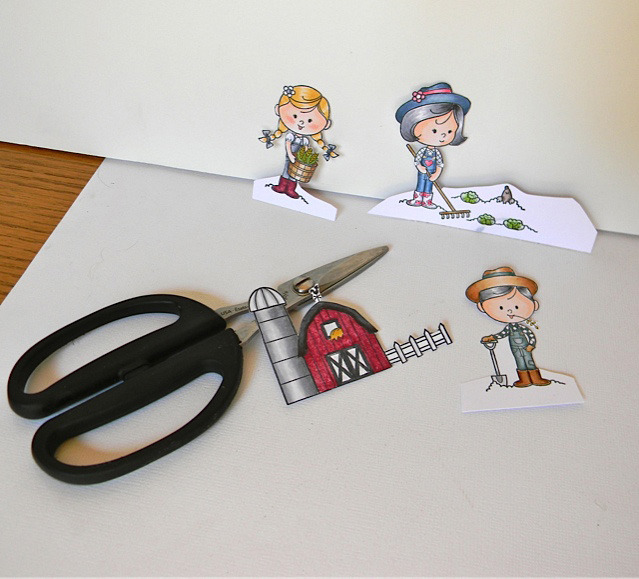
Next I stamp my images that will make the scene
Color them up with Copics (or your coloring medium of choice) and cut them out
Now I begin to build the scene I want, adding backgrounds and layering the characters
Posted by: YNS on Monday, June 17, 2013 at 11:00 am
Hello! Jen Roach here and today I have an exciting little tip for you for how to get more use out of your Your Next Dies by using them to make your own stamps! While you may have seen this done before, the Your Next Dies are the absolute PERFECT size for this technique.
Let’s get started.
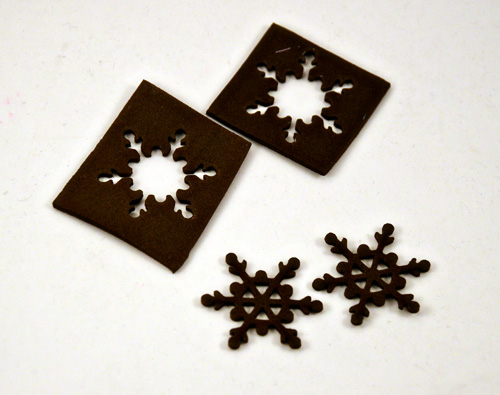
Step 1: Cut desired die out of fun foam (available in sheets at local craft or dollar stores – typically in the kids crafts area. Depending on the die cut machine and die you will be using you may need to add a shim to cut all the way through.
Step 2: Adhere your new “stamps” to a clear block. There are several ways you can do this I have an old block that I use double stick tape on so I just adhered my foam cut outs to the top of the tape. You could also glue them to a piece of wood or other hard surface.
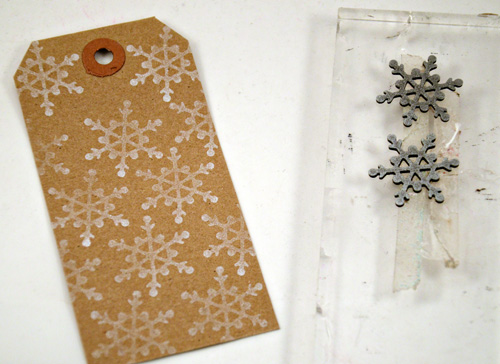
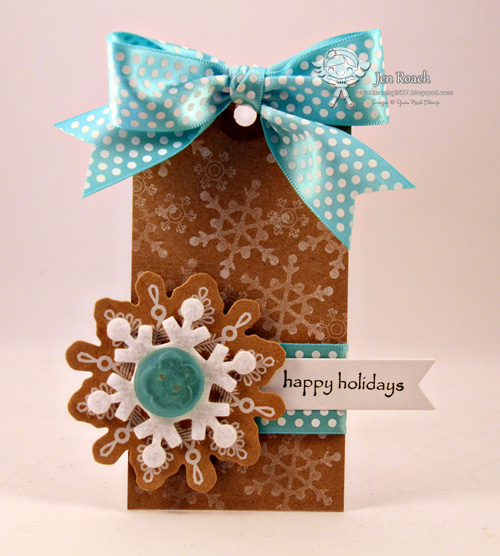
Step 3: Stamp away! The added bonus to making your own stamps out of foam is that you can stamp with inks, paints etc. For the tag I created today I used some white pigment ink.
And here is the finished tag I created with my stamped background. I added some additional snowflakes (stamps from the Holiday Snow Globe set) and a sentiment and voila!
Hope you enjoyed this little tutorial today and thanks so much for stopping by.
Posted by: YNS on Saturday, June 1, 2013 at 3:00 am
Well, it’s me again, Susan (susiestampalot) here with another SUSIE-Q Fun Tip tutorial. So are ya’ll ready for SUMMER? I know we are and my girls and I can’t wait to have some crafting fun. Several of ya’ll have asked for some GLITTERtutorials, so today I’m giving you the first installment of three tutorials involving just that! Let’s just call it the
“Summer sparkleSeries!”
Sound fun? It won’t be anything too hard, I promise. We all have glitter that’s just waiting to share its sparkle, so let’s get GLITTERFIED!For my tutorial today, I’m sharing a SUPER SIMPLE way to “glitter” (can it be a verb?) die cut shapes.
Off we go…
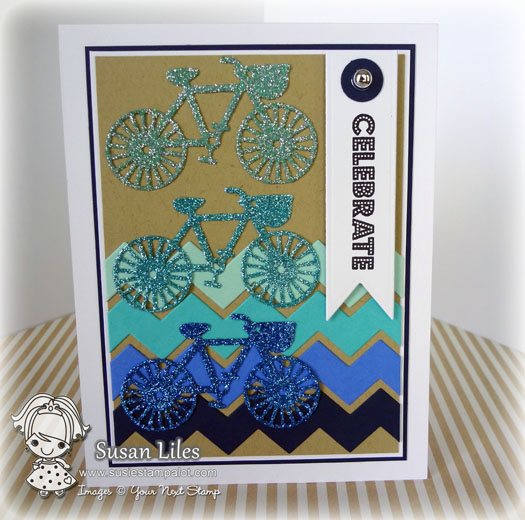
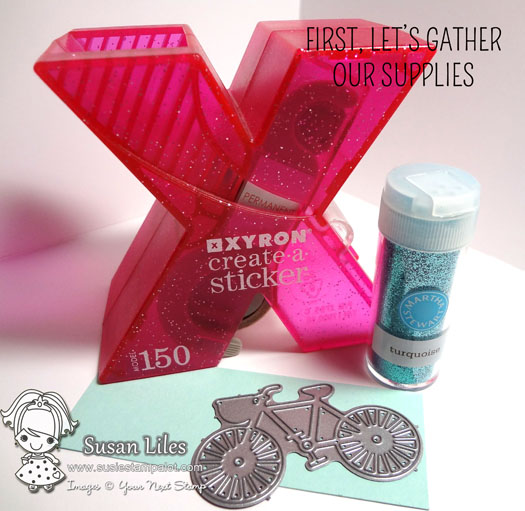
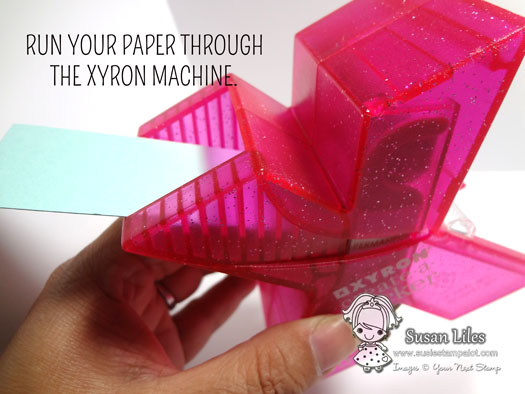
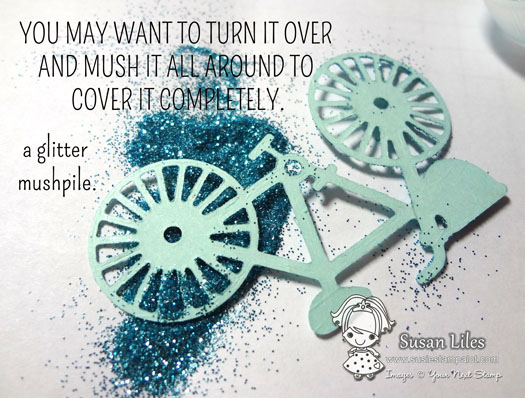
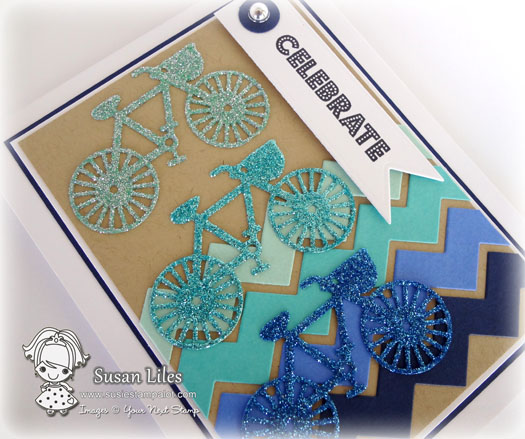
This is by no means my original idea, but I wanted to share the fact that even the most intricate die shape like the YNS bike die (which I LOVE) from the Cute Bike and Kite Die Set is easily glittered (v.) using this method. You’ll need Glitter (I used a fine glitter from Martha Stewart), cardstock (preferably a close color to the glitter), your trusty Xyron “X” machine or other sticker maker, and a die.
Obviously, your choice of sticker maker will depend on your size of die. Cut cardstock to fit and run it through the Xyron machine.
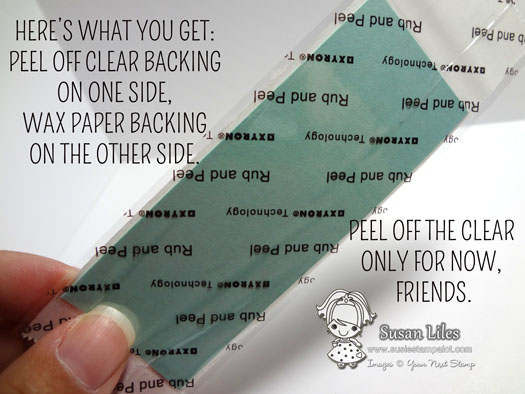
That leaves you with a strip of “sticker cardstock”. Yay. Peel off the clear side, but leave the wax side attached for now.
What we are basically making is a sticker, but with the sticky side on top, so that the glitter will have something to stick to. It’s important to cut the die out with the wax side of our sticker facing the “cut-side” of our die. Otherwise, you’ll have just a die-cut sticker and all you’ll be able to do is “stick-her” down.
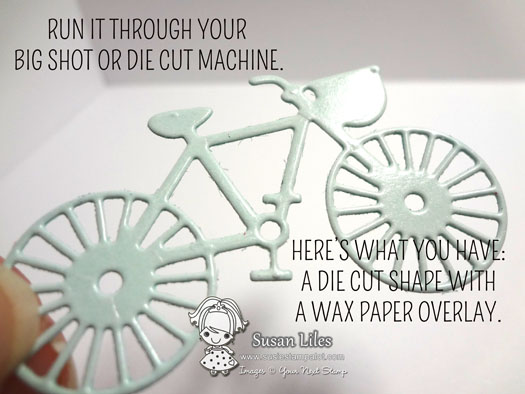
Run it on through your machine.
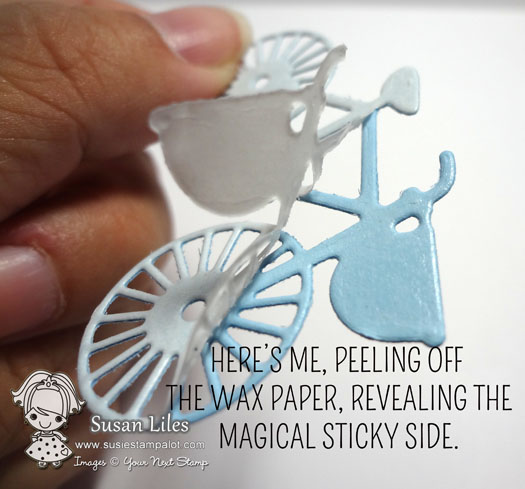
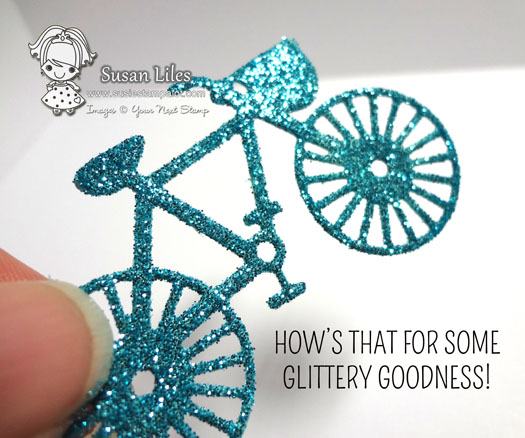
NOW peel off the wax paper from the TOP of your die cut shape.
You can kind of see the sticky side is UP.
Use a blank piece of copy paper and pour some glitter out on it (Reminds me of the Def Leppard song, Pour Some Sugar on Me. Don’t ask.) Tip: Before pouring out the glitter, slightly crease the paper down the center to help create a “ravine” for the leftover glitter to be poured back into its container.
I had to do this every time. No big deal. This is where your fingers will get very glittery. You may want to wear safety goggles.
OMG, this makes me SO HAPPY!!!
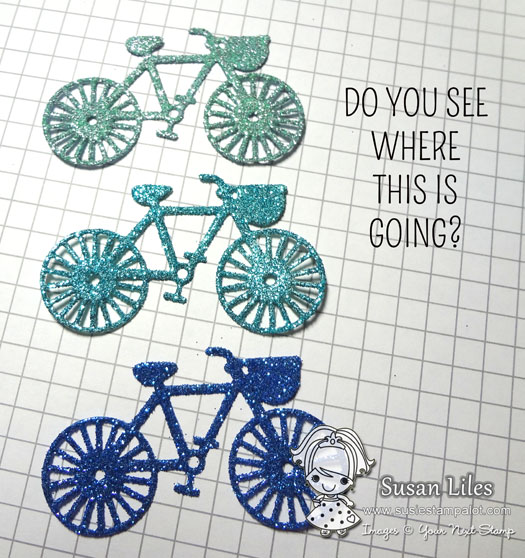
So then I had to make some more.
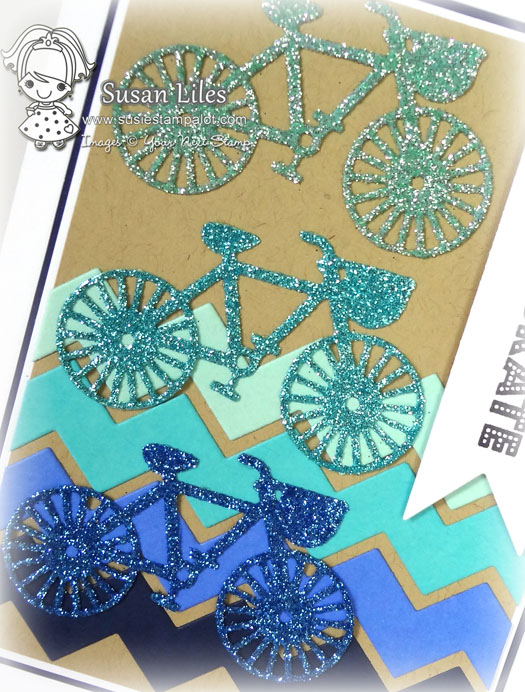
I love the trendy “ombre” look (where light colors fade to dark). Add chevrons and glitter to it and it equals a “SHUTTHEFRONTDOOR”creation!
Here’s another closer look. I have to tell you, this is super spark-a-lay!! Oh! I almost forgot to give a little shout-out to my fabulous YNS CLEAR sentiment stamp set, Awesome Journal Words.
Posted by: YNS on Wednesday, May 1, 2013 at 7:00 am
Well, it’s me Susan (susiestampalot)! Welcome to the May installment of my YNS SUSIE-Q Fun Tip! Most of ya’ll know that I’m not usually a very “technique-y” stamper. I like to stamp something, maybe color it, add some papers and embellishments and go from there. However, I still get caught up in the MAGICof heat embossing and using embossing powders. (Have ya’ll seen the new NEON ones lately? I want, but where would I put them?) Seeing the powder change to a shiny texture when the heat gets to it just makes me happy!
So, for today’s tutorial, I’m going to show ya’ll how
I used stamps and a few other supplies
to heat emboss onto a button.
Let’s turn up the heat and get started…
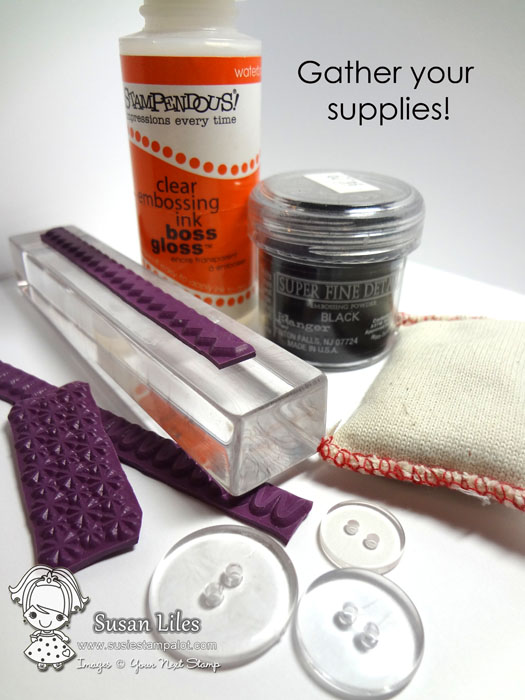
First, joining us today is one of the newest stamp sets from Your Next Stamp, Fun With Borders. You’ll see how I used it in just a minute. First, gather your supplies. The buttons can be any kind, as long as they have a flat side to them to stamp on. A border or background stamp works best.
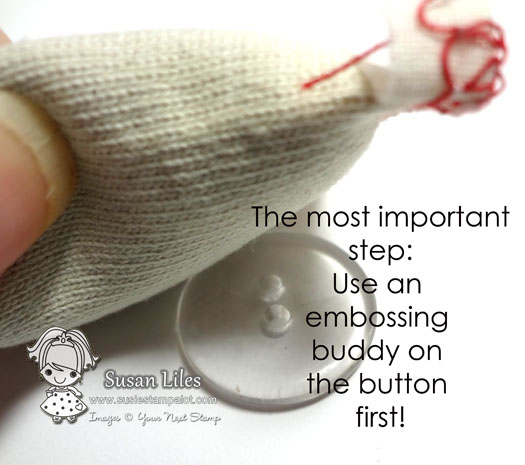
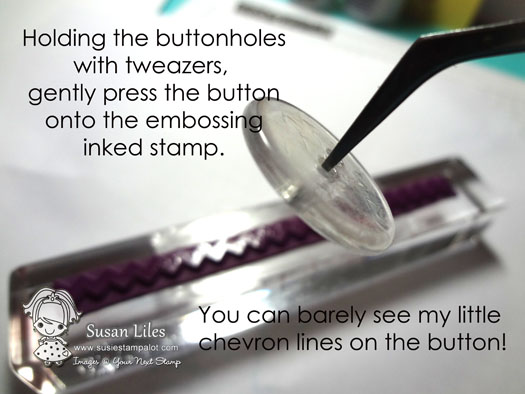
First, it’s very important to use an embossing buddy on your button, just as you would a cardstock surface before applying embossing ink to it. It takes the static away and keeps stray embossing powder from being where you don’t want it. If you don’t have one, cornstarch inside a thin baby sock works fairly well from what I understand. Just rub the embossing buddy all over the button, including the sides.
Next, ink up your stamp with embossing ink. Versamark works well as long as the inkpad is nice and juicy, but I LOVE my dauber style ink from Stampendous.
Next comes the tricky part. Leaving the inked stamp right side up on your desk, gently press the button onto it where you want the embossing to be. (Yes, I see my typo…grrr.)
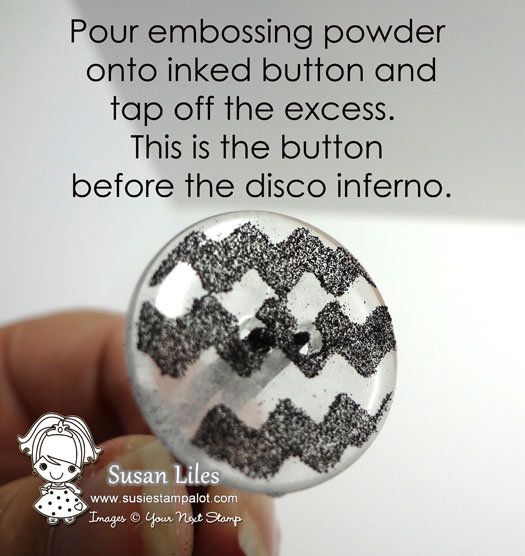
Pour/douse/smother the button with the embossing powder and tap off the excess. Don’t dip it in the powder. Be sure and have a scrap piece of copy paper on your work surface to catch the excess. (Rub the embossing buddy on it, too, and it will slide perfectly back into the powder’s container.)
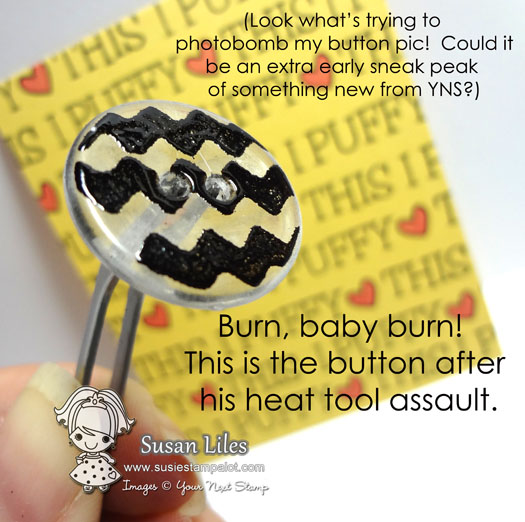
Ok, now it’s time for you to turn on your Disco Inferno song by The Trammps and use your heat tool to melt the embossing powder onto the button. Let it melt completely, but be careful not to melt the button itself. Burn, baby burn! (don’t blame me if that song is stuck in your head all day now…welcome to my world.)
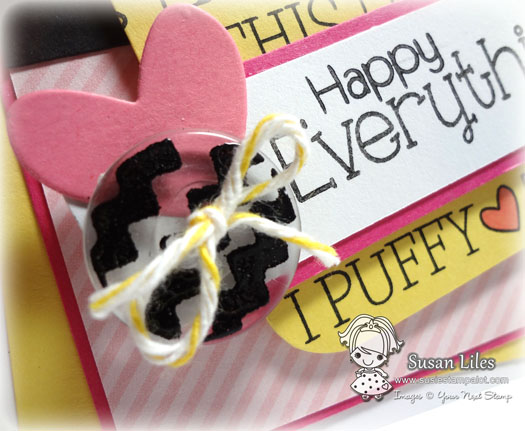
LOOK HOW CUTE!
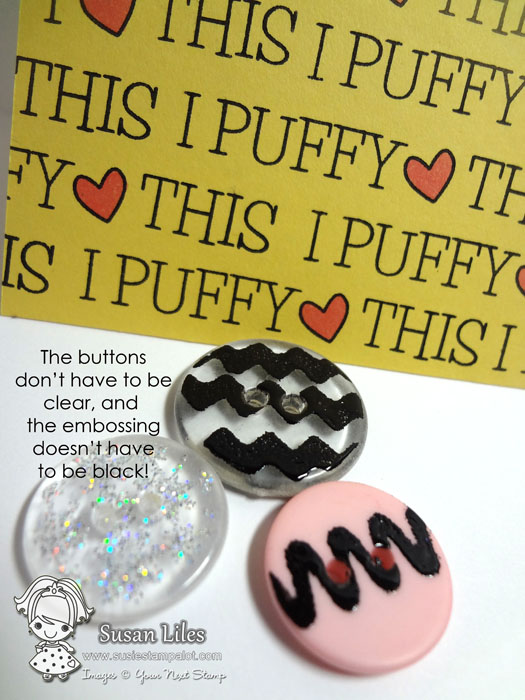
Here’s a couple of other buttons I did with some transparent glitter embossing powder (often referred to as EP) and other YNS border stamps from that same set.
Here’s a closer look at my buttons in action!
Ok, so I guess ya’ll noticed some YNS stuff you’ve never seen before, eh? Stay tuned this Friday, May 3rd for an exciting NEW RELEASE that bears watching for…something Your Next Stamp has never carried before! Any guesses as to what it is?
I hope ya’ll liked my Hot as a Button embossing tutorial! It’s fun and EASY! I love reading your comments, so feel free to give me a shout out. I’m dying to do something with glitter…what do ya’ll want to see?
DONT’ FORGET to leave me a comment—
There’s going to be arandom drawing on MAY 5th from all the comments to win some YNS goodies!