Well it’s the moment ya’ll have all been waiting for–what’s next from Susan for the YNS Susie-Q Fun Tip, right? Well today I’ve got a little something to share as far as making your own embellishments go!
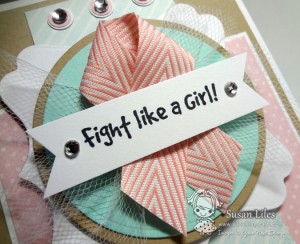
So many of ya’ll were intrigued by my card I posted the other day for the Hop for Hope and how I added the tulle to my project’s focal point. So I thought I’d show ya’ll one of my favorite things to do–stack die cuts, ribbon, tulle, etc. to create some fun and versatile embellishments. Off we go….
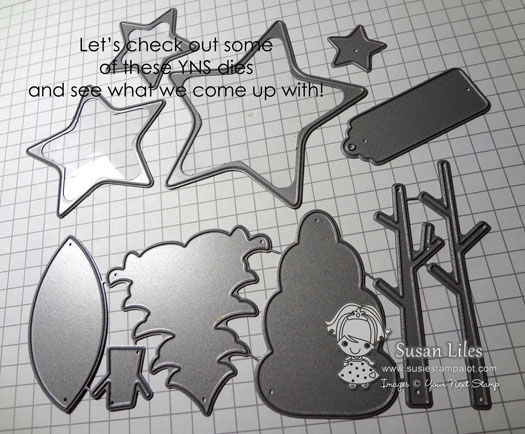
First I pulled out some of my newer dies from Your Next Stamp to give my brain a little inspiration as to what to use!

Once I had that all figured out, the next step was deciding on what to pair my die cuts with (the heart was from a punch).
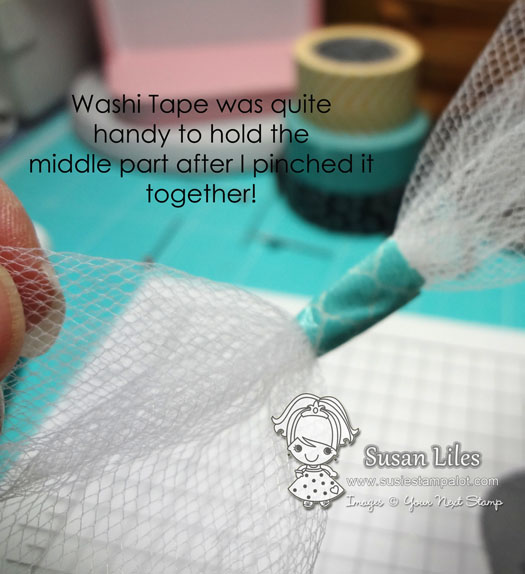
Plus I already knew my underlying layer would be tulle–you have to use something to tie it all to as your bottom layer for this tutorial such as tulle or ribbon, even a bow would work. In this case I cut about a 4 inch by 6 inch piece of tulle and pinched it in the middle, securing with what I had handy–WASHI TAPE!
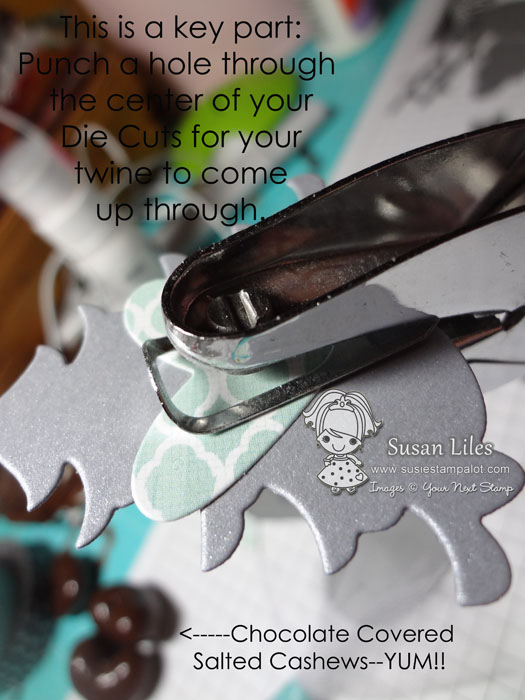
You’ll need to punch a hole in your die cuts for the twine to come up through.
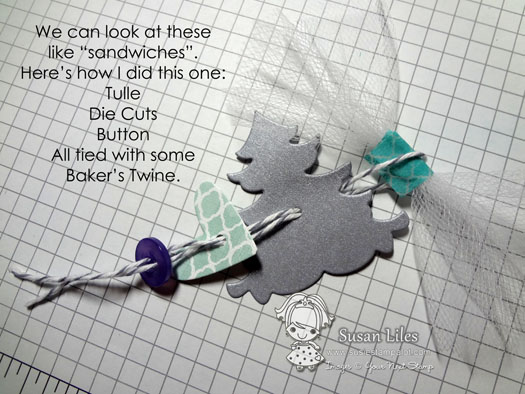
Then I just ran my twine around the washi taped tulle and then threaded both ends of the twine up through each piece I wanted in my “embellishment sandwich”.
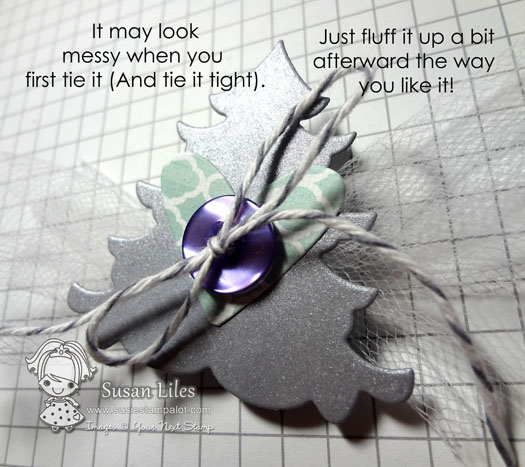
Here’s the magical moment! NO, I didn’t say Magic MIKE, I said MOMENT! Pull all your pieces together and tie it up in a bow or knot it tightly to secure it all.
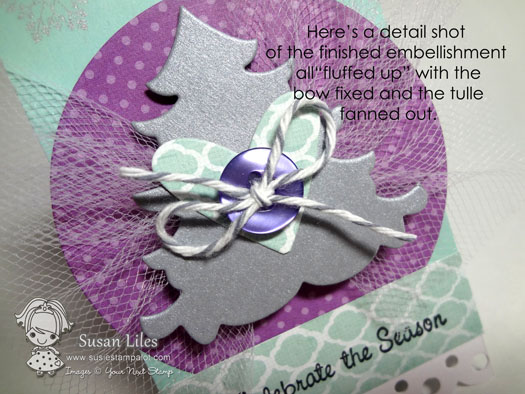
Then you can fluff up the tulle and fix your bow/turn your die cuts to line up properly as they may have twisted when you pulled it all together.

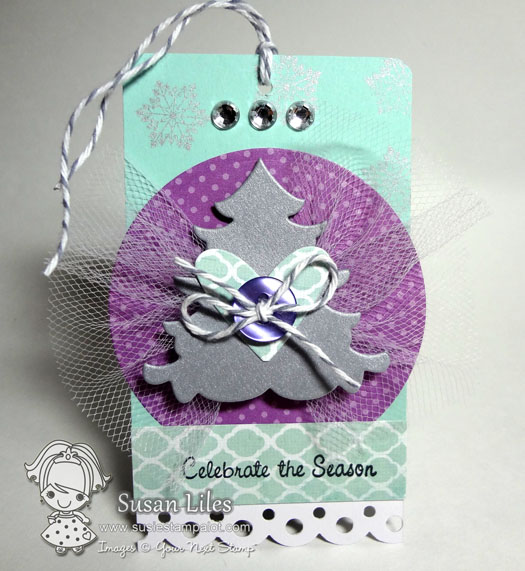
I thought I’d show ya’ll another quick example. I coined the phrase for this as my “Ribbon-Button-Loopy-Embellishment-Thingy” a long time ago when I first started making these handmade embellies! There are endless possibilities for them–They aren’t just for cute Christmas packaging or tags, even though they are quick when you need something with a handmade touch!

I stole some fresh Halloween candy and put it in a glassine bag for this little treat!
By the way, these required very little stamping, and I *may* have used some sentiments from a set that’s coming in November…that’s all I’m gonna say ’bout that!


Thanks for the tutorial. Love these little stacked clusters!
Also thanks for the little..ahem..sneaky peak!
You are so fun to read… LOL Love the tips here, now if only they stick in the brains…. LOVE the look and I need to get me some of that fancy tulle stuff!!!
Fabulous tips! Love how all those layers come together for that magical moment!
another terrific tutorial Susan, thanks for the great tips!
I think that I would have just glued each piece down. You have opened up a whole new technique for me with this stacking. Ihave plans for the craft room today so I know there will be stacking involved. Thanks for the inspiration.
Love the sandwiches – hold the mayo on mine! Seriously, though, this cuts down on all that gluing and holds everything secure. Really fabulous tip! And LOVE the tulle!!!
This is one of those things I can do in front of the TV at night! GREAT idea!
I have time to play today and am off to try something like this…..so cool!!
These are so fun! Thanks for the step by step instructions!
These are just awesome. I can’t wait to try it out. Thanks for the tutorial. Hugs, Robin
Great ideas! I can’t wait to try a few on my Christmas cards! Another great tutorial!!
Super cute and such great ideas! Thanks!
Very cool!!! I’ll definitely be trying this out. Thanks for the inspiration.
The Tutorial is STELLAR!!!!
Loved it!
Def gonna make some of these layered embellies!!
Thanks so much for sharing your talent with all of us!!!
Hugs
Lorianna
Thanks for the tutorial and the handy tip! I love the first tagy you made the colors are beautiful together and I love the tulle!
You know…we take these things for granted and forget that there are simple things that need a tutorial on ’em. Love it. TFS.
Be blessed, Beckie
http://justbcreativecrazy.blogspot.com
These are both adorable and elegant! I liked how functional the use of cord was to hold it all together.
Great tips on making these embellishments. I have to find my stash of tulle.
thanks for sharing this precious idea!
Thanks for these tips! Great ideas!
What a great tutorial! I love your embellies and this is so clear and easy to follow. Something so simple and yet it looks much more complicated than it really is!
These are the cutest and thank you for the awesome tutorial.
Great projects and I love the “fight like a girl” sentiment, awesome!
Love the ideas.Can’t wait to make my own.
Great dies! Love the stack & tie idea, defly use that idea!
Wonderful tutorial! I love using tulle and buttons but never used it like this before! Will definitely give it a try!! Thank you!
AMAZING, what a great time!! Great tutorial! TFS!! LOVE the tags!! Especially love the colors of the tree one! Beautiful!
Lovin’ all these cards! Makes me want to get in my scraproom and get busy!! =)
How cute as well as so easy! This is simple but can look so elegant! Thanks for the ideas and chance to win goodies!