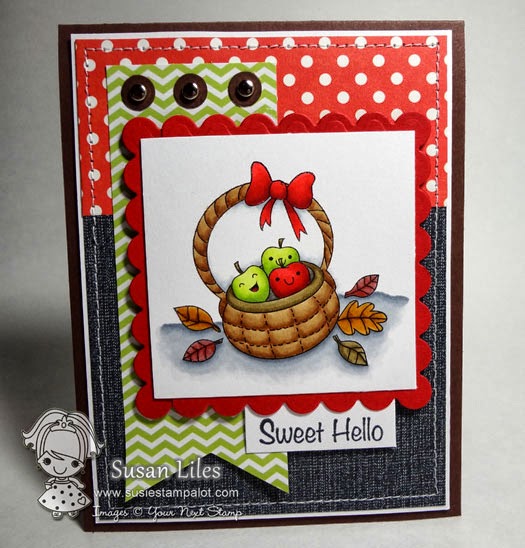
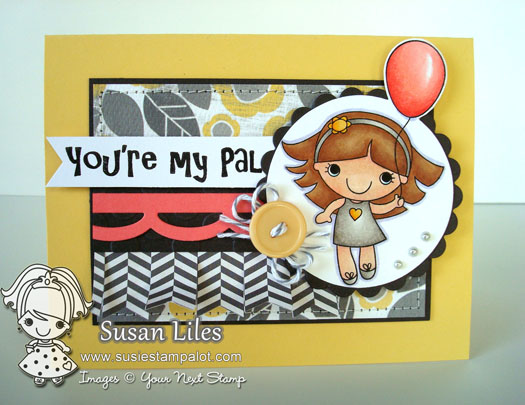
November Susie Q-Fun Tip!


Well it’s the moment ya’ll have all been waiting for–what’s next from Susan for the YNS Susie-Q Fun Tip, right?  Well today I’ve got a little something to share as far as making your own embellishments go!


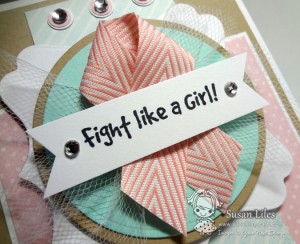
So many of ya’ll were intrigued by my card I posted the other day for the Hop for Hope and how I added the tulle to my project’s focal point.  So I thought I’d show ya’ll one of my favorite things to do–stack die cuts, ribbon, tulle, etc. to create some fun and versatile embellishments.  Off we go….

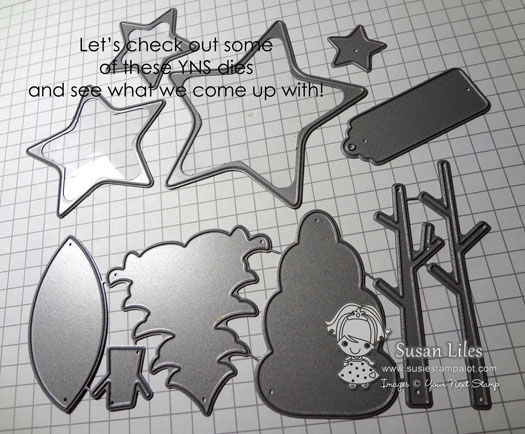
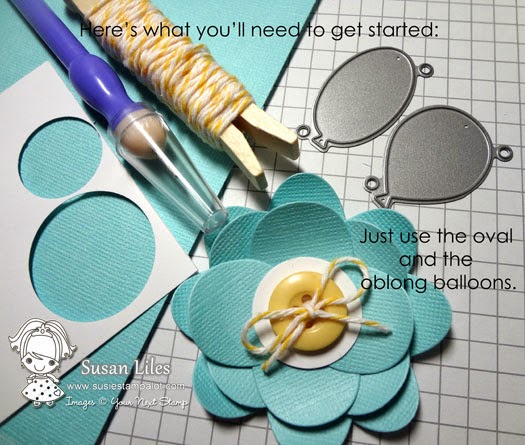
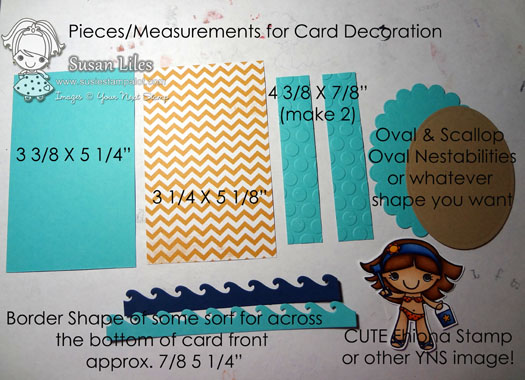
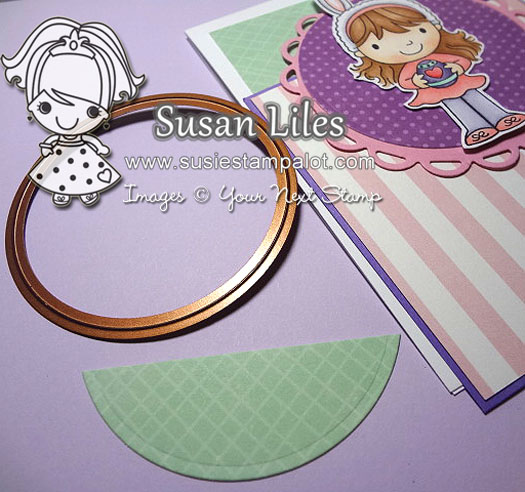
First I pulled out some of my newer dies from Your Next Stamp to give my brain a little inspiration as to what to use!

Once I had that all figured out, the next step was deciding on what to pair my die cuts with (the heart was from a punch).

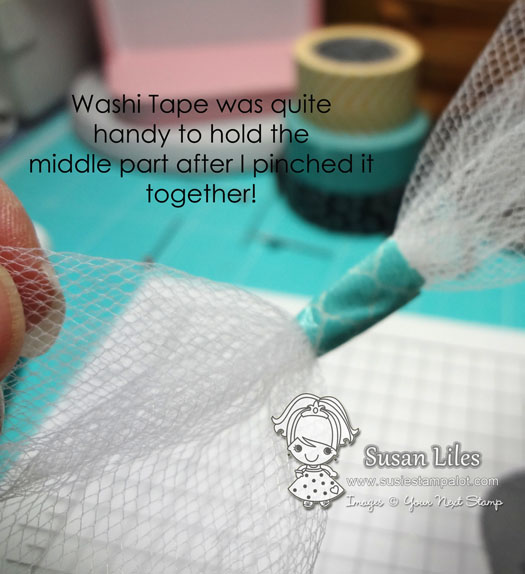
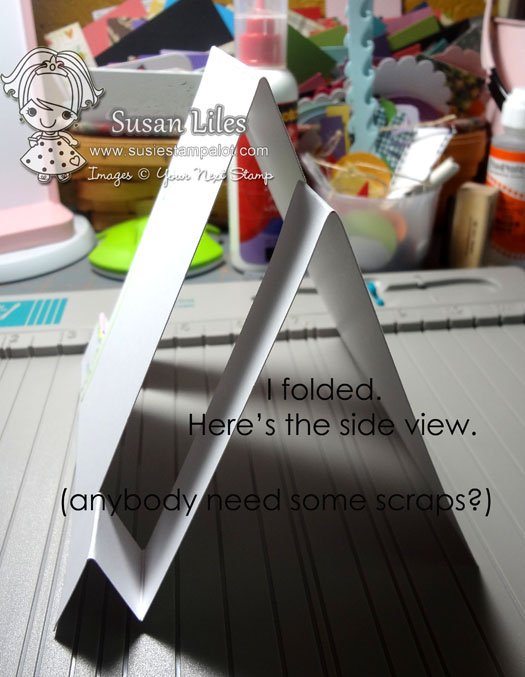
Plus I already knew my underlying layer would be tulle–you have to use something to tie it all to as your bottom layer for this tutorial such as tulle or ribbon, even a bow would work.  In this case I cut about a 4 inch by 6 inch piece of tulle and pinched it in the middle, securing with what I had handy–WASHI TAPE!

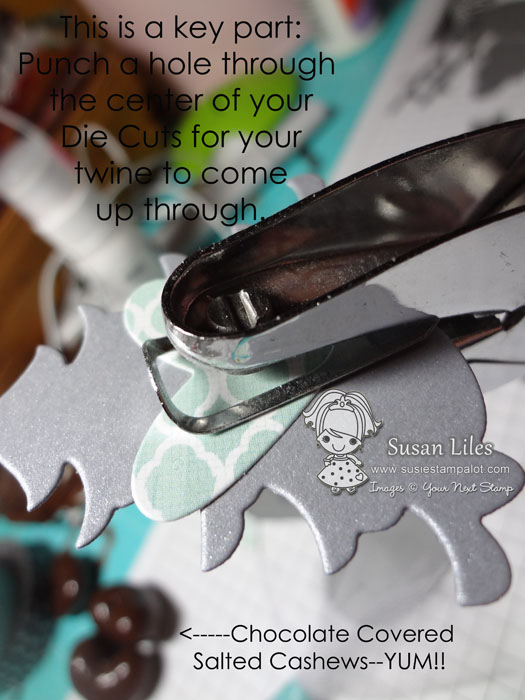
You’ll need to punch a hole in your die cuts for the twine to come up through.

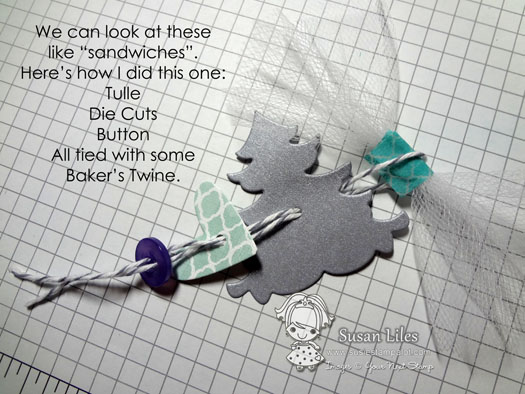
Then I just ran my twine around the washi taped tulle and then threaded both ends of the twine up through each piece I wanted in my “embellishment sandwich”.

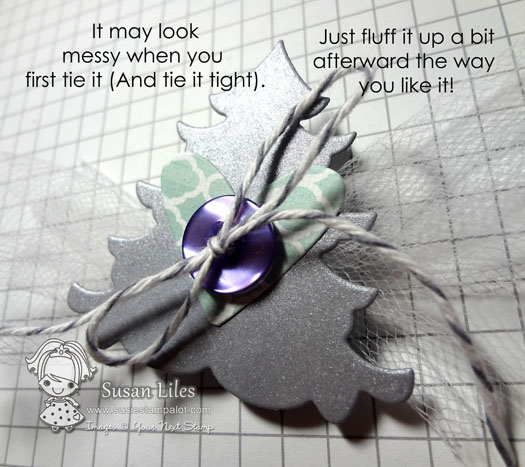
Here’s the magical moment!  NO, I didn’t say Magic MIKE, I said MOMENT!  Pull all your pieces together and tie it up in a bow or knot it tightly to secure it all.

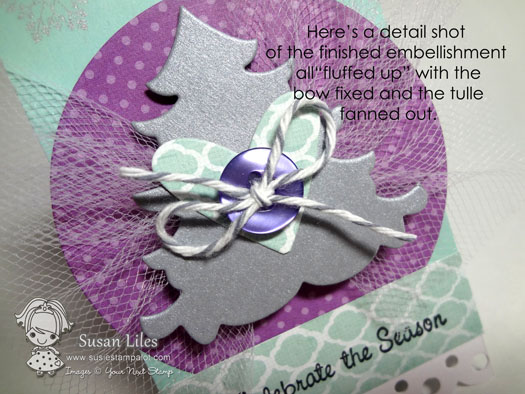
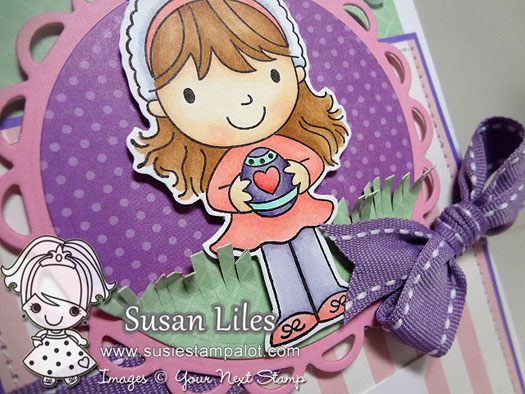
Then you can fluff up the tulle and fix your bow/turn your die cuts to line up properly as they may have twisted when you pulled it all together.

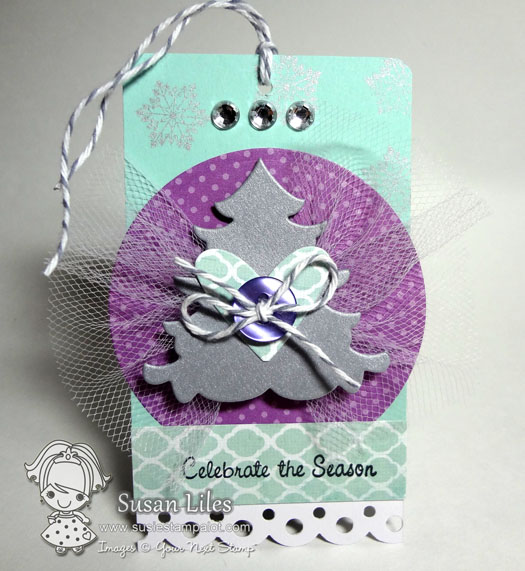
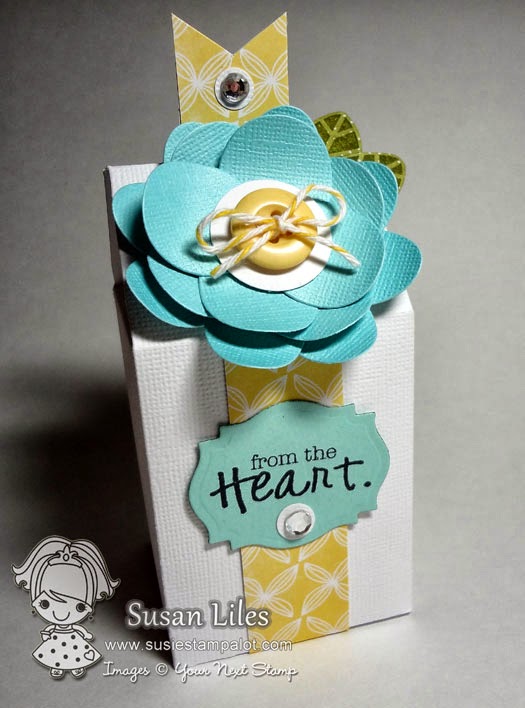
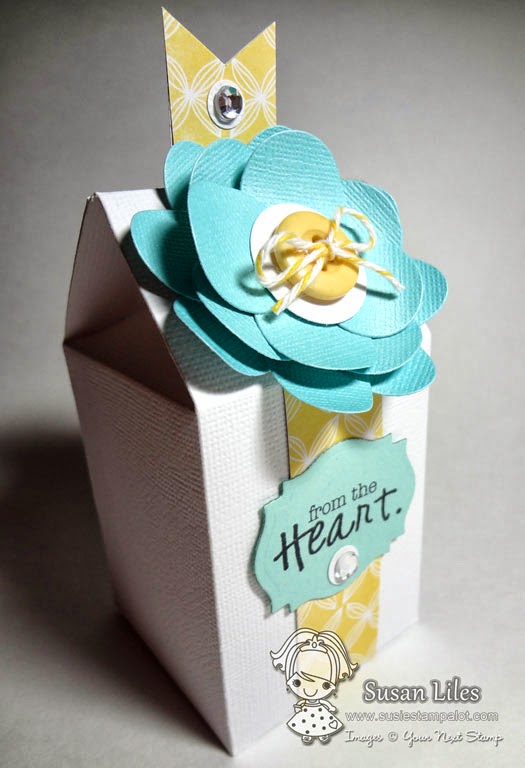
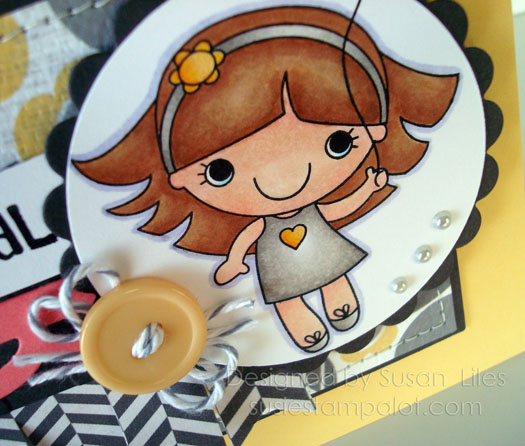
I thought I’d show ya’ll another quick example.  I coined the phrase for this as my “Ribbon-Button-Loopy-Embellishment-Thingy” a long time ago when I first started making these handmade embellies!  There are endless possibilities for them–They aren’t just for cute Christmas packaging or tags, even though they are quick when you need something with a handmade touch!

I stole some fresh Halloween candy and put it in a glassine bag for this little treat!

By the way, these required very little stamping, and I *may* have used some sentiments from a set that’s coming in November…that’s all I’m gonna say ’bout that! 

I hope that all made sense!  If you have any questions, you can leave them here and I’ll try to answer!  
Also, be sure and leave me some lovely comments as to what ya’ll think about this and let me know what else you’d like for me to cover next month!  
DONT’ FORGET— 
  There’s going to be a random drawing on NOV. 5th from all the comments to win some YNS goodies!   Ready, set, GO!!!!!
FacebookPinterestTwitterEmail

October YNS SUSIE-Q FUN TIP

Well, it’s me, Susan (susiestampalot)–Are ya’ll ready for Christmas?  No?  Well are ya’ll ready for another YNS SUSIE-Q FUN TIP?  GOOD, because I have some fun tricks to share with you!  This month I stepped out of my box and did something I rarely do, but still have a few tips to share about it.  A few months ago, I told ya’ll that I LOVE to cut out my stamped images and use them on my cards and created THIS tutorial on how I do that.  Per that tutorial, I shared that I normally leave a white edge around my cut image.  However, sometimes that’s not the look I want to achieve, especially when I’m using a cut image for an embellishment.  So today I’m going to share what I do when I cut an image along the image line and how to layer a flower image from one stamp for extra dimension.  Special thanks to the poinsettia image from the new Holiday Postage Set for helping me out with this tutorial.

I’m not sure about ya’ll, but I’m so inspired to start making Christmas projects.  My Christmas list got too long to make handmade cards for everyone a few years ago, but I still make several to hand deliver to my special friends.  So since I have gotten an early start on this year, I decided this card would be the perfect one to share for my tutorial today.  

Let’s dash through the snow in a one-horse open sleigh and get this show on the road…

First, since we are going to make flower layers, we need to stamp the image twice.  Now if this flower was bigger and the image had more layers than just 2, I might have stamped it several times to create dimension for each layer.

Now for the coloring.  Since we are going to cut out these images along the black lines, it’s ok to not care if we are A+ colorererers.

Get the images just the way you want them.  You don’t want to have to go back and touch them up after you’ve cut them out.  They will be itty-bitty and you will go cross-eyed.

Once you’ve finished coloring, grab your sharpest scissors and cut each flower layer out.  I use Cutter-bees–my brand new pair because my others got bent at the tippy tip. 🙁 

Ok, call me picky, but when I cut an image along the black line, I don’t like to see the white edges. (One of the many reasons I usually leave a white border around my images.)

Take a black marker, preferably one with a brush tip like a Copic or Tombow and VERY CAREFULLY run it around the edge, concealing the white edge of the cardstock.  It just gives it a cleaner look.  Go slowly–you don’t want that marker to slip and mess up the fabulous coloring you just did on the front of the image.

Here’s what the backside may look like.  It’s ok.  Put a foam booster on your upper layer(s).

To make it look even more layer-y, stick the top flower layer down a little offset from the bottom flower image.

Now you’re ready to use the flower as an embellishment or focal point on your project!  Easy and so fabulous looking!

So what’d ya’ll think?  I hope ya’ll thoroughly enjoyed that and gleaned a little out of my tutorial.  It’s not a new concept, but worthy of sharing! They are some pretty poinsettias, aren’t they?
Are you going to try it?  
Be sure and leave me some lovely comments as to what ya’ll think about this and let me know what else you’d like for me to cover next month!  
DONT’ FORGET— 
  There’s going to be a random drawing on OCT. 5th from all the comments to win some YNS goodies!   Ready, set, GO!!!!!
FacebookPinterestTwitterEmail

September YNS SUSIE-Q FUN TIP

Well howdy there, YNS fans!  It’s me, Susan (susiestampalot) and it’s time for another monthly installment of my SUSIE-Q FUN TIP!  This month, I’m expanding on how I make “grounding” using my Copic markers for some of my stamped images.  Ya’ll can’t leave them floating around in space, now can you?  It just gives your focal point more of a “setting” and completes the image.


Now, just so ya’ll know, I’m no expert in Copic coloring.  I just do what I do’s.  I’m sure there are plenty of other ways to get the job done for creating “ground” out there, but this is just the way I do it, using C1, C3, C5, and my Blender.  However, if you wanted it to be dirt or grass or Mars, you’d use a series of browns, greens or whatever color Mars is to make this work for you.

Today, the cutie patootie stamp set, Joyful Apple Basket is helping me out and modeling for us.  I bet if ya’ll leave a comment at the end of this post, telling us how much you love it and what else ya’ll would like me to feature here, Karen will give one away!  Just sayin’.  Let’s get started…


1.  I actually usually color my image in first, but for the sake of this tutorial, just pretend the apple basket is colored.  First you’ll want to decide where the ground should be.  In this case, I wanted the leaves to be sitting on the ground along with the basket, so I brought it up a little high.  I usually always make my image be a tad lower than my ground lines.  Then start by drawing a line where the ground starts and coloring in a “base coat” both with C1.  The base coat should just kind of make a “cloud” underneath your image, how ever big you want and leaving the edges of your cloud light (as in don’t go over this part a bunch.)


2.  Using the C3, draw over the ground line and add some shadow under objects where a shadow would be.  Blend this with the C1, being careful not to take the C1 all the way to the edges of your cloud so that your base coat is “one layered”.


3.  Use C5 and draw over the ground line again and add some more shadows  where desired to intensify.  Blend with the C3 carefully and close to the C5 only.  In other words, don’t go really far out into your C1 area when blending this step.  I call it “tight blending”.  See how it looks roughly blended still?

4.  Now go back with the C1 and blend, still keeping away from the original layer near the bottom and side edges of your cloud.  Be sure at this time to slightly blend the C1 all the way up to the top edge of the ground and into the darkest shadows over your C5.  (Don’t be scared going into the dark shadows, it’s not Halloween yet.)

5.  See number 4 and blend it really well.


6.  Lastly, use your Blender (0) to feather out the bottom and side edges of your cloud to almost white, using a circular motion.  Don’t touch your C5 areas, or it will take the color away.  It’s ok to use the Blender on your lighter shaded areas until you get the desired look.  This will also make your dark areas seem darker.  I think I went over this with my Blender 3 times.  Let it dry a bit between each time you go over it.  The blender sometimes keeps working until it’s dry, and you’ll be sorry if it takes out too much color all at once after all that work.

So what’d ya’ll think?  Aren’t those some happy apples!?!  
Are you going to try it?  
Be sure and leave me some lovely comments as to what ya’ll think about this and let me know what else you’d like for me to cover next month!  
DONT’ FORGET— 
There’s going to be a random drawing on Sept 5th from all the comments to win the Joyful Apple Basket Stamp Set!   Ready, set, GO!!!!!
FacebookPinterestTwitterEmail

August YNS SUSIE Q-TIP


Well, it’s already time for another YNS Fun SUSIE Q-TIP post from me, Susan (susiestampalot).   I came up with the idea for this month’s post right after and on the same day I posted last month’s tip/tutorial and I just couldn’t wait to put this together and show ya’ll what I came up with for this month! (making sure it worked in real life as I had imagined it in my head first of course!)   I have always loved how Jen, in one of her blog posts, had used the wings from the Dress Up Fhiona die set to make a flower.  It inspired this creation.  Can you guess what dies I used from Your Next Stamp in a non-traditional way and what I made with them? 

If you guessed the Balloon Trio Dies to make that gorgeous flower, you are RIGHT!!  You win, so go have a cookie and come back so I can show ya’ll what I did…

Ok, so are you ready?  Wipe the crumbs off your face and let’s roll…


Here’s what you’ll need, plus some adhesive.  I used my ATG gun.  The circle punches I used on the white were the 1 3/8″ for the base of the flower, and a 1″ for the flower center.  The quilling tool won’t be used to quill, but to just bend the petals around the stick part, so it could be a pen or something similar if you wish and the button can be substituted for any type of flower center ya’ll want to use.  A big ol’ piece of bling would be fun!

NOTE that you only use the longer oval and oblong balloon dies.  The circular balloon gets to sit this one out.

First, using the balloon dies, cut out 8 of each of the two balloon shapes (for a total of 16) and cut the tails off.  If you would like more dimension to your new “petals”, slightly bend all of them around the stick part of your quilling tool on the opposite end from where the tail was.  I bent mine up a little, but down is ok too, for a different look.

Punch out a large circle with your circle punch (I used 1 3/8″).  Using it as a base, adhere 4 of the long oval “petals” to the center of the circle at the 12, 3, 6, and 9 o’clock positions. 

For the second layer, adhere the other 4 long oval petals on top of the first layer, in between each of the already adhered petals from the first layer.  (It kind of makes an “X”.)

Using the smaller, oblong balloons, start a third layer, again in the 12, 3, 6, and 9 o’clock positions.  The smaller petals should be adhered so that it is more of an “inside”, shorter layer and their ends shouldn’t be “even” with the ends of the previous 2 layers.  It’s ok if you need to overlap them in the center a bit to make this happen. 

Then adhere the last 4 petals in the same way as you did on the second layer, creating a sort of “X” with the 4th layer of petals.  Punch a circle (I used the 1″ punch) from whatever colored cardstock to highlight your flower center.  Attach the flower center of choice.  (Button with twine here.)

Now comes the REALLY FUN part–using your new handmade flower embellishment that no one will realize you made with BALLOON DIES on a project!


I chose to create a cute gift box using a Milk Carton file I downloaded and cut out with my Cricut.  I cut a couple of 1×12″ strips of yellow DP, wrapped them from the bottom to the top and adhered them with Scor-Tape to create a band and flag-ended the top.  I stamped the sentiment using the Happiness set.  The leaves were stamped with the brand new Sunflower set by Ann Ellis and then cut out. 

I LOVE getting MORE from my dies!!
So what’d ya’ll think?  Are you going to try it?  
Be sure and leave me some lovely comments as to what ya’ll think about this and let me know what else you’d like for me to cover next month!  
There’s going to be a random drawing from all the comments to win some YNS goodness!  Ready, set, GO!!!!!

Winner will be posted on Aug 5th!

FacebookPinterestTwitterEmail

Time for Another Fun SUSIE Q-TIP


Well, hi YNS fans!  It’s me, Susan again with this month’s fun SUSIE Q-TIP!  I decided to go easy on ya’ll and do something really quick that I KNOW everyone can do with very little effort.  For my card today, I used the Balloon Dies and the Mixed Bag of Greetings set.  


Did ya’ll know you can color BLING with your Copic or any alcohol -based markers?  (Sharpies, Twin-touch, Prismacolor Pens, etc., as long as it’s an alcohol-based marker.  Water-based will just bead up and not cover adequately.)


That’s right!  If you don’t have JUST the right color you’re looking for, just use a clear rhinestone and color it.  I usually do mine in two coats.  It takes very little time for the first one to dry…not even a whole song on your Pandora or ipod (I listen to mine while I work)!  I just like the brightness that a double coat makes.  Be sure and color them while they are still on the plastic sheet they come on.  You DO NOT want to color them after you place them on the project.  Don’t ask me how I know this.  I don’t want to talk about it.  Anyway, I color my bling like this all the time, not that I don’t have TONS of different colors of bling….shhhhhhh!–that buck-fifty bin at Michael’s loves me….but sometimes this is just faster than pulling out all those little packages they come in!
 

Ok, that’s about it from me today.  I told ya’ll I’d keep it short and sweet!  Be sure and leave me some lovely comments as to what ya’ll think about this and let me know what else you’d like for me to cover next month!  There’s going to be a random drawing on July 4th from all the comments to win some YNS goodness!  Ready, set, GO!!!!!


 ALSO, be sure and stop back by this week starting on Tuesday, July 3rd…our SNEAK PEEKS begin that day and keep on coming through the 6th!  You WON’T want to miss it!!!
FacebookPinterestTwitterEmail

Fun Friday SUSIE Q-TIP!

Well, it’s me, Susan here, with another Fun Friday SUSIE Q-TIP! I don’t know about ya’ll, but I was ready for my girls to be out of school for the summer yesterday when I picked them up at noon. We have lots of fun (and cheap) things planned to keep us busy (no vacation per se) on the days that mommy isn’t stamping. So I had summer on the brain when I made this card for today’s SUSIE Q-TIP. I thought the little Fairy Fhiona looked like she could be a summer fairy to get us smiling in anticipation of the fun we will be having! (Don’t forget I’ll be giving one away later in this post.)

Speaking of FUN, today we are going to DO THE WIGGLE! I have a quick picture tutorial on how I sew, WIGGLE style. Let’s roll…

First we have to get what we are about to sew all ready:


By the way: 
  LOL!!!


Don’t ya’ll feel like this sometimes?  Going around and around, but getting nowhere?  Word.
 
Ok, that’s all from me today!  I hope ya’ll enjoyed it.  Special thanks to Mini Fairy Fhiona for playing “Summer Fairy” for me and helping out today with a smile.  I hope my children act just as precious as she looks over the next 3 months.  
How would ya’ll like to win a Fairy Fhiona of your very own?  Just leave a comment on this post, letting me know how a Summer Fairy could help YOU out and Karen will pick a random winner (as long as ya’ll are behaving…see?  I’m in “bribe” mode already!) and post it here soon.
BUT WAIT, THERE’S MORE!!!…
Are ya’ll ready for a NEW RELEASE from Your Next Stamp?  GOOD!  Because we have one coming your way that includes lots of fun new stamps and dies.  YAY!!  
The SNEAK PEEKS will be starting this Sunday, June 3rd and will continue on through the 6th when we will have our Blog Hop!  Stay tuned for more details on the upcoming Release Party on our SCS forum HERE!
 
FacebookPinterestTwitterEmail

SUSIE Q-TIP Fun Friday!

 
Well, hello YNS fans!  It’s me, Susan (susiestampalot) here with another SUSIE Q-TIP Fun Friday!  First of all, ya’ll DID hear the news, right?  Your Next Stamp is now a Member Company over on Splitcoaststampers.com!  And to celebrate, we are in the midst of a FABULOUS BLOG HOP that started on May 1st.  There are lots of prizes, great projects we are sharing and some awesome sales.  Be sure and get more info on that at the end of my post today, along with a BIG SURPRISE!! 


For now, let’s get started on my super fun SUSIE Q-TIP Fun Friday!  I’ve got an “out-of-the-box” card shape/design to show ya’ll today called a “Step Out Card”, just in case ya’ll are getting tired of the everyday 4.25 x 5.5 card like I am.  I am wanting to do something different!  So…I’ve got a simple little tutorial that I must credit Splitcoast for (I figured it was ok to use it since we are now “married”), but I’ve added a few more tips/measurements for the decoration of the card.  Off we go:

To start with the above instructions, ya’ll will need your paper trimmer and some sort of scoring tool.  I have the Scor-Pal, but you can use your Martha Stewart one if you prefer to be like her.
You will also need a piece of cardstock 5 1/2″ X 11″ as your card base.
I’ll go over the other pieces as we go.


Be sure and flip the card base over and cut the slit on the other side, just like the prior instruction, so that it will look like the above picture!
 

How’re ya’ll doin’ so far?  Don’t forget to cut the other side!

 Still with me?


 Here’s what you’ll need to make it pretty!

Then just glue it all together and add your own embellishments!  I didn’t add a sentiment to mine, but you certainly could just about anywhere.  Here’s a closer look at Summer Fun Fhiona.  Give her a round of applause for helping out today!


Ok, are ya’ll ready for the BIG SURPRISE???  We are giving away a Summer Fun Fhiona Stamp Set today as a thank you for checking out my SUSIE Q-TIP Fun Friday Post!  We will be doing that with all my once a month posts, so ya’ll will have to swing by on the first of every month!!  Just leave a comment on this post telling me what you like about this card, that you’re going to try it for yourself, any questions ya’ll have or that I need a manicure.  Karen will draw a winner and announce it here in a few days.  Ready, set, go!!!

But wait, if ya’ll haven’t checked out the May 1st Blog Hop, be sure and do that. Get all the details and how you could win MORE goodies from Your Next Stamp on the YNS blog HERE.
Ok, see ya’ll soon!


Stamps:  Summer Fun Fhiona (Your Next Stamp)
Paper:  Hawaiian Shores, Kraft, White, Orange Zest (PTI), Navy (SU!), The Bright Side (My Mind’s Eye)
Ink:  Brilliance Graphite Black (Tsukineko)
Accessories:  Oval and Scallop Oval Nestabilities, Sun, Water and Cloud Dies, Paper Piercer/Mat Pack, Seeing Spots Embossing Folder, Scor-Pal, Copic Markers, Buttons/Twine, Hot Glue, Foam Boosters

FacebookPinterestTwitterEmail

Fun Day with Another SUSIE Q-TIP!


Well, it’s me, Susan!  It’s the first of the month (April already?!?) and today I’m back with a fun and simple SUSIE Q-TIP for Your Next Stamp!

Do ya’ll remember the days when dies were few and far between?  We didn’t have them available in all shapes and sizes like we do now.  (But aren’t they one of the BEST parts of our craft?)  How in the world did we survive?  Kind of like before microwaves.  Well I remember those days before I had fun “grass” border dies, so I’m going to show ya’ll how you can still make grass without one.  I enjoy this look from time to time even though I have two grass dies, actually!

My main panel shape happens to be a circle, so first, I just cut a partial circle from a piece of scrap that I wanted to use as my grass, making sure it was the same size as my panel piece, so that I could just glue it right on top after I made the grass.

Next, I just took my detail scissors (again, my favorites are Cutter Bees–about $10 at Michael’s) and just hacked into it across the top, straight down about a half inch (ya’ll could make it however tall you want your grass to be).


Lastly, I simply “furled” them with my fingers to bend them down a bit.  If you want to, you can trim some of the grass “blades” at different angles along the tops of a few of them, so it’s not so uniform looking, like I did here.  Then just glue the grass piece over the main image panel and you have an instant “setting” for your special Fhiona.  Thanks to Bunny Ellie, this card came together so sweetly!


Now, go kick some grass, ya’ll!  Just leave a comment here if ya’ll have any questions or if there’s something you’d like for me to “attempt” to cover in a future SUSIE Q-TIP FUN DAY!!

FacebookPinterestTwitterEmail

SUSIE Q-TIP Fun Day!


Well, hello again YNS friends!  It’s me, Susan and I’m back with another SUSIE Q-TIP fun day!  I’m glad to be sharing here and I thank ya’ll for embracing me and my last (lengthy) post!  Today’s post still has lots of pictures, but may not be so wordy!  Stay with me here!…


I don’t know about ya’ll, but I am loving any papers I find with HERRINGBONE patterns.  Did ya’ll know that the pattern supposedly originated from the bone structure of herring–the fish?  What a coincidence…Today,  I’m going to talk about making a “fishtail” banner strip from some herringbone paper!  Let’s swim right along…


Start by cutting along the bottom “edge” of the herringbone with the zig-zag pattern.  Try not to get dizzy while doing this.  The paper I used today flip-flops the gray and white, so I had to hold my mouth just right to not mess up.


Then cut up from the bottom at the points you just created.  I only go up about an inch, sometimes less, depending on how wide my paper was to start with and how long I want my fishtails to be.

It should now look like the picture above.


Now just trim the top off to form a long strip of banner to go across your card or whatever.  Be careful not to cut across the cuts you just made from the points or you’ll cut your fishy tails off!  Don’t ask me how I know this. I don’t want to talk about it.


Then just randomly curl the fishtail ends upward with your fingers to give it a little dimension and show off the fabulously trendy technique you just finished and glue to your project.


Here’s a closer look at my card using the also fabulously trendy Flying High Fhiona and a sentiment from the Mixed Bag of Greetings Set.  I hope ya’ll enjoyed this little tutorial and remember, you can always leave a comment if you have any questions or would like for me to “esplain” something else in a future SUSIE Q-TIP fun day–I’ll be hanging around to answer them!  (After I go lay down.  I’m a little dizzy.)

FacebookPinterestTwitterEmail

It’s YNS Fun Friday With a SUSIE Q-TIP!


Karen here…I’d like to take a moment to welcome Susan Liles to the YNS DT!!! WOOT! WOOT! She is a fabulous designer and wonderful person so I am delighted to let you know that Susan will be bringing you a very special YNS FUN Friday every month!!! YAY!!! She’s got some amazing tips for you today and then after you have enjoyed all your Susie Q Awesomeness I have some fun DT cards to share with you!!!

Cheers to another amazing YNS FUN Friday!!!

Well, it’s me, Susan from susiestampalot.com. Apparently, everyone loves my SUSIE Q-TIPS over on my blog (I know because I get emails from ya’ll if I don’t post one every time; ya’ll think I have a fever or not feeling well or something!). So Karen has invited me to share and expand on some of them once a month over here on the YNS blog. YAY!

Today is my first post–ya’ll can tell I was a teensy bit excited about this because I took lots of pictures. I hope ya’ll like visuals! Don’t get used to it, though, I may not be as zealous next time! When I made this card, it was just me, Zina, some scissors and my camera having a love affair with a little glue and we got carried away. It’s the month of love so it was allowed.


Ok, so I love to actually cut out my images once they are stamped and colored in order to be able to put them against fun backgrounds. I’ve learned a few things along the way in regards to doing this, some I don’t want to talk about, but here are a few pointers I’ve gleaned that actually make it a little less tedious. Raise your hand if you have any questions along the way (or just leave a comment and I’ll get back with ya).

1. First off, I think it looks better to cut the image out, leaving a little white border around all the edges (no need to highlight around your image with pencils or markers when doing this either). This also helps hide mistakes where you may accidentally cut into the line too much. It’s forgiving and helps make the image pop. Double duty. Happy.

2. I guess I should back up a little bit. You need a GOOD pair of sharp detail scissors like Cutter Bees (about $10). I like them because they cut all the way to the TIPPY TIP TIP! When cutting around curves, you’ll have more control if you keep your scissors still (except for the cutting motion) and move your image where you want the blades to go.

3. When you’re cutting it out, if the excess gets in the way, cut it off! Who’da thunk? Like here, I started to go around the rest of her face, but the part I had already cut off was getting in the way and making me bend my image. No bendy on the images! It’s outta there.

4. Ok, this one is probably the most important to me. When getting into tight corners, cut into them from different angles all the way to the tip of your scissors, making each cut end just short of the image line. Doing this as opposed to getting your scissors in that little crevice and turning them to go the other direction, will make that spot nice and neat and deliver a crisp edge. Otherwise, the scissors will “chew” up that edge and be messy. Here’s a look at the difference it can make:

It takes no extra time to cut it like the example on the left as I mentioned above. You’ll be glad you did it. Trust me.

5. When you employ tip #4, you’ll sometimes have a little “hang-osis”. This is the technical term for where you’ve cut into the corner from both angles like good girls and boys, but the piece you’re cutting off is still trying to hang on. Make sure you don’t just need to cut it a little further to get your cuts to meet up closer to the corner. If they are super close and you don’t want to get too scissor happy that you might make a mistake and cut too far into your white margin, pull that piece to the BACK of your image and either snip it off from the back, or gently pull it off (or both). Doing this keeps that corner clean if you have to pull it off a bit. 


6. Lastly, if there are any sharp corners, I snip them off as well if I can get to them without bending the piece. Be careful and just snip the tiniest bit off to keep that white margin uniform.

Ok, that’s about all I’ve got for today! Thanks for letting me share. That Zina is so photogenic, isn’t she?!

Thank you Susan!!! Your card is adorable and your Susie Q Tip is awesome!!!!
Check out these super adorable cards Jen Roach, Veronica Zalis and Amy Rohl made for Fun Friday!!! CUTE!!!
Tip – Quick and Easy Valentine’s
Veronica ZalisJapan Icons SetTwo
Her tip is about using Washi Tape


Be sure to visit their blogs for more details!

Thanks for joining us!!!
Happy Stamping!
FacebookPinterestTwitterEmail

© 2024 Your Next Stamp. All Rights Reserved.