
Well, it’s me, Susan (susiestampalot)–Are ya’ll ready for Christmas? No? Well are ya’ll ready for another YNS SUSIE-Q FUN TIP? GOOD, because I have some fun tricks to share with you! This month I stepped out of my box and did something I rarely do, but still have a few tips to share about it. A few months ago, I told ya’ll that I LOVE to cut out my stamped images and use them on my cards and created THIS tutorial on how I do that. Per that tutorial, I shared that I normally leave a white edge around my cut image. However, sometimes that’s not the look I want to achieve, especially when I’m using a cut image for an embellishment. So today I’m going to share what I do when I cut an image along the image line and how to layer a flower image from one stamp for extra dimension. Special thanks to the poinsettia image from the new Holiday Postage Set for helping me out with this tutorial.

I’m not sure about ya’ll, but I’m so inspired to start making Christmas projects. My Christmas list got too long to make handmade cards for everyone a few years ago, but I still make several to hand deliver to my special friends. So since I have gotten an early start on this year, I decided this card would be the perfect one to share for my tutorial today.

First, since we are going to make flower layers, we need to stamp the image twice. Now if this flower was bigger and the image had more layers than just 2, I might have stamped it several times to create dimension for each layer.

Now for the coloring. Since we are going to cut out these images along the black lines, it’s ok to not care if we are A+ colorererers.
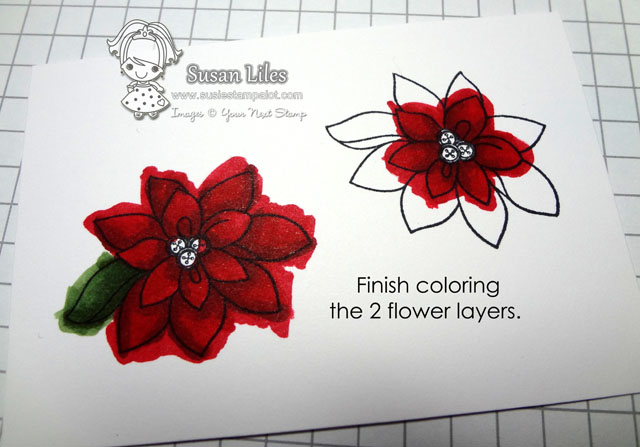
Get the images just the way you want them. You don’t want to have to go back and touch them up after you’ve cut them out. They will be itty-bitty and you will go cross-eyed.
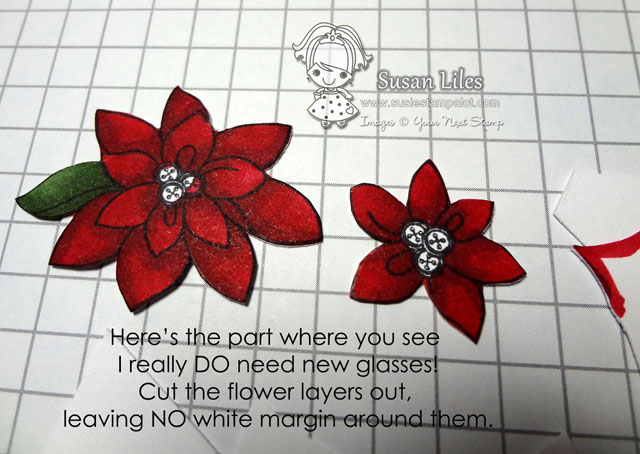
Once you’ve finished coloring, grab your sharpest scissors and cut each flower layer out. I use Cutter-bees–my brand new pair because my others got bent at the tippy tip. 🙁

Ok, call me picky, but when I cut an image along the black line, I don’t like to see the white edges. (One of the many reasons I usually leave a white border around my images.)

Take a black marker, preferably one with a brush tip like a Copic or Tombow and VERY CAREFULLY run it around the edge, concealing the white edge of the cardstock. It just gives it a cleaner look. Go slowly–you don’t want that marker to slip and mess up the fabulous coloring you just did on the front of the image.
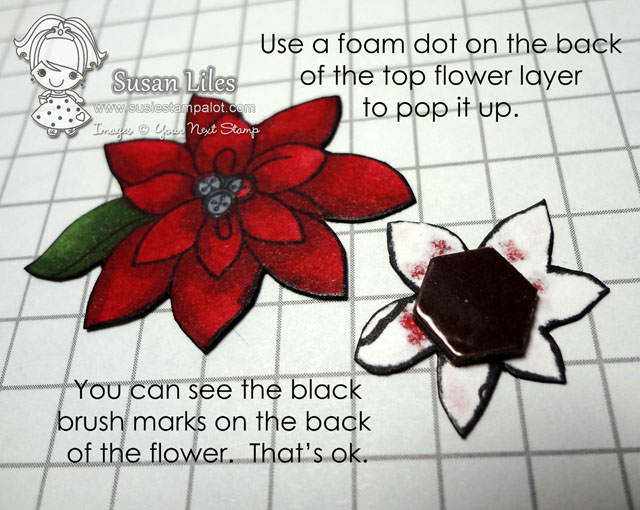
Here’s what the backside may look like. It’s ok. Put a foam booster on your upper layer(s).
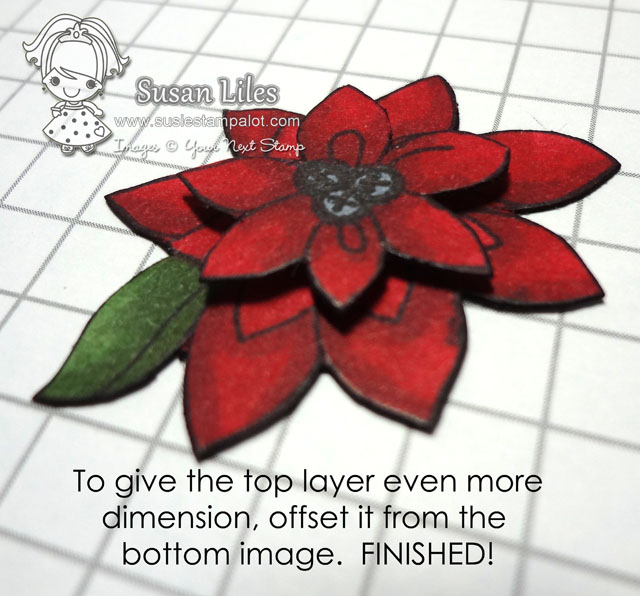 To make it look even more layer-y, stick the top flower layer down a little offset from the bottom flower image.

Now you’re ready to use the flower as an embellishment or focal point on your project! Easy and so fabulous looking!
Are you going to try it?


Beautiful card!
Cutting out small stamped images is tedious work, hehe… I love the tip to get rid of the white edges.
Awesome tip and beautiful card Susan!
Love this card Susan. I need to get busy with my cards too.
WOW! This is beautiful. I love the look and feel of this card. I need to get moving on Christmas cards.
This card is so beautiful. I love how you off set the top flower.
I love fussy cutting too and you did a great job with yours! Good tips too!
oh my goodness what a great idea – thanks for sharing
Awsome tutorial! Thanks for the tips!
So gorgeous card. Love your dimensional flower. I use this technique a lot but I’ve never offset the upper layer. It is brilliant idea! Thank you for sharing.
Ah Susan, great tips! I kind of feel like “dah” right now! The simplest thing makes such a big impact! Your card is GORGEOUS and I love all the layers and pretty poinsettias. I guess it is time to start thinking of our Christmas cards, huh. Thanks so much for the great tutorials. I’m going back to view a few more. ; )
What a wonderful card…I love the reds and blacks. Thank you for the picture tutorial…its always nice to see how others do certain key steps. The poinsettias are gorgeous.
I learned about this tip a little bit ago and it really makes a difference. Thanks for sharing this.
Awesome card Susie! Great tip! I will have to keep this in mind. I have some pointsettia and rose stamps I could use for this tip.
Beautiful card! I love how you layered the poinsettia, and “shadowing” each one really made it pop! Another great tutorial!
A great tutorial and a fab card, I love the colors you’ve used for it.
Super cool and I’m SO glad that you covered this. I usually use the color that I have colored with to go around my edges if I cut on the lines. It BUGS me to see white, almost like I missed a spot coloring!!!! you are an AWESOME colorerer! LOL
Great how to! Love that you can be a messy colorer when you fussy cut. There’s gotta be advantages to taking the time and effort, right?!