Posted by: Thanh Vo on Wednesday, July 1, 2015 at 11:00 am
Happy July 1st and to all of our Canadian friends, Happy Canada Day!
What’s happening in July at YNS? We’ve got a fun release happening on July 5th and then I’ll be introducing you to our fabulous Guest Designers. You’ll already be seeing a preview of their work during the July release.
Let’s talk about the main reason why I’m posting today. We are beyond excited to welcome two new Design Team members to the YNS family! These ladies have been anxiously waiting to start their term with us and we couldn’t be happier to have them on board. We enjoyed reading all the applications for our last DT Call, but these two ladies and their enthusiasm really made an impression on us.
Please help me in welcoming Holly and Kymona to YNS:
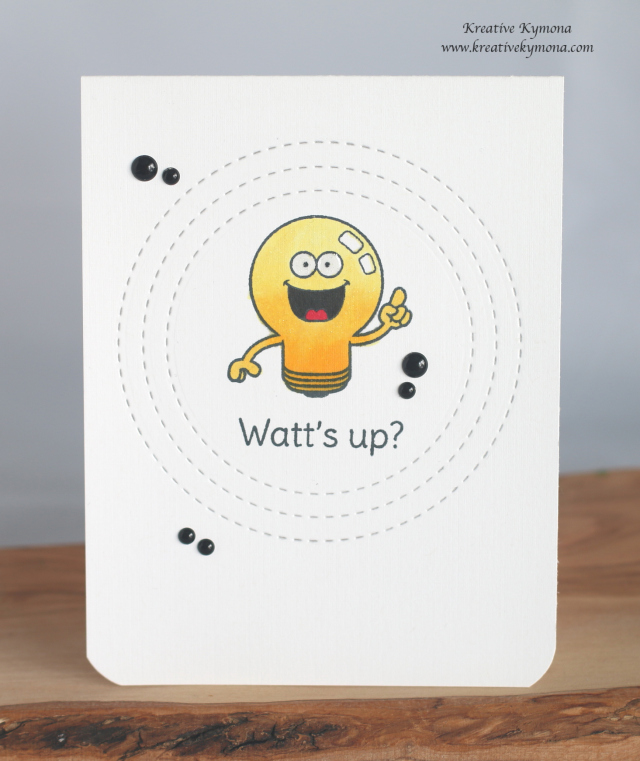
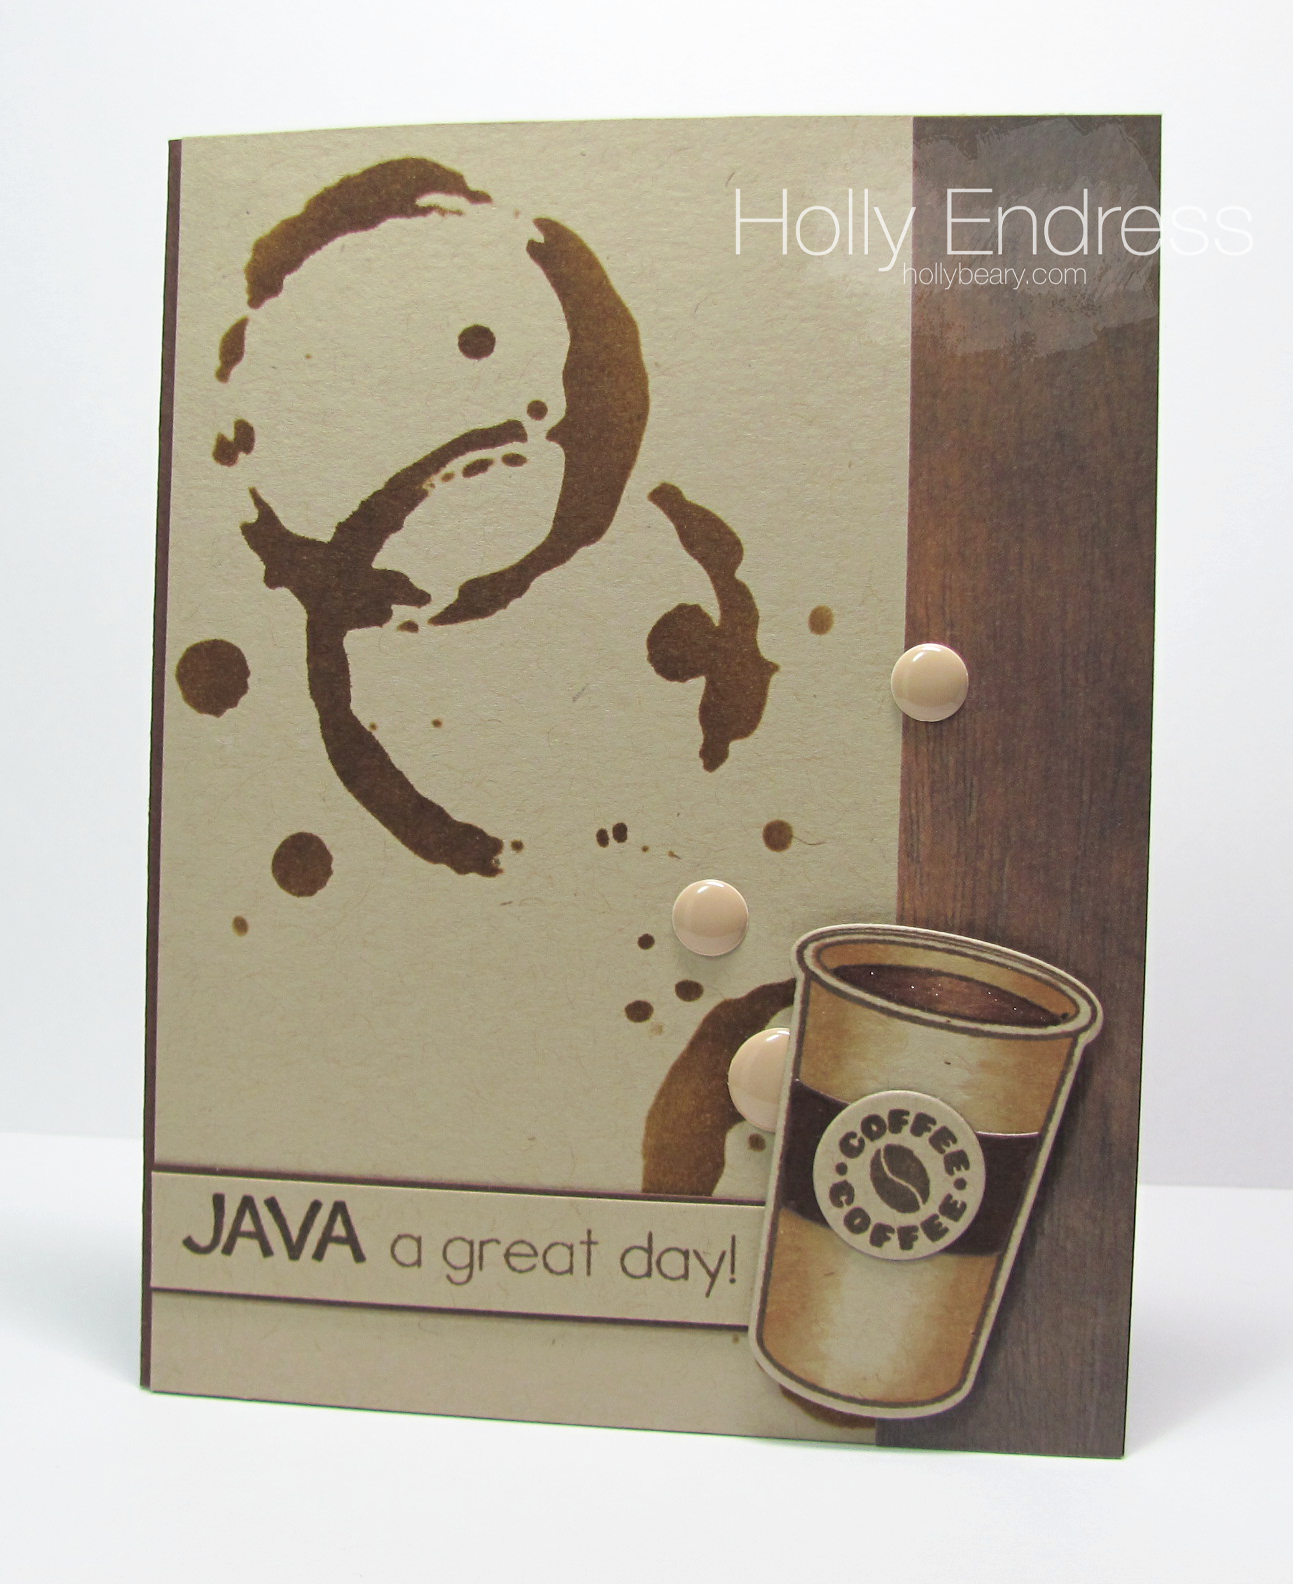
I felt that I couldn’t give these ladies an introduction without giving you a taste of what their style is like so here are cards made by each Designer from the past little while:
Posted by: Thanh Vo on Monday, May 18, 2015 at 12:20 am
G’day, YNS friends! We’ve wrapped up our latest Design Team series posts with Karen answering some questions a couple weeks ago. These posts were focused on getting to know our Design Team better. In case you missed any of the posts, I’ve listed all our the posts below.
We also thought we’d reach out and ask, what do you want to see from Your Next Stamp next? Do you want to see more basics or techniques from the Team? Do you want us to focus on a particular image? Let us know, we’d love to have your feedback!
Here is the list of DT members that shared their background and their favorite color combos:
Posted by: YourNextStamp on Monday, May 4, 2015 at 12:00 am
Hi, YNS Friends! It’s Karen Dedman, the proud owner of Your Next Stamp! I’m excited to share a little bit about myself with you today. Let’s get started shall we?!
Q: Tell us about your family and where you live.
I live in Ontario, Canada with my super amazing and supportive husband Chris. We have 2 kids, Brandon who is our energetic 6 year old boy and Jessica who is our sweet little 15 month old girl. Let’s not forget about Olive, our furry hamster friend who keeps us up half the night with her squeaking exercise wheel! I am so blessed to have such an amazing family, I wouldn’t be able to do everything I do if it wasn’t for all their love and support.
Q: When and why did you start YNS?
I’ll try to keep this short and sweet…I started YNS in 2008, after our son Brandon was born. I really wanted to stay home with him and still have a career so the only way I could do that was to start a business that I could run from our home. I’ve always loved creating art and crafting so when my sister introduced me to stamping I knew I had found my ‘calling’. I instantly fell in love with stamping and card making and just knew I had to do something with this passion! My mission was to bring happiness to craft rooms all over the world :o) I’m so lucky to have a supportive family who has been there with me since day one, my father helped me name YNS and everyone has been there to help whenever needed…sound board for ideas, packing product, shipping orders, bookkeeping, working ScrapFest etc… I look back at these past 6 years and I feel so blessed, I would like to say ‘thanks’ to all of YOU for loving YNS products and for being apart of my journey. I look forward to many more years of SMILES and FUN, from my craft room to yours!
Q: What are your favorite YNS images?
Seriously? Do I really need to answer this one? To be honest, I can’t pick a favorite image as I truly LOVE them all. I personally hand pick each and every image that you find here at YNS. My main focus when working with our designers is that the images must make me HAPPY and I always ask myself “will this stamp make my customers smile and is it FUN to create with?” If you’re having FUN while creating with our YNS products than I know I’ve completed my mission! The cherry on top is when you share your projects with us, I LOVE seeing what you make with YNS products!
Q: What are your favorite color combos?
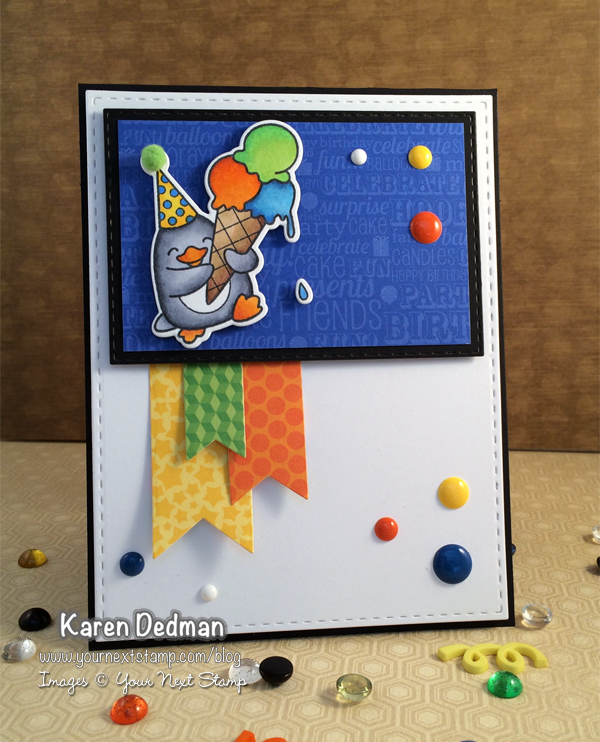
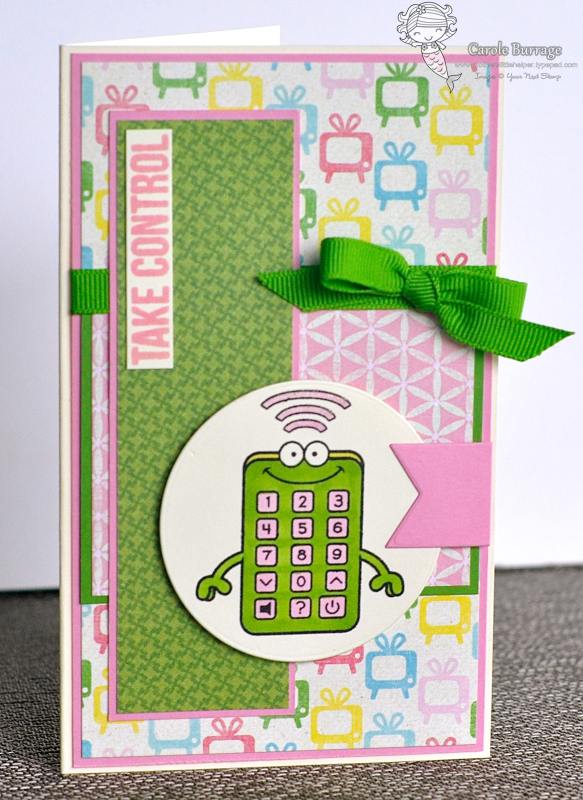
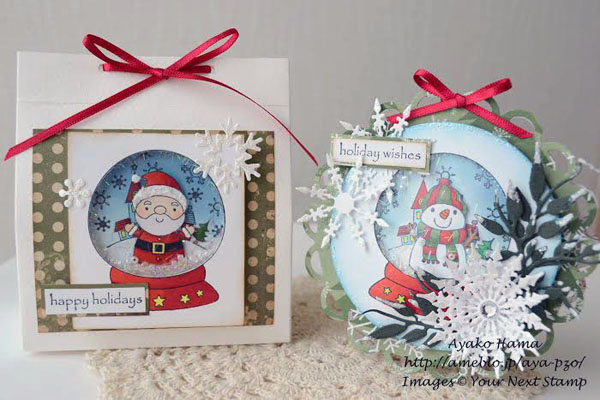
Bright cheerful colors (especially purple and green with black as an accent) tend to be my go to colors but I do find myself picking out colors that match the person I’m creating for. Our son Brandon is turning 7 this month so for my project today I decided to make him a birthday card! He LOVES ice cream, the Waddles character and YNS Gumdrops soooooo I used the super sweet Waddles – Happy Brrr-thday stamp and die set to create his birthday card. I also used our Stitched Rectangle die set and Fishtail Banner Two die set.
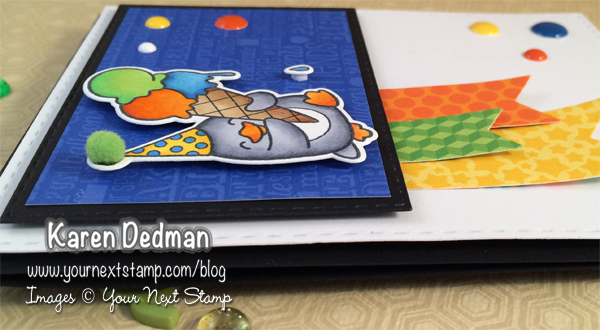
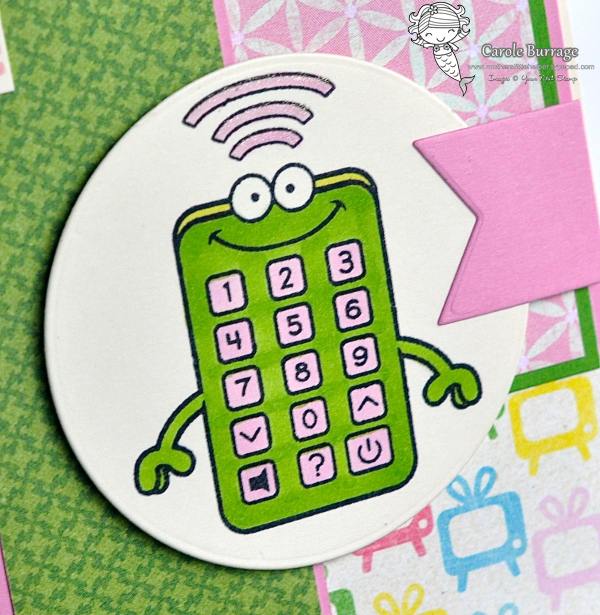
I LOVE adding dimension to my projects so here’s a close-up of my pop up dot and YNS Gumdrop addiction:
I used our current challenge sketch as inspiration for my card, why not join in the FUN! You never know, you could be a lucky winner of some YNS bucks or our next Top Pick!
I hope you’ve enjoyed our Design Team Q & A Series! We’ll be starting a new series really soon but first we have a New Release for you!!! Be sure to stop by for some sneak peeks on May 9th!
Posted by: Carole Burrage on Monday, April 27, 2015 at 12:00 am
Hi, YNS Friends! It’s Carole Burrage, and here’s more than you ever wanted to know about lil ol’ me.
Q: Tell us about your family and where you live.
I’ve been married for almost 22 years to my college/law school sweetheart, Sean. We have two boys, Truman (age 18 and a soon-to-be graduating high school senior) and Carter (age 10 and in the fourth grade). We also have two dogs – Sweet Pea and Daisy – both of whom are rescue girlies we adopted. We just moved this past year from Claremore, Oklahoma, where we’d lived for 18 years. We now reside in Durant, Oklahoma, where my husband is the President of Southeastern Oklahoma State University. We’ve been living in a historic (read: ancient; it was built in 1918) house on campus, but just closed on a house that I am ever so anxious to move into. We have pretty extensive renovations to complete first, so please: pray for me!
Q: When did you join YNS?
That’s actually a pretty hard question for me to answer. (Those of you who know me at all realize that nothing is ever simple or straightforward when it comes to yours truly. I like to think of myself as a riddle wrapped in an enigma, but I’m probably just a garden variety PITA.) I’ve been stamping with YNS products since 2010, and shortly thereafter Karen and I struck up an online friendship (I can’t believe we STILL haven’t met in person! That must be remedied soon.) I guest designed for YNS, and guested for a few YNS blog hops, and for a year or so, I even had a monthly column, of sorts, called “Carole’s Creative Commotion” on the YNS Blog. In 2013-2014, I took a stamping hiatus for a while. By late 2014, I was ready to return to my beloved images and inks, so my buddy Karen created a spot for me on the YNS design team and I’ve been happily playing with the talented gals on the team ever since.
Q: What are your favorite YNS images?
I am a huge fan of all things Fhiona, especially the awesome World Kids collection. I can’t resist Cory’s Critters and Friends (his big-eyed characters remind me of the Muppets, whom I love dearly). I adore kawaii (especially food with faces!) so that means Macy Wong’s illustrations are among my faves, as well.
Q: What are your favorite color combos?
I lurve me some bright colors, and given the opportunity to use all ROY G. BIV of the rainbow, I will elect to do just that. As for a single color combo that always makes me a little giddy to see? I’d have to go with my longtime go-to, the perfectly preppy pink & green. In my Lilly Pulitizer-ized version of the world, this combo would reign supreme. Even my remote control would be pink & green, just like the one in this card I created using the new For the Boys stamp set and the Circles Die Set.
Thanks so much for letting me share a little of my cluttered mind with you. Next week you’ll have the oh-so-awesome privilege of getting a peek into what makes Boss Lady Karen tick – good times! Carole
Posted by: Thanh Vo on Thursday, December 18, 2014 at 8:00 am
Hello, hello!
It’s Thanh here and before I make the announcement of our New Design Team Members, I wanted to acknowledge ALL the applicants who applied for our last Design Team Call or for those who thought about it and decided “maybe next time.” Trust me when I say that I’ve been in your position; I’ve received my share of – I’m going to use the word – rejection emails. It’s not an easy topic to discuss and it was definitely challenging for Karen and I to choose just TWO designers from all the applicants! We’re so humbled by the love and the growth that you’ve given YNS over these years that we want to ensure you that each application was reviewed carefully and thoroughly. You took the time and effort to send them in to us and Karen made a point of responding to each one – with a discount to the Store!
When I was starting out (been actively in the business since 2008 now), I always used to wonder how companies choose their design team members. I hope that by being transparent about our selection process and giving you tips for next time (to apply for YNS or any other DT out there), this will help you in your future endeavours!
When Karen and I were reviewing the applications, we were looking for/most interested in the following:
Photography: how well you photograph your creations. Are your photos showing off your projects in the best way? Are they crisp and clear?
Team Player: There is no I in team. You work closely with us and other DT members and we need to have each other’s backs.
Social Media and Communication Skills: With the movement of fewer publications and more digital/social mediums, we needed to see how you promote yourself, your blog and how you would be willing to promote YNS. Are you a good writer; do you communicate well and have clear instructions on your projects? Are you active on your social media accounts? Are you enthusiastic about the products you’re using?
Readership: Do you have a large readership; what’s your influence on them?
Being open to learning, growing and receiving feedback: We love educating our DT members and love seeing them grow with YNS. Are you the type of person who can handle that nudge – sometimes a push – from us?
I hope that this has helped and we encourage you to apply with us next time; continue applying to any DT company that you love. Your passion and enthusiasm will shine through! To summarize, I’ll leave you with a simple yet very true quote:
You miss 100% of the shots you don’t take. – Wayne Gretzky
**************
Once again, ya’ll made it so tough on us, but I am so happy to be introducing the following two ladies to our North American DT:
You may recognize Sue who was our September Guest Designer. You will learn more about these two ladies in the new year as they create up a storm for YNS! Please help me in welcoming them to our YNS family.
Surprise! We have another exciting announcement to make. I bet you didn’t know that YNS has a large following in Japan! We are so fortunate that our stamps are also well known on the East Coast of the World and that we have some very talented designers working with our images. These two ladies will be joining the Japanese segment of the YNS family. Please also help me in welcoming the following two ladies:
Posted by: Thanh Vo on Thursday, December 4, 2014 at 12:01 am
Hello! I have a very special announcement today, but before I move forward with that, I wanted to address all of those who applied to be on the YNS Design Team. Thank you SO much for setting aside the time to put in an application and we are so humbled by the fact that you all want to be apart of our little family! We are currently reviewing the applications but we’re a little overwhelmed with the response! We’re also in the midst of bringing you another new release on December 7th, so we are working hard behind the scenes. We will be sending all applicants a response soon. 🙂
For the big announcement today, the YNS Crew is very excited to welcome back Carole Burrage to the team! Carole is no stranger to YNS – she used to write the most amusing posts and her creative spirit is a force to be reckoned with! I had the opportunity to meet Carole in person at CHA 2012 and I can attest that she is as funny in person as she is online!
I’ll let Carole take it away and introduce herself:
Hi, my name is Carole Burrage, and I’m thrilled to be re-uniting (and it feels so good… 😉 ) with my dear friends at Your Next Stamp. I’ve been stamping since 2006, and have had the pleasure of serving on many design teams as well as the Splitcoaststamper’s Dirty Dozen (June – Nov. 2008). I also used to write the ‘Carole’s Creative Commotion’ monthly blog post for YNS (who knows – maybe it will make a comeback one of these days!). I took a lengthy hiatus from serious stamping to go back to work after several years as a stay-at-home-mom. Thanks to a recent move, I’m once again a SAHM and itching to get those creative juices flowing again. I now live in Durant, Oklahoma, with my husband, two sons, and our two rescue dogs. I’m so grateful to Karen for giving me another opportunity to get crafty with her awesome company and talented team of designers. I look forward to sharing my designs with you!
**********
YAY! I can’t wait to see what you create, Carole! Please go visit her on her blog – Mother’s Little Helper – and give her some love!
Posted by: Tracy Penney on Monday, November 17, 2014 at 12:00 am
Happy Monday crafty friends, it’s Tracy here, and I am taking over the YNS blog today to share a little bit about my design process.
Someone recently asked me how long it takes to make a card. I really found that question difficult to answer. Being a busy mom of two young girls and working full time, it’s rare that I can work on a card from start to finish all at once. My crafting is usually done in pieces and I squeeze in creative time whenever (and wherever) I can get it. That means I may sketch out a card during my breaks at work, colour my images during my daughter’s dance lesson and jot down ideas for cards – well that may happen at any time so I always carry a note book with me.
Here is a little bit about my creative process:
Selecting my Image:
This is always my starting point. When I am deciding on a stamp, I like to flip through the images I have and pull out two or three stamps/dies that I could use for my project. I try not to waste too much time and will generally go with the stamp that excites my creativity the most. I find that my entire project comes together a lot easier when I am excited about the image/die that I am using.
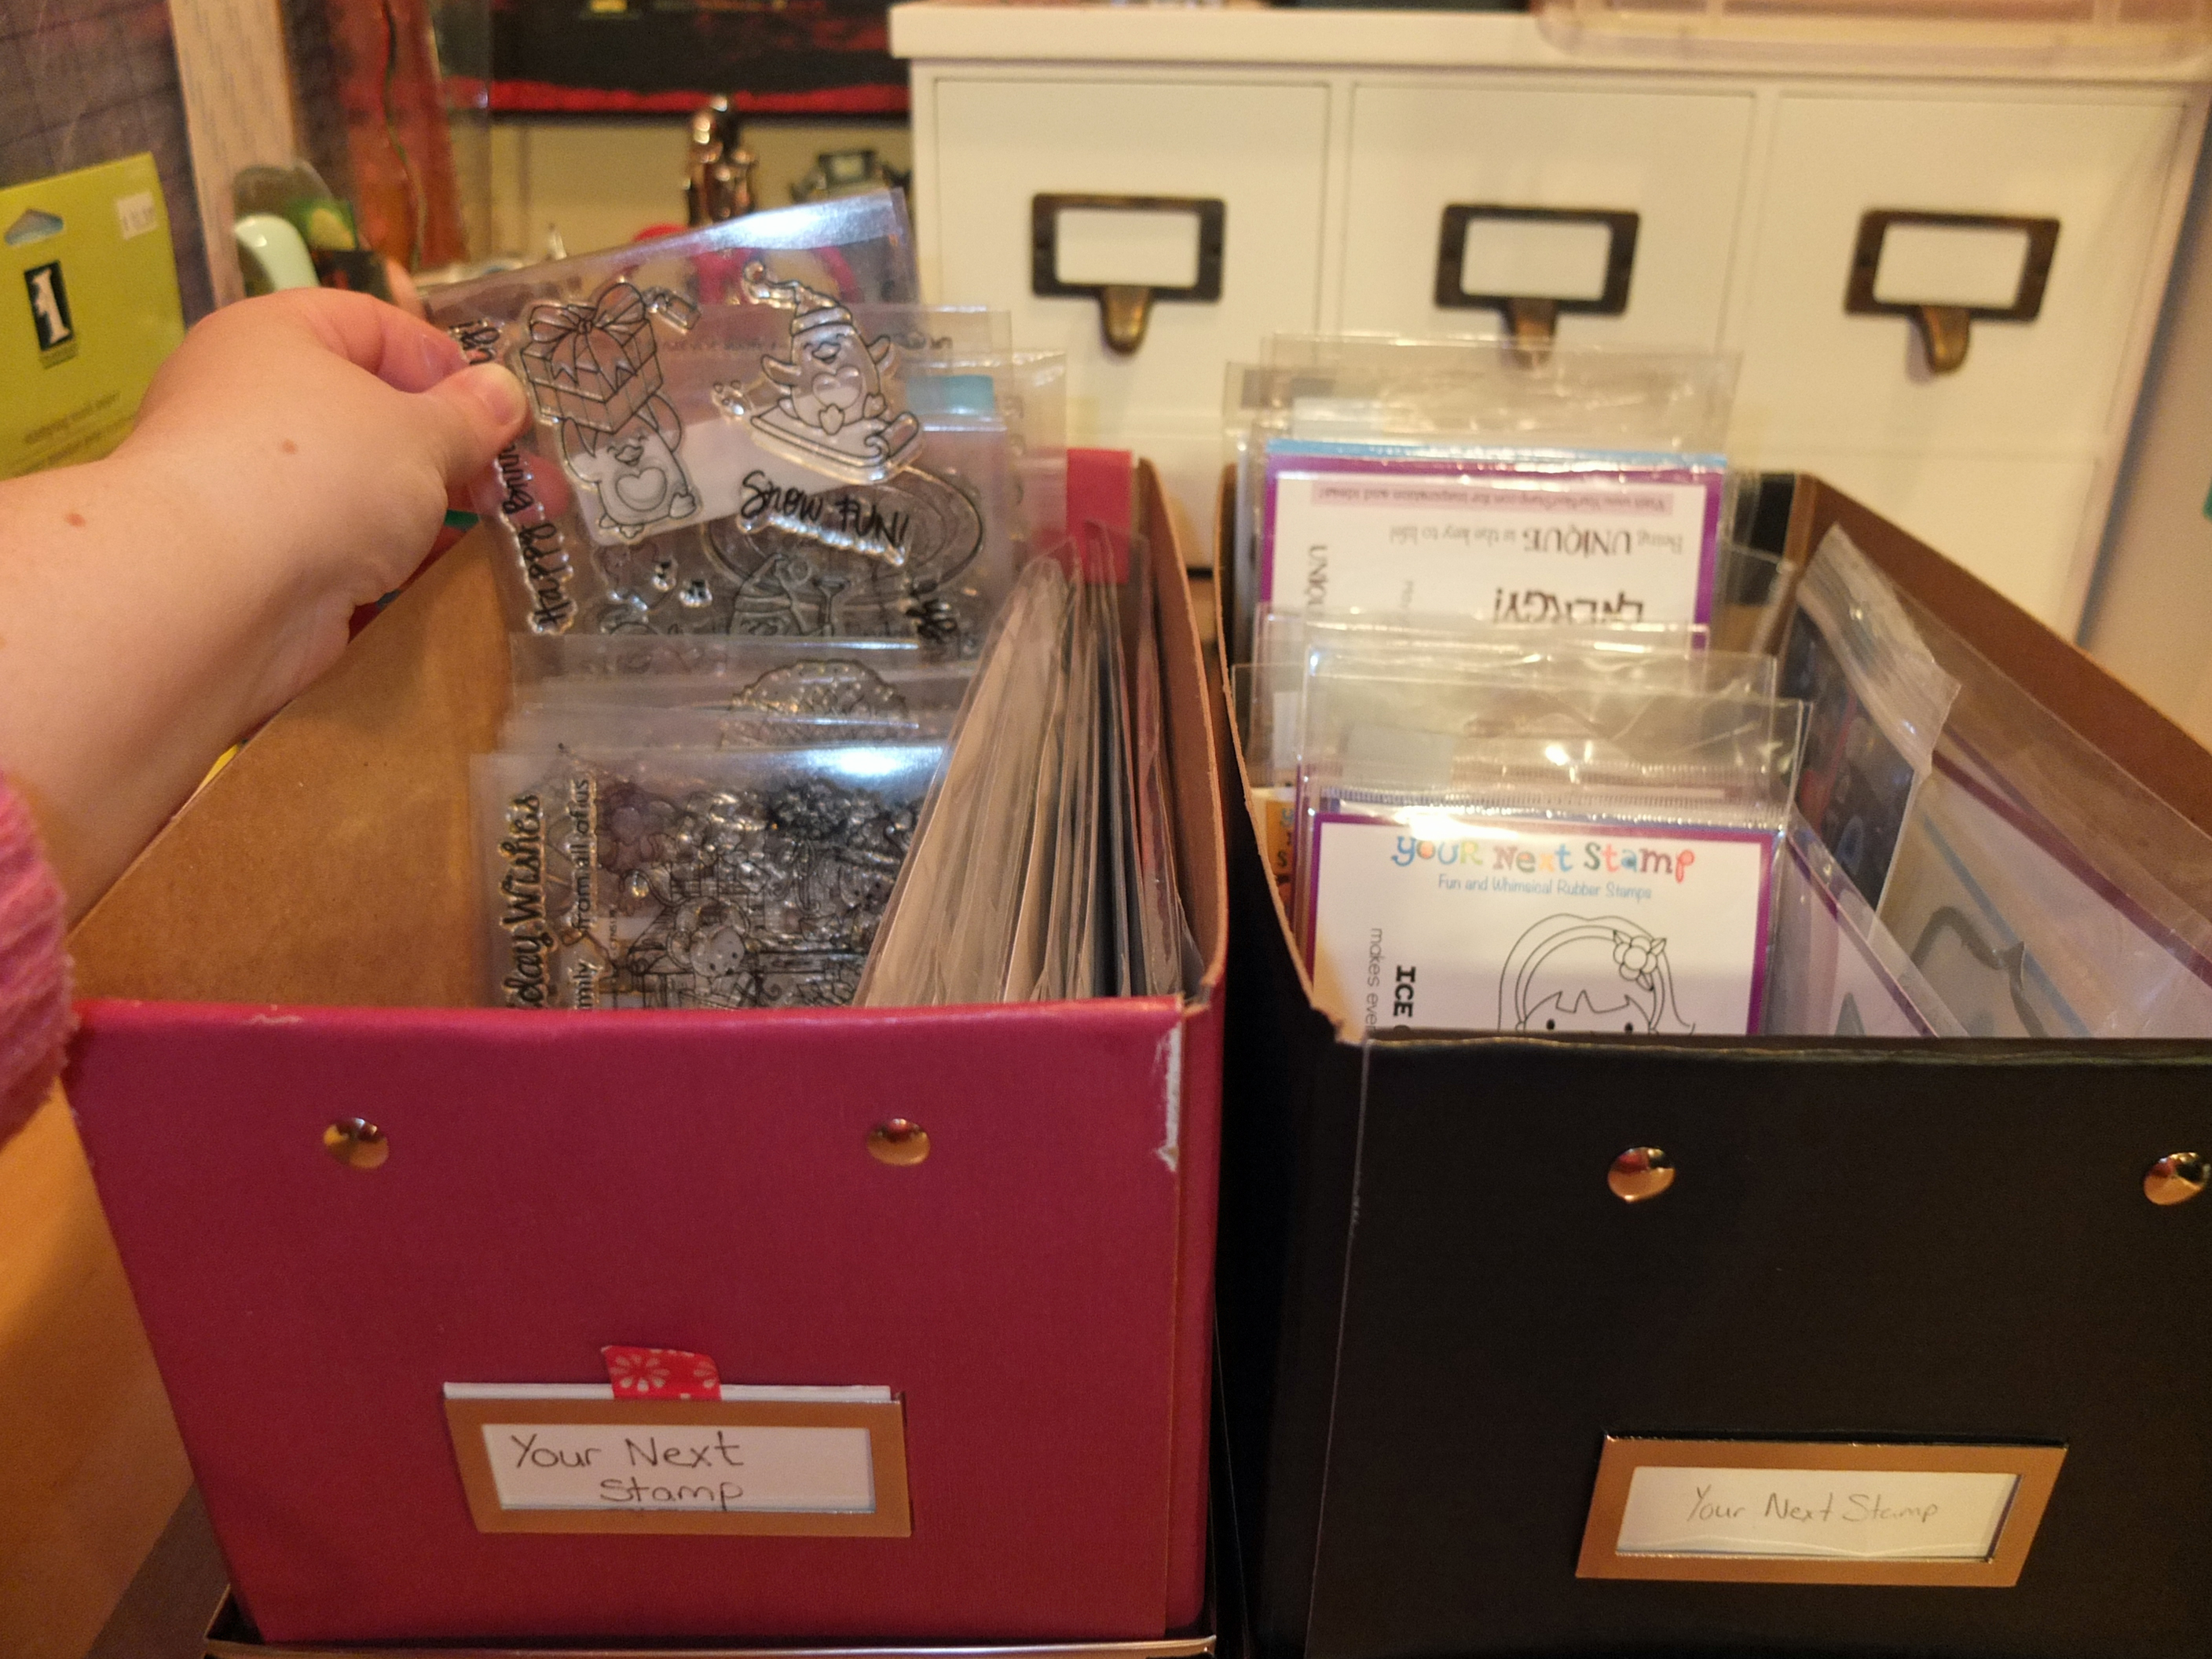
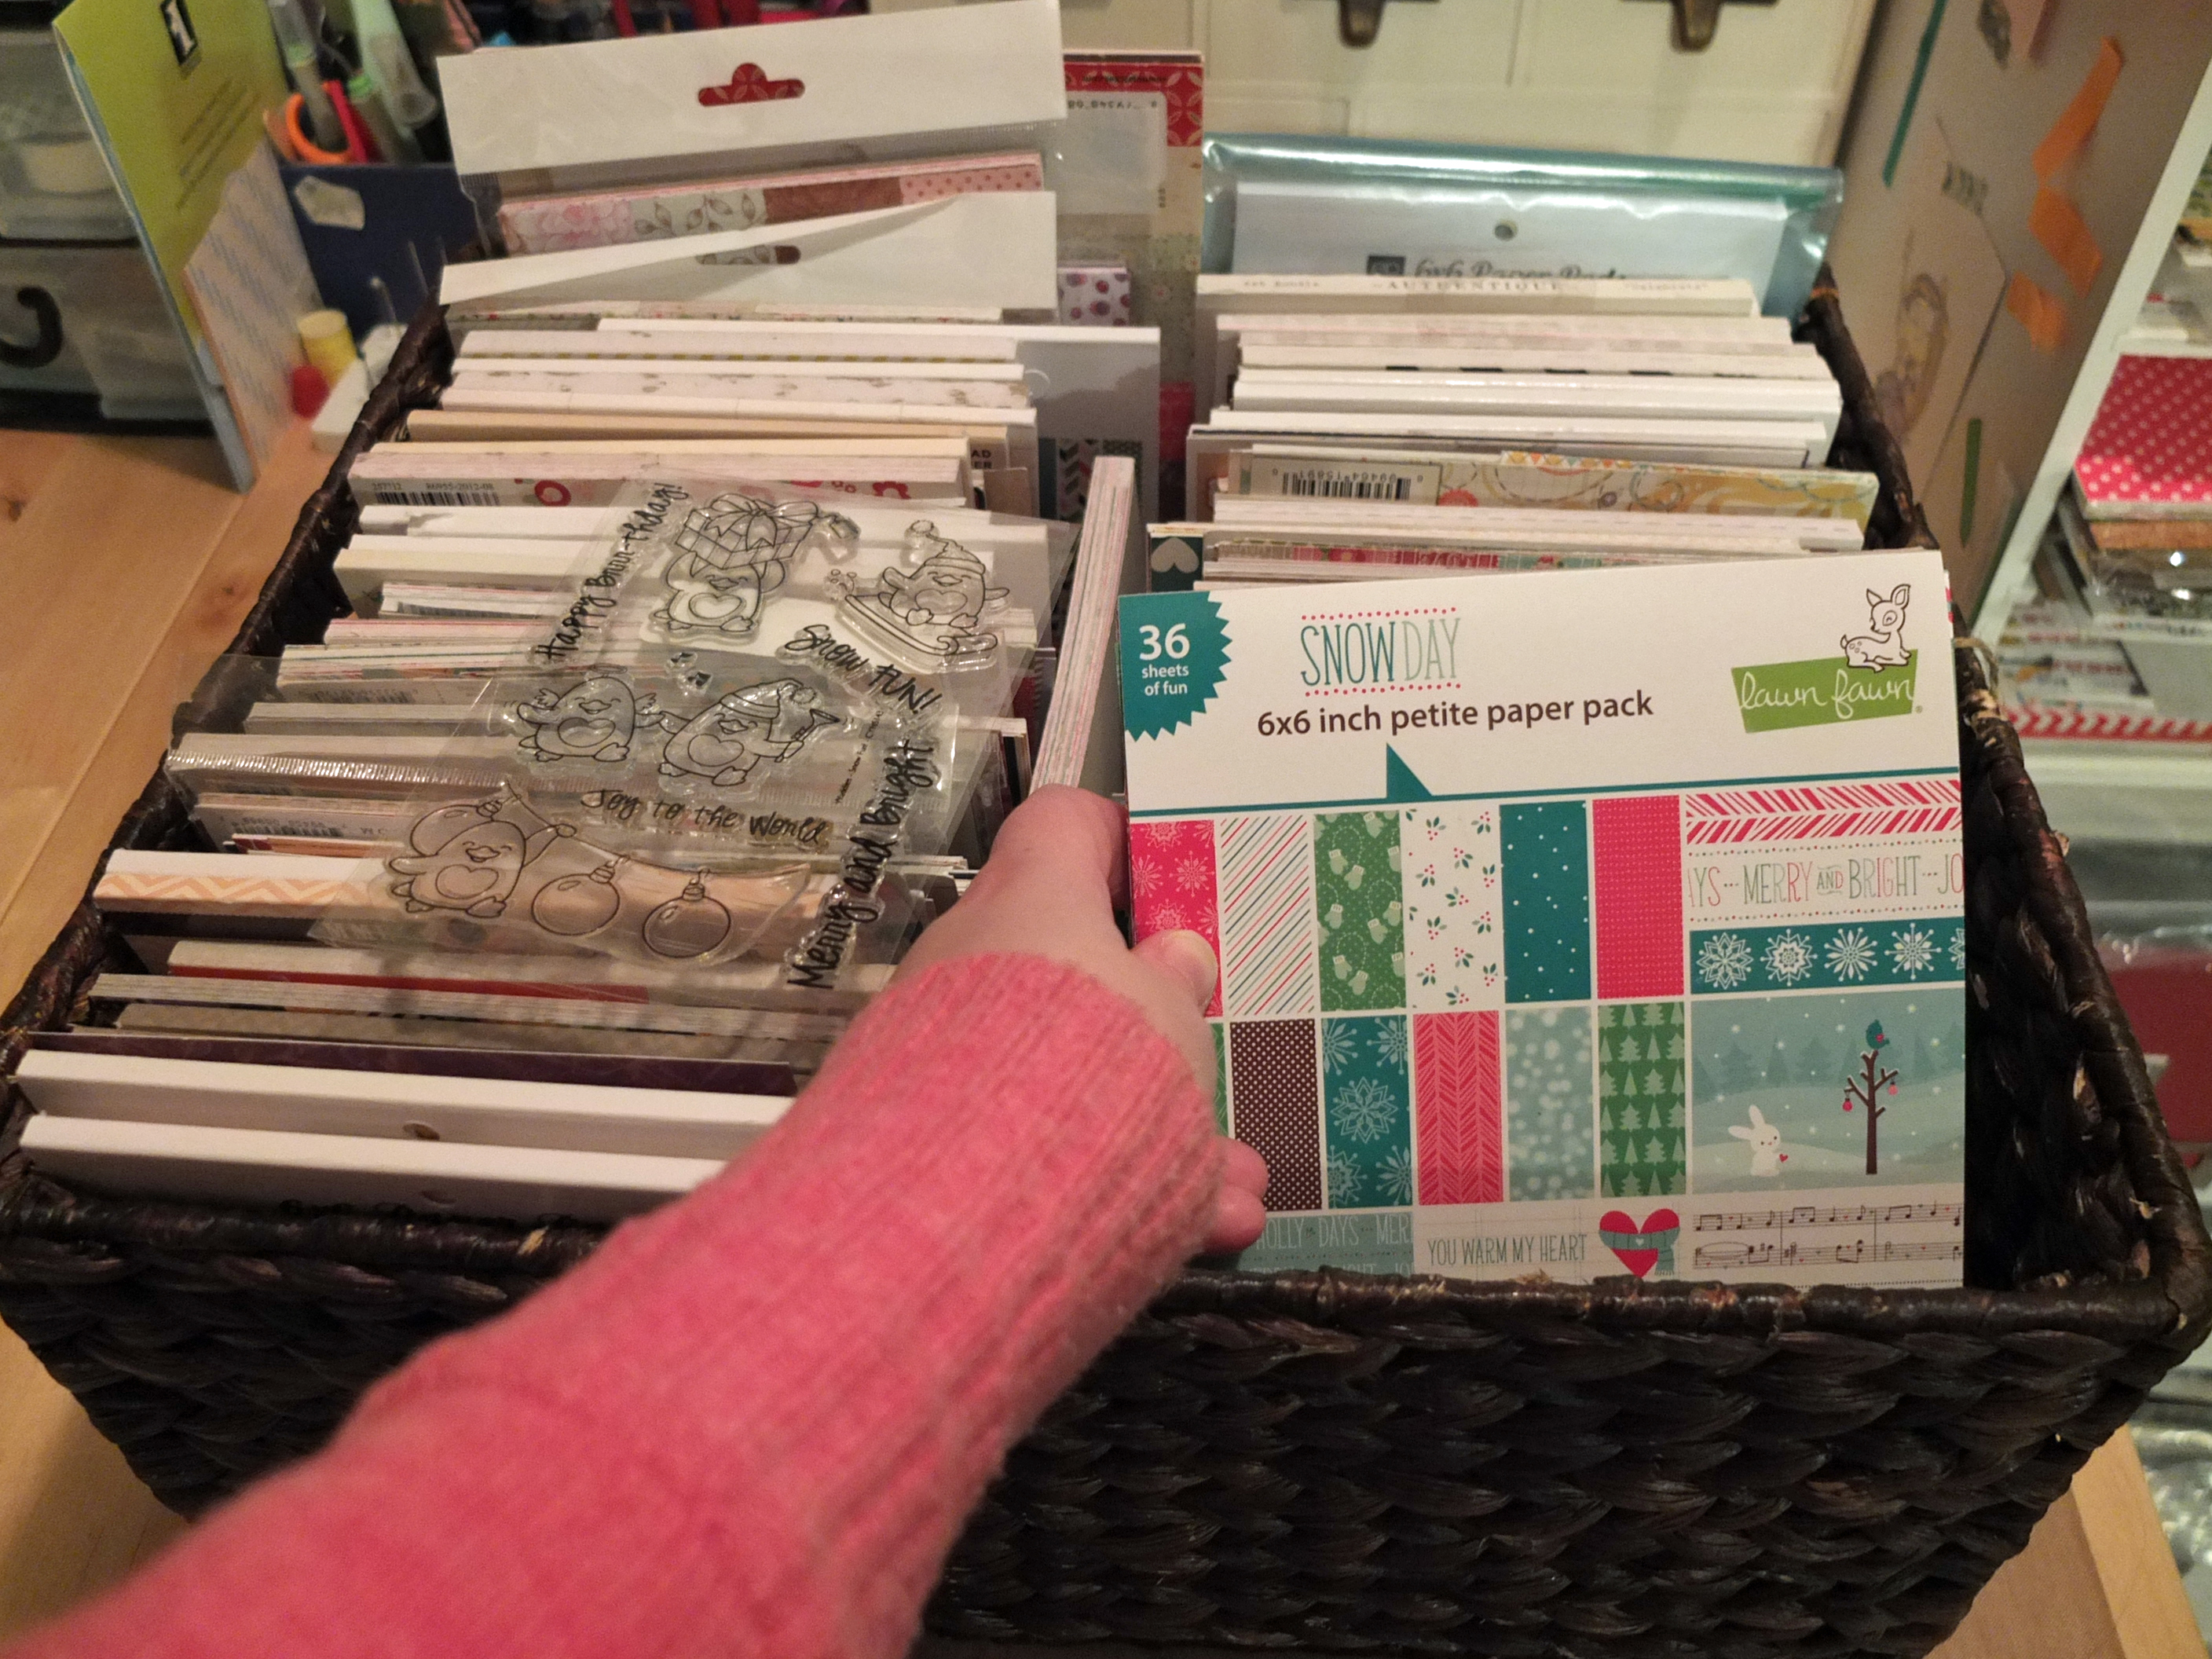
I do keep my stamps together by manufacture, however I also have a “create with” basket on my desk. This basket holds those images that I want to work into future projects. There is a mixture of new and older images in this basket and they are ones that I will use when I am not working on a DT project.
Selecting my Paper:
Once I have my image, I will then select the paper I want to use. I work with 6×6 paper pads, so at this stage in the process, I am just selecting the collection that I think will work best for the image and project I want to create. The 6×6 collections are great because I know that everything coordinates together. While I am selecting my pattern paper, I will also be thinking about the colour of card stock I will use to mat my images and pattern paper.
Similar to my selection process for the stamp, depending on my project theme I like to pick the paper that inspires me the most.
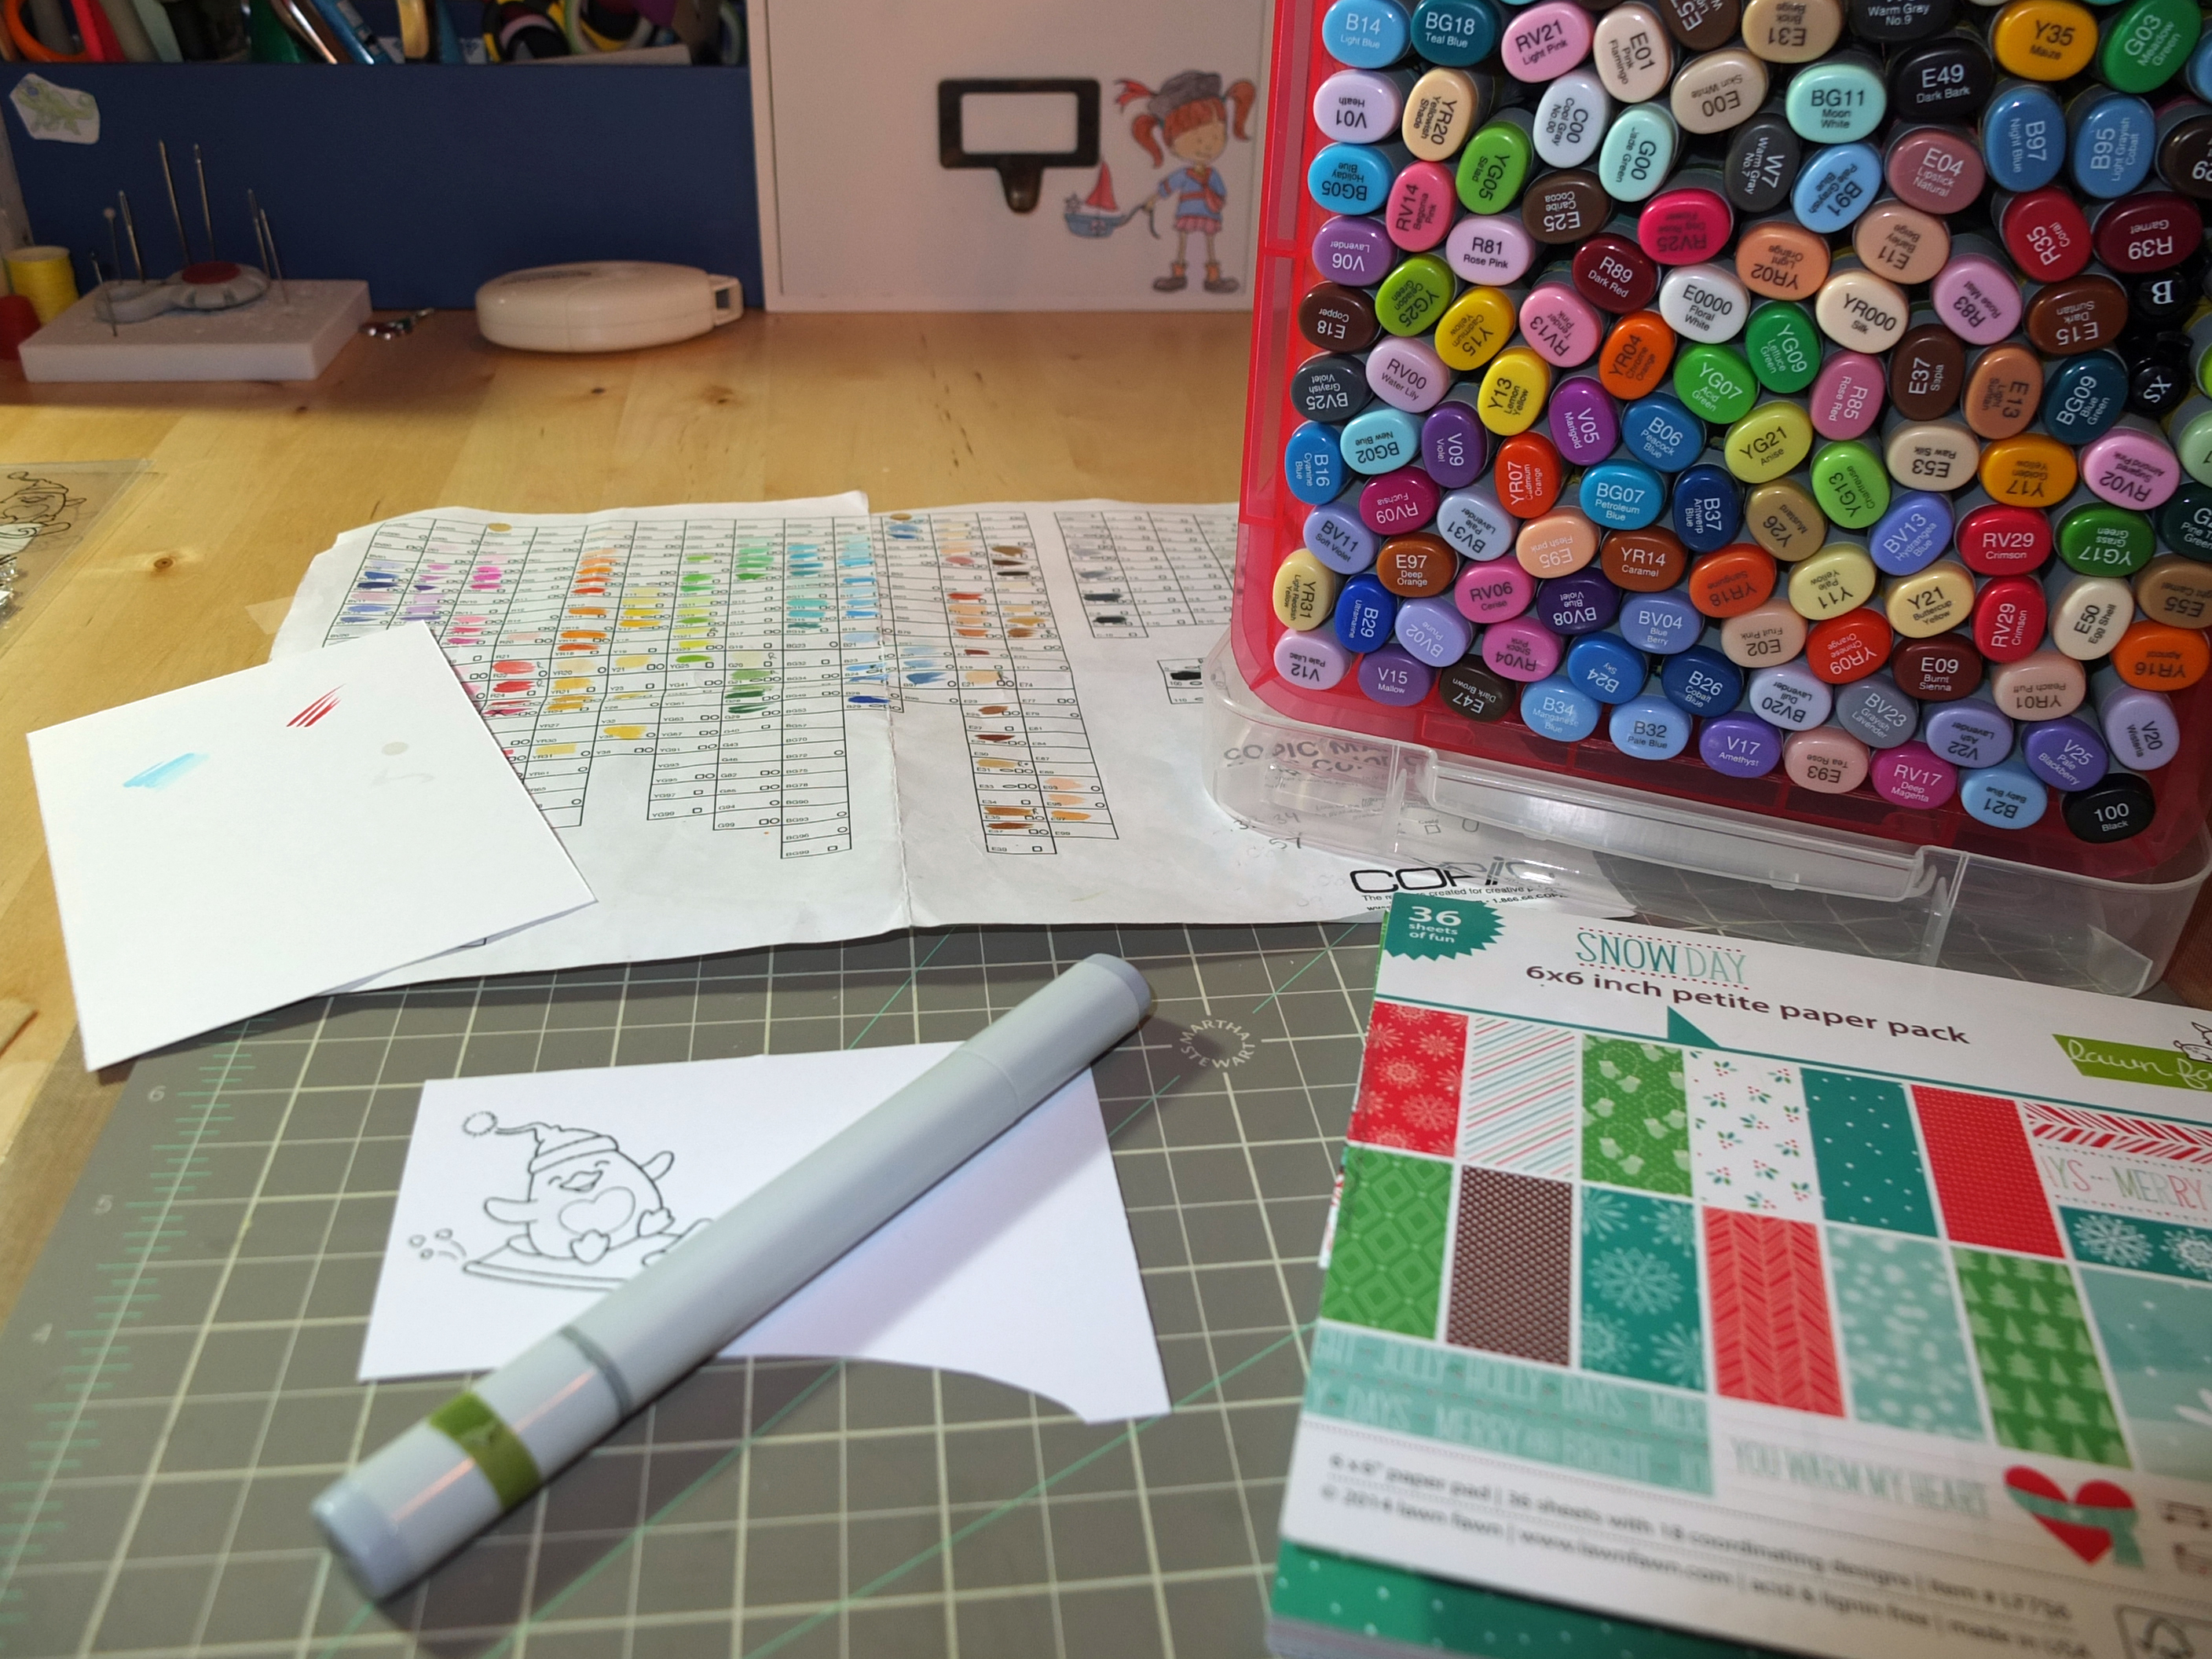
Colouring My Image:
I stamp out my image (Copic Xpress It paper) using Memento Tuxedo black ink. When I am stamping out my image I like to have an idea of how I plan to display the image on my project (i.e. fussy cut, die cut, special background). This will help me decide if I need to leave space around my image. If I am not sure, I will always leave enough space to decide later.
When I start to colour my image I like to have a few essentials around me:
Copic markers (that’s obvious)
Copic colouring chart
Pattern paper and
Scrap paper (for testing out blending, colour combos or just practice something before I colour)
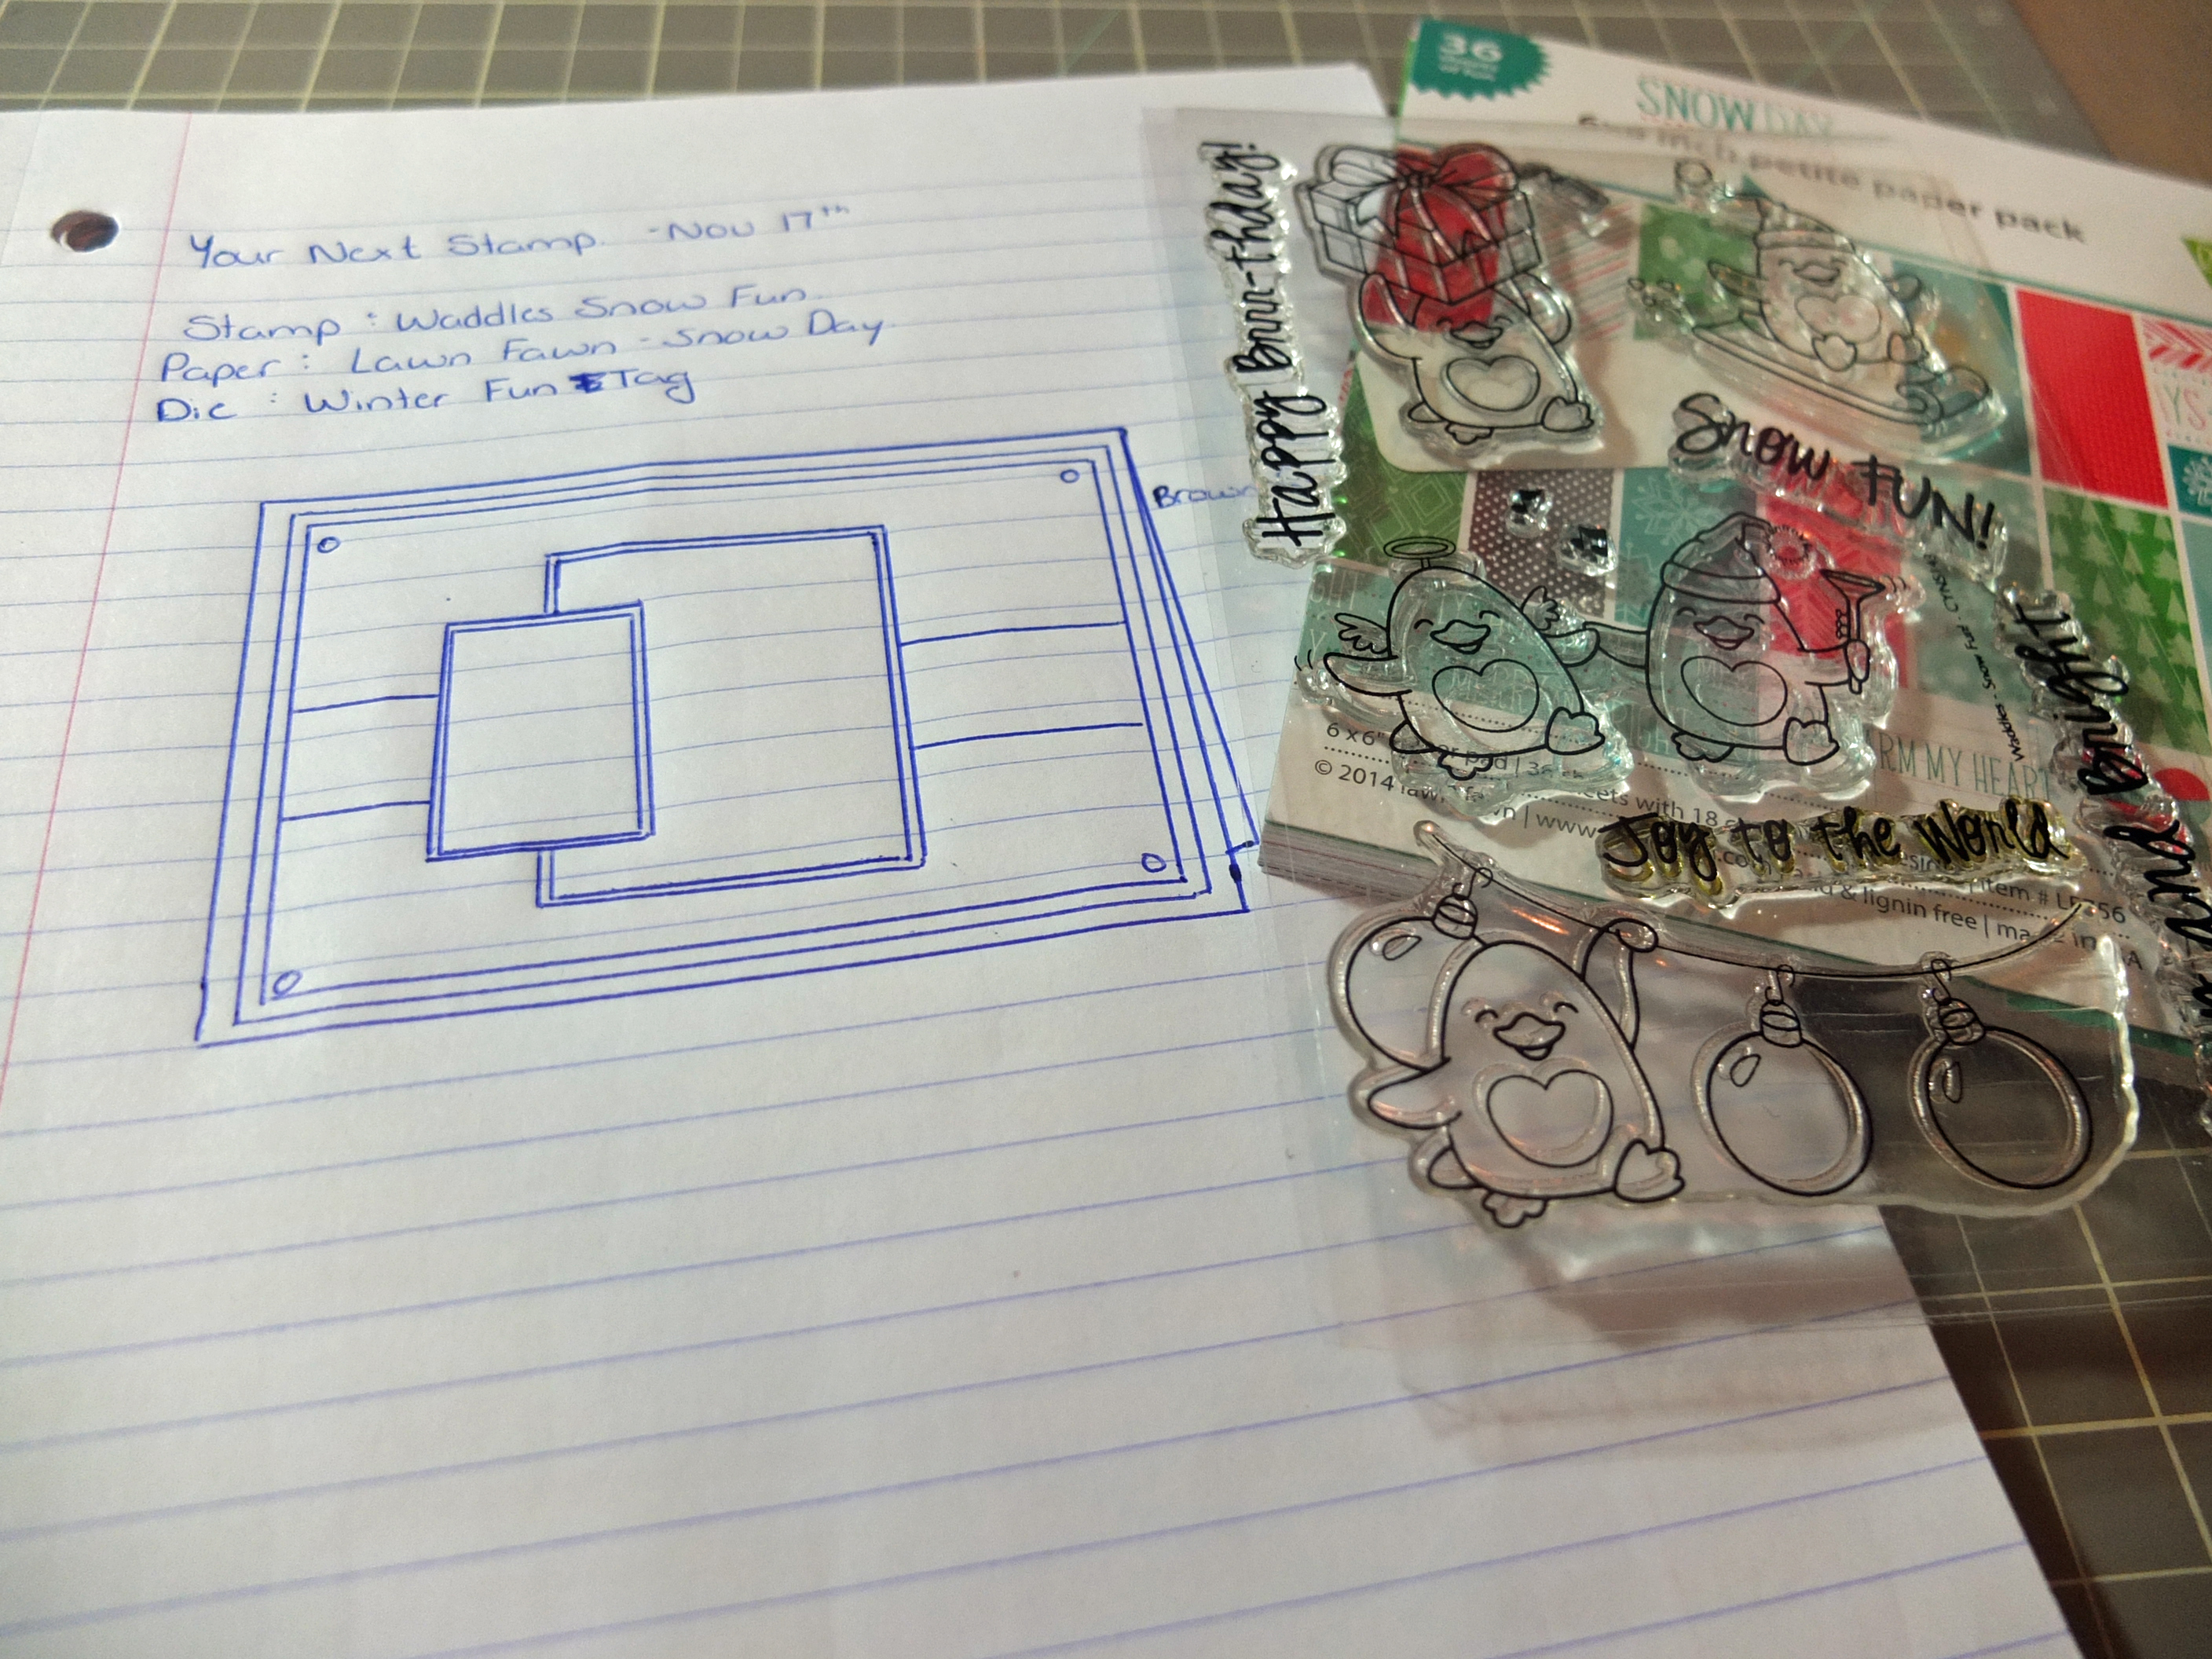
Sketch It:
This is not always a step I do. However, I find it really helps reduce the time spent starting at my supplies, wishing everything to magically place itself on my card. Most times I will draw my own card sketch, but I do have a collection of sketches from various resources if I am in a creative slump. While I am sketching, I like to make notes on dies, embellishments or techniques I may want to use.
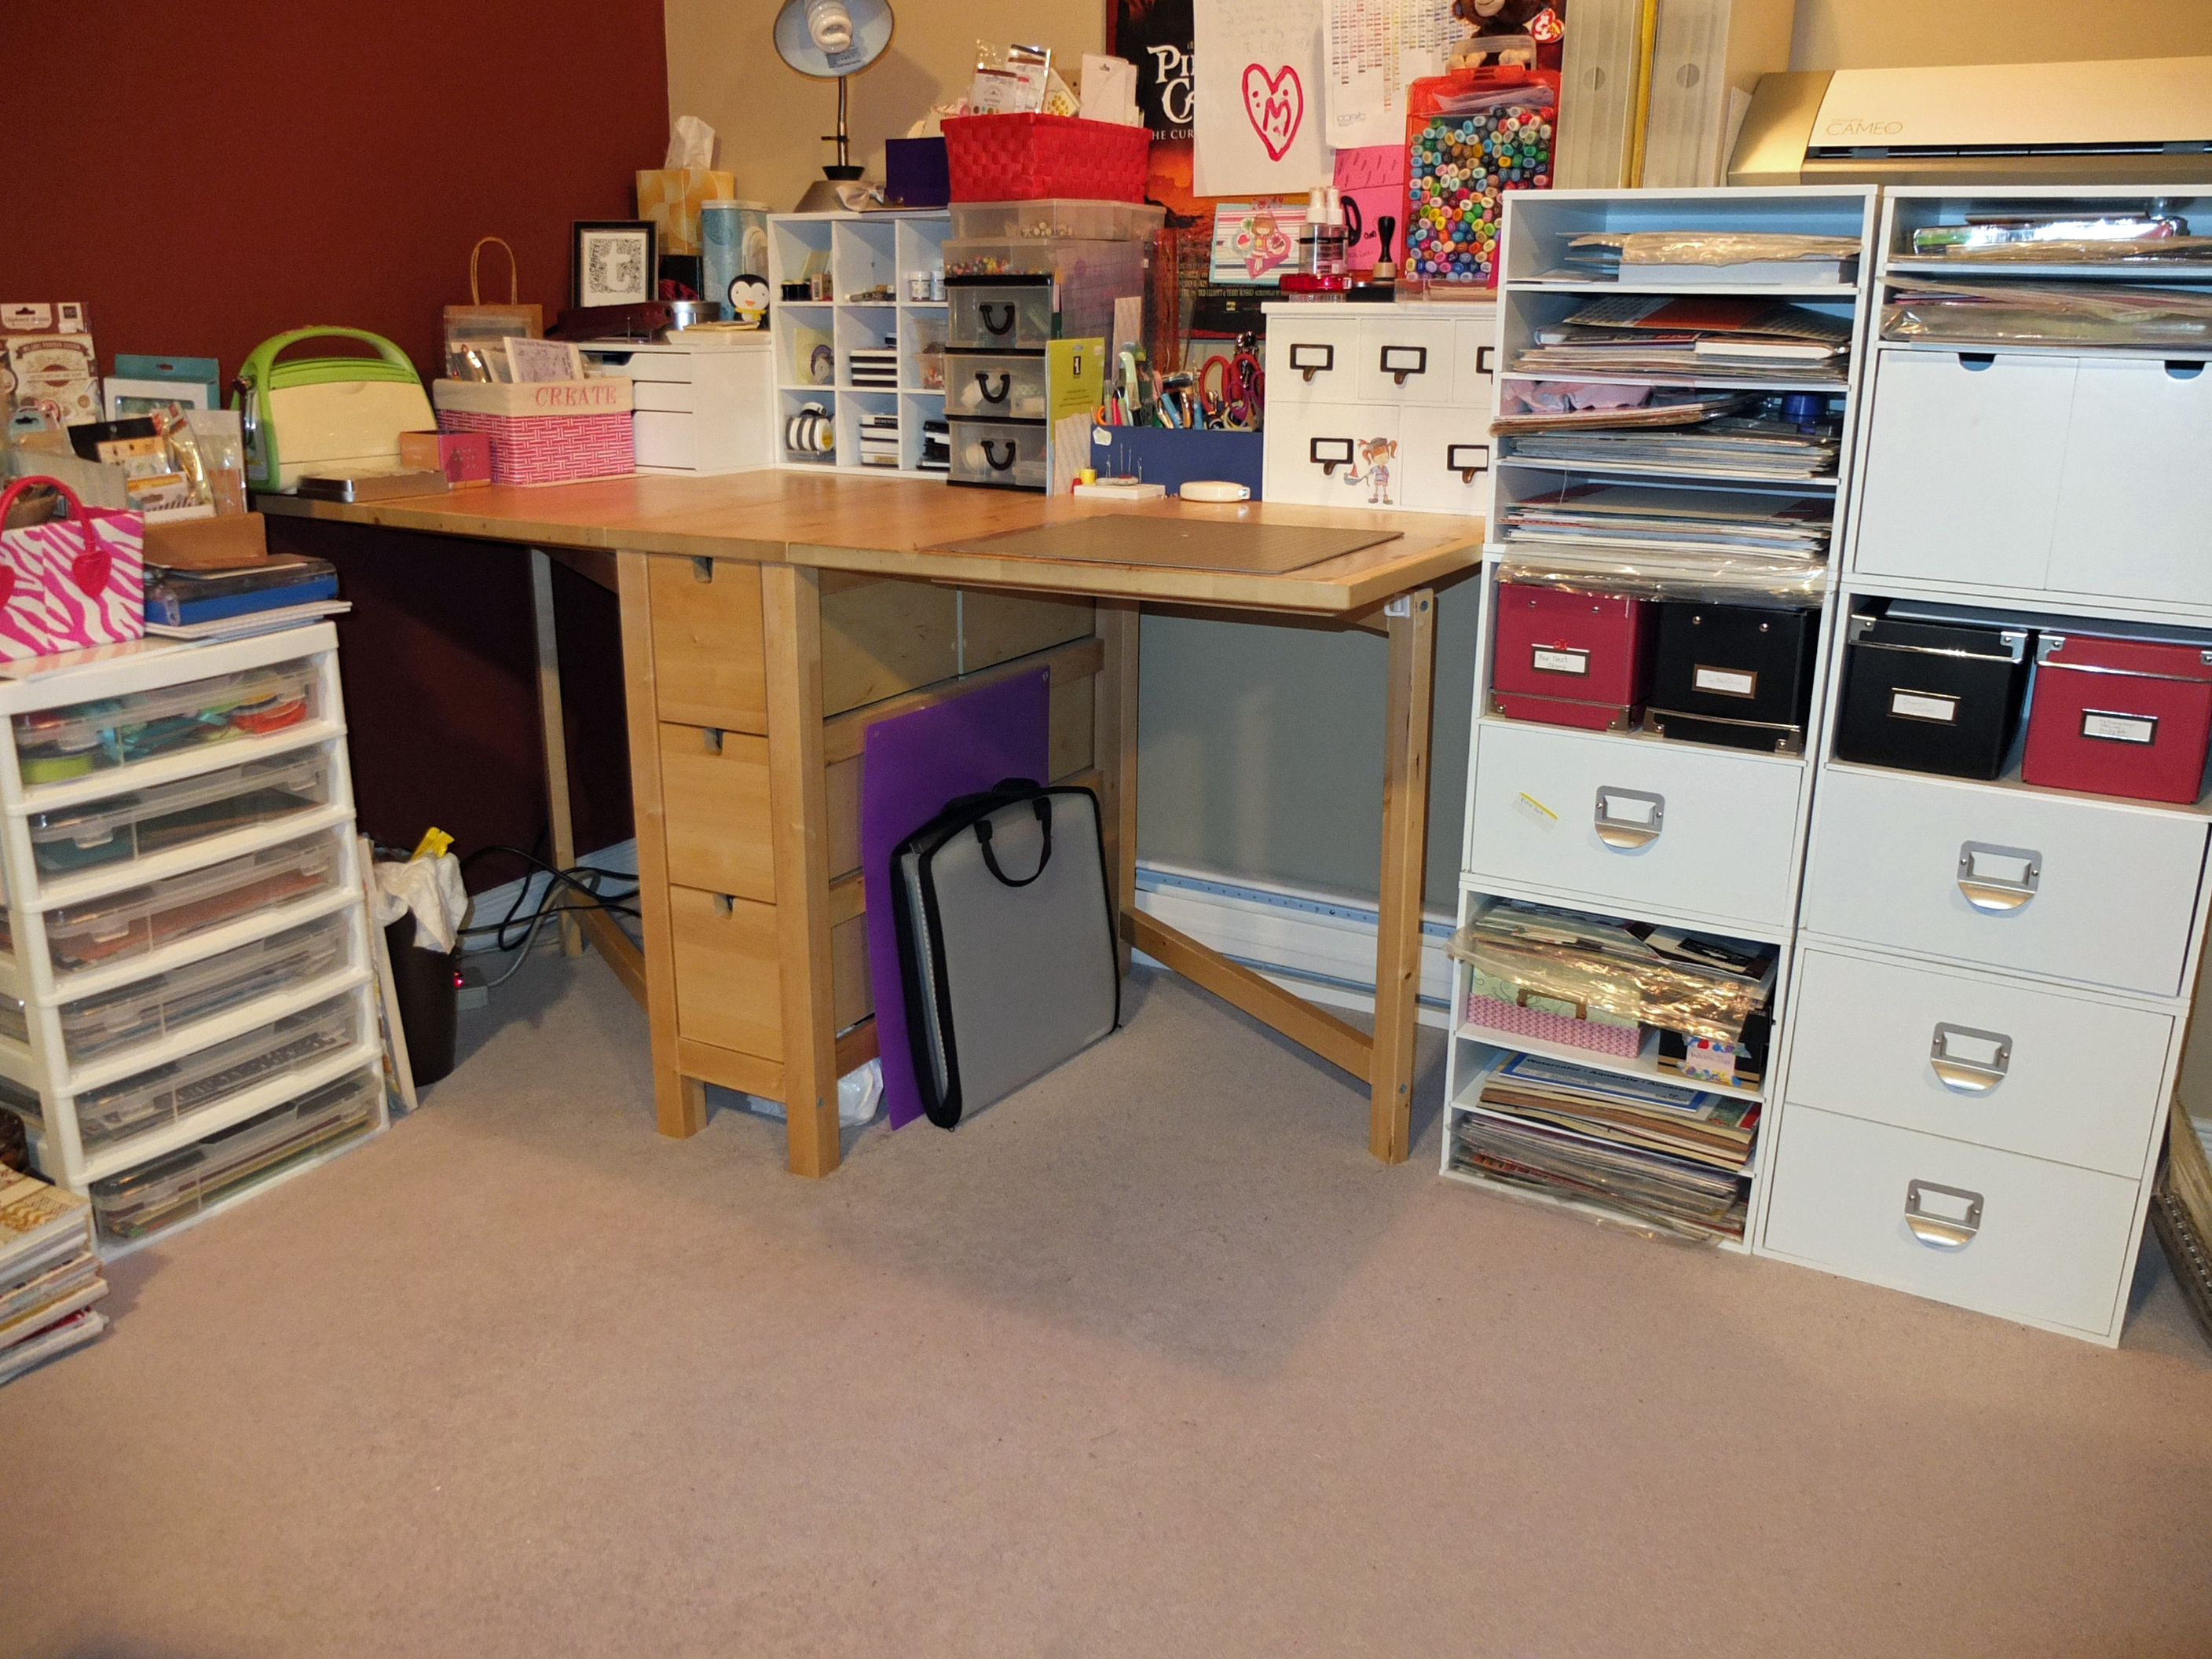
Getting Crafty:
Here is my little crafty corner which is located in the basement of the house. It’s in desperate need of organization, which when I have “time” will get done. Once I am ready to start creating, I will pull together all of my tools and supplies for my project including:
Coloured image
Sketch/notes
Card base: most of my cards are 5 x 6.25 however I do work occasional with 5.5 square or for smaller cards 4.25 x 5.5. The size of card will depend on my image and my plan for layers and embellishments.
Paper: now is when I will pull out the pattern paper from the collection I would have selected earlier. I will also select my coordinating card stock. Based on my typical sketch, I will use 3 or 4 pattern papers on my cards. I try to select the patterns that go best together, often a simple design for the background then 2 or more complementing patterns that work well together (i.e. dots, stripes, floral)
When I start to cut and layout my paper, I will put everything in place before sticking it all down. This gives me a chance to move and adjust or add layers (which I love to do).
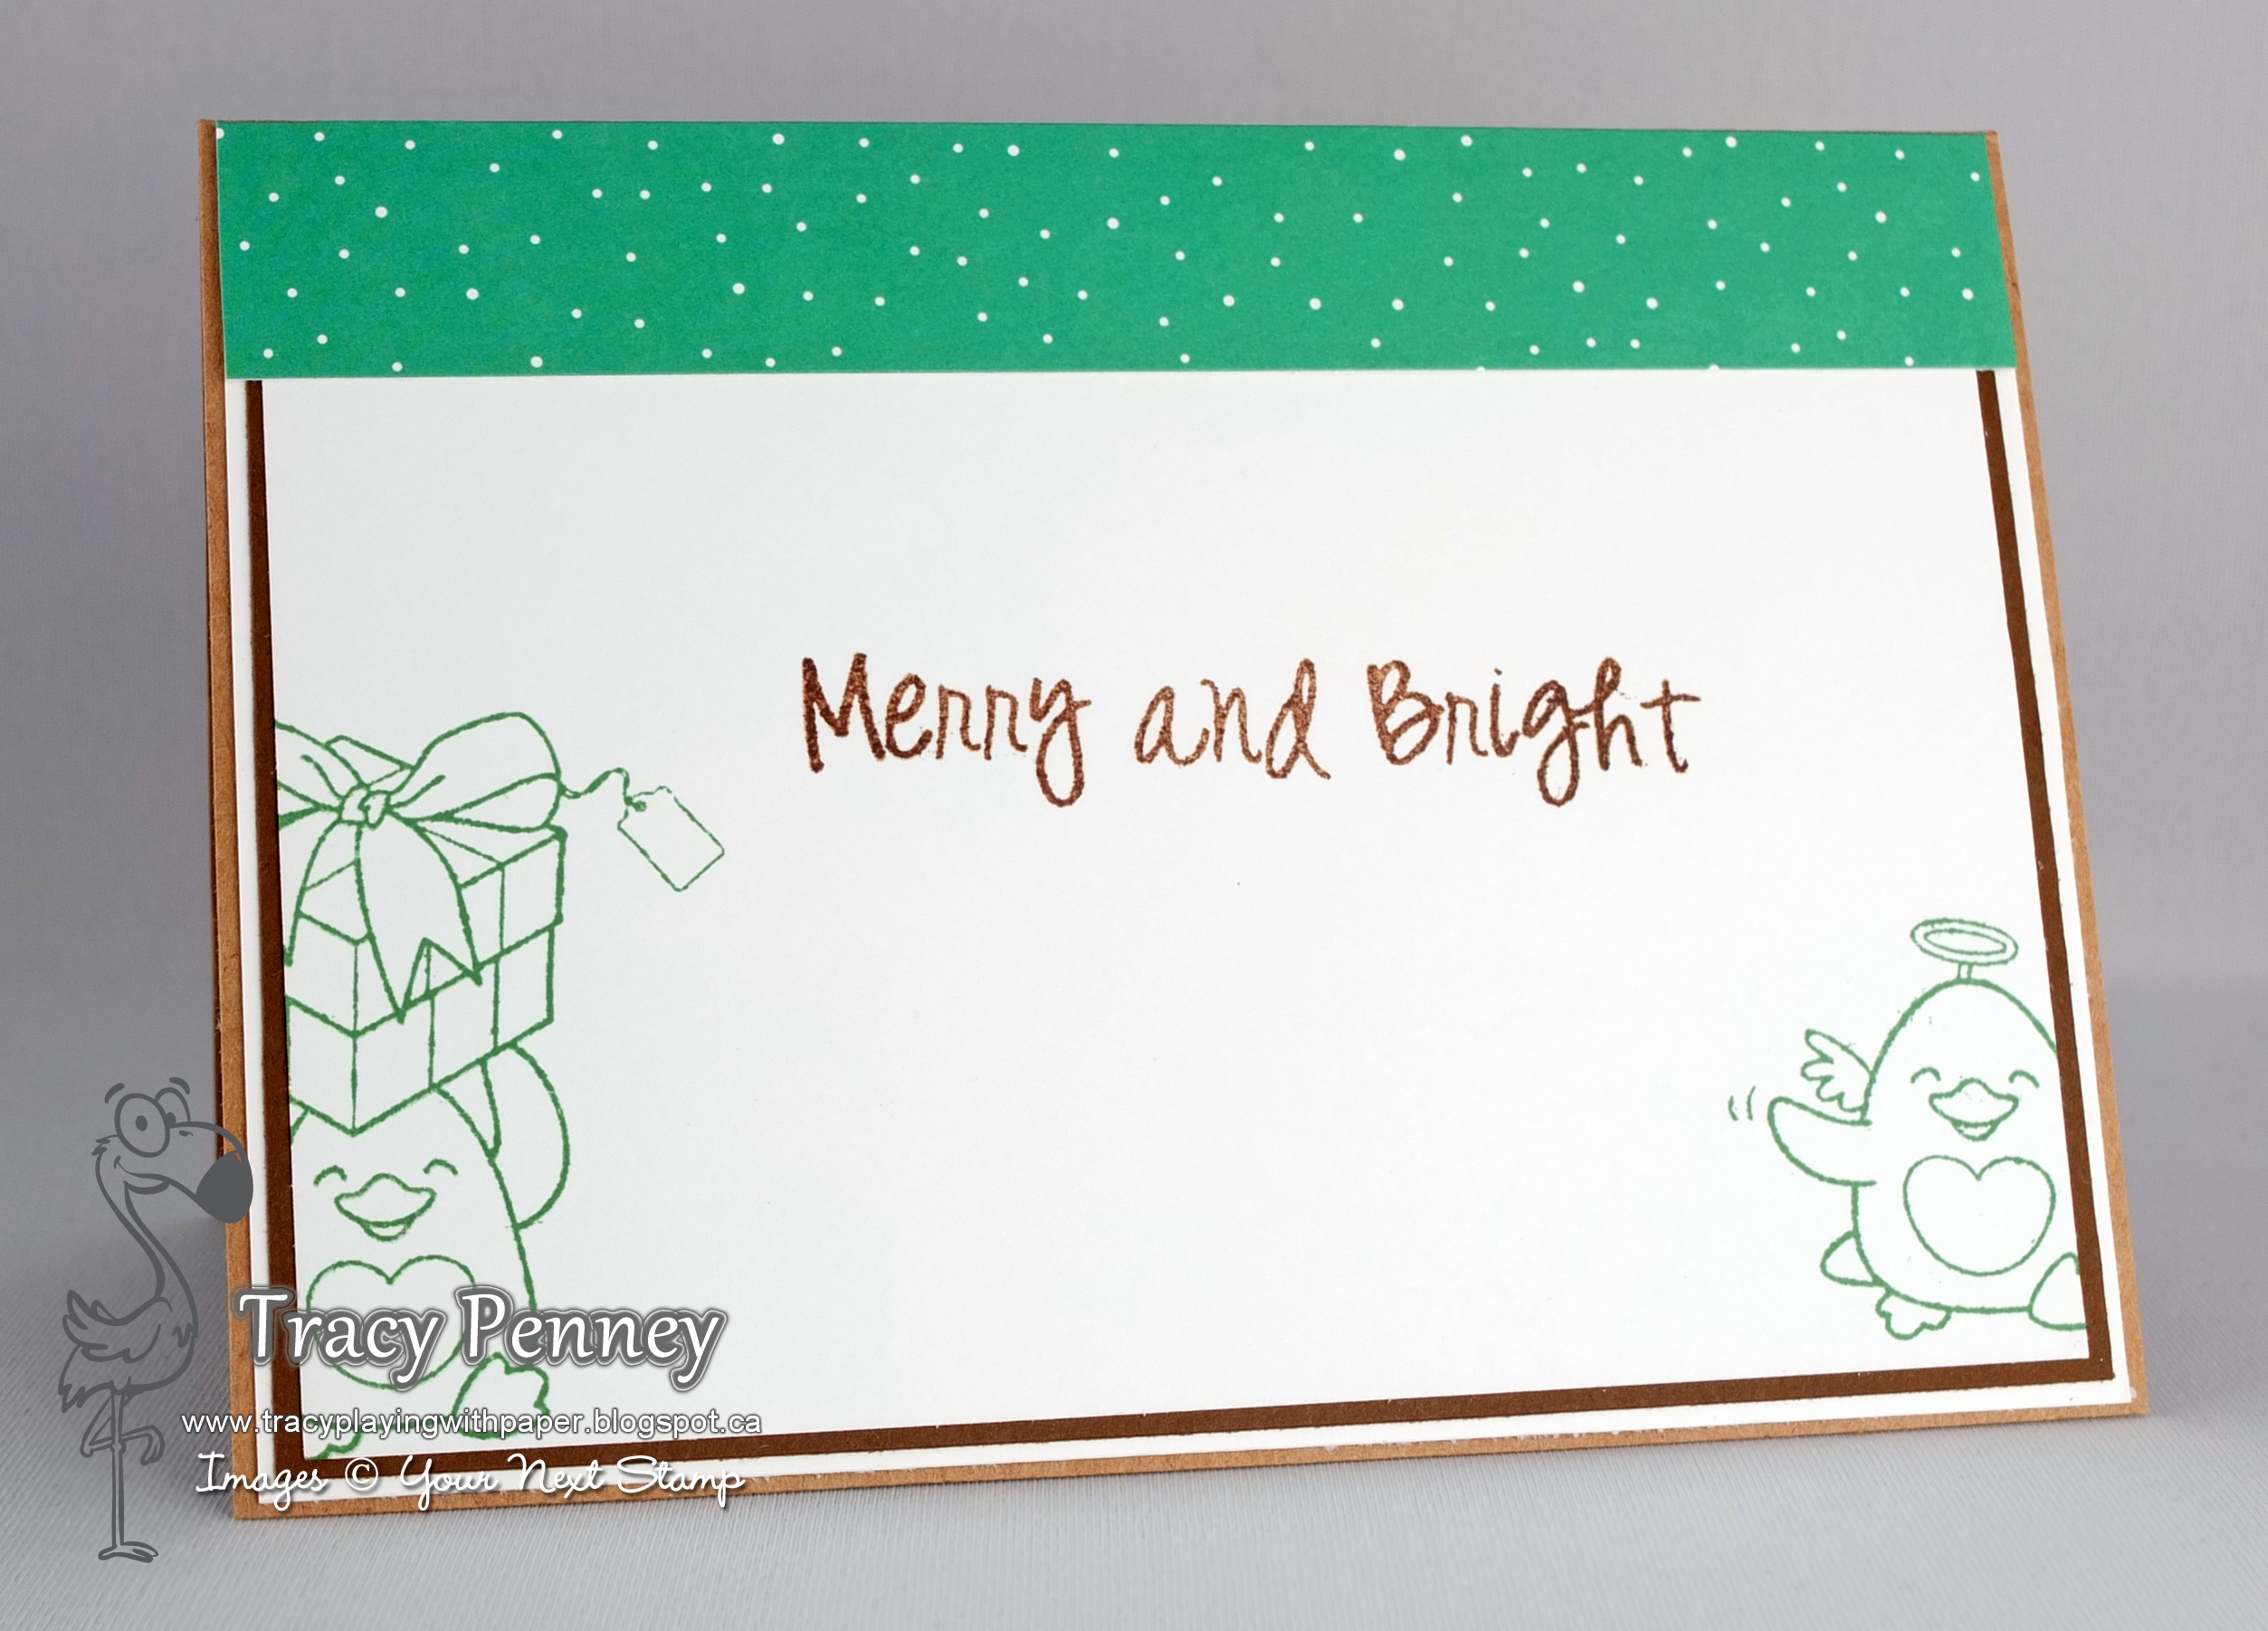
As a final part of my creative process I like to finish the inside of my card. My inside decorations usually include an image stamped in a coordinating colour, sentiment and pattern paper. The decorated inside is a nice additional creative surprise for the card recipient.
Thanks for joining me today. I hope that you found something helpful and inspiring in my creative process. Come back again next Monday because Deborah will be sharing with you her creative process.
Posted by: YNS on Monday, October 13, 2014 at 11:38 am
Hello YNS Fans! In case you missed it we kicked off a brand new Design Team series on the blog on Mondays. This time around we are talking about the design process. Well, I’ll be honest. I’m a “fly by the seat of my pants” kind of girl when it comes to designing so it’s a bit hard to describe my process. But typically I have two different modes of operation when I sit down to create a project: 1. Pick my paper/colours and embellishments first and then my stamps OR 2. Pick my stamps and then pick my theme based on the image. Here’s an example of a card that I did where I chose my papers and embellishments first. Then I chose a stamp (Moving Elly) that would fit the theme of the papers and that I could colour with the colours in the papers. In terms of card design, I like to use sketches as a guide or in this case the paper with the chevrons was my starting point and I built the design from there.
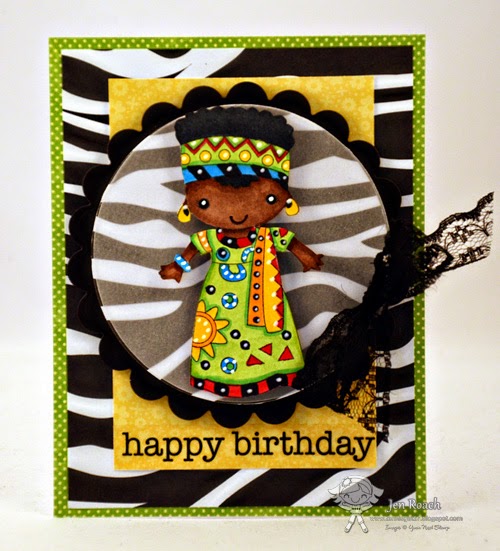
Other times (like when we are giving our new release stamps to work with) I have a specific image to work with. I look at the image and then decide how I’d like to use it. For example, for this card I had to use the “Zina from Africa” stamp. First I coloured her and then I picked out some papers that accented the African theme and the image.
I hope this gives you a little bit of insight on how I start my design process. Stop by each and every month for the next several weeks for more tips.
Posted by: YNS on Monday, October 6, 2014 at 4:00 am
I am once again in the honorable position of kicking off a new design team series! Have you ever wanted to know more about our creative process? Well, now is your chance to learn each design team member’s personal design process!
Ahhhhh, the creative process. Some days it is all rainbows and others…
and other days it is a mess! Warning, the following photo may be scary for some.
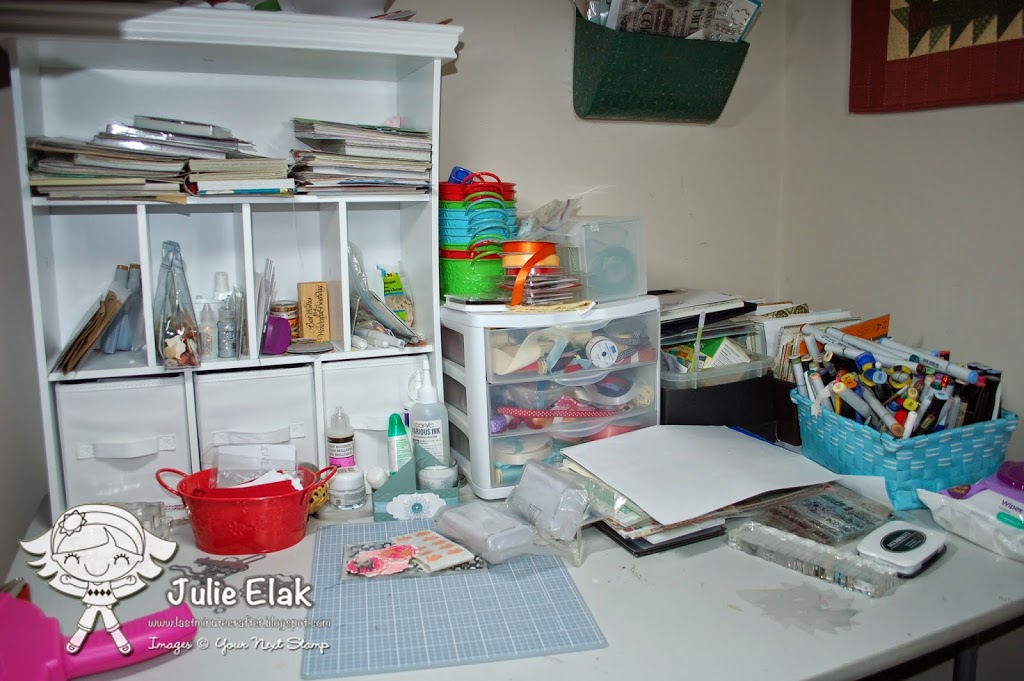
This is what my desk looks like most of the time.
I know it is hard to believe from the picture above, but I am actually somewhat organized when it comes to the whole process. My crafting area is much bigger than just this desk. I frequently take my crafting on the road. I carpool to work so I craft in the car on the days I don’t drive. Waiting for the kids is another great time to pull out markers and scissors. I try to take advantage of every minute to fit in crafting which means I need to be organized and plan ahead! Taking everything on the road though sometimes contributes to the mess. My markers are all disorganized in the photo because I quickly took out the ones that were in my travel bag and tossed them right on top.
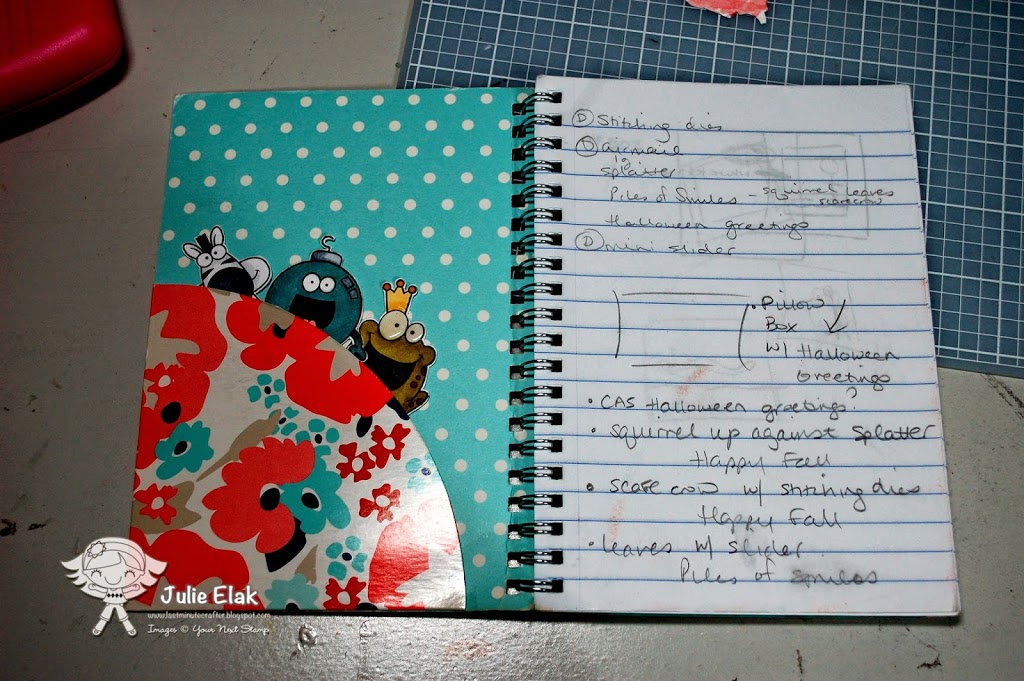
Organization – For me, it starts with a design team assignment or challenge. I have a mini notebook that tracks everything and keeps me organized. I like to think over what I am going to make before I even get started.
Here is my latest handy dandy notebook. I usually have a page for each challenge etc. and if it is for new stamp sets than there are multiple pages. This book is great because it has a little pocket in the front to hold fussy cut images.
Inspiration – Inspiration can strike at any time and my notebook travels with me everywhere I go so I can jot down ideas. I don’t really keep up on the latest trends and I can’t even say that I am inspired by one thing more than another. It really is whatever happens to catch my attention and make me think “oooo, that would make a fun card”.
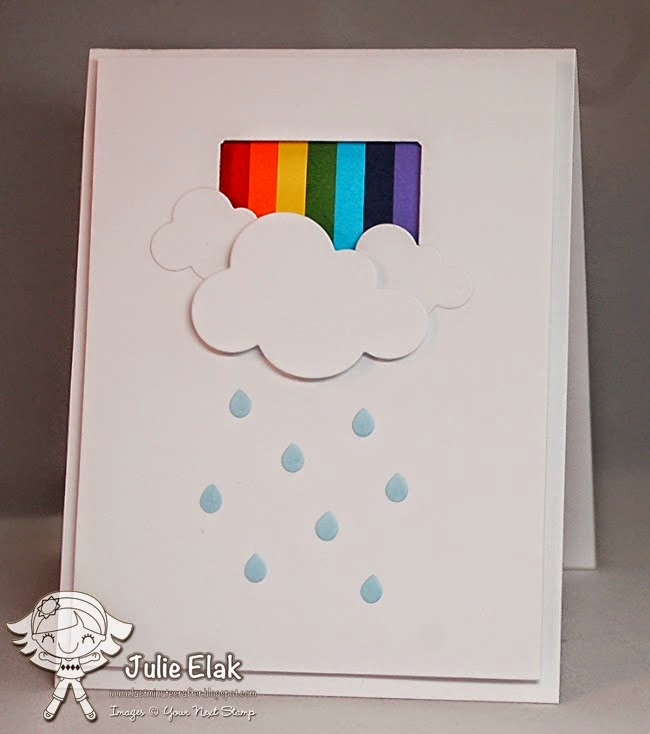
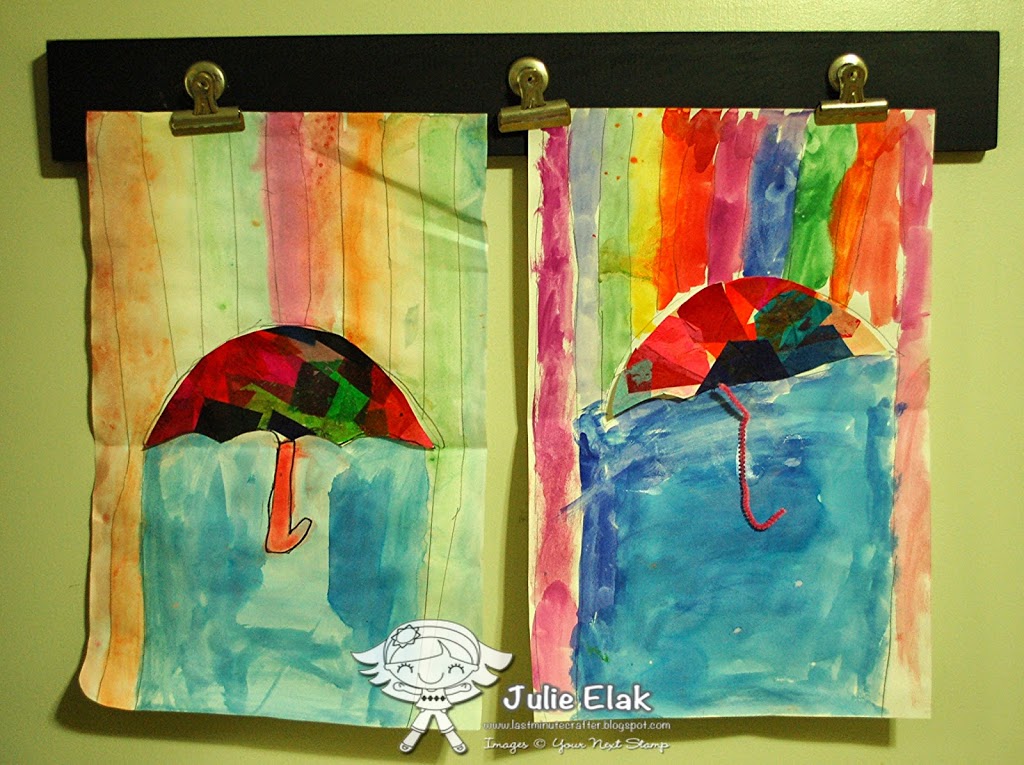
Can you guess what my inspiration was for this card?
Dies – Your Next Stamp – Puffy Cloud
Dies, Raindrops from Rainy Day and square formed with Pinwheel Die.
If you said my children’s artwork you would be correct!
These paintings were done by my sons in art class at school.
Crafting – When it comes to actually putting together cards I would describe it as a colorful mess. I have found that I do best if I am making several cards at once. At the end there are always piles of paper, stamps, ink pads, etc. that I need to put away. I, errrr, enjoy looking at those piles for days. I am usually tired by the time I finish a card and ready to go to bed so those piles stay out until I craft again or can’t stand looking at them anymore.
Be sure to check back next Monday to find out more about Jen’s crafting process!
Posted by: YNS on Monday, July 21, 2014 at 4:00 am
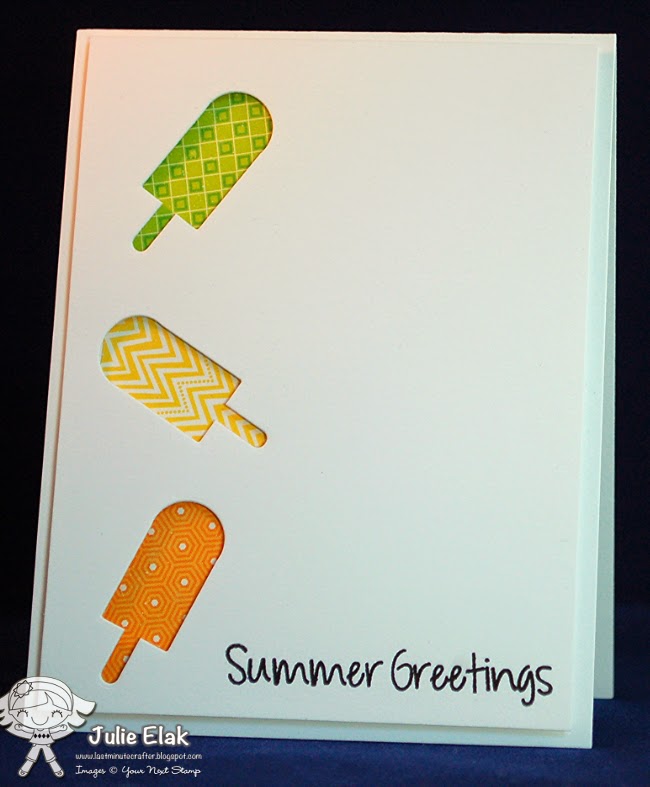
Hello everyone! Today I am kicking off a new weekly series on the Your Next Stamp Blog…CAS! What is CAS? (Besides being one of my favorite styles of cards!) CAS is the acronym for Clean And Simple Picture a card with lots of white or open space, few embellishments, and one focal point. This type of card is uncluttered, quick and easy to create. Less is more when it comes to a CAS card. I once read that CAS is the equivalent of a LBD (Little Black Dress) for card makers.
Now on to my card featuring dies as the focal point, lots of white space and a bit of patterned paper – I always like to throw in a little pattern on my CAS cards.