Posts By: Tracy Penney

Design Team Q and A: Tracy Penney

Hello crafty friends, welcome to another fun Design Team Q and A post. Each week you have a chance to get to know a little more about each of the Your Next Stamp Design Team, as we answer a few questions and share our favourite colour combos when we get crafty.

IMG_3187-XL

Q1: Tell us more about you, your family and where you live:

My name is Tracy. I have a loving husband of 12 years and two sweet and creative little girls that keep me busy. When I am not busy with my family, I work full-time for an insurance company. My job as my kids would say is to “boss people around”. I live in Ontario Canada close to my parents and 3 brothers and even closer to YNS head quarters. I have always enjoyed being creative and I have been creating cards, layouts and anything I can with paper for nearly 10 years.

Q2: When did you join the team at Your Next Stamp?

I started my blog in September 2013 as a way to share my cards and participate in challenges. I was very lucky to win a guest design spot with YNS in April 2014 and was over the top excited to join the team full-time in August. I am still a DT newbie and I am really enjoying this creative journey.

Q3: What are your favourite Your Next Stamp images?

First on the list will be Ellie Loves Lattes. This sweet stamp in the image that drew me to YNS as a customer so many years ago. Since then, some of my favourites include Ellie Loves Sunflowers, the Whatnot Sentiments (all of them), Silly Monsters and the new Jessica with Cupcakes.

Q4: What are your favourite colour combos?

Although it seems like a simple enough question, this is not an easy one for me to answer. I love so many colours and try to mix things up depending on the image, occasion, season and my creative mood.

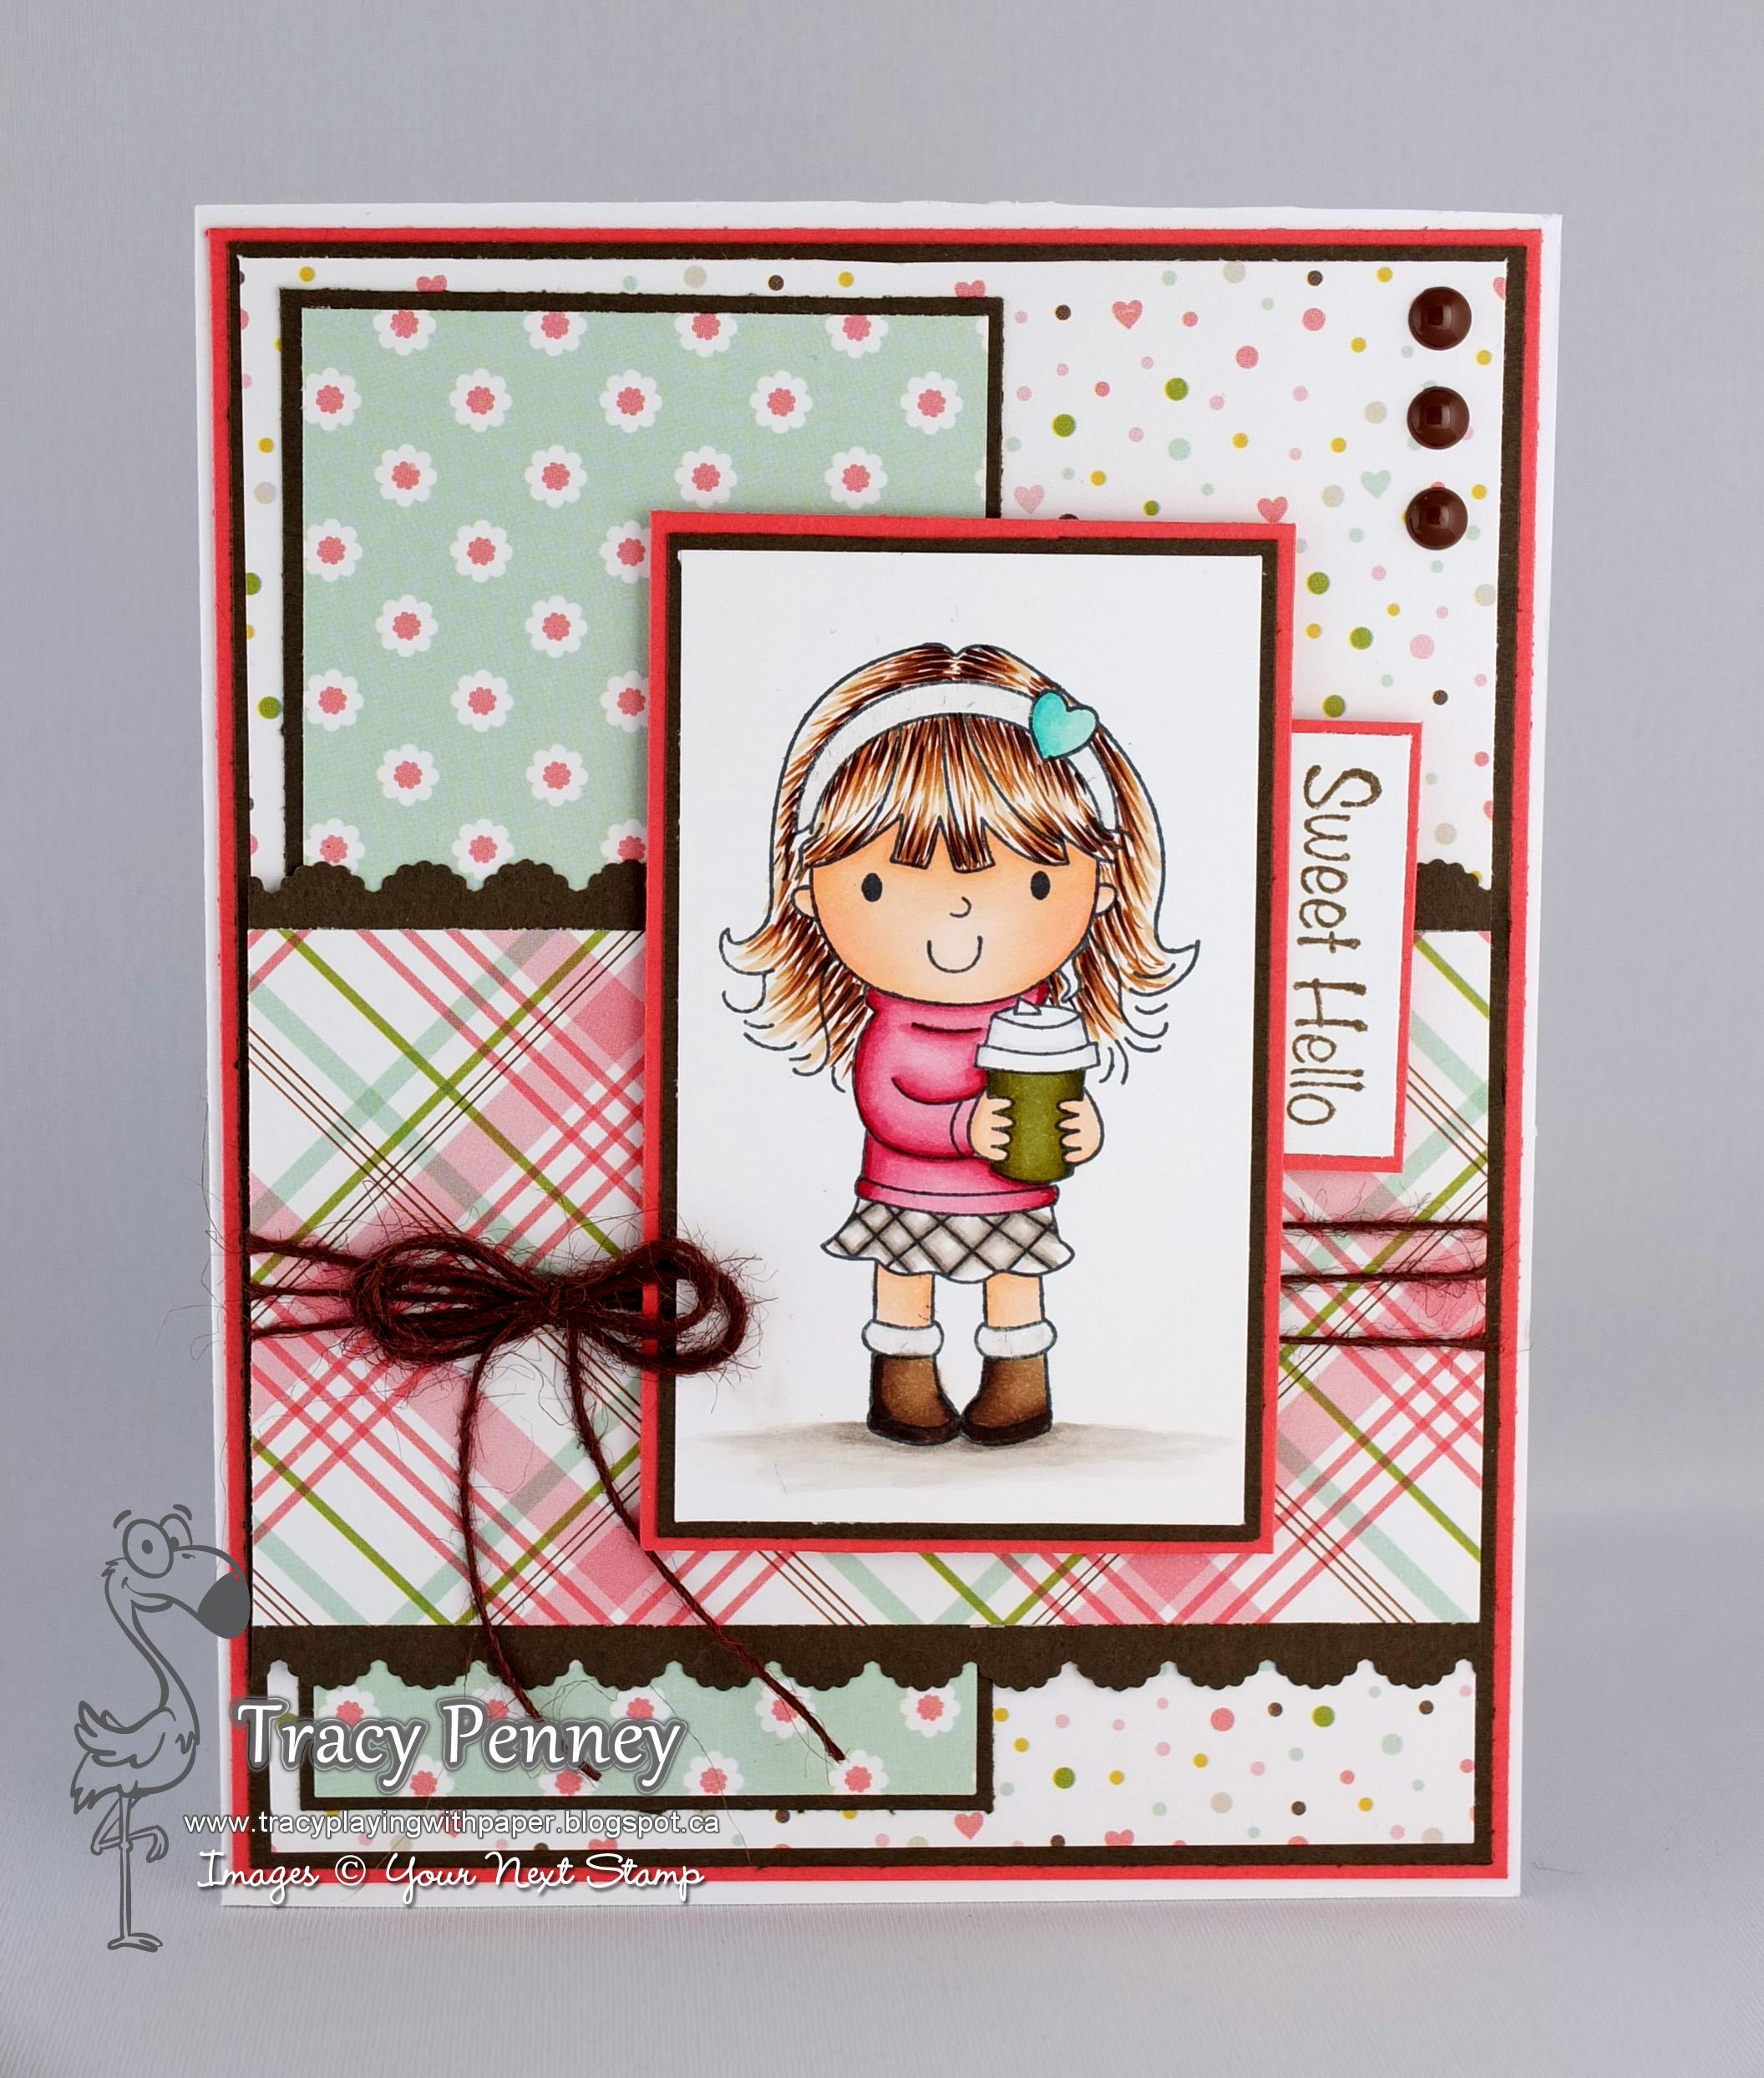
Since I know that an answer of “everything” will not be accepted, I will go with brown, pink and teal. I love using brown and will most often reach for this as my neutral to mat my pattern paper and images. There are so many great shades of pink and teal, I find these colours work well with so many styles of card. Whether a simply CAS, something girly or an all out distress look, with the right shade of pink and teal you can do it all!

Here is a look at the card I created today. I went back to where it all began and used Ellie Loves Lattes.

DSCF6990e


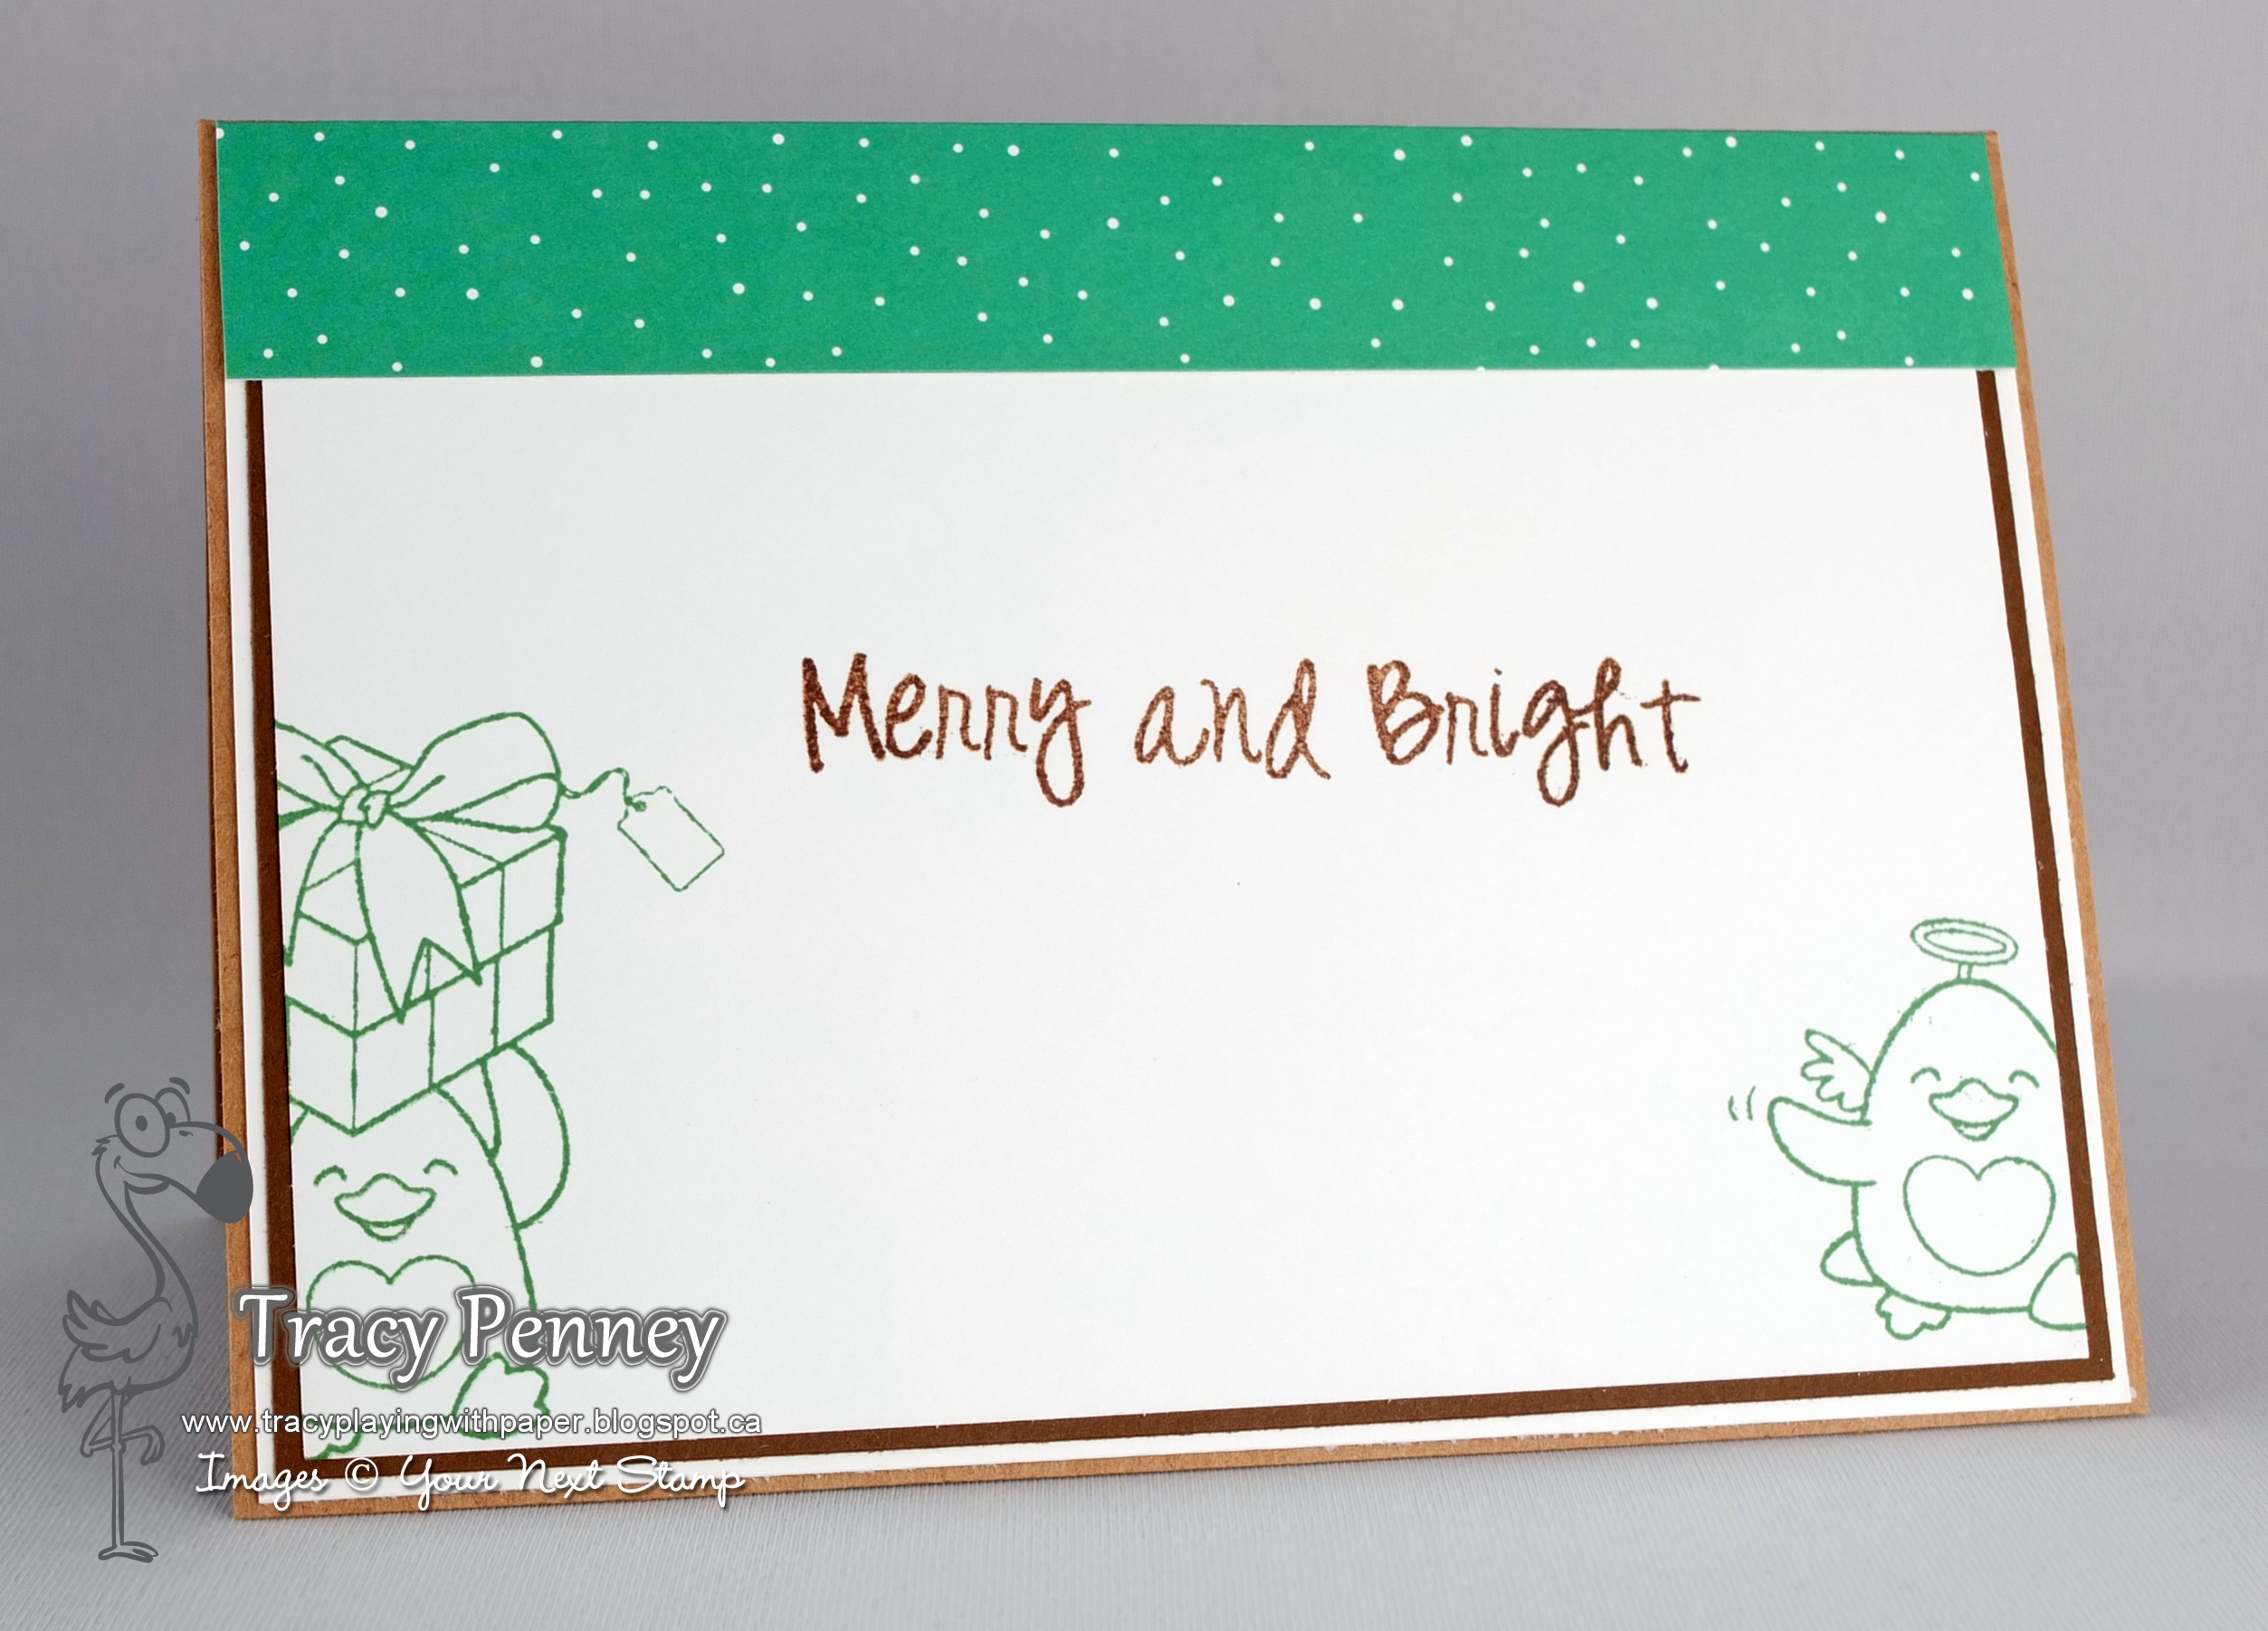
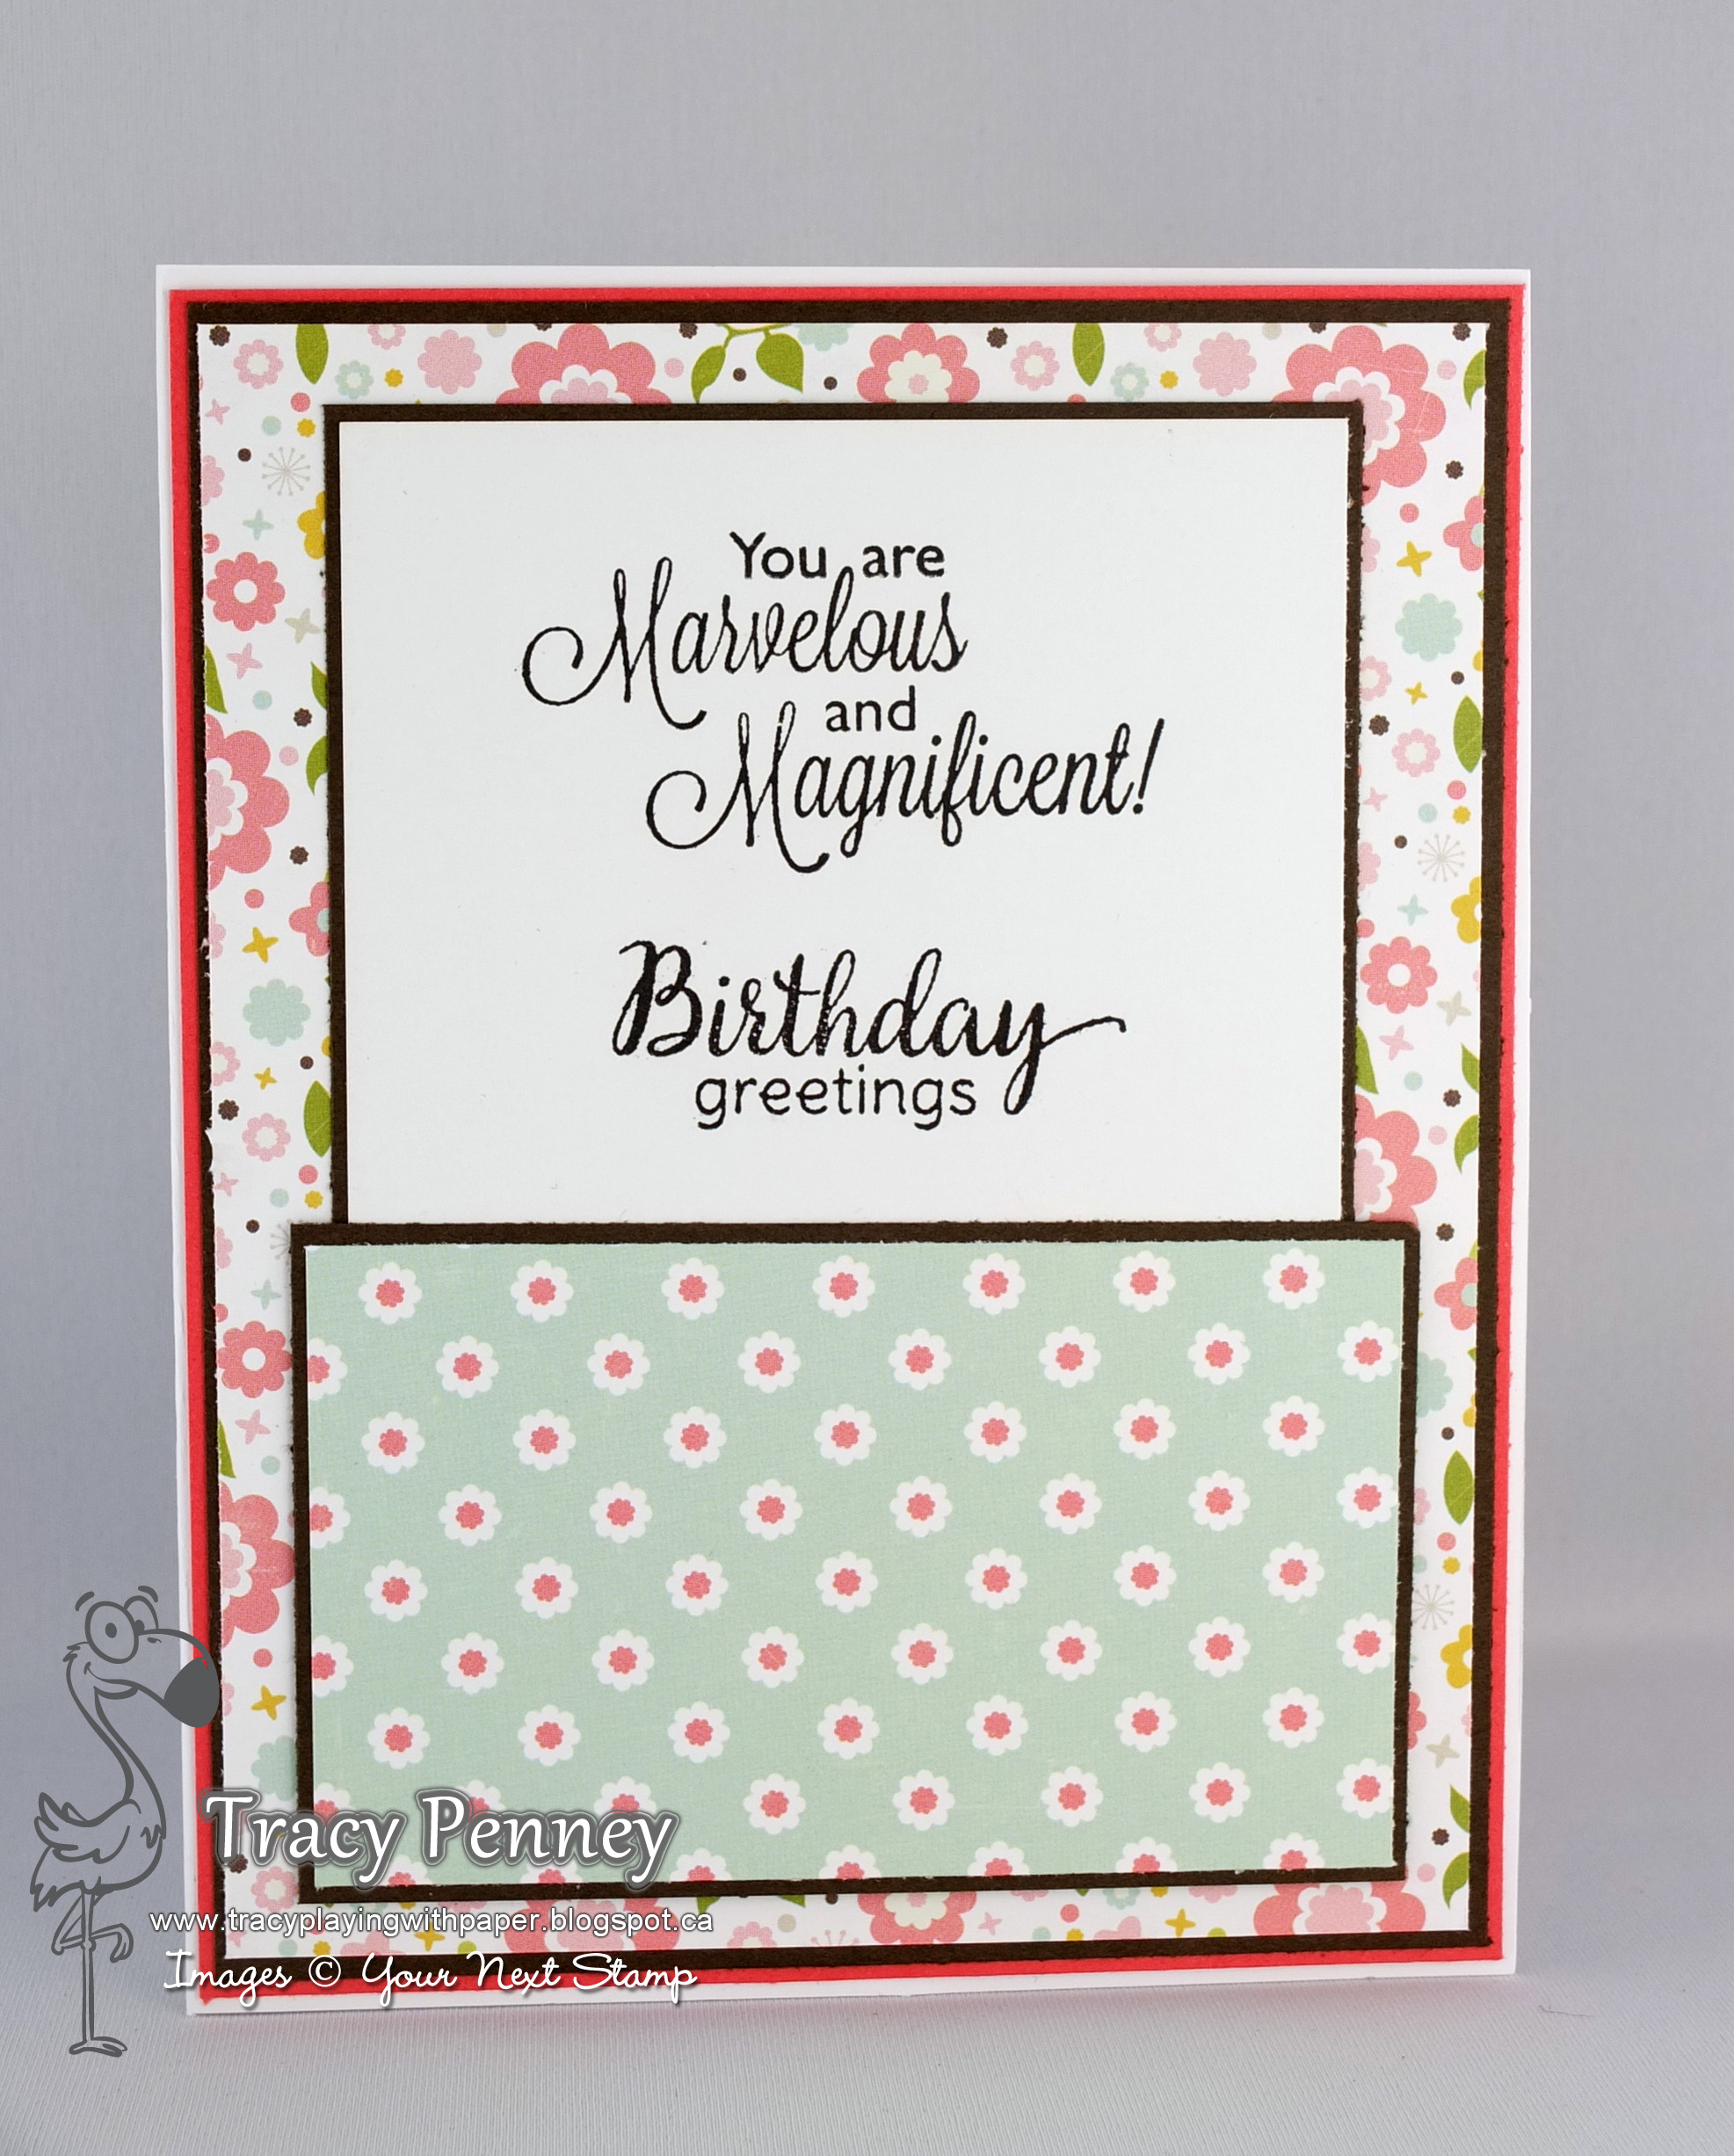
Inside of my card, I added sentiments from Whatnot Sentiments Three and the birthday greetings from Jessica with Cupcakes.

DSCF6992e


Thanks for joining me today. Next week be sure to stop back as we get to know more about Brianna and her favourite crafty colour combos.

Have a fabulous and crafty day!

Tracy

FacebookPinterestTwitterEmail

Design Team Series – Tracy’s Creative Process

Happy Monday crafty friends, it’s Tracy here, and I am taking over the YNS blog today to share a little bit about my design process.

Someone recently asked me how long it takes to make a card. I really found that question difficult to answer. Being a busy mom of two young girls and working full time, it’s rare that I can work on a card from start to finish all at once. My crafting is usually done in pieces and I squeeze in creative time whenever (and wherever) I can get it. That means I may sketch out a card during my breaks at work, colour my images during my daughter’s dance lesson and jot down ideas for cards – well that may happen at any time so I always carry a note book with me.

Here is a little bit about my creative process:

Selecting my Image:

DSCF6159e

This is always my starting point. When I am deciding on a stamp, I like to flip through the images I have and pull out two or three stamps/dies that I could use for my project. I try not to waste too much time and will generally go with the stamp that excites my creativity the most. I find that my entire project comes together a lot easier when I am excited about the image/die that I am using.

I do keep my stamps together by manufacture, however I also have a “create with” basket on my desk. This basket holds those images that I want to work into future projects. There is a mixture of new and older images in this basket and they are ones that I will use when I am not working on a DT project.

Selecting my Paper:

DSCF6161e

Once I have my image, I will then select the paper I want to use. I work with 6×6 paper pads, so at this stage in the process, I am just selecting the collection that I think will work best for the image and project I want to create. The 6×6 collections are great because I know that everything coordinates together. While I am selecting my pattern paper, I will also be thinking about the colour of card stock I will use to mat my images and pattern paper.

Similar to my selection process for the stamp, depending on my project theme I like to pick the paper that inspires me the most.

Colouring My Image:

DSCF6170e

I stamp out my image (Copic Xpress It paper) using Memento Tuxedo black ink. When I am stamping out my image I like to have an idea of how I plan to display the image on my project (i.e. fussy cut, die cut, special background). This will help me decide if I need to leave space around my image. If I am not sure, I will always leave enough space to decide later.

When I start to colour my image I like to have a few essentials around me:

  • Copic markers (that’s obvious)
  • Copic colouring chart
  • Pattern paper and
  • Scrap paper (for testing out blending, colour combos or just practice something before I colour)

Sketch It:

DSCF6162e

This is not always a step I do. However, I find it really helps reduce the time spent starting at my supplies, wishing everything to magically place itself on my card. Most times I will draw my own card sketch, but I do have a collection of sketches from various resources if I am in a creative slump. While I am sketching, I like to make notes on dies, embellishments or techniques I may want to use.

Getting Crafty:

DSCF6154e

Here is my little crafty corner which is located in the basement of the house. It’s in desperate need of organization, which when I have “time” will get done. Once I am ready to start creating, I will pull together all of my tools and supplies for my project including:

  • Coloured image
  • Sketch/notes
  • Card base: most of my cards are 5 x 6.25 however I do work occasional with 5.5 square or for smaller cards 4.25 x 5.5. The size of card will depend on my image and my plan for layers and embellishments.
  • Paper: now is when I will pull out the pattern paper from the collection I would have selected earlier. I will also select my coordinating card stock. Based on my typical sketch, I will use 3 or 4 pattern papers on my cards. I try to select the patterns that go best together, often a simple design for the background then 2 or more complementing patterns that work well together (i.e. dots, stripes, floral)
  • Other: embellishments, dies, gumdrops, brads, flowers, punches………etc.

Now CREATE!

When I start to cut and layout my paper, I will put everything in place before sticking it all down. This gives me a chance to move and adjust or add layers (which I love to do).

Here is my card using Waddles from Waddles Snow Fun and the Winter Fun Tag die set.

DSCF6197e

As a final part of my creative process I like to finish the inside of my card. My inside decorations usually include an image stamped in a coordinating colour, sentiment and pattern paper. The decorated inside is a nice additional creative surprise for the card recipient.

DSCF6202e

Thanks for joining me today. I hope that you found something helpful and inspiring in my creative process. Come back again next Monday because Deborah will be sharing with you her creative process.

Happy crafting friends!

Tracy

FacebookPinterestTwitterEmail

© 2024 Your Next Stamp. All Rights Reserved.