Hello, Jen Roach here and today I have a “faux-bossing” technique tutorial to share with you using the new snowflake border die. This technique is a wonderful way to create the look of an embossing folder using die cuts. The snowflake border is perfectly designed for this technique!
Step 1: Die cut or trim a piece of cardstock for your background (or you could do this directly on a card base as well). Cut out a bunch of your desired die in the same colour cardstock
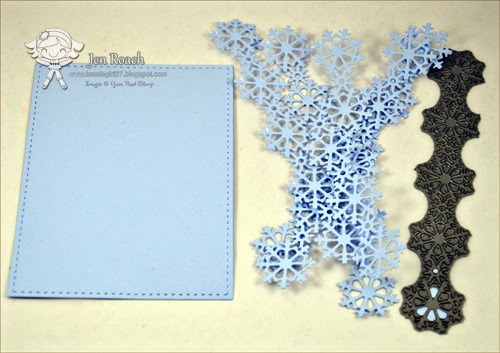
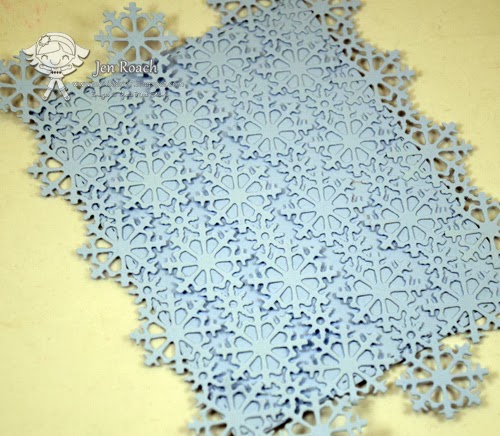
Step 2: Adhere die cuts to card base/cardstock. I was able to put a small dot of glue in the center of each of the large snowflakes.
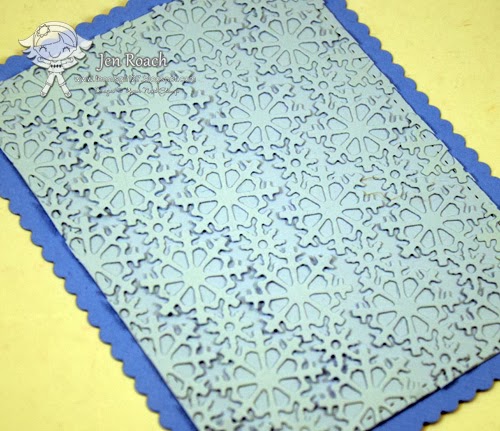
Step 3: Trim and adhere to card base.
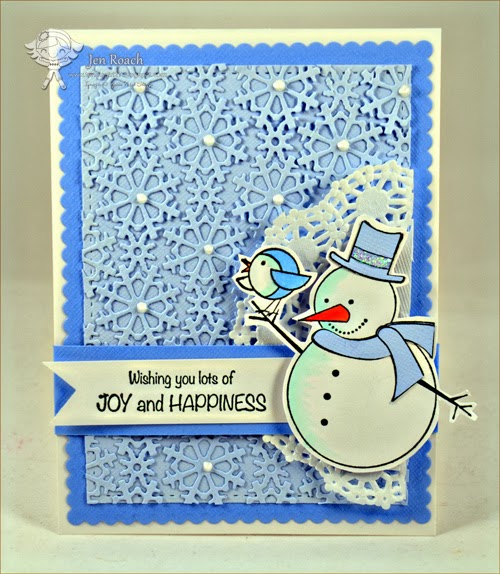
Step 4: Create you card. I added some liquid pearls to the center of each large snowflake and used the Winter Smiles Robin snowman image to finish off my card.
Supplies:
Stamps: Winter Smiles Robin set from Your Next Stamp, Joy set (sentiment) from Your Next Stamp
YNS Dies: Snowflake Border
Ink: Memento Tuxedo Black
Paper: Bazzill cardstock, Neenah cardstock
Accessories: Copic Markers, Viva Décor pearl pen, Stickles,
I hope you enjoyed today’s tutorial and I hope you have found a new use for your Your Next Stamp dies!
Enjoy your day!
Jen


this is fabulous Jen…love that die..can;t figure out how I missed that one I NEED it …LOL
I would have never thought of this. thanks for the lovely tutorial.
Great technique that makes a really fabulous background!
Wow this is such a great way to use border dies…I will have to try this!
Very cool. Great way to get extra out of those border dies. Thanks for sharing.
That is such an awesome idea!!! I have several longer dies … will have to try this! TFS!
This is just Beautiful!!!!!! I love it!
Have a wonderful day,
Migdalia
♥ Crafting With Creative M ♥
♥ 2 Creative Chicks Challenge Blog ♥
Thanks! Love this idea!