Hello! Kerri, here and I wanted to share with you how I usually color faces with my Copic markers:)
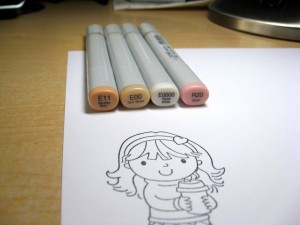
These are the colors I almost always use. E11, E00, E0000, and R20. I am using the adorable Ellie Loves Lattes for my demo today.
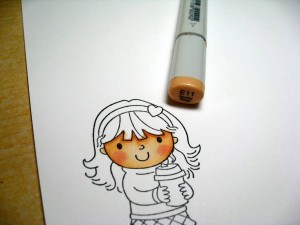
I know that many teach to start with the lighter color first, but I always start with the darkest first. I outline the hairline and the sides of the face with E11.
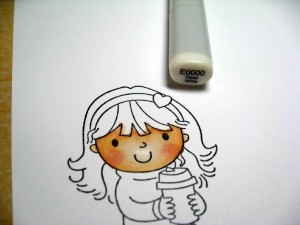
Next I add some blush to the cheeks with R20.
I blend those together with E00, making sure to leave a space for my lightest color around the nose and mouth.
I finish blending with E0000.
Sometimes I go back and add a little shading around the hairline with my E11 once again.
The finished product! I used the YNS Fishtail/Banner Dies for my sentiment and the dp is Pebbles Seen and Noted.
I hope you enjoyed my tutorial! Thank you so much for stopping by and have a fabulous day!
Kerri
Recipe:
Stamps: Ellie Loves Lattes
Paper: White and Red cs, Pebbles Seen and Noted dp
Ink: Memento Tuxedo Black, Copics
Accessories: YNS Fishtail/Banner Dies, CB Seeing Spots EF, Sewing Machine, Foam Squares, Oval Nestabilities


Great tutorial Kerri! I always love to see how other people color!
Awesome tutorial, Kerri! I also color dark to light! She turned out super cute! 🙂
Lovely coloring and adorable card!
Great tutorial! Thank you!
Outstanding.
Be blessed, Beckie
Just B Creative Crazy
Just Because Linky Party 8/1-/31
Great sponsors and prizes!
Great photos for the tutorial. thanks and darling image.
Thanks for such a awesome tutorial.
Have a creative day.
Hugs Nana
♥ My Crafting Channel ♥
♥ 2 Creative Chicks ♥
♥ Silhouette Challenges ♥