Posts Tagged: guest designer

Baby Blessings

Today, guest Kim Taylor has a sweet baby card for you featuring the Baby Blessings stamp set.

From Kim:

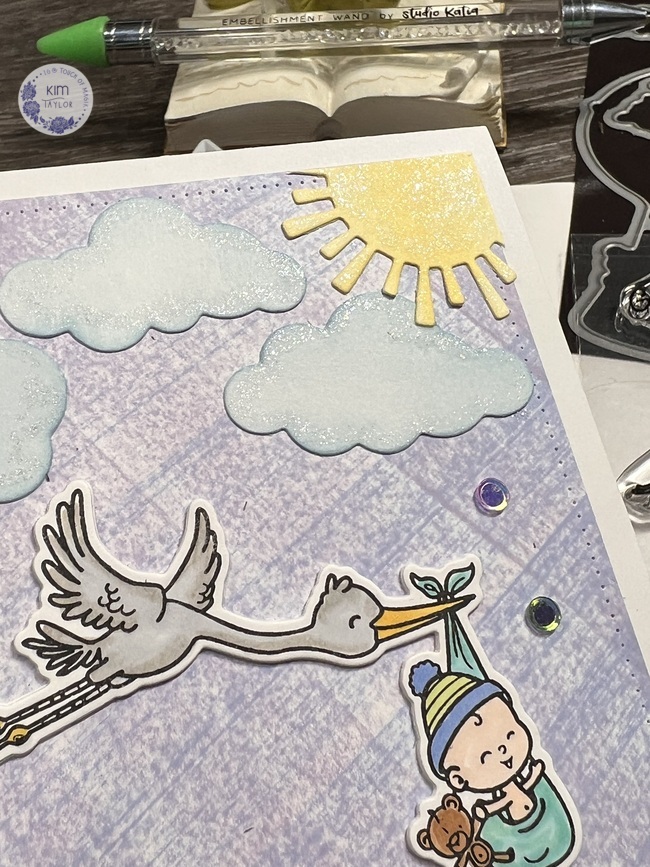
Who doesn’t need a cute baby card now and then right?  This card is made with the YNS Baby Blessings set

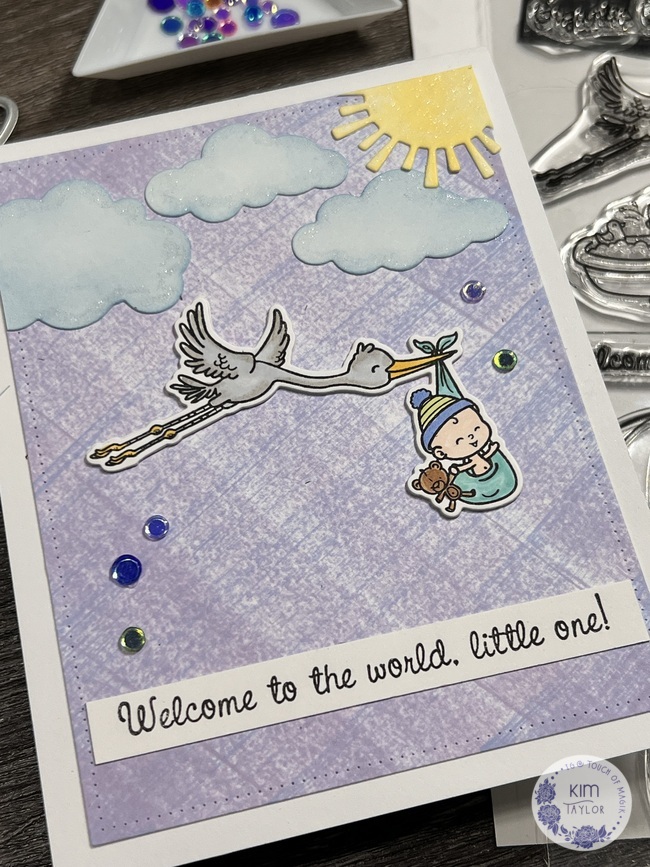
I kept it very simple with an ink swiped background aka swinking (iykyk), some fluffy clouds, a sun and the image of the stork and baby.  The images are coloured with alcohol markers and some are highlighted with an Aqua Shimmer Pen.  This stamp set is still available as of today.  One of my favourite things about sets like these is how versatile they are. You can use just one image or build a whole scene with the set.  

Happy Crafting!

Kim


Find more of Kim’s creations at IG: @touchofmagik or her blog: Touch of Magik.

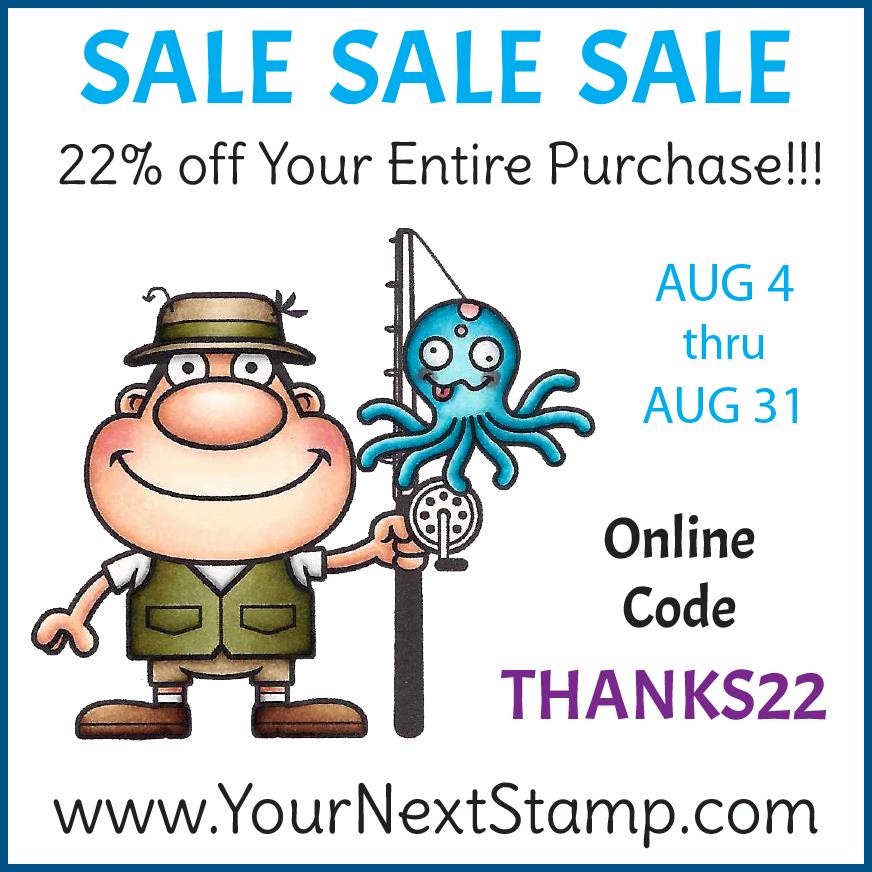
Save 22% on top of all the marked down prices in the YNS Store.

Everything is on sale!

Happy Stamping!

FacebookPinterestTwitterEmail

Latte Happy Vibes

Today, guest Kim Taylor is sharing coffee and donuts from the Latte Happy Vibes stamp set.

From Kim:

For today’s cards we have a 3-fer!This project was a lot of fun because this stamp set is so cute!!!  Colouring all the adorable images from the YNS Latte Happy Vibes Stamp & Die set and turning them into 3 cards only took a couple of hours and the end results are so worth the time!


The first one isn’t a true single layer card but I kept it fairly flat by doing most of the background directly on the card base.  I did some light, intentionally splotchy ink blending on the card base after masking off the bottom 1/3. I stamped a brick wall background stamp, pulled off the masking and moved it to cover the wall.  Then I inked the sidewalk a dark grey and added some green paper that I tore to be the grass. The sentiments in the set are equally fun and adorable so I used one of those as well.

For card two I repeated the process on a card panel so that there would be a small white framing margin to give it a slightly different look.  I also used a speech bubble die for the sentiment this time to match the ‘active’ feel of the card.


For card three I repeated the same process as the second card, varying the brick wall colours a bit.  I like to use neutrals in the background so that the brighter colours of the images really pop!


I hope that these cards inspire you to break out your smaller images and really see what you can create!


Happy Crafting!

Kim


Find more of Kim’s creations at IG: @touchofmagik or her blog: Touch of Magik.

Happy Stamping!

FacebookPinterestTwitterEmail

Snowflake Kisses in July

Today, guest Kim Taylor is helping us all cool off with a snowy card! Her Christmas in July cards continue and this time around the Snowflake Kisses stamp set is taking the spotlight.

From Kim:

Happy Christmas in July one more time!!

This cute set is small but mighty! The images from the YNS Snowflake Kisses are so cute that they really make an impact on your project. 

I started with a smooshed panel in purples and blues from my BoBT (as I call my bin of background techniques) and heat embossed it with a background stamp that is supposed to be water.  But in my mind it works great for snow too!  I used a sparkly blue embossing powder to emphasize the snowy idea a bit more.  I tore some white shimmer paper for some snow drifts and blended the top edges with some blue inks. The front snow drift is popped up for some extra dimension. The images and sentiment are all from the set and stamped with black pigment ink and heat embossed with clear powder.  The images are coloured with my Ohuhu Alcohol Markers.  


I hope this shows you that you can think outside of the box with the supplies you already have.  Remember a small cute set can have a big impact! I hope this card inspires you to look at your supplies with new eyes!


Happy Crafting!

Kim


Find more of Kim’s creations at IG: @touchofmagik or her blog: Touch of Magik.

Happy Stamping!

FacebookPinterestTwitterEmail

Christmas in July Continues

Today, guest Kim Taylor continues spreading the holiday cheer with snowflakes and the Tweet Holiday stamp set.

From Kim:

Following the theme of Christmas in July I pulled out some fave YNS products for these two mini slimline cards. 

It started with a sparkly smooshed panel from my background bin and the YNS Mini Slimline Snowflake Panel. And again I figured why make one when I can make two?


Using the positive panel I inlaid the pieces that were cut out from it onto a separate piece that was cut out with the YNS Mini Slimline Stitched Dies. 


I coloured the image from the YNS Tweet Holiday Stamp twice with my Ohuhu Alcohol Markers and cut them out with the coordinating die.  The sentiment is stamped in purple to tie in the colours from the background panel.  I added a slim strip of purple shimmer along the bottom edge of the card then added the finished piece on top.  I just wanted to tie the colours all together visually . The finished cards are 6 1/4″ x 3 3/8″ .


I love when a small stamp set like this can have a huge impact and fill a card bigger than you’d expect!  I hope you find inspiration in todays cards!


Happy Crafting!

Kim


Find more of Kim’s creations at IG: @touchofmagik or her blog: Touch of Magik.

Happy Stamping!

FacebookPinterestTwitterEmail

Magical Winter

Today, guest Kim Taylor has more holiday inspiration for you using Mini Slimline Diagonal Stripes panel die, Magical Winter Wishes stamp set & Pop Dots. All of these are available in the YNS store at a huge discount right now!

From Kim:

I decided to stick with the Christmas in July mojo from last week and see what else I could create from my YNS stash!  

For these cards I made a ‘twofer’, aka two for one !  The base is watercolour paper that comes from my background stash.  It’s smooshed with various inks and shimmer powders in shades of blues and purples which I liked for a winter vibe.  


For the portrait card I laid the die cut coloured panel over a white card base saving all the stripes that come out.   I love this YNS Mini slimline Diagonal Stripes panel die, it’s so very versatile and fun.  The images and sentiments are from the YNS Magical Winter Wishes stamp & die set and coloured with Ohuhu Alcohol Markers and attached to the cards with some YNS Pop Dots.


On the landscape card I did a reverse of the first and inlaid the coloured stripes overtop of a white panel that I left all the pieces in. This way the coloured stripes also give some subtle dimension to the card.  I cut one of the YNS Cute Holiday Tags and used it for my sentiment piece.  I love to be able to get more out of my products this way.  And of course there is a scattering of bling and YNS Pop Dots on the cards for a final bit of wintery sparkle!


I hope you are inspired to get out your supplies and create something fun!


Cheers, Kim


Find more of Kim’s creations at IG: @touchofmagik or her blog: Touch of Magik.

Happy Stamping!

FacebookPinterestTwitterEmail

Christmas in July

Today, guest Kim Taylor has some holiday inspiration for you using the You Lift Me Up Set which is still in stock, so grab it before it is gone.

From Kim:

It’s July so that means it’s time to start making Christmas cards!! 

For these two sweet cards I used a combination of You Lift Me Up Set, Magical Holiday Moments (out of stock) and the Holiday Joy 6×6 Paper Pad

I stamped the images with Versafine Black Onyx on Canson XL Watercolour paper and then heat set them with clear embossing powder.  I used Distress Inks to watercolour the images adding some extra sparkle with gel pens for accents.   The papers from the Holiday Joy 6×6 Paper Pad go perfectly with these sets! For the card with the Green and Gold theme I stacked up several layers of the die by cutting my ‘scraps’ of white cardstock and gluing them together.  The top layer is Hammermill 80lb smooth white. I used a fun stitched sentiment die set and stamped on it in a coordinating green dye ink. For the Blue and White set I made a mini shaker with the globe die by stacking extra layers of scrap cardstock and adding some acetate under the top layer after putting some chunky glitter in to add some shine and festive fun!


I hope you find some inspiration in my cards today and are motivated to start thinking about making some Christmas cards of your own!


Happy creating!

Kim


Find more of Kim’s creations at IG: @touchofmagik or her blog: Touch of Magik.

Happy Stamping!

FacebookPinterestTwitterEmail

Books, Books, and More Books

Today, guest Kim Taylor has a birthday card for a book lover!

From Kim:

This card is made with the Silly Book Monster stamp and die set, the Silly Fun Birthday and the Mini Slimline Stitched Panel Dies.  I used some patterned paper that made me think of wallpaper and set the images on that then matted it on a black mat to make the colours pop.

The images are coloured with Ohuhu’s alcohol markers and the cute monster is popped up with some YNS Pop Dots.

YNS Supplies: Silly Book Monsters stamp and die sets, Silly Fun Birthday, Pop Dots


Find more of Kim’s creations at IG: @touchofmagik or her blog: Touch of Magik.

Happy Stamping!

FacebookPinterestTwitterEmail

Silly Bookmarks

Guest Kim Taylor

From Kim:

I love bookmarks as a little extra something to tuck into gifts or just as a fun thinking of you.   As an avid I reader I’m all about encouraging people to pick up a book!

For these two I used the Silly Book Monster Stamp and die set and the Bookmark/Tag die set.  The Bubbles stencil was used for the background and the images were coloured with Ohuhu’s alcohol markers.   I also used a laminator and laminating sheets to seal it all up!

YNS Supplies: Silly Book Monsters stamp and die sets & Bubble Stencil


Find more of Kim’s creations at IG: @touchofmagik or her blog: Touch of Magik.

Happy Stamping!

FacebookPinterestTwitterEmail

Birthday Wishes on the Way

Say it isn’t so!

This is Cristina Raposo‘s last guest post and we are sending huge thanks her way for being an amazing guest and sharing so many creative cards. All the YNS cuteness from Cristina has had us smiling for the past several weeks! Thank you Cristina for joining in the YNS fun!!!

Today, Cristina has a pop up card for you that is full of the birds from Make Some Noise.

Check out all the details on Cristina’s card, with birds flying through the sky and gumdrop centered flowers.

Be sure to follow Cristina on IG: @stampin_in_the6ix to continue seeing more of her creations.

Happy Stamping!

FacebookPinterestTwitterEmail

Sprinkles and Bubbles

Guest Kim Taylor brought Sprinkles back for this card – Sprinkles the bunny!

From Kim:

I just adore this little bunny so I had to make another card with the Sprinkles Coffee & Tea stamp set

I used the YNS Bubbles Stencil with some Jade Vine Paper Glaze and kept the look fairly monochromatic by using similar shades of Ohuhu alcohol markers for the tea cup.  I fussy cut the image and used YNS Pop Dots for some dimension to help it stand out.  The sentiment is from the same set and done in black to tie in the matting and make the teal shades pop!  This is as close to clean and simple as I get!   I love that you can take one really cute image and make it the focal point of the card. 

Tea-riffic 1


I hope this tea-riffic card gives you some inspiration !


Find more of Kim’s creations at IG: @touchofmagik or her blog: Touch of Magik.

Happy Stamping!

FacebookPinterestTwitterEmail

© 2024 Your Next Stamp. All Rights Reserved.