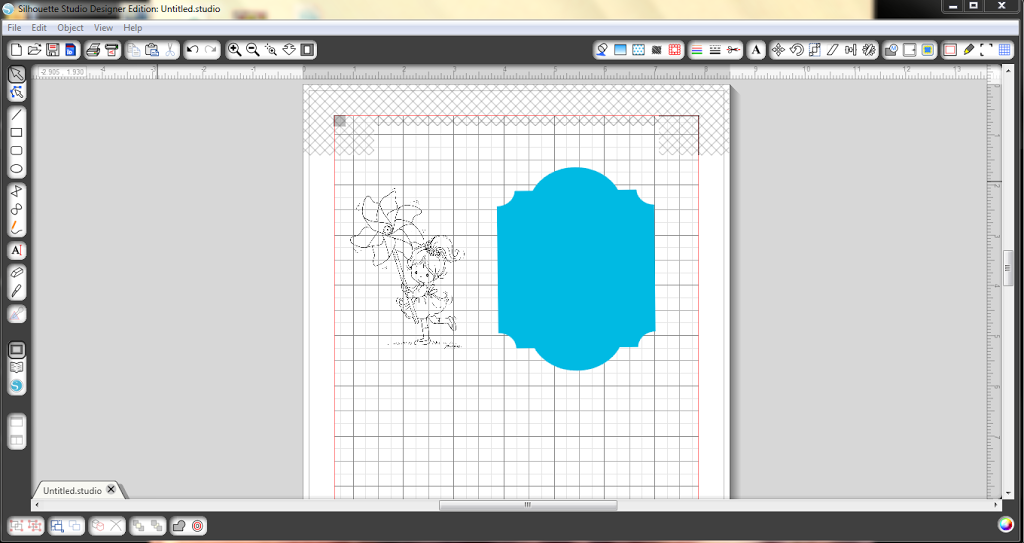
Step 1: Go to file button in your Silhouette program ( I am using the Designer Edition) and scroll to the merge button, go to where you would have your digi’s and mat saved, and bring them into the program. I will be showing you how to change the color of mat later on in my steps, I am just keeping it blue so its easier for you to follow along and see what I am doing! Also you will want to make sure you have your registrations marks turned on and print paper settings set correctly.

Step 2: At this point, I like to bring my digi over and layer it on top of my mat, so I can size it accordingly, so I can begin with the faux stitching.

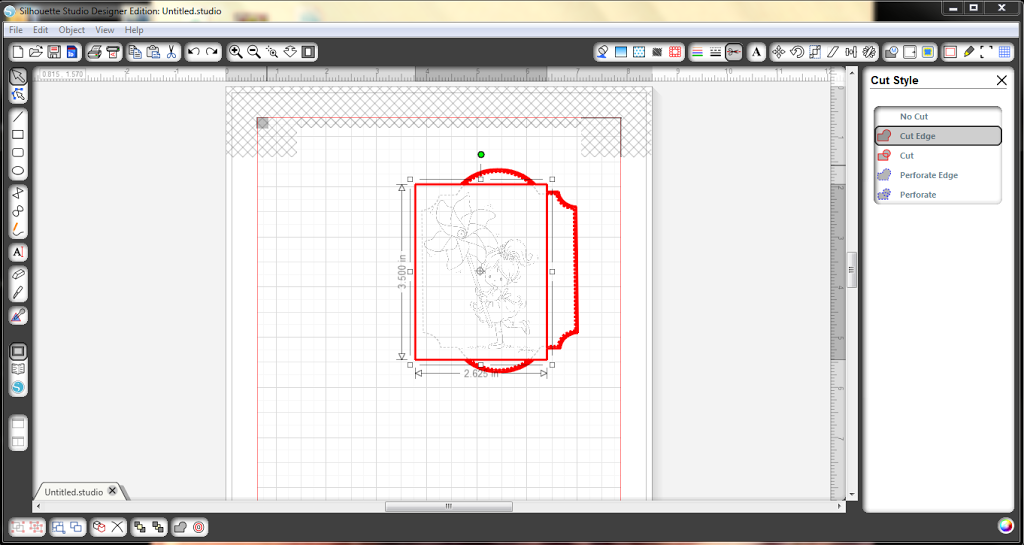
Step 3: You can now see I have my digi layered on my mat. I am now going to go up to the offset button in my Silhouette, it’s in second group from the right at the top, middle button. You can now see how the box appeared on the right, that says offset. At this point, you want to select the “Internal Offset” option. Now that you have that selected, you will go to the guide where it says “Offset Distance”, I just guide it, until I get to the point I like. In this case, I choose a really minimal offset at 0.040. Right now the line is solid, in the next step I will show you how to switch it to stitching.

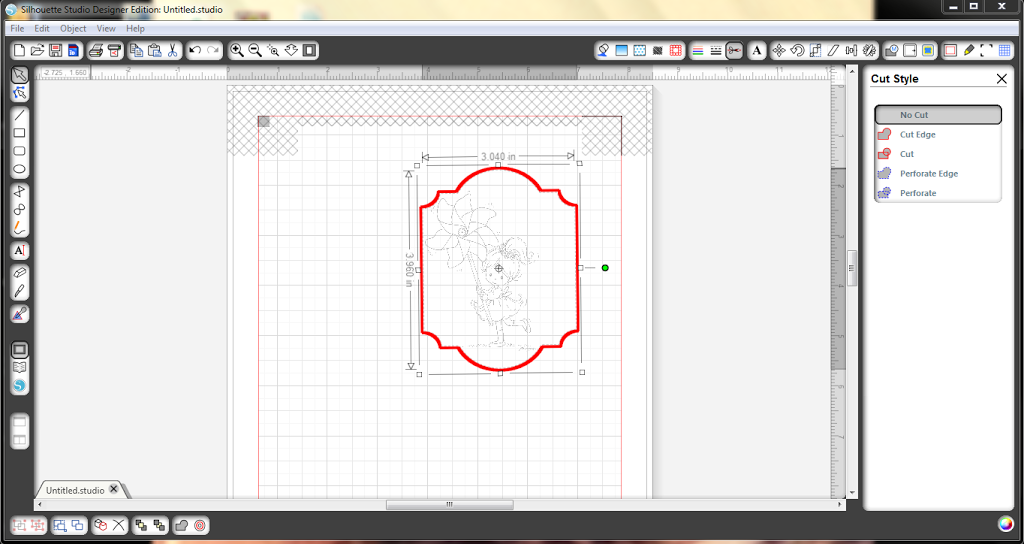
Step 4: Okay, now comes the time to change our line from a solid to a stitched and from red to black. Going back to the top of our tool bar in our program, we will be working in the 5th box from the right. We will be working with both the Line Style & Line Color. First lets start with Line Style, this will be the middle button in that group. You can choose any style you like, I am going to just choose the smallest stitch, which is the second option. You probably can’t tell that well from my photo, but right now our stitch marks are red and I want mine to be black. So now we want to choose the button right next to the “Line Style” one, with the, red, green and blue lines on it. When you are in here you will have many different colors to choose from but for today we are going to be using black.


Awesome tutorial!!!
Saving this one to try this technique myself!
What a fabulous tute, Brianna!!!
Thanks so much for the detail !!! I love it and can’t wait to try this out!!
xo
Brianna, it makes me wish i had a Silhouette and then for you to come to my house and show me all you know..this is awesome..thanks for sharing!
Fabulous tutorial! TFS!
Brianna you did such an awesome Tutorial!! I am so proud of you I loved it and it was done so well
Deb C