Happy Monday YNS crafters. Deborah here and I am sharing how my creative process works when starting a card or project.
My process doesn’t have a set amount of time, but really is based on my schedule with work and my boys extra curricular activities. Those times of hectic schedules will cause my projects to be done in pieces. I will admit that I am no longer a night owl, but I used to burn the midnight oil in the past. Hee hee… Those times are unfortunately long gone. I am now an early morning crafter or afternoon crafter.
So allow me to share…
Selecting an image:
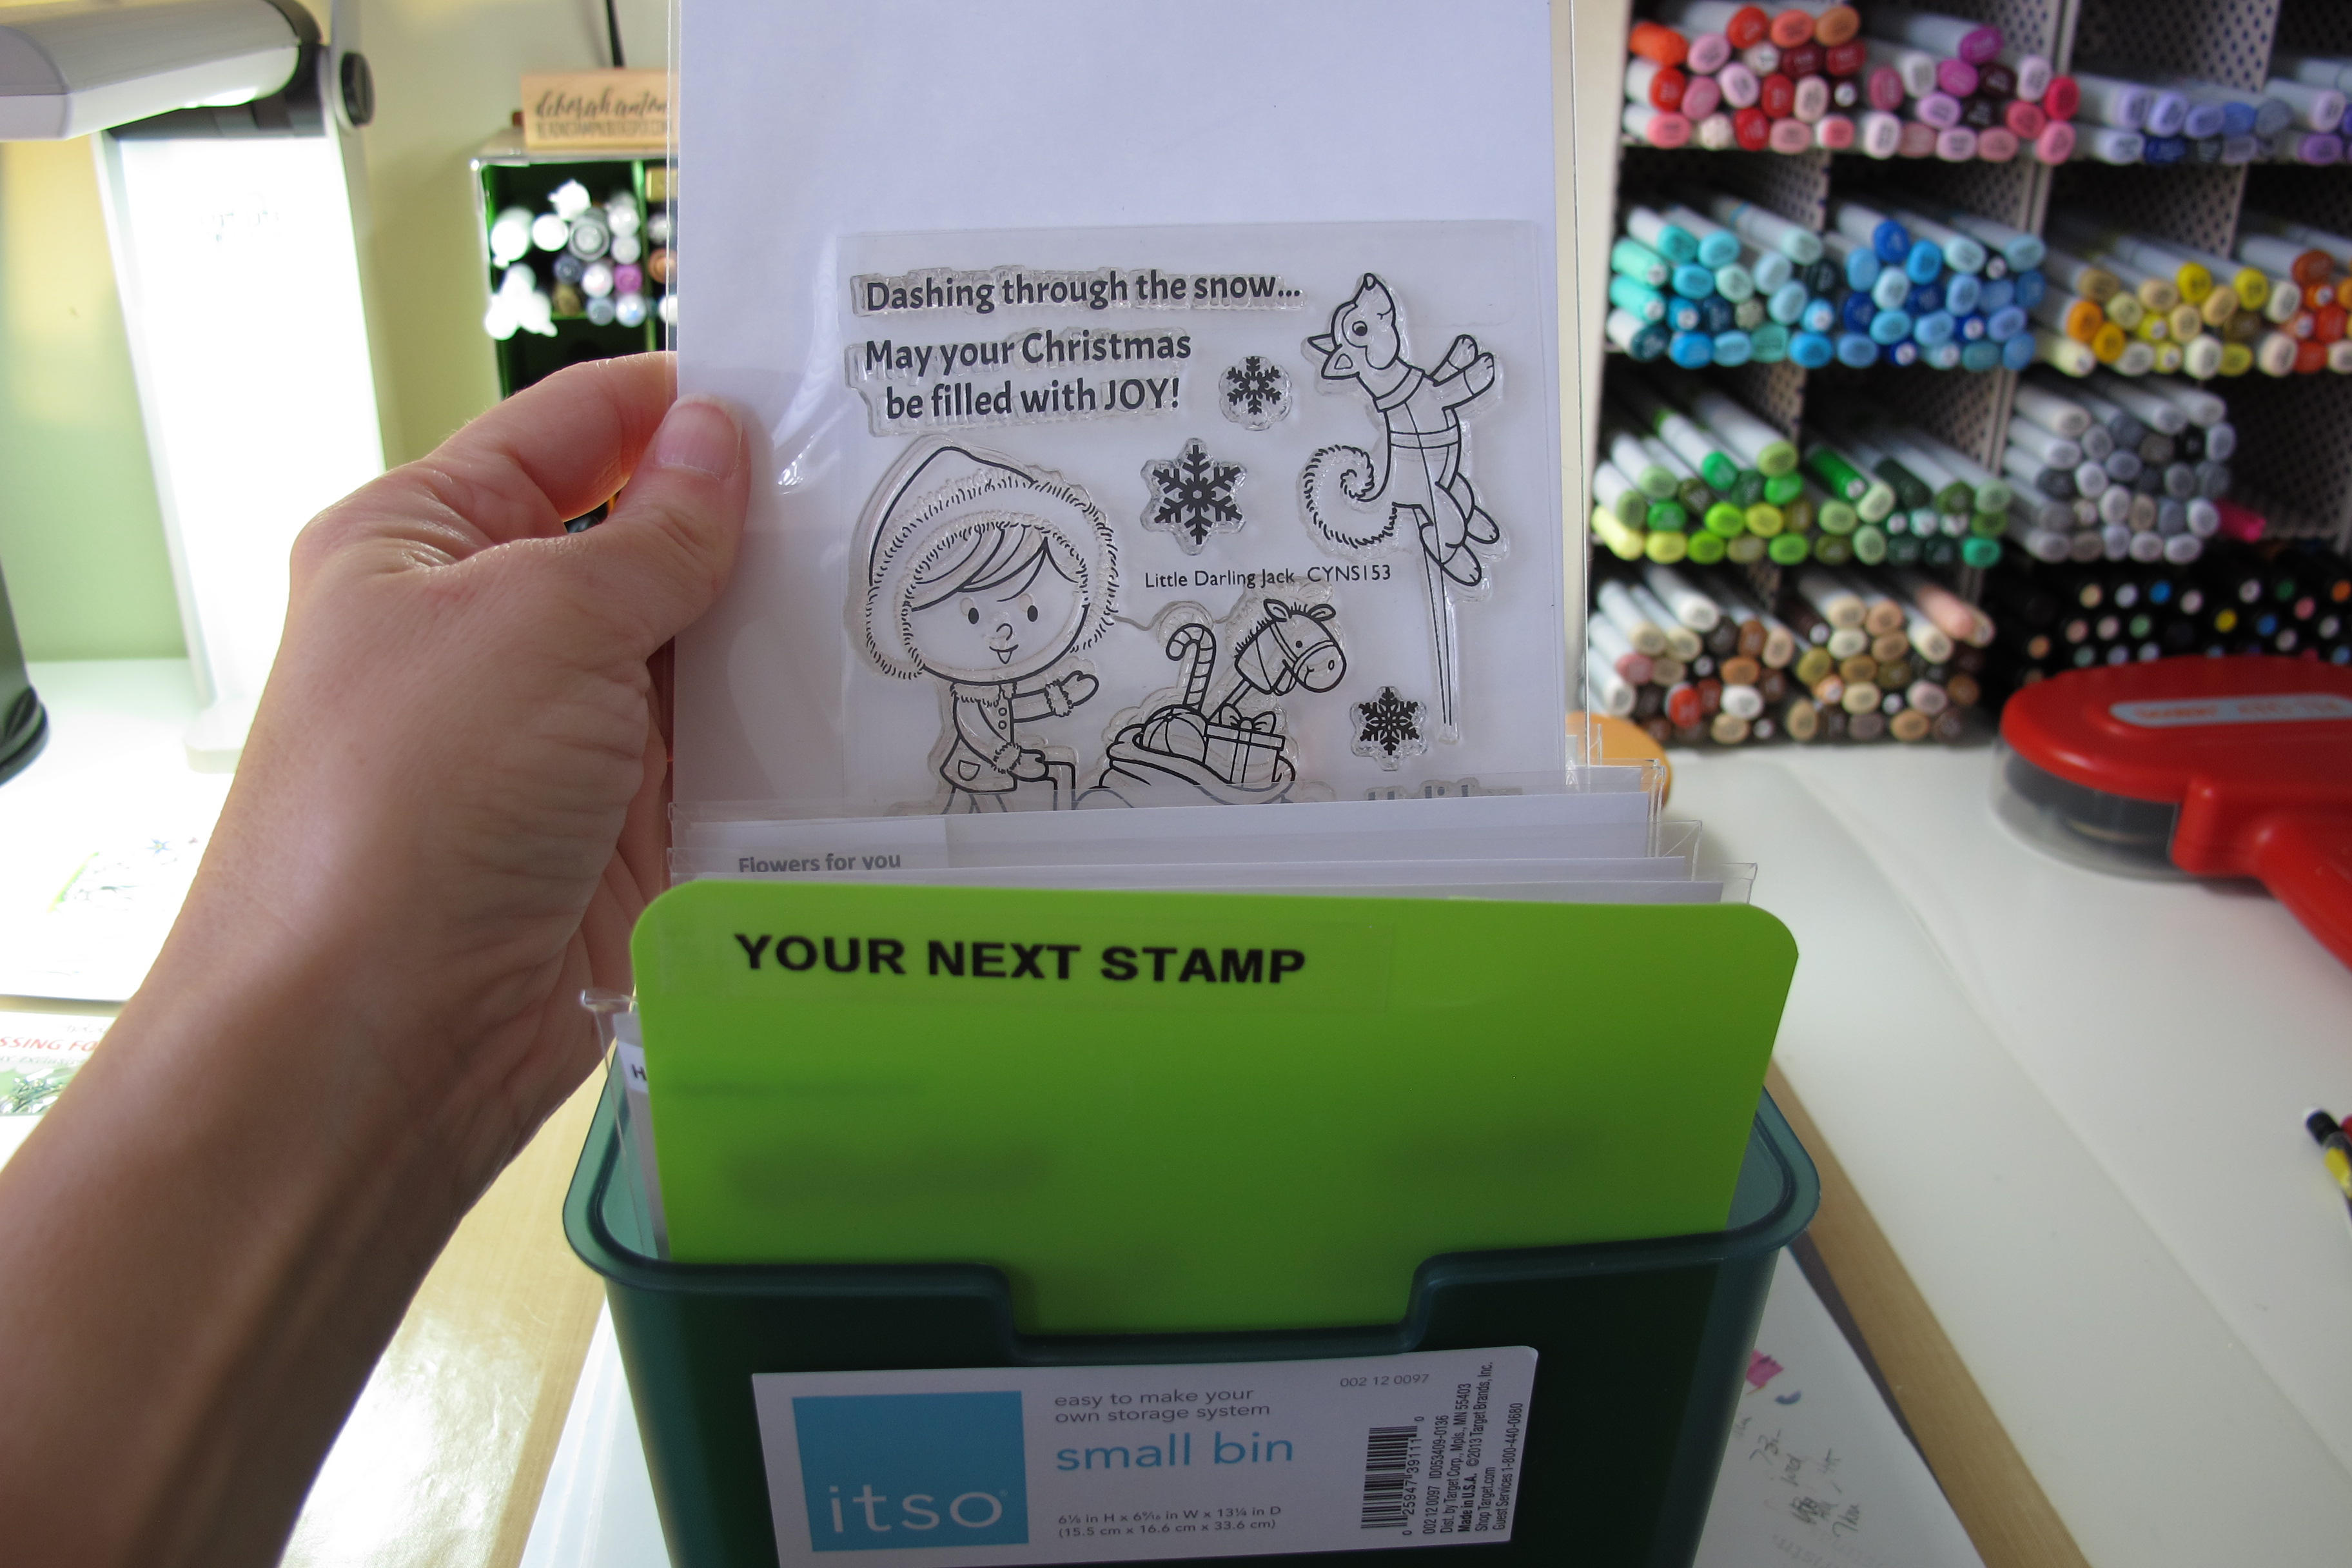
This is how I organize my stamps, which I adapted from Jennifer McGuire’s organizational system. I have them separated by stamp company that makes it easy for me to select a set for creating. Here is one of the full bins I use:
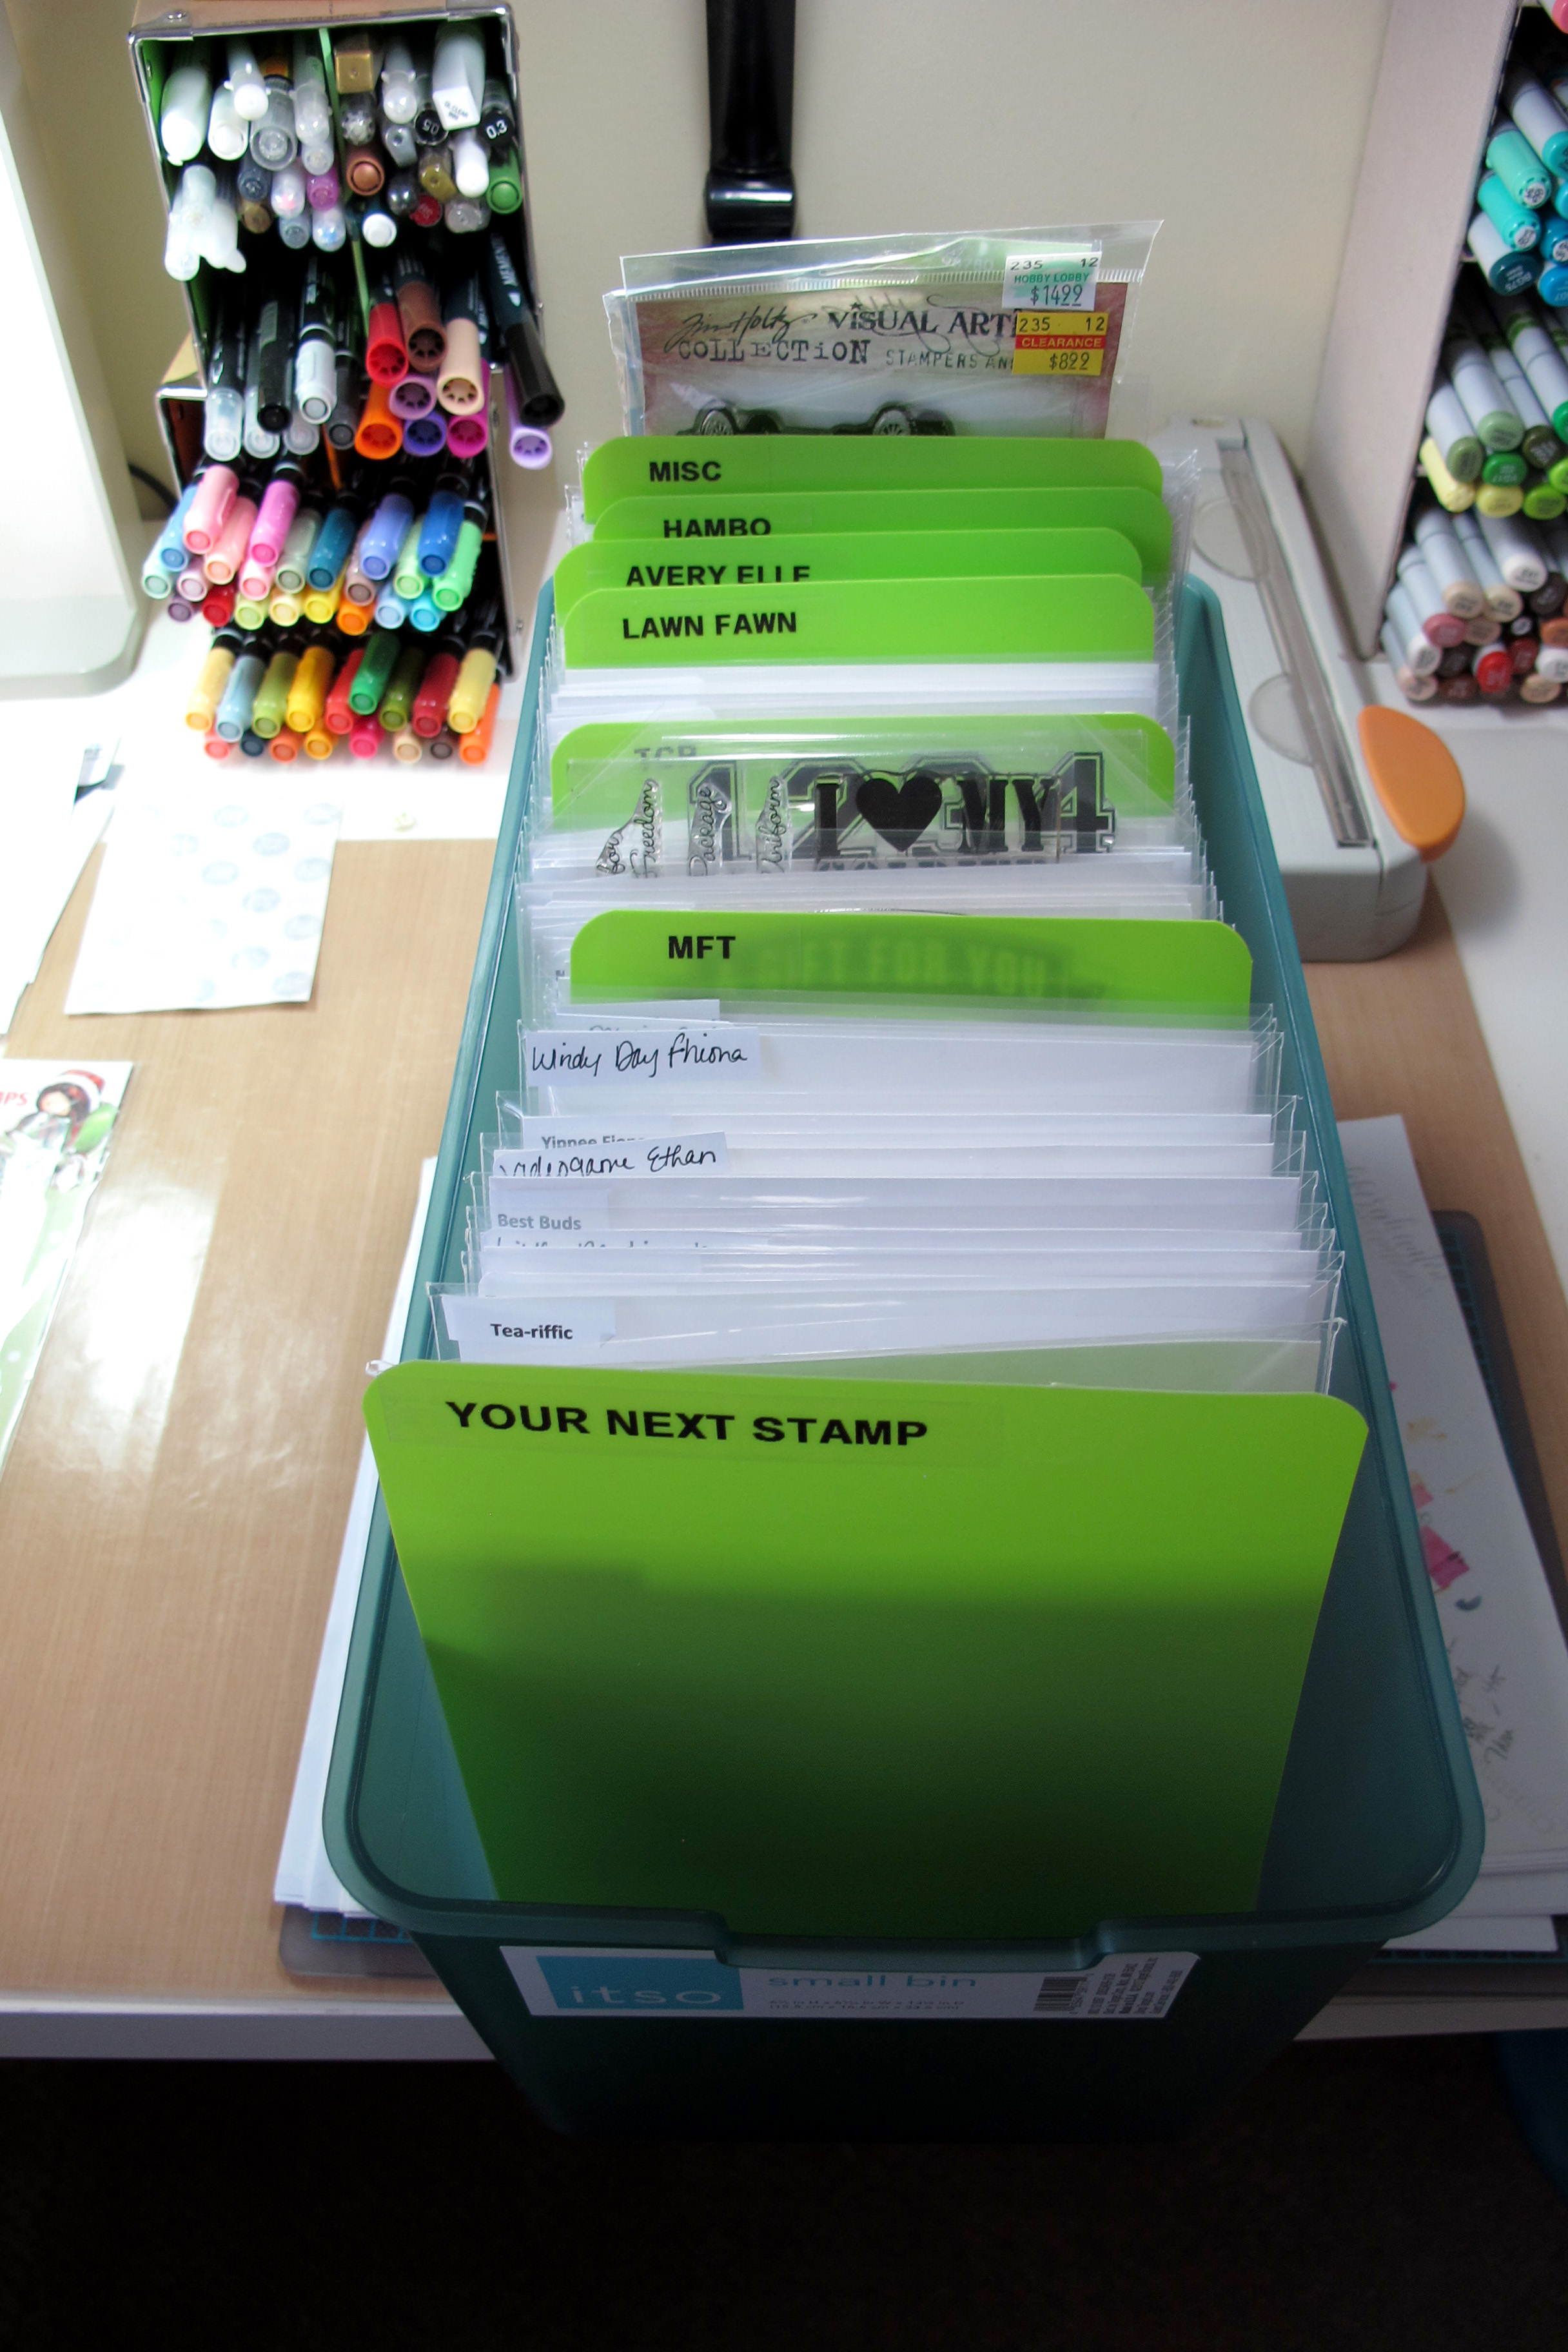
You can see that each set is labeled and in it’s own package. This makes for locating the stamp set really easy. Depending on what is needed to be made, I will decide on the project. For example, if it’s a new release for a design team, I will use the set that is required. But if I am making a card for a deadline in which I am able to choose my image, I will go with what my creative instincts are telling me. Another way to make this process easier is that I have another bin that sits on my desk that has all the sets that I need to create with for design teams or sets that I want to create with. That way, I am able to thumb through that bin first to see what is needed to be done. I call this little area of my desk my essentials. It’s all the things I use and need all the time. Those things in the picture are:
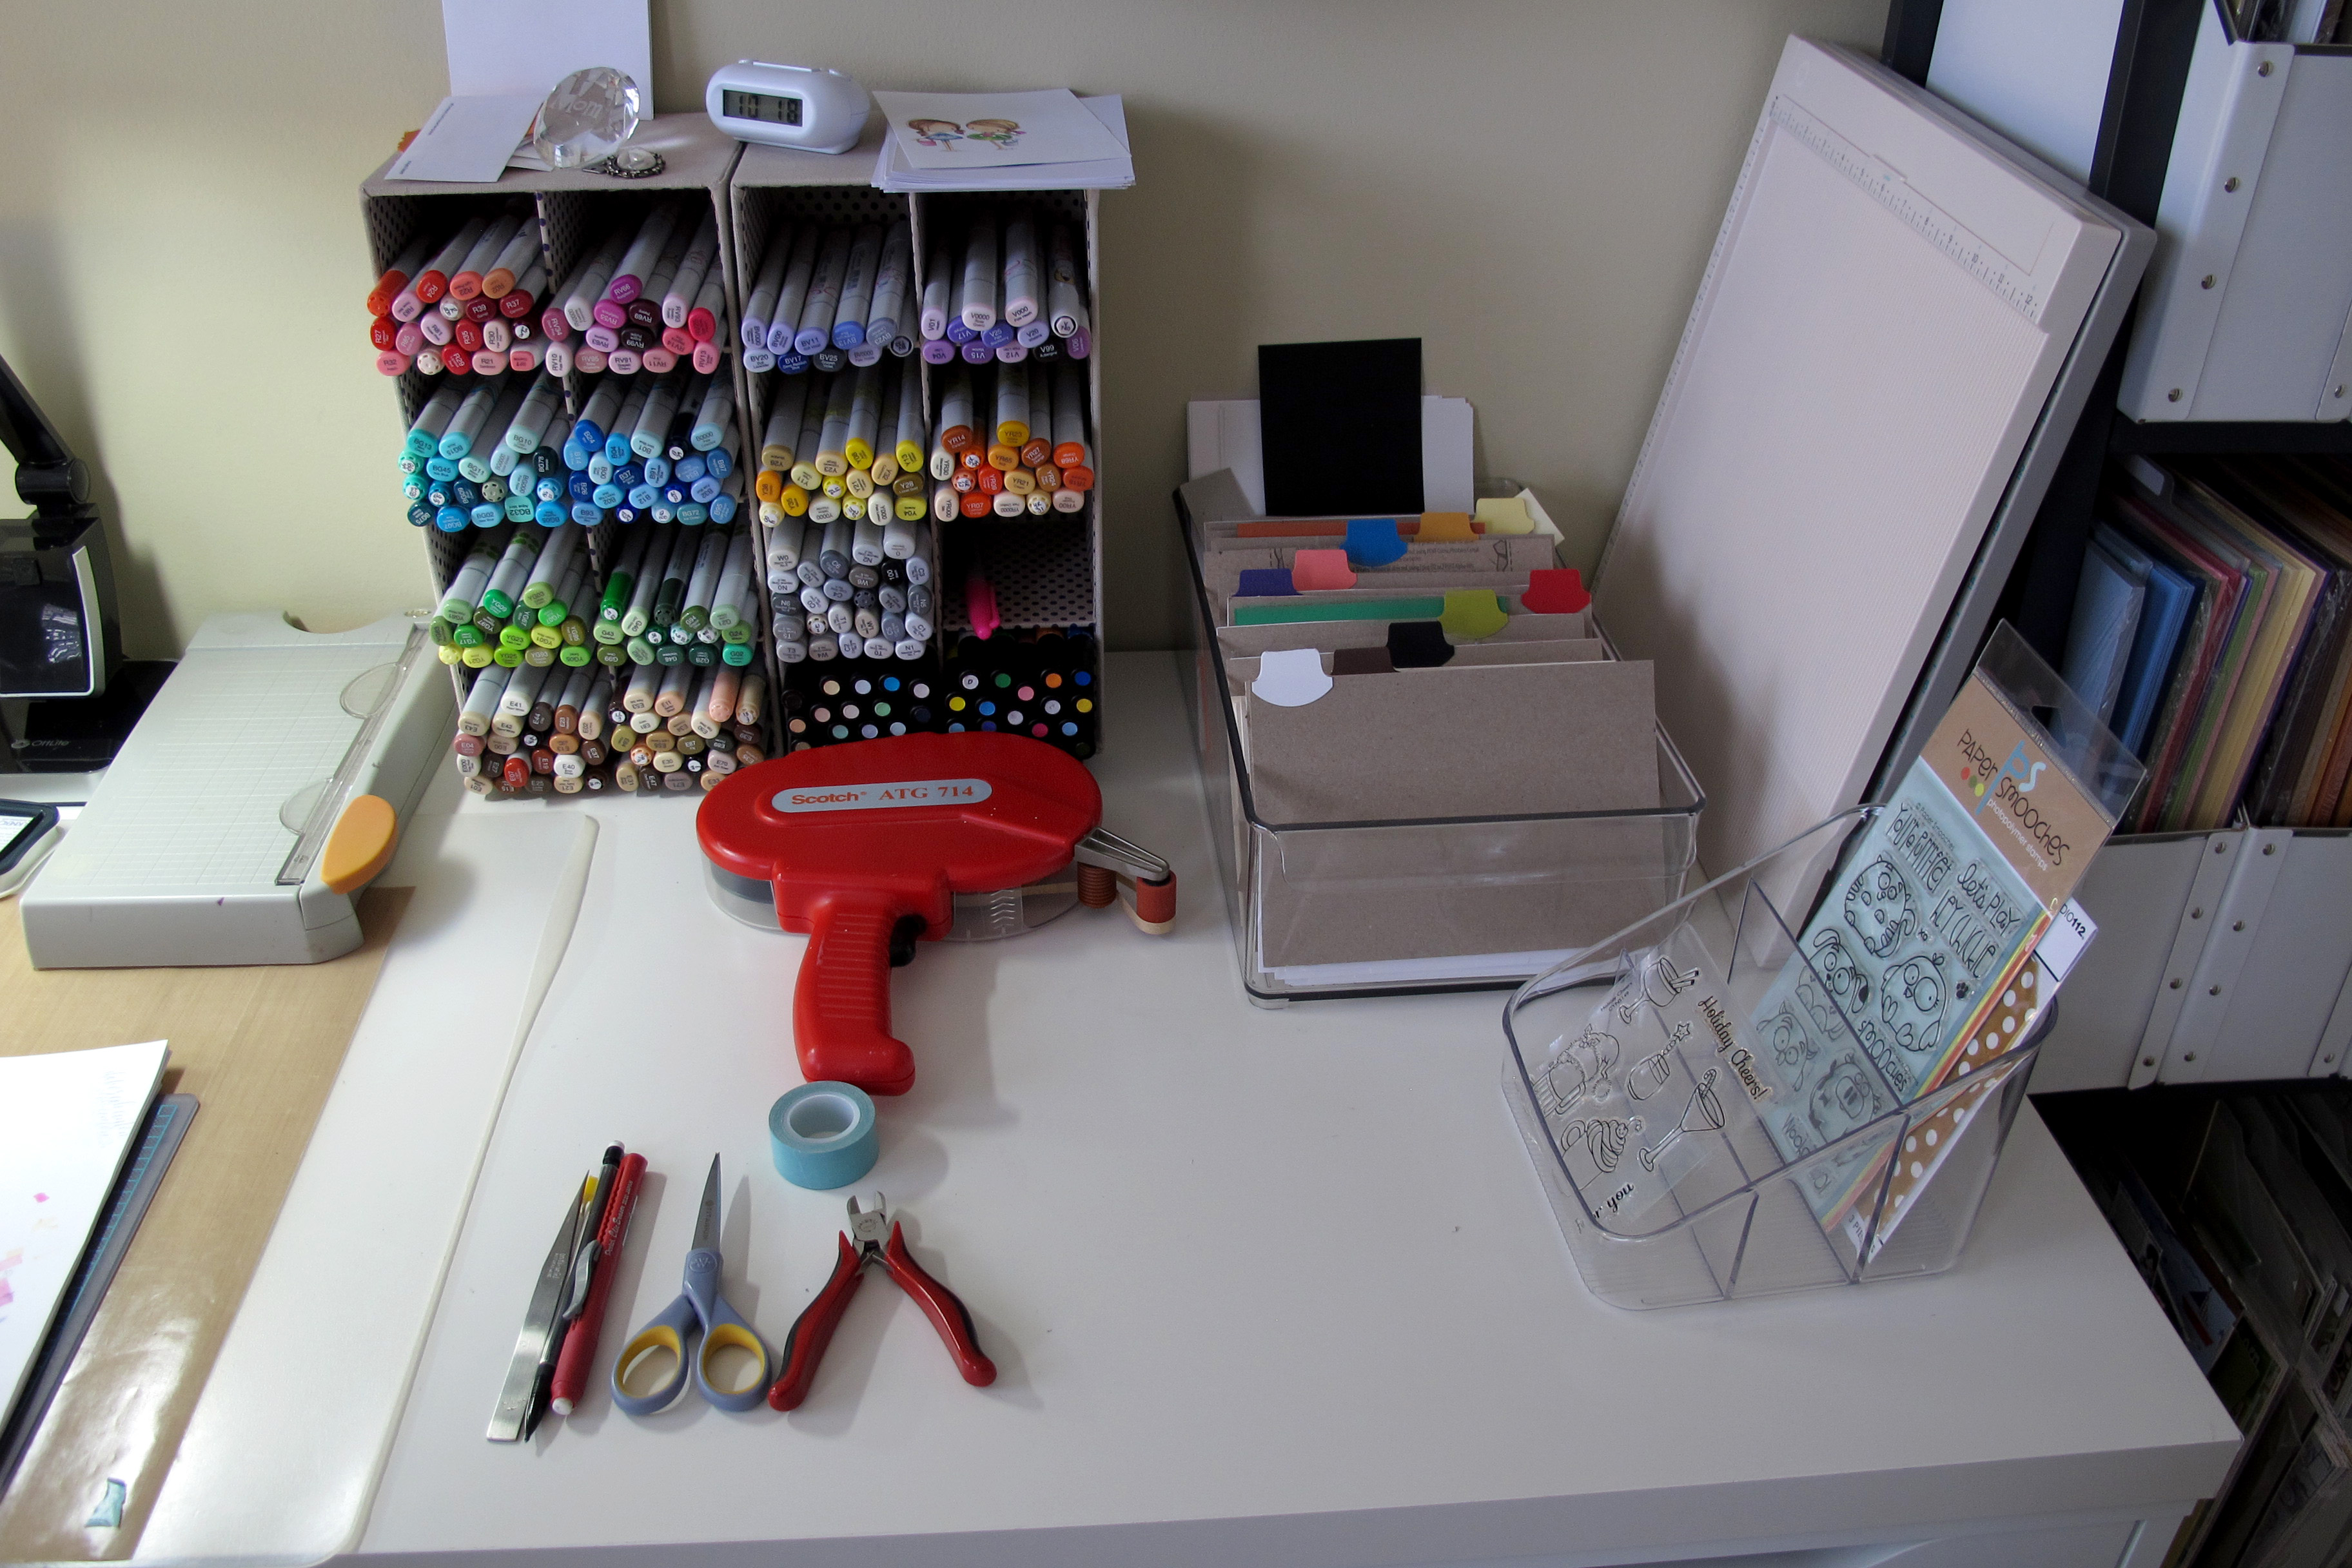
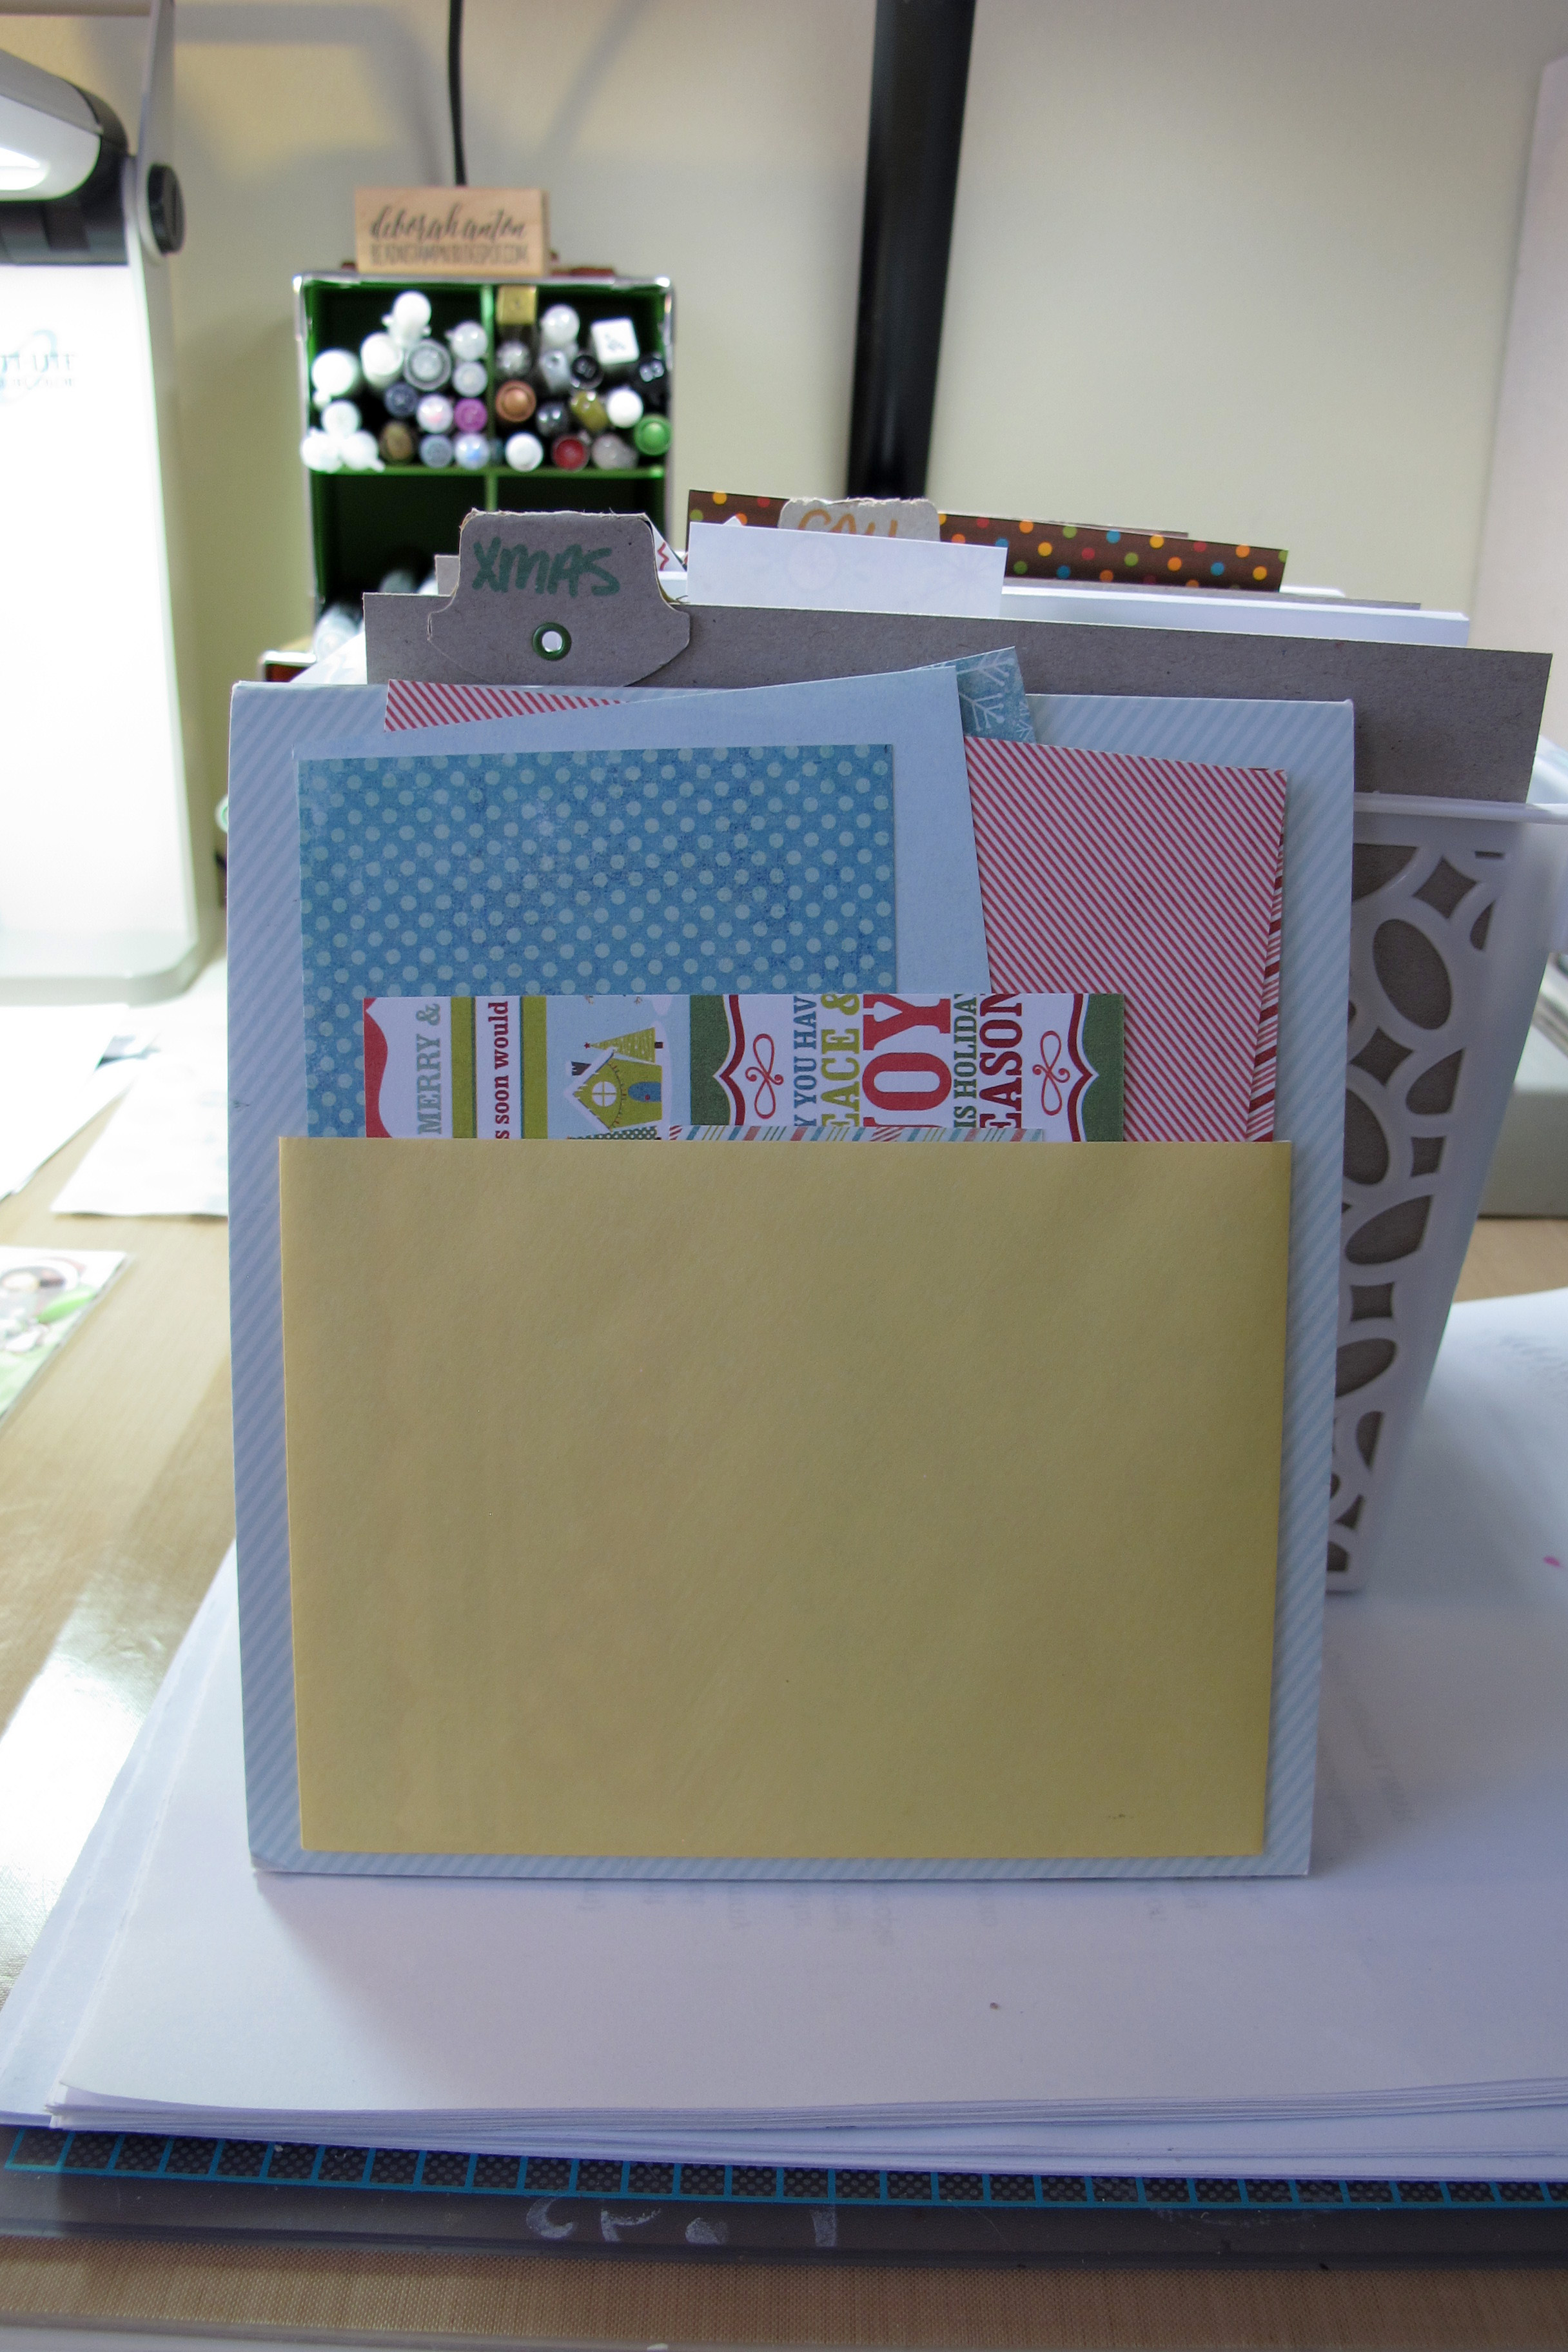
Copics (of course!), the organization bin I spoke about above, paper snips, metal snips (for the die sets), eraser, pencil, washi tape (for holding things in place), tweezers, my ATG gun, my scraps system, and my score boards. Now that I have selected the image I want to color, I select the paper I think will coordinate well with that image. Here, I have my holiday/seasonal 6×6 pads that I keep separate from my everyday 6×6 pads I may use. The everyday pads, I file by company. But for the seasonal/holiday ones, I just file them as such.
Selecting Paper:

On a side note, I always look at my scraps for that collection first to see if there is any piece or part I may want to use on my project. In order to keep my scraps together with the collection, I have a system using envelopes attached to the back of the pad to keep it together. If you are interested in knowing more, here is the link on my blog that gives a step by step on how to make it.
Now that the image and paper is selected, It’s time to color it. I stamp my image on X-Press it cardstock and begin coloring it in with Copics.

As far as my layout consideration, I either create one on my own sketching on the scratch pieces of paper you see, or I will use a challenge layout. The thought process really depends on the size of the image and the size of the base card I may use. Most of my cards are the average A2 size, but sometimes I like to make 5.5×5.5″ cards. I always color my image on top of some scratch paper I keep on top of my desk. That stack of scratch paper is on top of a self healing mat and my craft sheet. That way, when something calls at the moment to use my X-acto knife or my airbrush system, I have what I need right there. And my Copics are always right in front of me ready for selection.
Finished Card:
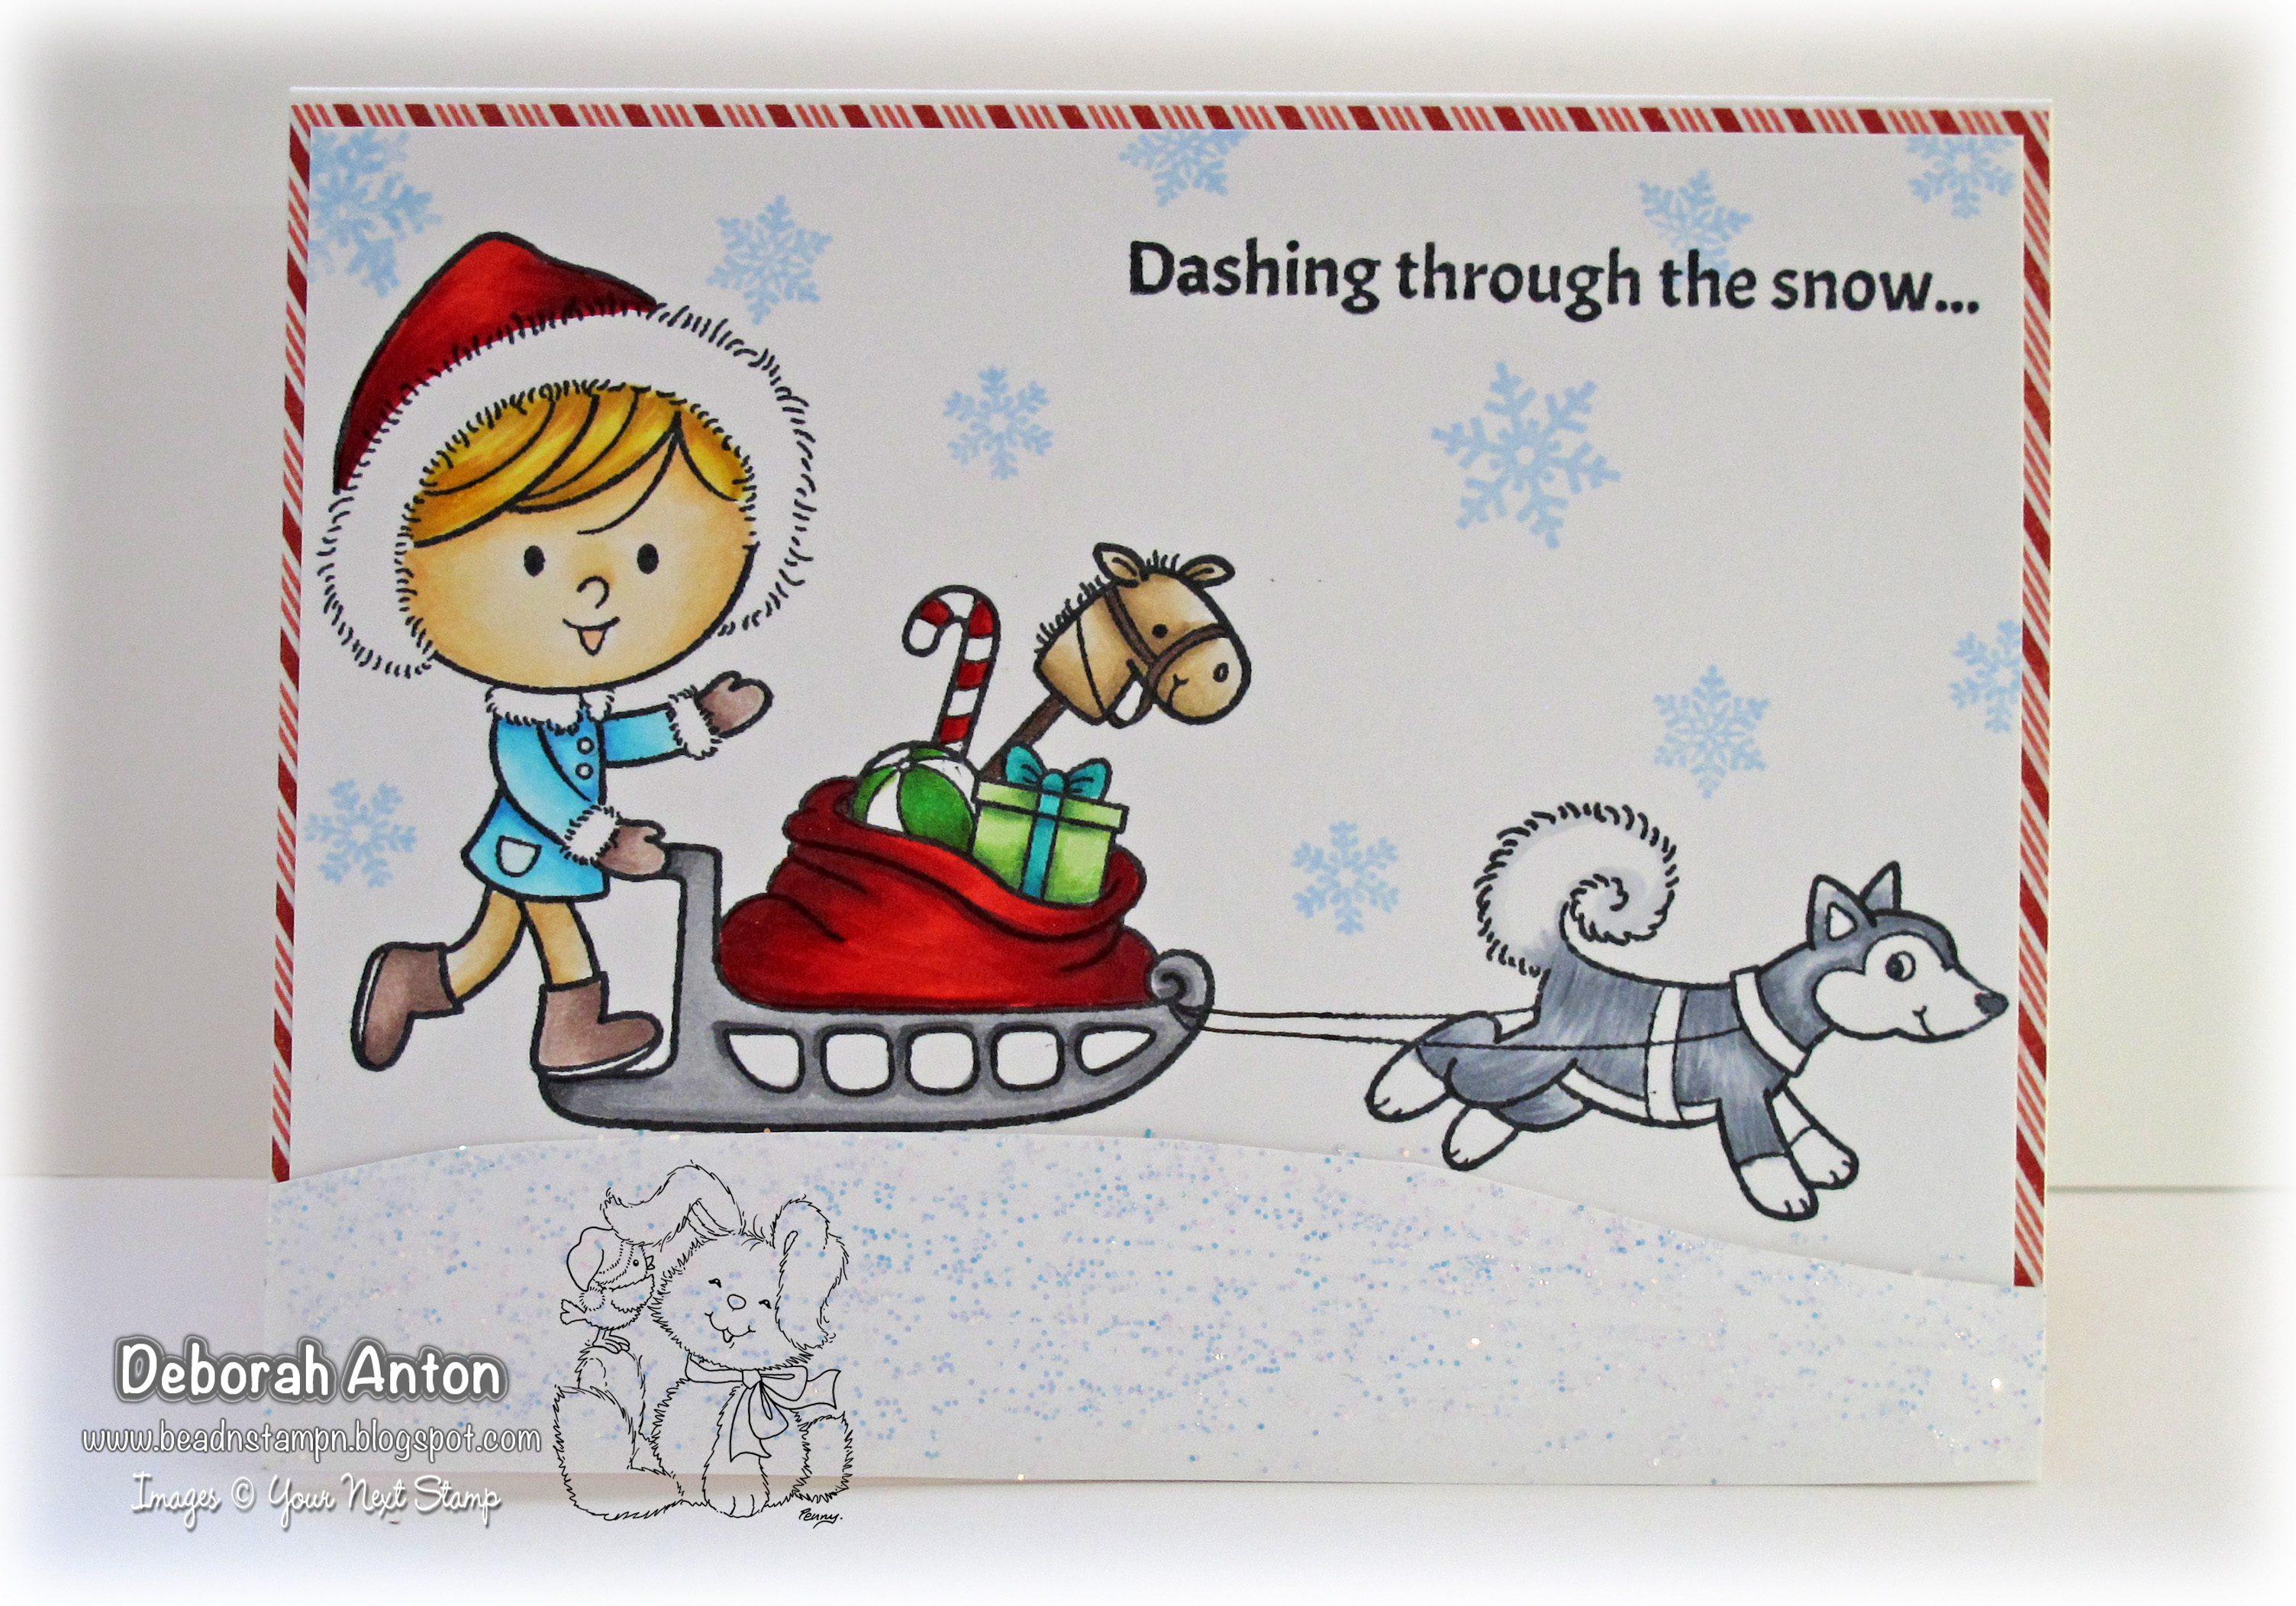
Here is my finished card using Little Darling Jack. I used my stickles for the snow to add some sparkle, but once I did that, I wished I had just used some glitter. That’s ok.. it will give the card sparkle, and perhaps later, I will add some glitter to hide some of the bald areas. I do like to finish the inside of my cards, but I don’t always do it right away. Partly because I always forget to take a picture of it! But I will add to the inside when it is time to give the card.
Now, here is a peek into my craft room that I am fortunate to have and my husband is so patient and accepting about. Secretly, he calls it the black hole, but he knows it makes me happy. I have a good man…
My crafty area:
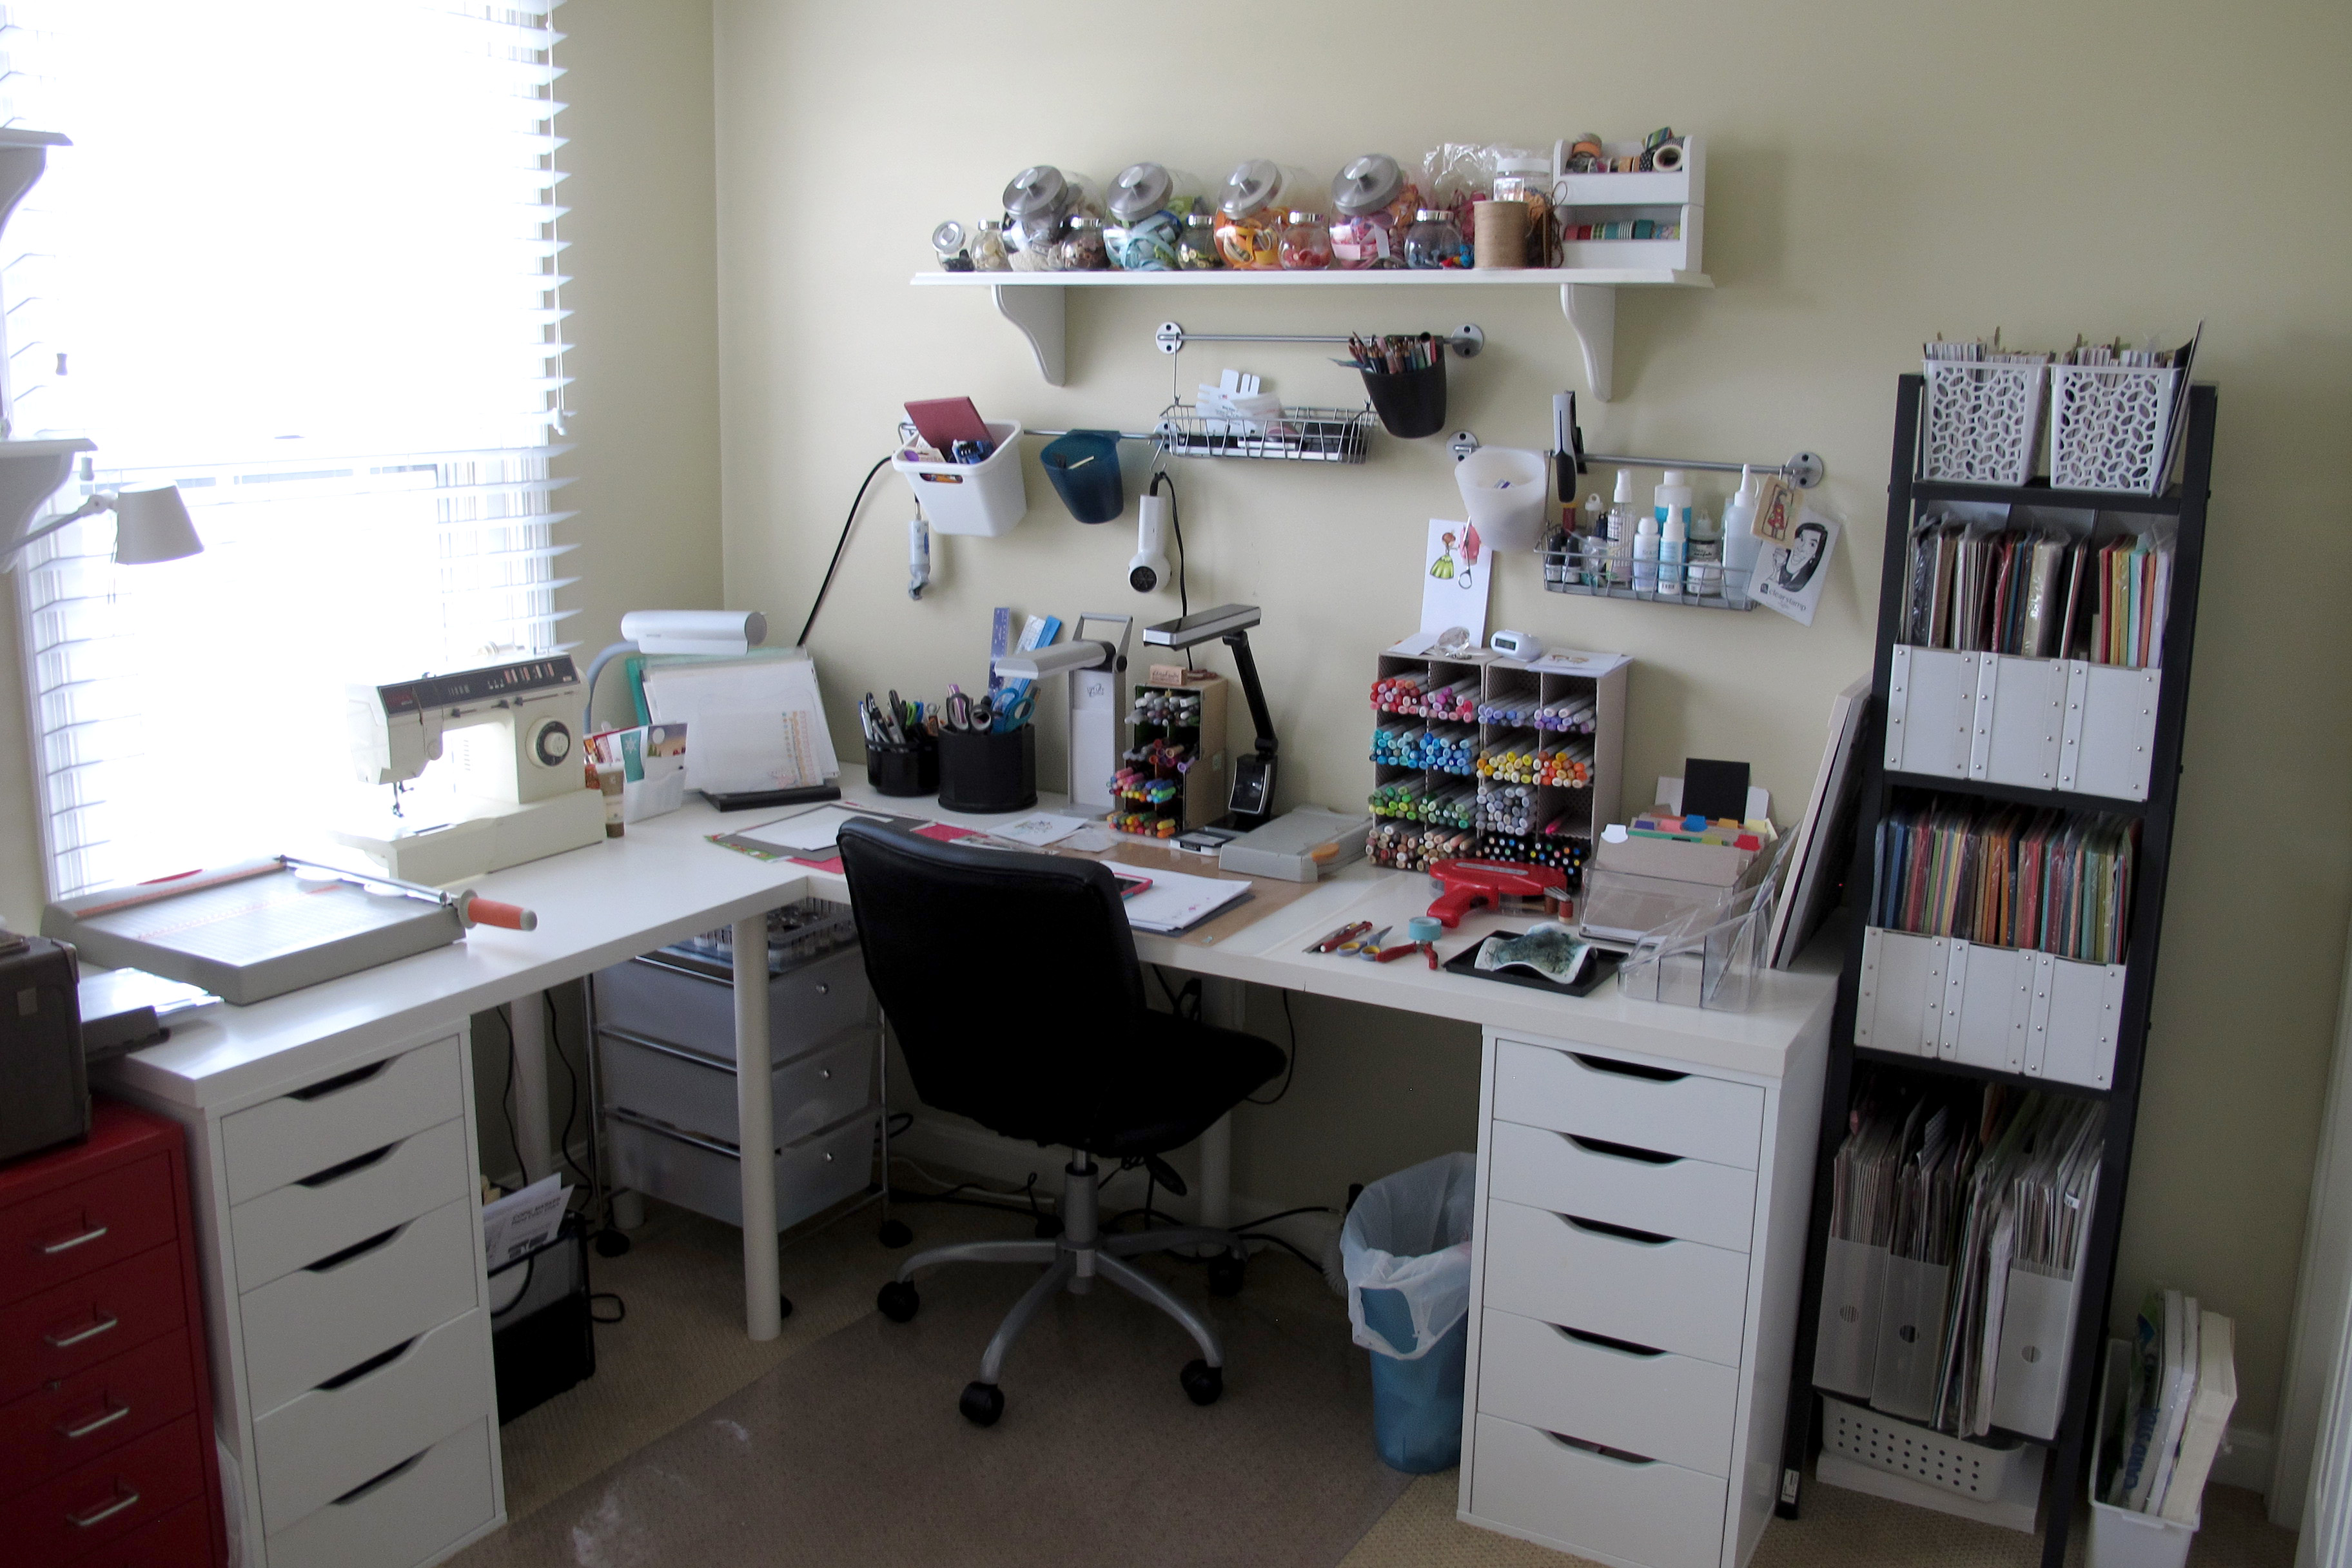
This is my desk where I sit and create.
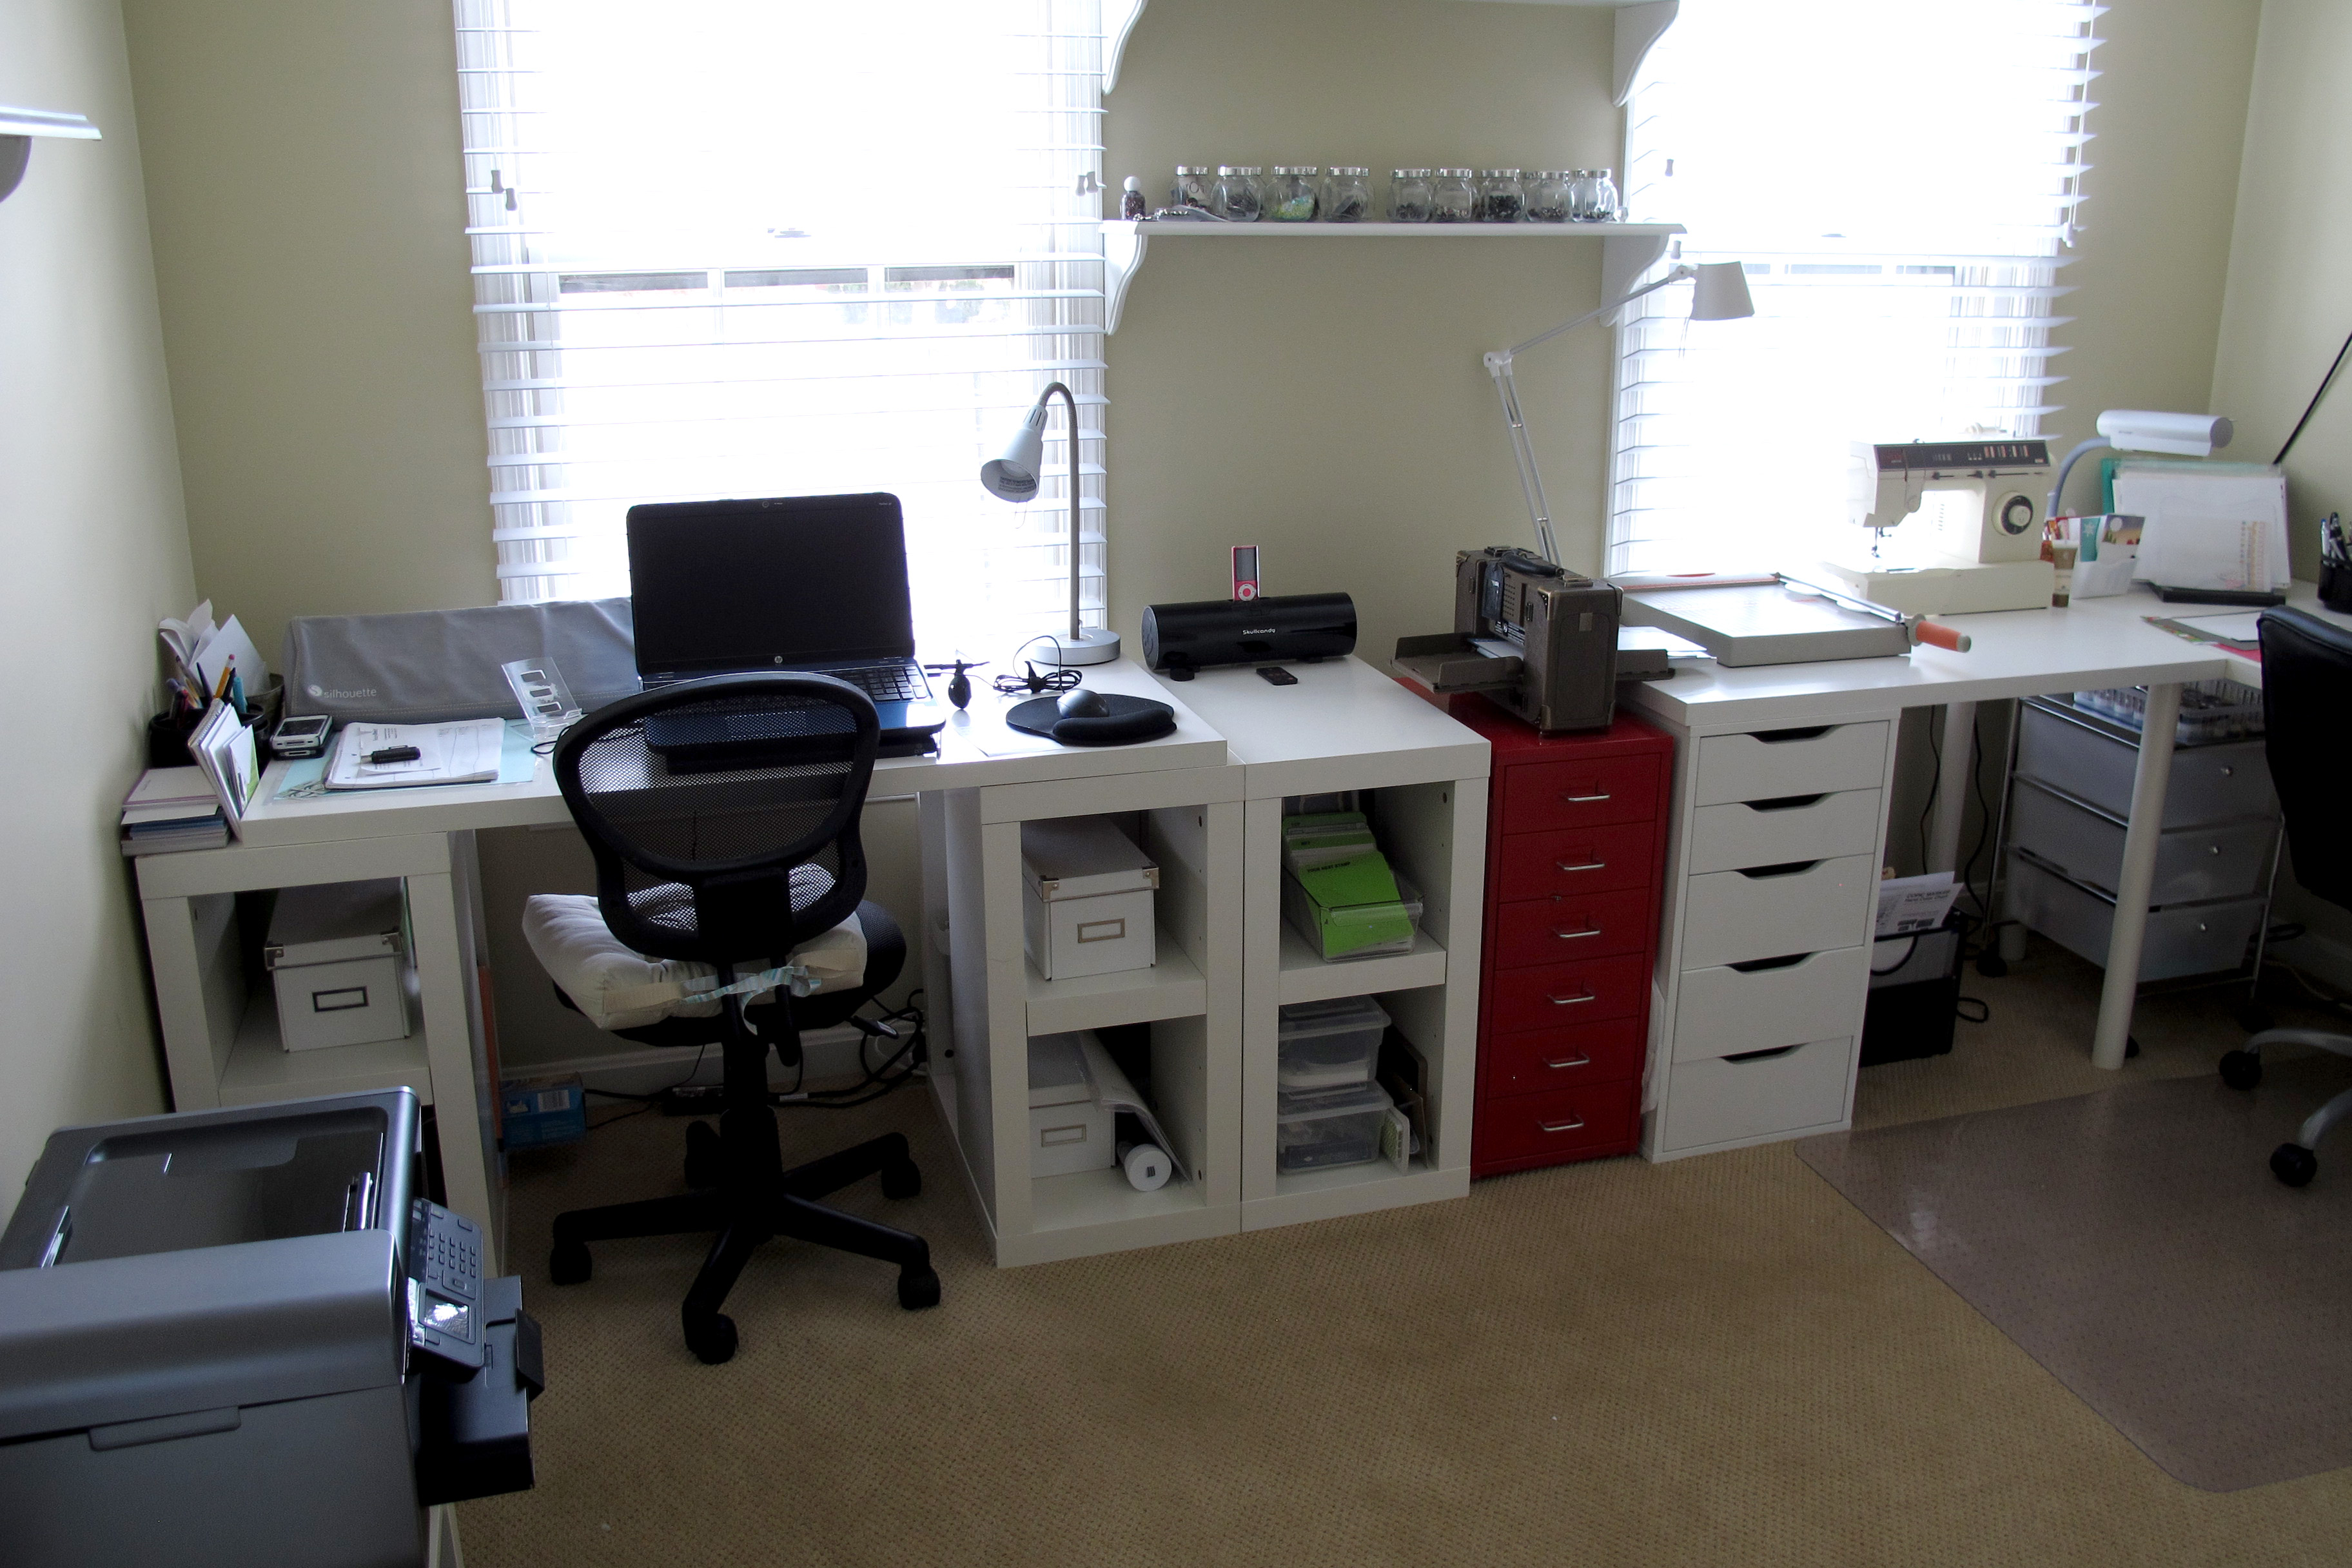
And this is my computer/Silhouette desk. I definitely have an office with a view! 🙂 A view of my children while they play, really. Either way, my room is functional and there is a bit more in it that it not shown, but this is my main area. The hardest part of it would be that I have to move it all every 2-3 years! My husband is in the military, so all my beloved items get boxed up and moved when it is time for him to move. It’s crazy, but a fantastic time to purge my items!
Thanks so much for taking the time to peek into my space and be sure to check back next Monday to see Brianna’s creative process. Now.. go CREATE something beautiful!
Deborah


Lovely card Deborah 😀 Thank you for sharing your creative process…. I like your crafty place/space a lot 😀 Enjoy
Wonderful design process and adorable card! I NEED to make those little paper envelopes you make for your 6×6 paper pad scraps!!! TFS!
Your little crafty space is perfect, Deborah! For someone who moves around every few years, it’s just got the essentials and everything is right at reach.
Nice space Deborah!! I had to chuckle because that is what my husband calls my scrap room…the black hole!!